
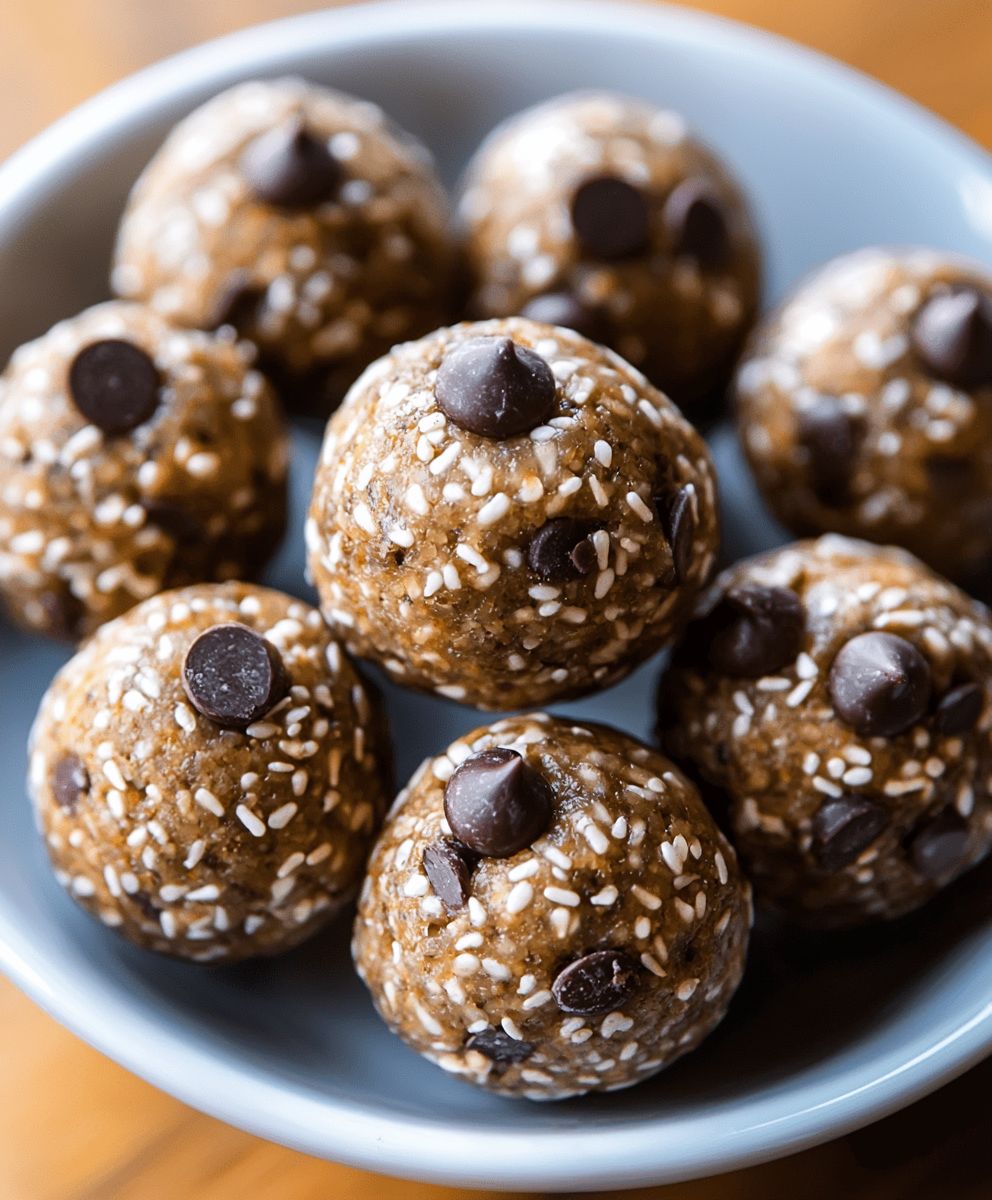
Energy balls: tiny bites of pure, unadulterated energy! Are you tired of that mid-afternoon slump? Do you crave a healthy and delicious snack that will power you through your day? Then look no further! These little spheres of goodness are the perfect solution, and I’m so excited to share my favorite recipe with you.
While the exact origins of energy balls are a bit hazy, the concept of combining nuts, seeds, and dried fruits for sustained energy has been around for centuries. Think of ancient travelers carrying mixtures of dried goods for long journeys a precursor to our modern-day power snack! Today, they’ve evolved into a customizable and convenient treat enjoyed by athletes, busy professionals, and anyone looking for a healthy boost.
What makes these energy balls so irresistible? It’s the perfect combination of textures and flavors. The chewy sweetness of dates, the satisfying crunch of nuts, and the subtle hint of spices all come together in a harmonious blend. Plus, they’re incredibly easy to make and require no baking! You can whip up a batch in minutes and have a week’s worth of healthy snacks ready to go. They are also highly customizable, allowing you to tailor the ingredients to your specific dietary needs and preferences. Get ready to experience a burst of flavor and sustained energy with every bite!

Ingredients:
- 1 cup rolled oats (old-fashioned or quick-cooking)
- ½ cup peanut butter (creamy or crunchy, your preference!)
- ? cup honey or maple syrup
- ¼ cup chocolate chips (semi-sweet, dark, or milk whatever you love!)
- 2 tablespoons chia seeds
- 1 tablespoon flaxseed meal
- 1 teaspoon vanilla extract
- Optional: ¼ cup shredded coconut, chopped nuts (almonds, walnuts, pecans), dried cranberries, protein powder
Getting Started: Preparing Your Ingredients
Before we dive into the mixing, let’s get everything prepped and ready. This will make the whole process smoother and more enjoyable. Trust me, a little organization goes a long way!
- Measure out your oats: Grab your measuring cup and scoop out one full cup of rolled oats. You can use either old-fashioned or quick-cooking oats for this recipe. Old-fashioned oats will give your energy balls a slightly chewier texture, while quick-cooking oats will make them a bit smoother. I personally prefer old-fashioned for that extra bit of bite!
- Measure out your peanut butter: Next, measure out half a cup of peanut butter. Now, here’s where you can really customize things! Creamy peanut butter will result in a smoother, more uniform texture, while crunchy peanut butter will add little bursts of nutty goodness. I’m a big fan of crunchy, but feel free to use whatever you have on hand or prefer. Make sure it’s well stirred before measuring to ensure you get a consistent amount of oil and solids.
- Measure out your sweetener: Time for the sweetness! Measure out one-third of a cup of honey or maple syrup. Both work beautifully in this recipe. Honey will add a slightly floral and richer flavor, while maple syrup will give a more subtle, caramel-like sweetness. If you’re using honey, make sure it’s a good quality honey for the best flavor. If you’re using maple syrup, opt for pure maple syrup rather than pancake syrup for a more natural and authentic taste.
- Measure out your chocolate chips: Who doesn’t love chocolate? Measure out one-quarter of a cup of chocolate chips. Again, the choice is yours! Semi-sweet chocolate chips are a classic choice, but dark chocolate chips will add a more intense and sophisticated flavor. Milk chocolate chips will make your energy balls extra sweet and decadent. You can even use mini chocolate chips for a more even distribution of chocolate throughout the balls.
- Measure out your chia seeds and flaxseed meal: These little powerhouses add a boost of nutrition and help bind the ingredients together. Measure out two tablespoons of chia seeds and one tablespoon of flaxseed meal. Chia seeds are packed with fiber and omega-3 fatty acids, while flaxseed meal is a great source of lignans and fiber. If you don’t have flaxseed meal, you can simply use more chia seeds.
- Measure out your vanilla extract: A teaspoon of vanilla extract adds a touch of warmth and enhances the other flavors. Use pure vanilla extract for the best flavor. Imitation vanilla extract will work in a pinch, but it won’t have the same depth of flavor.
- Prepare your optional ingredients: If you’re using any optional ingredients, now’s the time to get them ready. If you’re using shredded coconut, measure out one-quarter of a cup. If you’re using chopped nuts, chop them into small pieces. If you’re using dried cranberries, make sure they’re not too sticky and chop them if they’re very large. If you’re using protein powder, measure out the amount recommended on the package.
Mixing It All Together: Creating the Energy Ball Base
Now that we have all our ingredients prepped, it’s time to combine them and create the base for our energy balls. This is where the magic happens!
- Combine the dry ingredients: In a large mixing bowl, combine the rolled oats, chia seeds, flaxseed meal, and any optional dry ingredients like shredded coconut or protein powder. Give everything a good stir to ensure it’s evenly distributed. This will help prevent clumps of any one ingredient in your energy balls.
- Add the wet ingredients: Add the peanut butter, honey or maple syrup, and vanilla extract to the bowl. Now, here’s a little tip: if your peanut butter is very thick, you can microwave it for a few seconds to soften it up and make it easier to mix. Just be careful not to overheat it!
- Mix everything together: Using a sturdy spoon or spatula, mix all the ingredients together until they are well combined. This may take a few minutes, as the mixture will be quite thick. Be patient and keep stirring until everything is evenly incorporated. You should end up with a sticky, slightly crumbly mixture.
- Incorporate the chocolate chips: Once the base mixture is well combined, gently fold in the chocolate chips. Be careful not to overmix, as this can cause the chocolate chips to melt and make the mixture too sticky. Just fold them in until they are evenly distributed throughout the mixture.
Shaping and Chilling: Forming the Energy Balls
We’re almost there! Now it’s time to shape the mixture into energy balls and chill them to firm them up. This is the final step before you can enjoy your delicious and nutritious treats.
- Chill the mixture: Cover the mixing bowl with plastic wrap or a lid and refrigerate the mixture for at least 30 minutes. This will help the mixture firm up and make it easier to roll into balls. You can even chill it for longer, up to a few hours, if you prefer.
- Shape the energy balls: After the mixture has chilled, remove it from the refrigerator. Using a spoon or a small cookie scoop, scoop out portions of the mixture. Roll each portion between your palms to form a ball. The size of the balls is up to you, but I usually aim for about 1 inch in diameter.
- Optional: Roll in toppings: If you want to add an extra touch of flavor and texture, you can roll the energy balls in toppings like shredded coconut, chopped nuts, cocoa powder, or sprinkles. Simply place the topping in a shallow dish and roll each ball in the topping until it’s evenly coated.
- Chill again (optional): Place the finished energy balls on a baking sheet lined with parchment paper. If you want them to be extra firm, you can chill them in the refrigerator for another 15-20 minutes before serving. This will also help them hold their shape better.
Storing Your Energy Balls: Keeping Them Fresh
Now that you’ve made your energy balls, it’s important to store them properly to keep them fresh and delicious. Here’s how:
- Refrigerate: Store the energy balls in an airtight container in the refrigerator for up to a week. This will help them maintain their shape and prevent them from becoming too soft.
- Freeze: For longer storage, you can freeze the energy balls. Place them in a single layer on a baking sheet lined with parchment paper and freeze for about 30 minutes, or until they are solid. Then, transfer them to an airtight container or freezer bag and store them in the freezer for up to 2-3 months.
- Thawing: When you’re ready to eat a frozen energy ball, simply remove it from the freezer and let it thaw at room temperature for a few minutes, or until it’s soft enough to eat. You can also thaw them in the refrigerator overnight.
Tips and Variations: Making Them Your Own
The beauty of this recipe is that it’s so versatile! You can easily customize it to suit your own tastes and preferences. Here are a few tips and variations to get you started:
- Nut butter variations: Don’t like peanut butter? No problem! You can use almond butter, cashew butter, sunflower seed butter, or any other nut or seed butter you like.
- Sweetener variations: If you’re not a fan of honey or maple syrup, you can use agave nectar, brown rice syrup, or even dates (pureed into a paste).
- Chocolate variations: Get creative with your chocolate! Use white chocolate chips, butterscotch chips, or even chopped up candy bars.
- Spice it up: Add a pinch of cinnamon, nutmeg, or ginger to the mixture for a warm and cozy flavor.
- Add some crunch: Mix in some chopped nuts, seeds, or granola for extra crunch.
- Make them vegan: Use maple syrup or agave nectar instead of honey, and make sure your chocolate chips are vegan-friendly.
- Add dried fruit: Dried cranberries, raisins, chopped apricots, or dates add sweetness
Conclusion:
So there you have it! These energy balls are more than just a snack; they’re a powerhouse of flavor and nutrition, perfectly designed to fuel your day, satisfy your sweet cravings, and keep you feeling fantastic. I truly believe this recipe is a must-try for anyone looking for a healthy, convenient, and utterly delicious treat. Why, you ask? Because they’re incredibly versatile! Need a pre-workout boost? Grab a couple. Craving something sweet after dinner? These will hit the spot without the guilt. Looking for a healthy snack for the kids? They’ll love them! And the best part? They take mere minutes to prepare, require no baking, and are easily customizable to suit your individual tastes and dietary needs. Think of these energy balls as your blank canvas for flavor. Feeling adventurous? Try adding a pinch of cayenne pepper for a spicy kick. Love chocolate? Throw in some dark chocolate chips or cacao nibs. Want to boost the protein content? Add a scoop of your favorite protein powder. The possibilities are truly endless! Here are a few serving suggestions to get you started:- Enjoy them straight from the fridge for a cool and refreshing treat.
- Pair them with a glass of almond milk or a cup of herbal tea for a satisfying snack.
- Pack them in your lunchbox for a healthy and convenient midday pick-me-up.
- Serve them as a healthy dessert option at your next gathering.
- Peanut Butter Chocolate Chip: Add 1/4 cup of peanut butter and 1/4 cup of chocolate chips to the base recipe.
- Coconut Almond: Replace the walnuts with almonds and add 1/4 cup of shredded coconut.
- Lemon Poppy Seed: Add the zest of one lemon and 1 tablespoon of poppy seeds.
- Cranberry Pistachio: Add 1/4 cup of dried cranberries and 1/4 cup of chopped pistachios.
Energy Balls: The Ultimate Guide to Homemade Power Snacks
Easy no-bake energy balls with oats, peanut butter, honey, and chocolate chips. A quick, healthy, and portable snack!
- Prep Time: 15 minutes
- Cook Time: 0 minutes
- Total Time: 45 minutes
- Yield: 12–15 energy balls 1x
Ingredients
Scale- 1 cup rolled oats (old-fashioned or quick-cooking)
- ½ cup peanut butter (creamy or crunchy)
- ? cup honey or maple syrup
- ¼ cup chocolate chips (semi-sweet, dark, or milk)
- 2 tablespoons chia seeds
- 1 tablespoon flaxseed meal
- 1 teaspoon vanilla extract
- Optional: ¼ cup shredded coconut, chopped nuts (almonds, walnuts, pecans), dried cranberries, protein powder
Instructions
- Prepare Ingredients: Measure out all ingredients. Chop nuts or dried cranberries if using.
- Combine Dry Ingredients: In a large bowl, combine rolled oats, chia seeds, flaxseed meal, and any optional dry ingredients (shredded coconut, protein powder). Stir well.
- Add Wet Ingredients: Add peanut butter, honey or maple syrup, and vanilla extract to the bowl. If peanut butter is very thick, microwave for a few seconds to soften.
- Mix Well: Mix all ingredients together until well combined. The mixture will be thick and sticky.
- Incorporate Chocolate Chips: Gently fold in the chocolate chips until evenly distributed.
- Chill: Cover the bowl and refrigerate for at least 30 minutes to firm up the mixture.
- Shape: Scoop out portions of the mixture and roll between your palms to form balls (about 1 inch in diameter).
- Optional: Roll in Toppings: Roll the energy balls in shredded coconut, chopped nuts, cocoa powder, or sprinkles.
- Chill Again (Optional): Place the finished energy balls on a baking sheet lined with parchment paper. Chill for another 15-20 minutes for extra firmness.
- Store: Store in an airtight container in the refrigerator for up to a week, or freeze for up to 2-3 months.
Notes
- Nut Butter Variations: Use almond butter, cashew butter, or sunflower seed butter instead of peanut butter.
- Sweetener Variations: Use agave nectar, brown rice syrup, or pureed dates instead of honey or maple syrup.
- Chocolate Variations: Use white chocolate chips, butterscotch chips, or chopped candy bars.
- Spice it up: Add a pinch of cinnamon, nutmeg, or ginger.
- Add some crunch: Mix in some chopped nuts, seeds, or granola.
- Make them vegan: Use maple syrup or agave nectar instead of honey, and make sure your chocolate chips are vegan-friendly.
- Add dried fruit: Dried cranberries, raisins, chopped apricots, or dates add sweetness
Leave a Comment