
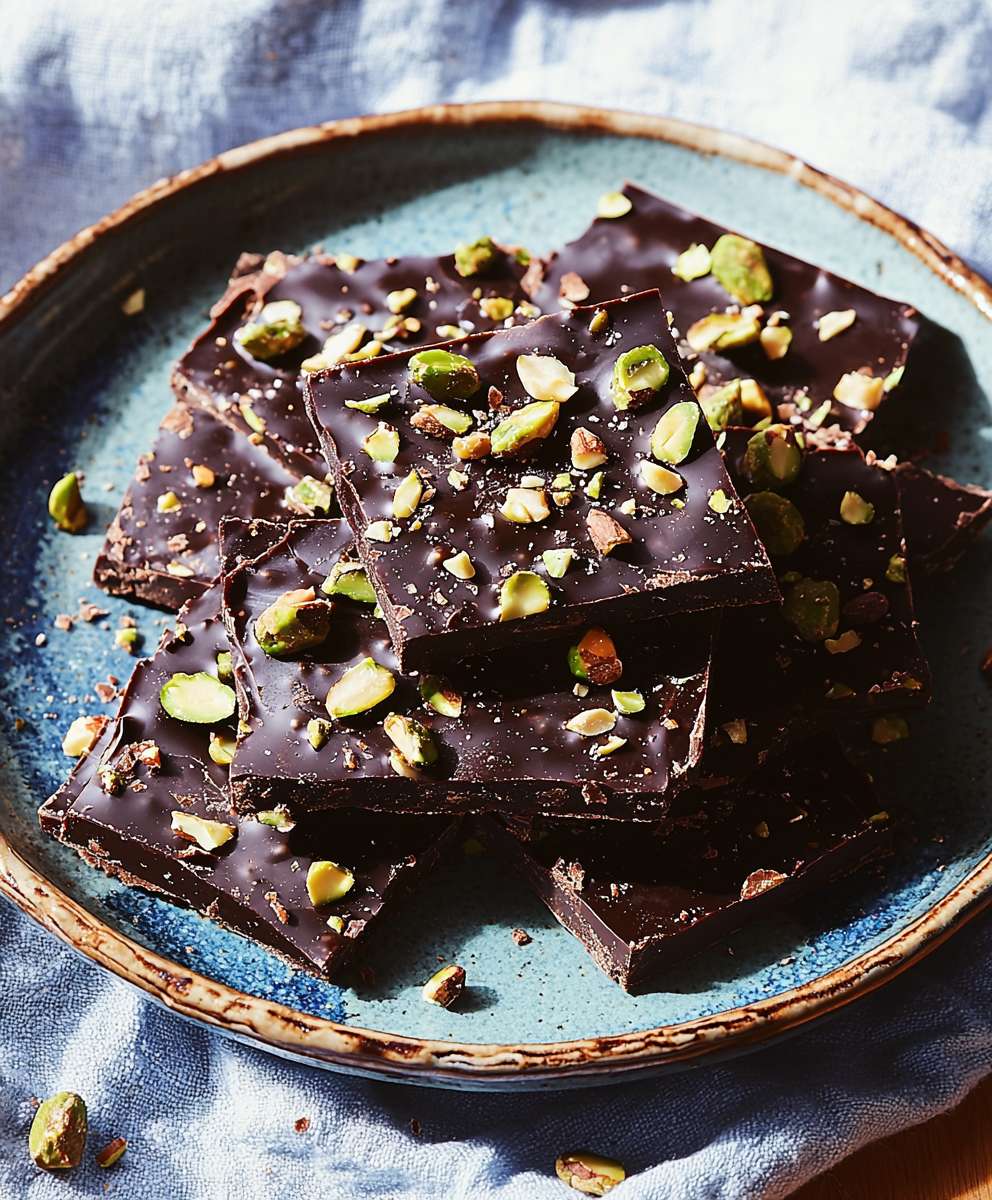
Dark Chocolate Bark: Prepare to unlock a world of decadent delight with a recipe so simple, yet so satisfying, it will become your go-to treat for any occasion. Imagine the rich, intense flavor of dark chocolate melting in your mouth, studded with your favorite crunchy, salty, and sweet additions. It’s not just a dessert; it’s an experience!
While the origins of chocolate bark aren’t steeped in ancient history like some confections, its modern appeal lies in its customizable nature and effortless preparation. Think of it as the edible equivalent of a blank canvas, ready to be transformed into a masterpiece with your personal touch. This delightful treat gained popularity as a homemade gift and a festive holiday staple, quickly becoming a beloved tradition for many.
What makes dark chocolate bark so irresistible? It’s the perfect balance of textures and flavors. The smooth, velvety chocolate provides a luxurious base, while the toppings offer a delightful contrast think crunchy nuts, salty pretzels, chewy dried fruit, or even a sprinkle of sea salt to enhance the sweetness. Plus, it’s incredibly convenient! With minimal effort and readily available ingredients, you can whip up a batch of this delectable treat in no time. Whether you’re craving a quick indulgence, need a last-minute gift, or want to impress your guests with a stunning dessert, dark chocolate bark is always the answer.

Ingredients:
- 16 ounces high-quality dark chocolate (70% cacao or higher), finely chopped
- 1/2 cup dried cranberries
- 1/2 cup chopped walnuts
- 1/4 cup shelled pistachios
- 1/4 cup unsweetened shredded coconut
- 1/4 cup cacao nibs
- 1/4 teaspoon sea salt flakes (such as Maldon)
- Optional: 1 tablespoon orange zest
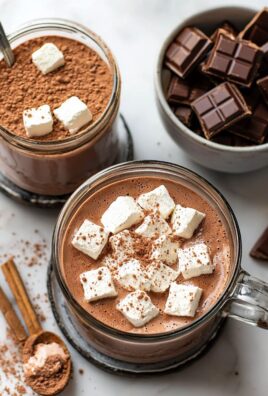
- Optional: 1/4 cup mini marshmallows
- Optional: 1/4 cup pretzels, broken into small pieces
Preparing the Chocolate:
- Melt the Chocolate: The key to perfect bark is properly melted chocolate. I prefer using the double boiler method, as it’s gentle and prevents scorching. Fill a saucepan with about an inch of water and bring it to a simmer over medium heat. Place a heatproof bowl (glass or stainless steel) on top of the saucepan, ensuring the bottom of the bowl doesn’t touch the water. Add about two-thirds of the chopped chocolate to the bowl.
- Stirring is Key: As the chocolate begins to melt, stir it frequently with a rubber spatula. Be patient and avoid the temptation to crank up the heat. You want the chocolate to melt slowly and evenly.
- Tempering (Optional but Recommended): For a truly professional-looking bark with a glossy finish and a satisfying snap, consider tempering the chocolate. Once the chocolate is almost completely melted (a few small pieces may remain), remove the bowl from the heat. Add the remaining one-third of the chopped chocolate (the “seed” chocolate). Stir continuously until all the chocolate is melted and the mixture is smooth and glossy. This process helps stabilize the cocoa butter crystals in the chocolate, resulting in a superior final product. If you don’t want to temper, just make sure all the chocolate is melted smoothly.
- Check for Smoothness: Ensure the melted chocolate is completely smooth and free of any lumps. If necessary, you can return the bowl to the double boiler for a few more seconds, stirring constantly, until the chocolate is perfectly melted. Be careful not to overheat it!
Adding the Toppings:
- Prepare Your Baking Sheet: Line a baking sheet with parchment paper or a silicone baking mat. This will prevent the bark from sticking and make it easy to remove once it’s set.
- Pour and Spread: Pour the melted chocolate onto the prepared baking sheet. Use an offset spatula or the back of a spoon to spread the chocolate evenly into a thin layer, about 1/8 to 1/4 inch thick. The thinner the layer, the snappier the bark.
- Work Quickly: Now comes the fun part! While the chocolate is still wet, sprinkle the dried cranberries, chopped walnuts, pistachios, shredded coconut, cacao nibs, and orange zest (if using) evenly over the surface of the chocolate.
- Get Creative: Don’t be afraid to get creative with your toppings! Arrange them in a pattern or create different sections with different combinations. If you’re using mini marshmallows or pretzels, gently press them into the chocolate to ensure they adhere properly.
- The Finishing Touch: Sprinkle the sea salt flakes evenly over the bark. The salt enhances the sweetness of the chocolate and adds a delightful salty-sweet contrast.
Setting and Breaking:
- Chill Time: Place the baking sheet in the refrigerator for at least 30 minutes, or until the chocolate is completely set and firm. You can also place it in the freezer for about 15-20 minutes for a faster setting time, but be careful not to freeze it solid.
- Break It Up: Once the bark is set, remove it from the refrigerator or freezer. Carefully peel the parchment paper or silicone mat away from the bark.
- Breaking Technique: Break the bark into irregular pieces. You can use your hands to snap it into pieces, or you can use a large knife to score the bark and then break it along the scored lines. I prefer the rustic look of hand-broken bark.
Tips and Variations:
- Chocolate Choice: While I recommend using high-quality dark chocolate, you can also use milk chocolate or white chocolate for this recipe. Just be aware that milk chocolate and white chocolate are more prone to scorching, so be extra careful when melting them.
- Nut Allergies: If you have nut allergies, you can easily substitute the nuts with seeds, such as pumpkin seeds or sunflower seeds.
- Spice It Up: Add a pinch of cayenne pepper to the melted chocolate for a spicy kick.
- Peppermint Bark: For a festive holiday treat, add crushed peppermint candies to the bark.
- Espresso Bark: Stir a teaspoon of instant espresso powder into the melted chocolate for a coffee-flavored bark.
- Citrus Burst: Use different citrus zests, such as lemon or lime, for a bright and refreshing flavor.
- Storage: Store the dark chocolate bark in an airtight container at room temperature or in the refrigerator for up to two weeks.
- Melting Chocolate in the Microwave: If you prefer to melt the chocolate in the microwave, use a microwave-safe bowl and heat it in 30-second intervals, stirring well after each interval, until the chocolate is melted and smooth. Be very careful not to overheat the chocolate, as it can burn easily.
- Even Topping Distribution: To ensure even distribution of the toppings, you can lightly press them into the melted chocolate with your fingers or the back of a spoon.
- Preventing Bloom: Chocolate bloom is a whitish coating that can appear on the surface of chocolate if it’s not tempered properly or if it’s exposed to temperature fluctuations. While bloom doesn’t affect the taste of the chocolate, it can make it look less appealing. To prevent bloom, temper the chocolate properly and store the bark in a cool, dry place.
- Adding a Swirl: For a visually appealing bark, you can create a swirl effect by drizzling a contrasting color of melted chocolate (such as white chocolate) over the dark chocolate before adding the toppings. Use a toothpick or skewer to swirl the two colors together.
- Using Extracts: You can add a few drops of your favorite extract, such as vanilla extract or almond extract, to the melted chocolate for added flavor. Be careful not to add too much extract, as it can make the chocolate seize up.
Troubleshooting:
- Chocolate Seizing: If your chocolate seizes (becomes thick and grainy), it’s usually because it has come into contact with water or has been overheated. Unfortunately, there’s not much you can do to salvage seized chocolate. It’s best to start over with a fresh batch.
- Uneven Melting: If your chocolate is melting unevenly, try chopping it into smaller pieces and stirring it more frequently. You can also add a tablespoon of vegetable oil or shortening to the chocolate to help it melt more smoothly.
- Bark Not Setting: If your bark is not setting properly, it could be because the chocolate was not tempered properly or because the refrigerator is not cold enough. Try placing the bark in the freezer for a few minutes to help it set.
- Toppings Not Sticking: If your toppings are not sticking to the chocolate, make sure the chocolate is still wet when you add them. You can also gently press the toppings into the chocolate to help them adhere.
Enjoy Your Homemade Dark Chocolate Bark!
This recipe is a great starting point, but feel free to experiment with different chocolates, toppings, and flavor combinations to create your own signature bark. The possibilities are endless! And remember, the most important ingredient is love (and maybe a little bit of chocolate!).
Conclusion:
This Dark Chocolate Bark recipe isn’t just another dessert; it’s an experience. It’s the perfect blend of rich, decadent dark chocolate and whatever exciting toppings your heart desires. From the simplicity of sea salt to the extravagance of dried fruits and nuts, this bark is endlessly customizable, making it a must-try for anyone looking to impress or simply indulge in a little self-care. I truly believe that once you’ve tasted the homemade difference, you’ll never go back to store-bought bark again!
But why is this recipe a must-try, you ask? Well, beyond the sheer deliciousness, it’s incredibly easy to make. Seriously, if you can melt chocolate, you can conquer this recipe. It requires minimal ingredients, most of which you probably already have in your pantry. And the best part? It’s ready in under an hour, including chilling time! That’s faster than ordering takeout, and infinitely more satisfying. Plus, it makes a fantastic homemade gift for birthdays, holidays, or just because. Imagine the look on someone’s face when you present them with a beautifully wrapped package of your own handcrafted Dark Chocolate Bark. It’s a gift that says, “I care,” and “I have excellent taste!”
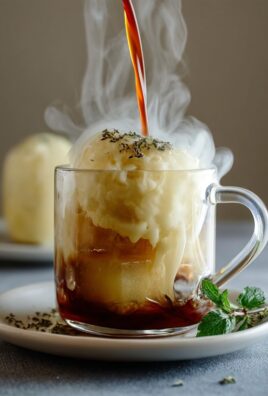
Now, let’s talk serving suggestions and variations. While this bark is divine on its own, broken into shards and enjoyed with a cup of coffee or tea, there are so many ways to elevate it. Try crumbling it over ice cream for an extra layer of chocolatey goodness. Or, use it as a garnish for cakes and cupcakes to add a touch of elegance. For a festive twist, sprinkle crushed candy canes on top during the holidays. Feeling adventurous? Add a pinch of chili powder for a spicy kick.
Here are a few of my favorite variations to get you started:
Peppermint Bark:
Melt white chocolate and swirl it on top of the dark chocolate before adding crushed peppermint candies.
Salted Caramel Bark:
Drizzle homemade or store-bought caramel sauce over the dark chocolate and sprinkle with sea salt.
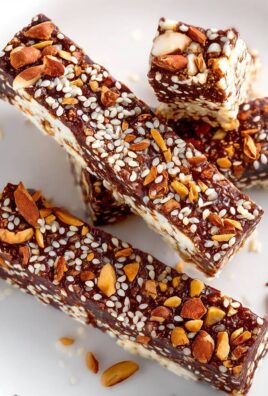
Nutty Delight Bark:
Add a mix of your favorite nuts, such as almonds, walnuts, and pecans, for a crunchy and satisfying treat.
Fruit and Nut Bark:
Combine dried cranberries, cherries, and pistachios for a colorful and flavorful bark.
Espresso Bark:
Mix a teaspoon of instant espresso powder into the melted dark chocolate for a coffee-infused delight.
The possibilities are truly endless! Don’t be afraid to experiment with different flavors and textures to create your own signature Dark Chocolate Bark.
I’m so excited for you to try this recipe! I know you’ll love it as much as I do. It’s the perfect way to satisfy your sweet tooth, impress your friends and family, or simply treat yourself to something special. So, gather your ingredients, put on some music, and get ready to create some chocolate magic.
And finally, I would absolutely love to hear about your experience! Once you’ve made your own batch of this delicious Dark Chocolate Bark, please share your photos and comments. Let me know what toppings you used, what variations you tried, and how much you enjoyed it. Your feedback is invaluable, and it helps inspire others to try this recipe as well. You can share your creations on social media using [Insert your social media handle/hashtag here]. Happy baking (or rather, melting and chilling)!
Dark Chocolate Bark: The Ultimate Guide to Delicious Recipes
Easy and delicious dark chocolate bark loaded with cranberries, walnuts, pistachios, coconut, and cacao nibs. A perfect sweet and salty treat!
Ingredients
- 16 ounces high-quality dark chocolate (70% cacao or higher), finely chopped
- 1/2 cup dried cranberries
- 1/2 cup chopped walnuts
- 1/4 cup shelled pistachios
- 1/4 cup unsweetened shredded coconut
- 1/4 cup cacao nibs
- 1/4 teaspoon sea salt flakes (such as Maldon)
- Optional: 1 tablespoon orange zest
- Optional: 1/4 cup mini marshmallows
- Optional: 1/4 cup pretzels, broken into small pieces
Instructions
- Melt the Chocolate: Use a double boiler. Fill a saucepan with about an inch of water and bring it to a simmer over medium heat. Place a heatproof bowl on top, ensuring it doesn’t touch the water. Add about two-thirds of the chopped chocolate to the bowl.
- Stirring is Key: Stir frequently with a rubber spatula as the chocolate melts. Be patient and avoid high heat.
- Tempering (Optional): Once almost melted, remove from heat. Add the remaining one-third of the chopped chocolate (“seed” chocolate). Stir continuously until all chocolate is melted and smooth. If you don’t want to temper, just make sure all the chocolate is melted smoothly.
- Check for Smoothness: Ensure the melted chocolate is completely smooth and free of any lumps. If necessary, you can return the bowl to the double boiler for a few more seconds, stirring constantly, until the chocolate is perfectly melted. Be careful not to overheat it!
- Prepare Baking Sheet: Line a baking sheet with parchment paper or a silicone baking mat.
- Pour and Spread: Pour the melted chocolate onto the prepared baking sheet. Use an offset spatula or the back of a spoon to spread the chocolate evenly into a thin layer, about 1/8 to 1/4 inch thick.
- Add Toppings: While the chocolate is still wet, sprinkle the dried cranberries, chopped walnuts, pistachios, shredded coconut, cacao nibs, and orange zest (if using) evenly over the surface of the chocolate.
- Get Creative: Arrange toppings in a pattern or create different sections. If using mini marshmallows or pretzels, gently press them into the chocolate.
- Finishing Touch: Sprinkle sea salt flakes evenly over the bark.
- Chill Time: Place the baking sheet in the refrigerator for at least 30 minutes, or until the chocolate is completely set and firm. You can also place it in the freezer for about 15-20 minutes for a faster setting time, but be careful not to freeze it solid.
- Break It Up: Once set, remove from the refrigerator or freezer. Carefully peel the parchment paper or silicone mat away from the bark.
- Breaking Technique: Break the bark into irregular pieces by hand or with a knife.
Notes
- Chocolate Choice: You can use milk chocolate or white chocolate, but be careful when melting them.
- Nut Allergies: Substitute nuts with seeds.
- Spice It Up: Add a pinch of cayenne pepper.
- Peppermint Bark: Add crushed peppermint candies.
- Espresso Bark: Stir in instant espresso powder.
- Citrus Burst: Use different citrus zests.
- Storage: Store in an airtight container at room temperature or in the refrigerator for up to two weeks.
- Melting Chocolate in the Microwave: Use a microwave-safe bowl and heat it in 30-second intervals, stirring well after each interval, until the chocolate is melted and smooth. Be very careful not to overheat the chocolate, as it can burn easily.
- Even Topping Distribution: To ensure even distribution of the toppings, you can lightly press them into the melted chocolate with your fingers or the back of a spoon.
- Preventing Bloom: To prevent bloom, temper the chocolate properly and store the bark in a cool, dry place.
- Adding a Swirl: For a visually appealing bark, you can create a swirl effect by drizzling a contrasting color of melted chocolate (such as white chocolate) over the dark chocolate before adding the toppings. Use a toothpick or skewer to swirl the two colors together.
- Using Extracts: You can add a few drops of your favorite extract, such as vanilla extract or almond extract, to the melted chocolate for added flavor. Be careful not to add too much extract, as it can make the chocolate seize up.
Leave a Comment