
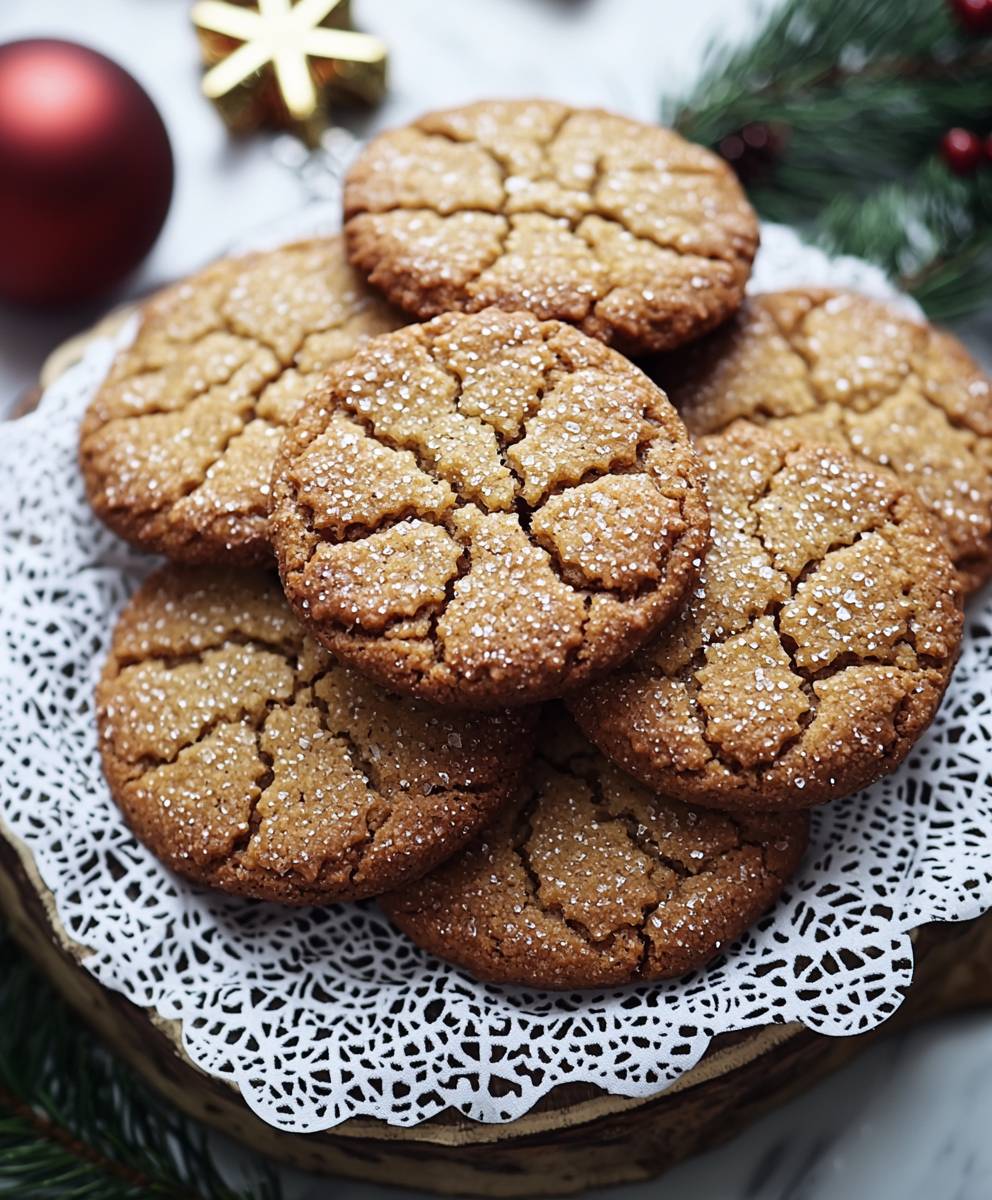
Christmas Spiced Biscuits: the very words conjure up images of cozy evenings, twinkling lights, and the warm, inviting aroma of cinnamon and nutmeg wafting through the air. Have you ever wondered what makes these little treats so irresistibly festive? It’s more than just the spices; it’s the tradition, the shared moments, and the pure, unadulterated joy they bring.
Biscuits, in various forms, have been a staple in European baking for centuries, but the addition of warming spices like ginger, cloves, and allspice elevates them to something truly special for the holiday season. These spices, historically prized and often associated with celebrations, lend a depth of flavor that perfectly complements the buttery, crumbly texture of the biscuit. Think of them as edible Christmas ornaments, each bite a tiny explosion of holiday cheer!
People adore Christmas Spiced Biscuits for so many reasons. Their delightful combination of sweet and spicy notes is simply irresistible, making them the perfect accompaniment to a cup of tea or coffee on a cold winter’s day. They’re also incredibly versatile ideal for decorating with icing, gifting to loved ones, or simply enjoying as a comforting snack. Plus, let’s be honest, the process of baking them, filling your home with that incredible scent, is a Christmas tradition in itself. So, let’s get baking and create some holiday magic!
Ingredients:
- For the Biscuits:
- 3 cups all-purpose flour, plus more for dusting
- 1 teaspoon baking soda
- 1/2 teaspoon baking powder
- 1/4 teaspoon salt
- 1 cup (2 sticks) unsalted butter, softened
- 1 1/2 cups granulated sugar
- 1 large egg
- 1 teaspoon vanilla extract
- 1/2 teaspoon almond extract (optional, but adds a lovely depth)
- 1/4 cup molasses
- 2 teaspoons ground cinnamon
- 1 teaspoon ground ginger
- 1/2 teaspoon ground cloves
- 1/4 teaspoon ground nutmeg
- For the Royal Icing:
- 4 cups powdered sugar, sifted
- 3 tablespoons meringue powder
- 1/2 cup warm water, plus more as needed
- Gel food coloring (various colors)
Preparing the Dough:
- Combine Dry Ingredients: In a large bowl, whisk together the flour, baking soda, baking powder, salt, cinnamon, ginger, cloves, and nutmeg. Make sure everything is evenly distributed this will ensure a consistent flavor throughout your biscuits.
- Cream Butter and Sugar: In a separate large bowl (or the bowl of your stand mixer), cream together the softened butter and granulated sugar until light and fluffy. This usually takes about 3-5 minutes on medium speed. The mixture should be noticeably lighter in color and texture. Don’t rush this step; it’s crucial for creating tender biscuits.
- Add Egg and Extracts: Beat in the egg, vanilla extract, and almond extract (if using) until well combined. Scrape down the sides of the bowl to ensure everything is incorporated evenly.
- Incorporate Molasses: Stir in the molasses until the mixture is smooth and uniform in color. The molasses adds a wonderful depth of flavor and helps to keep the biscuits moist.
- Gradually Add Dry Ingredients: Gradually add the dry ingredients to the wet ingredients, mixing on low speed until just combined. Be careful not to overmix, as this can result in tough biscuits. Mix until the flour is mostly incorporated, but there are still some streaks of flour visible.
- Form the Dough: Turn the dough out onto a lightly floured surface. Gently knead the dough a few times to bring it together into a smooth disc. If the dough is too sticky, add a little more flour, one tablespoon at a time.
- Chill the Dough: Wrap the dough tightly in plastic wrap and refrigerate for at least 2 hours, or preferably overnight. This chilling time is essential for preventing the biscuits from spreading too much during baking and for making the dough easier to handle.
Baking the Biscuits:
- Preheat Oven: Preheat your oven to 375°F (190°C). Line baking sheets with parchment paper. Parchment paper prevents the biscuits from sticking and makes cleanup a breeze.
- Roll Out the Dough: On a lightly floured surface, roll out the chilled dough to about 1/4 inch thickness. If the dough is still a bit sticky, dust it with more flour as needed.
- Cut Out Shapes: Use cookie cutters to cut out your desired shapes. I love using Christmas-themed cutters like stars, trees, and gingerbread men.
- Place on Baking Sheets: Carefully transfer the cut-out biscuits to the prepared baking sheets, leaving about 1 inch of space between each biscuit.
- Bake: Bake for 8-10 minutes, or until the edges are lightly golden brown. Keep a close eye on them, as baking times can vary depending on your oven.
- Cool: Let the biscuits cool on the baking sheets for a few minutes before transferring them to a wire rack to cool completely.
Preparing the Royal Icing:
- Combine Dry Ingredients: In a large bowl, whisk together the sifted powdered sugar and meringue powder. Sifting the powdered sugar is crucial for preventing lumps in your icing.
- Add Water: Gradually add the warm water to the dry ingredients, mixing on low speed with an electric mixer (or by hand) until a smooth icing forms. Start with 1/2 cup of water and add more, one tablespoon at a time, until you reach the desired consistency.
- Adjust Consistency: The ideal consistency for outlining is similar to toothpaste. For flooding (filling in the outlined areas), you’ll want a slightly thinner consistency, similar to shampoo. To thin the icing, add a few drops of water at a time. To thicken it, add a tablespoon of powdered sugar at a time.
- Divide and Color: Divide the icing into separate bowls, depending on how many colors you want to use. Add gel food coloring, one drop at a time, until you reach your desired shades. Gel food coloring is preferred over liquid food coloring because it’s more concentrated and won’t thin out the icing as much.
- Prepare Piping Bags: Transfer each color of icing to a piping bag fitted with a small round tip (for outlining) or a squeeze bottle (for flooding). If you don’t have piping bags, you can use ziplock bags with a small corner snipped off.
Decorating the Biscuits:
- Outline the Biscuits: Using the thicker icing, outline the edges of each biscuit. This creates a border that will prevent the thinner flooding icing from running off the edges.
- Flood the Biscuits: Using the thinner icing, flood the inside of the outlined areas. Use a toothpick or scribe tool to gently spread the icing and pop any air bubbles.
- Add Details: While the flooding icing is still wet, you can add details such as sprinkles, nonpareils, or other decorations. You can also use different colors of icing to create intricate designs.
- Let the Icing Dry: Allow the icing to dry completely, which usually takes several hours or overnight. The icing should be hard to the touch before you stack or package the biscuits.
- Add Additional Layers (Optional): Once the base layer of icing is dry, you can add additional layers of detail, such as dots, lines, or other decorative elements. Let each layer dry completely before adding the next.
Tips for Success:
- Don’t Overmix the Dough: Overmixing develops the gluten in the flour, resulting in tough biscuits. Mix until just combined.
- Chill the Dough Thoroughly: Chilling the dough is crucial for preventing the biscuits from spreading too much during baking.
- Use Parchment Paper: Parchment paper prevents the biscuits from sticking and makes cleanup a breeze.
- Sift the Powdered Sugar: Sifting the powdered sugar is essential for preventing lumps in your royal icing.
- Adjust Icing Consistency: The consistency of your royal icing is key to successful decorating. Make sure you have both a thicker icing for outlining and a thinner icing for flooding.
- Be Patient: Decorating biscuits can be time-consuming, but the results are worth it! Take your time and enjoy the process.
Storage Instructions:
Store the decorated biscuits in an airtight container at room temperature for up to a week. To prevent the icing from sticking, you can place a sheet of parchment paper between layers of biscuits.
Conclusion:
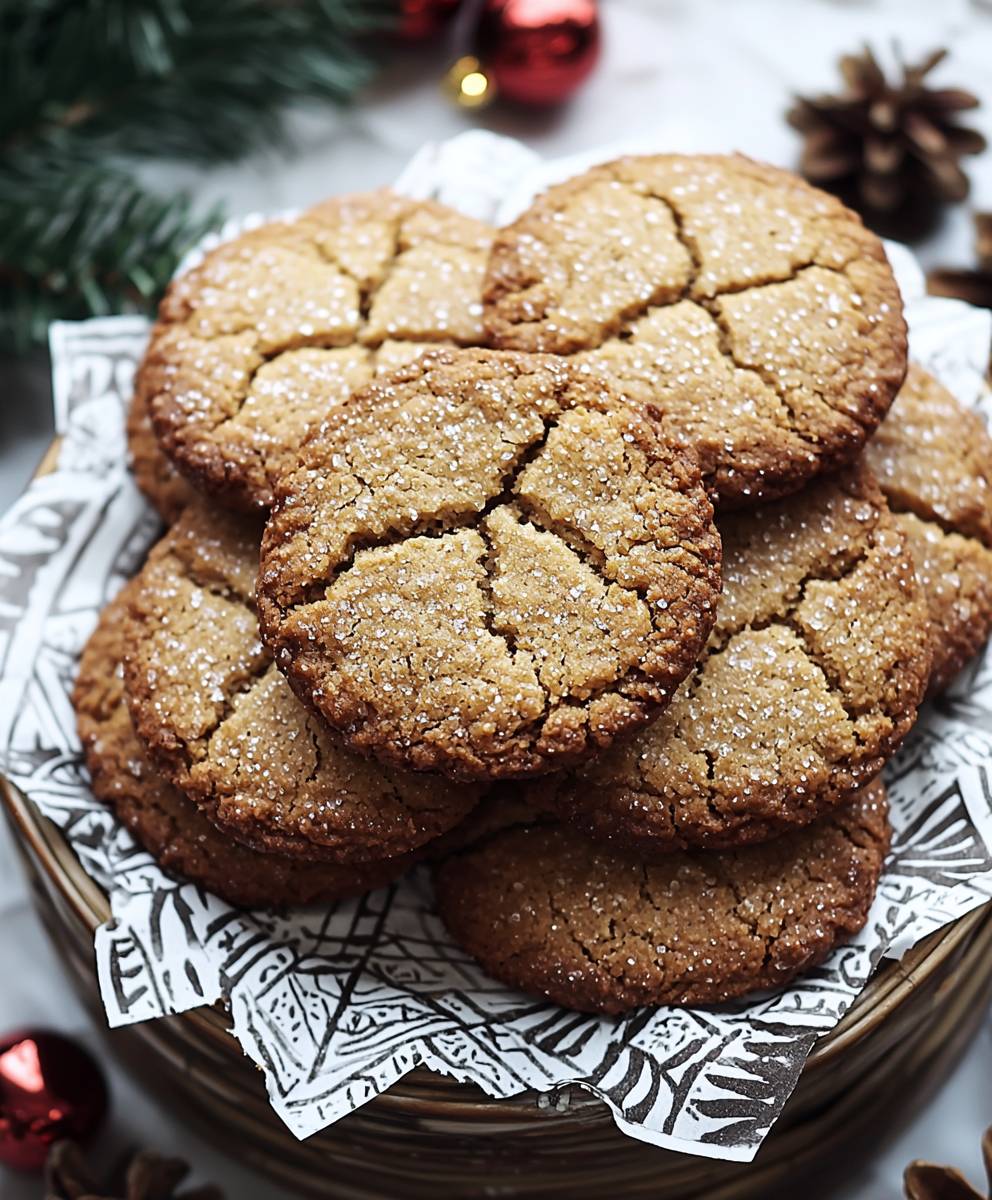
And there you have it! These Christmas Spiced Biscuits are more than just a treat; they’re a warm hug in cookie form, a nostalgic trip down memory lane, and a guaranteed crowd-pleaser all rolled into one delicious bite. I truly believe this recipe is a must-try this holiday season, and here’s why: the perfect blend of spices creates an aroma that will fill your home with festive cheer, the texture is delightfully crisp yet tender, and the subtle sweetness makes them incredibly addictive (in the best way possible, of course!).
But the real magic lies in their versatility. While they’re absolutely divine on their own, dunked in a steaming mug of hot chocolate or a rich, dark coffee, they also pair beautifully with a variety of accompaniments. Imagine them alongside a scoop of vanilla ice cream for a simple yet elegant dessert, or crumbled over a bowl of creamy yogurt for a festive breakfast.
Serving Suggestions and Variations:
* Iced and Decorated: For a truly festive touch, whip up a batch of royal icing and let your creativity run wild! Decorate these Christmas Spiced Biscuits with colorful sprinkles, edible glitter, or intricate designs. This is a fantastic activity to do with kids, and the results are always adorable (and delicious!).
* Sandwich Cookies: Spread a layer of your favorite jam, Nutella, or cream cheese frosting between two biscuits to create a delightful sandwich cookie. Raspberry jam and a hint of orange zest in the frosting would be particularly divine.
* Cheese Pairing: Don’t underestimate the power of a good cheese pairing! These biscuits are surprisingly delicious with a sharp cheddar or a creamy brie. The sweet and spicy notes complement the savory cheese beautifully.
* Spice it Up (or Down): Feel free to adjust the spices to your liking. If you prefer a stronger ginger flavor, add a bit more ground ginger. If you’re not a fan of cloves, you can reduce the amount or omit them altogether. Experiment and find the perfect balance for your taste buds.
* Nutty Addition: For added texture and flavor, try adding chopped nuts to the dough. Walnuts, pecans, or almonds would all be excellent choices.
* Citrus Zest: A little bit of orange or lemon zest can brighten up the flavor of these biscuits and add a lovely aromatic note.
I’ve poured my heart into perfecting this recipe, and I’m confident that you’ll love it as much as I do. But the best part about baking is sharing the joy with others. So, gather your loved ones, preheat your oven, and get ready to create some unforgettable memories.
I truly encourage you to give these Christmas Spiced Biscuits a try. They are perfect for gifting, sharing at holiday gatherings, or simply enjoying as a cozy treat on a cold winter’s night. Once you’ve made them, I’d absolutely love to hear about your experience! Did you try any of the variations? What were your favorite decorations? What did your family and friends think? Share your photos, tips, and stories in the comments below. I can’t wait to see what you create! Happy baking, and happy holidays!
Christmas Spiced Biscuits: The Ultimate Festive Recipe
Festive and delicious spiced sugar biscuits, decorated with royal icing. Perfect for holidays or any special occasion!
Ingredients
- 3 cups all-purpose flour, plus more for dusting
- 1 teaspoon baking soda
- 1/2 teaspoon baking powder
- 1/4 teaspoon salt
- 1 cup (2 sticks) unsalted butter, softened
- 1 1/2 cups granulated sugar
- 1 large egg
- 1 teaspoon vanilla extract
- 1/2 teaspoon almond extract (optional)
- 1/4 cup molasses
- 2 teaspoons ground cinnamon
- 1 teaspoon ground ginger
- 1/2 teaspoon ground cloves
- 1/4 teaspoon ground nutmeg
- 4 cups powdered sugar, sifted
- 3 tablespoons meringue powder
- 1/2 cup warm water, plus more as needed
- Gel food coloring (various colors)
Instructions
- In a large bowl, whisk together the flour, baking soda, baking powder, salt, cinnamon, ginger, cloves, and nutmeg.
- In a separate large bowl (or the bowl of your stand mixer), cream together the softened butter and granulated sugar until light and fluffy (3-5 minutes on medium speed).
- Beat in the egg, vanilla extract, and almond extract (if using) until well combined. Scrape down the sides of the bowl.
- Stir in the molasses until the mixture is smooth and uniform in color.
- Gradually add the dry ingredients to the wet ingredients, mixing on low speed until just combined. Be careful not to overmix.
- Turn the dough out onto a lightly floured surface. Gently knead the dough a few times to bring it together into a smooth disc. If the dough is too sticky, add a little more flour, one tablespoon at a time.
- Wrap the dough tightly in plastic wrap and refrigerate for at least 2 hours, or preferably overnight.
- Preheat your oven to 375°F (190°C). Line baking sheets with parchment paper.
- On a lightly floured surface, roll out the chilled dough to about 1/4 inch thickness.
- Use cookie cutters to cut out your desired shapes.
- Carefully transfer the cut-out biscuits to the prepared baking sheets, leaving about 1 inch of space between each biscuit.
- Bake for 8-10 minutes, or until the edges are lightly golden brown.
- Let the biscuits cool on the baking sheets for a few minutes before transferring them to a wire rack to cool completely.
- In a large bowl, whisk together the sifted powdered sugar and meringue powder.
- Gradually add the warm water to the dry ingredients, mixing on low speed with an electric mixer (or by hand) until a smooth icing forms. Start with 1/2 cup of water and add more, one tablespoon at a time, until you reach the desired consistency.
- The ideal consistency for outlining is similar to toothpaste. For flooding (filling in the outlined areas), you’ll want a slightly thinner consistency, similar to shampoo. To thin the icing, add a few drops of water at a time. To thicken it, add a tablespoon of powdered sugar at a time.
- Divide the icing into separate bowls, depending on how many colors you want to use. Add gel food coloring, one drop at a time, until you reach your desired shades.
- Transfer each color of icing to a piping bag fitted with a small round tip (for outlining) or a squeeze bottle (for flooding). If you don’t have piping bags, you can use ziplock bags with a small corner snipped off.
- Using the thicker icing, outline the edges of each biscuit.
- Using the thinner icing, flood the inside of the outlined areas. Use a toothpick or scribe tool to gently spread the icing and pop any air bubbles.
- While the flooding icing is still wet, you can add details such as sprinkles, nonpareils, or other decorations. You can also use different colors of icing to create intricate designs.
- Allow the icing to dry completely, which usually takes several hours or overnight. The icing should be hard to the touch before you stack or package the biscuits.
- Once the base layer of icing is dry, you can add additional layers of detail, such as dots, lines, or other decorative elements. Let each layer dry completely before adding the next.
Notes
- Don’t Overmix the Dough: Overmixing develops the gluten in the flour, resulting in tough biscuits. Mix until just combined.
- Chill the Dough Thoroughly: Chilling the dough is crucial for preventing the biscuits from spreading too much during baking.
- Use Parchment Paper: Parchment paper prevents the biscuits from sticking and makes cleanup a breeze.
- Sift the Powdered Sugar: Sifting the powdered sugar is essential for preventing lumps in your royal icing.
- Adjust Icing Consistency: The consistency of your royal icing is key to successful decorating. Make sure you have both a thicker icing for outlining and a thinner icing for flooding.
- Be Patient: Decorating biscuits can be time-consuming, but the results are worth it! Take your time and enjoy the process.
- Storage Instructions: Store the decorated biscuits in an airtight container at room temperature for up to a week. To prevent the icing from sticking, you can place a sheet of parchment paper between layers of biscuits.

Leave a Comment