
Easy No Knead Bread: the words themselves sound like a dream, don’t they? Imagine sinking your teeth into a crusty, golden loaf, the aroma of freshly baked bread filling your kitchen, all without the fuss and exertion of traditional kneading. This isn’t just a recipe; it’s a revolution in home baking, bringing the joy of homemade bread to even the busiest of schedules.
While the exact origins are debated, the modern no-knead bread technique gained significant popularity thanks to Jim Lahey of Sullivan Street Bakery in New York City. His method, published in the New York Times, demystified bread making and proved that incredible bread could be achieved with minimal effort. It’s a testament to the idea that sometimes, simplicity is the key to perfection.
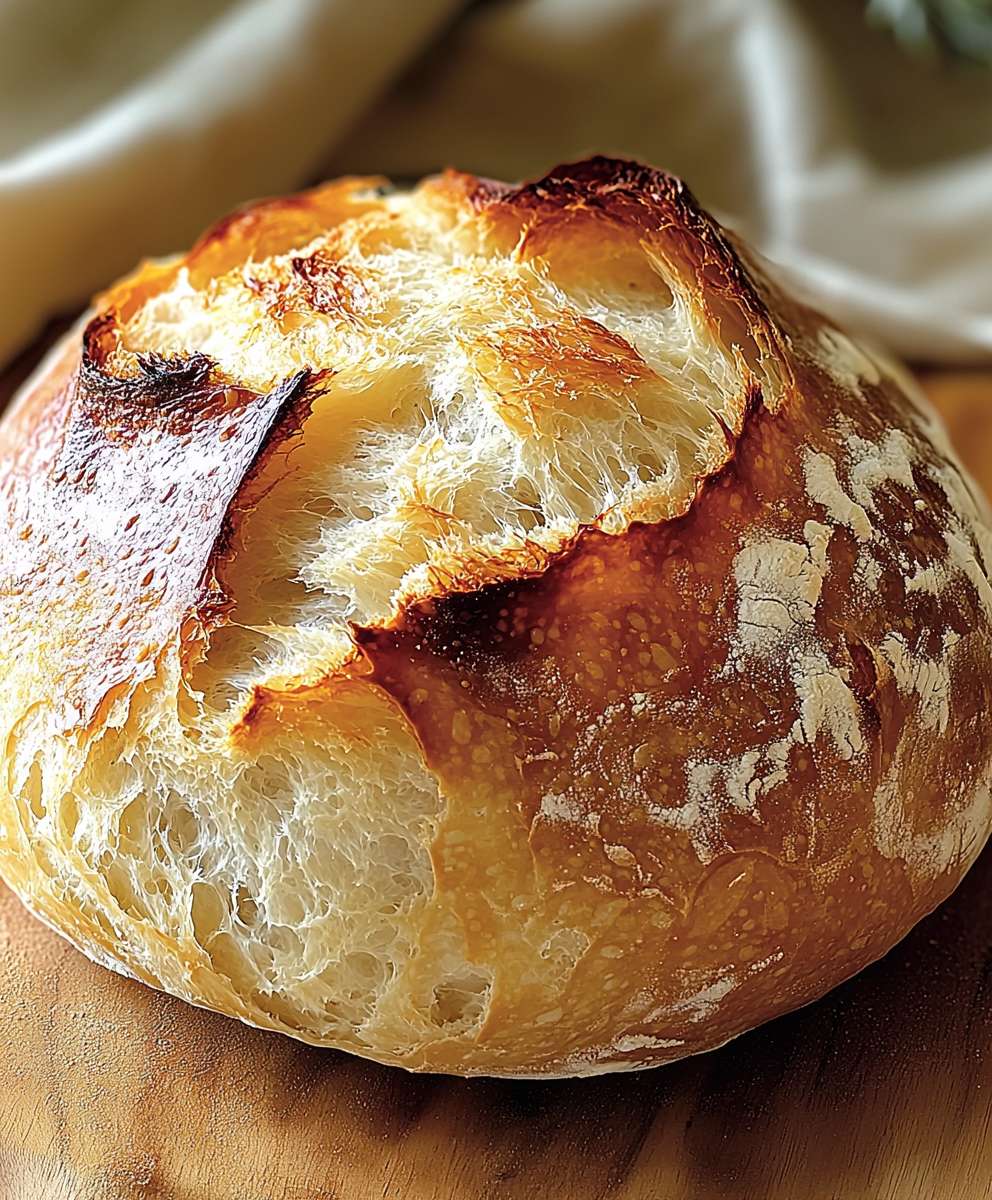
So, why is easy no knead bread so beloved? It’s a symphony of textures: a satisfyingly crisp crust gives way to a soft, airy interior. The flavor is complex and slightly tangy, thanks to the long fermentation process. But perhaps the biggest draw is the sheer convenience. With just a few minutes of active time and a little patience, you can have a bakery-worthy loaf on your table. Forget complicated techniques and hours of kneading; this recipe is all about letting time and simple ingredients do the work. Get ready to experience the magic of homemade bread, the easy way!

Ingredients:
- 3 cups (384g) all-purpose flour, plus more for dusting
- 1 3/4 teaspoons salt
- 1/2 teaspoon instant or rapid-rise yeast
- 1 1/2 cups (360ml) lukewarm water (not hot!)
- Optional: 1 tablespoon olive oil, for greasing the bowl
Instructions:
Mixing the Dough:
- In a large bowl, whisk together the flour, salt, and yeast. Make sure these ingredients are well combined before adding the water. This ensures even distribution of the yeast and salt throughout the dough, which is crucial for proper rising and flavor development. I like to use a whisk to really get everything incorporated.
- Add the lukewarm water to the dry ingredients. The water temperature is important! Too hot, and you’ll kill the yeast. Too cold, and it won’t activate properly. Lukewarm is the sweet spot think baby bottle temperature.
- Using a wooden spoon or a spatula, stir the mixture until a shaggy dough forms. It will be sticky and a bit messy, and that’s perfectly fine! Don’t overmix it. You just want to make sure all the flour is hydrated. There should be no dry flour remaining at the bottom of the bowl.
- If you’re using olive oil, lightly grease a separate bowl with it. This will prevent the dough from sticking as it rises.
- Transfer the dough to the greased bowl (or just leave it in the original bowl if you didn’t use oil). Cover the bowl tightly with plastic wrap or a lid. Make sure the seal is good to prevent the dough from drying out.
First Rise (Bulk Fermentation):
- Let the dough rise at room temperature for 12-18 hours, or until it has more than doubled in size and is bubbly on top. The exact time will depend on the temperature of your room. Warmer temperatures will result in a faster rise. Don’t be tempted to rush this step! This long, slow rise is what develops the amazing flavor of this bread.
- You’ll know it’s ready when it’s puffy, airy, and has lots of bubbles. If you gently poke it, it should slowly deflate.
Shaping the Dough:
- Generously flour a clean work surface. This is important because the dough will be very sticky. Don’t skimp on the flour!
- Gently turn the dough out onto the floured surface. Be careful not to deflate it too much.
- Using floured hands, gently shape the dough into a round or oval. You can do this by folding the edges of the dough towards the center, then flipping it over and gently rounding it out. Don’t overwork the dough at this stage. We just want to create a basic shape.
- Place the shaped dough on a large piece of parchment paper. This will make it easier to transfer the dough to the hot Dutch oven later.
- Cover the dough loosely with plastic wrap or a clean kitchen towel.
Second Rise (Proofing):
- Let the dough rise for another 30-60 minutes. This second rise, called proofing, allows the dough to relax and develop even more flavor.
- While the dough is proofing, preheat your oven to 450°F (232°C) with a Dutch oven inside. It’s crucial that the Dutch oven is very hot before you add the dough. This creates a steamy environment that helps the bread rise beautifully and develop a crispy crust. Make sure your Dutch oven is oven-safe to that temperature!
Baking:
- Carefully remove the hot Dutch oven from the oven. Be extremely cautious, as it will be very hot! Use oven mitts or thick towels to protect your hands.
- Using the parchment paper as a sling, gently lower the dough into the hot Dutch oven. Try to center it as much as possible.
- Score the top of the dough with a sharp knife or a lame (a special bread-scoring tool). This allows the bread to expand properly in the oven and prevents it from cracking randomly. A simple slash or an “X” works well.
- Cover the Dutch oven with the lid and bake for 30 minutes. The lid traps the steam, creating a moist environment that helps the bread rise.
- After 30 minutes, remove the lid and bake for another 15-20 minutes, or until the crust is deeply golden brown and the internal temperature reaches 200-210°F (93-99°C). Removing the lid allows the crust to crisp up and brown beautifully.
- If the crust is browning too quickly, you can tent it with foil.
Cooling and Enjoying:
- Carefully remove the bread from the Dutch oven and place it on a wire rack to cool completely. This is important because the bread continues to cook as it cools. Cutting into it too soon will result in a gummy texture.
- Let the bread cool for at least 1 hour before slicing and serving. I know it’s tempting to dig in right away, but trust me, it’s worth the wait!
- Enjoy your homemade no-knead bread! It’s delicious on its own, with butter, or used for sandwiches.
Tips and Variations:
- Flour: While all-purpose flour works great, you can also use bread flour for a chewier texture. You can even experiment with adding a portion of whole wheat flour for a nuttier flavor.
- Yeast: I recommend using instant or rapid-rise yeast for this recipe, as it doesn’t require proofing beforehand. However, you can use active dry yeast, but you’ll need to proof it in warm water for about 5-10 minutes before adding it to the dry ingredients.
- Salt: Don’t skip the salt! It’s essential for flavor and also helps to control the yeast activity.
- Water: The water temperature is crucial for activating the yeast. Make sure it’s lukewarm, not hot.
- Add-ins: Get creative with add-ins! You can add herbs, cheese, olives, or dried fruit to the dough for extra flavor and texture. Just add them after the first rise, when you’re shaping the dough.
- Dutch Oven Size: A 5-6 quart Dutch oven is ideal for this recipe. If you don’t have a Dutch oven, you can bake the bread on a baking sheet, but you’ll need to create a steamy environment in the oven by placing a pan of hot water on the bottom rack.
- Scoring: Scoring the dough is important for controlling how it expands in the oven. Use a sharp knife or a lame to make a clean cut.
- Storage: Store the bread in an airtight container at room temperature for up to 3 days. You can also freeze it for longer storage.
Troubleshooting:
- Dough didn’t rise: This could be due to several factors, such as using expired yeast, water that was too hot or too cold, or a room that was too cold. Make sure your yeast is fresh, your water is lukewarm, and your room is warm enough for the dough to rise properly.
- Dough is too sticky: This is normal for no-knead bread. Just make sure to flour your work surface and hands generously.
- Bread is too dense: This could be due to not letting the dough rise long enough, or overworking the dough during shaping. Be patient and let the dough rise until it has more than doubled in size.
- Crust is too dark: If the crust is browning too quickly, you can tent it with foil during the last 10-15 minutes of baking.
Why This Recipe Works:
This no-knead bread recipe is so easy because it relies on a long, slow fermentation process to develop flavor and texture. The high hydration level of the dough also contributes to its airy and open crumb. The Dutch oven creates a steamy environment that helps the bread rise beautifully and develop a crispy crust. It’s truly a foolproof recipe that anyone can make!
Enjoy!
Conclusion:
And there you have it! This Easy No Knead Bread recipe is truly a game-changer, and I wholeheartedly believe it deserves a permanent spot in your baking repertoire. Why? Because it delivers bakery-quality results with minimal effort. We’re talking about a crusty, golden-brown loaf with a soft, airy interior all achieved without the tedious kneading typically associated with bread making. It’s the perfect solution for busy weeknights, impromptu gatherings, or simply when you crave the comforting aroma of freshly baked bread filling your home.
But the best part? It’s incredibly forgiving. Even if you’re a novice baker, this recipe is practically foolproof. The long fermentation process allows the gluten to develop naturally, resulting in a flavorful and textured loaf that will impress even the most discerning palates. Forget complicated techniques and specialized equipment; all you need is a bowl, a spoon, and a little patience.
Now, let’s talk about serving suggestions. This Easy No Knead Bread is incredibly versatile. Slice it thick and slather it with butter for a simple yet satisfying breakfast. Use it to create gourmet sandwiches with your favorite fillings. Toast it and top it with avocado and a sprinkle of sea salt for a trendy brunch option. Or, cube it and toss it with olive oil, herbs, and garlic for homemade croutons that will elevate any salad.
And don’t be afraid to experiment with variations! Add a handful of chopped olives and rosemary to the dough for a Mediterranean-inspired loaf. Incorporate some shredded cheese and jalapeños for a spicy kick. Or, swirl in some cinnamon and raisins for a sweet treat. The possibilities are endless! You can also experiment with different types of flour. Try using whole wheat flour for a nuttier flavor or rye flour for a more rustic texture. Just remember to adjust the amount of water accordingly, as different flours absorb moisture differently.
I personally love serving this bread with a hearty bowl of soup or stew on a chilly evening. The crusty bread is perfect for soaking up all the delicious broth. It’s also fantastic alongside a cheese board or charcuterie platter. The neutral flavor of the bread allows the other flavors to shine through.
But truly, the best way to enjoy this bread is simply warm, straight from the oven, with a generous pat of butter. There’s nothing quite like it!
So, what are you waiting for? Gather your ingredients, preheat your oven, and prepare to be amazed by the simplicity and deliciousness of this Easy No Knead Bread. I promise you won’t be disappointed.
I’m so excited for you to try this recipe and experience the joy of baking your own bread. Once you do, I would absolutely love to hear about your experience! Share your photos and stories in the comments below. Let me know what variations you tried, what you served it with, and most importantly, how much you enjoyed it. Happy baking! I can’t wait to see what you create!
Easy No Knead Bread: The Ultimate Guide to Baking at Home
Effortless, crusty, and flavorful homemade bread with minimal effort! This no-knead recipe requires just a few ingredients and a long rise for incredible results.
Ingredients
- 3 cups (384g) all-purpose flour, plus more for dusting
- 1 3/4 teaspoons salt
- 1/2 teaspoon instant or rapid-rise yeast
- 1 1/2 cups (360ml) lukewarm water (not hot!)
- Optional: 1 tablespoon olive oil, for greasing the bowl
Instructions
- Mixing the Dough: In a large bowl, whisk together the flour, salt, and yeast until well combined. Add the lukewarm water and stir with a wooden spoon or spatula until a shaggy, sticky dough forms. Ensure all flour is hydrated.
- If using, lightly grease a separate bowl with olive oil. Transfer the dough to the greased bowl (or leave in the original). Cover the bowl tightly with plastic wrap or a lid.
- First Rise (Bulk Fermentation): Let the dough rise at room temperature for 12-18 hours, or until it has more than doubled in size and is bubbly on top.
- Shaping the Dough: Generously flour a clean work surface. Gently turn the dough out onto the floured surface. Using floured hands, gently shape the dough into a round or oval.
- Place the shaped dough on a large piece of parchment paper. Cover loosely with plastic wrap or a clean kitchen towel.
- Second Rise (Proofing): Let the dough rise for another 30-60 minutes.
- While the dough is proofing, preheat your oven to 450°F (232°C) with a Dutch oven inside.
- Baking: Carefully remove the hot Dutch oven from the oven. Using the parchment paper as a sling, gently lower the dough into the hot Dutch oven.
- Score the top of the dough with a sharp knife or lame.
- Cover the Dutch oven with the lid and bake for 30 minutes.
- After 30 minutes, remove the lid and bake for another 15-20 minutes, or until the crust is deeply golden brown and the internal temperature reaches 200-210°F (93-99°C). Tent with foil if browning too quickly.
- Cooling and Enjoying: Carefully remove the bread from the Dutch oven and place it on a wire rack to cool completely. Let the bread cool for at least 1 hour before slicing and serving.
Notes
- Flour: All-purpose flour works great, but bread flour will give a chewier texture. You can also add some whole wheat flour.
- Yeast: Instant or rapid-rise yeast is recommended. If using active dry yeast, proof it in warm water first.
- Salt: Don’t skip the salt!
- Water: Lukewarm water is crucial for activating the yeast.
- Add-ins: Get creative with herbs, cheese, olives, or dried fruit. Add them after the first rise.
- Dutch Oven Size: A 5-6 quart Dutch oven is ideal. If you don’t have one, bake on a baking sheet with a pan of hot water on the bottom rack.
- Scoring: Use a sharp knife or lame to score the dough.
- Storage: Store in an airtight container at room temperature for up to 3 days, or freeze for longer storage.
- Troubleshooting:
* Dough didn’t rise: Check yeast freshness, water temperature, and room temperature.
* Dough is too sticky: Flour your work surface and hands generously.
* Bread is too dense: Let the dough rise longer and avoid overworking it.
* Crust is too dark: Tent with foil during the last 10-15 minutes of baking.


Leave a Comment