
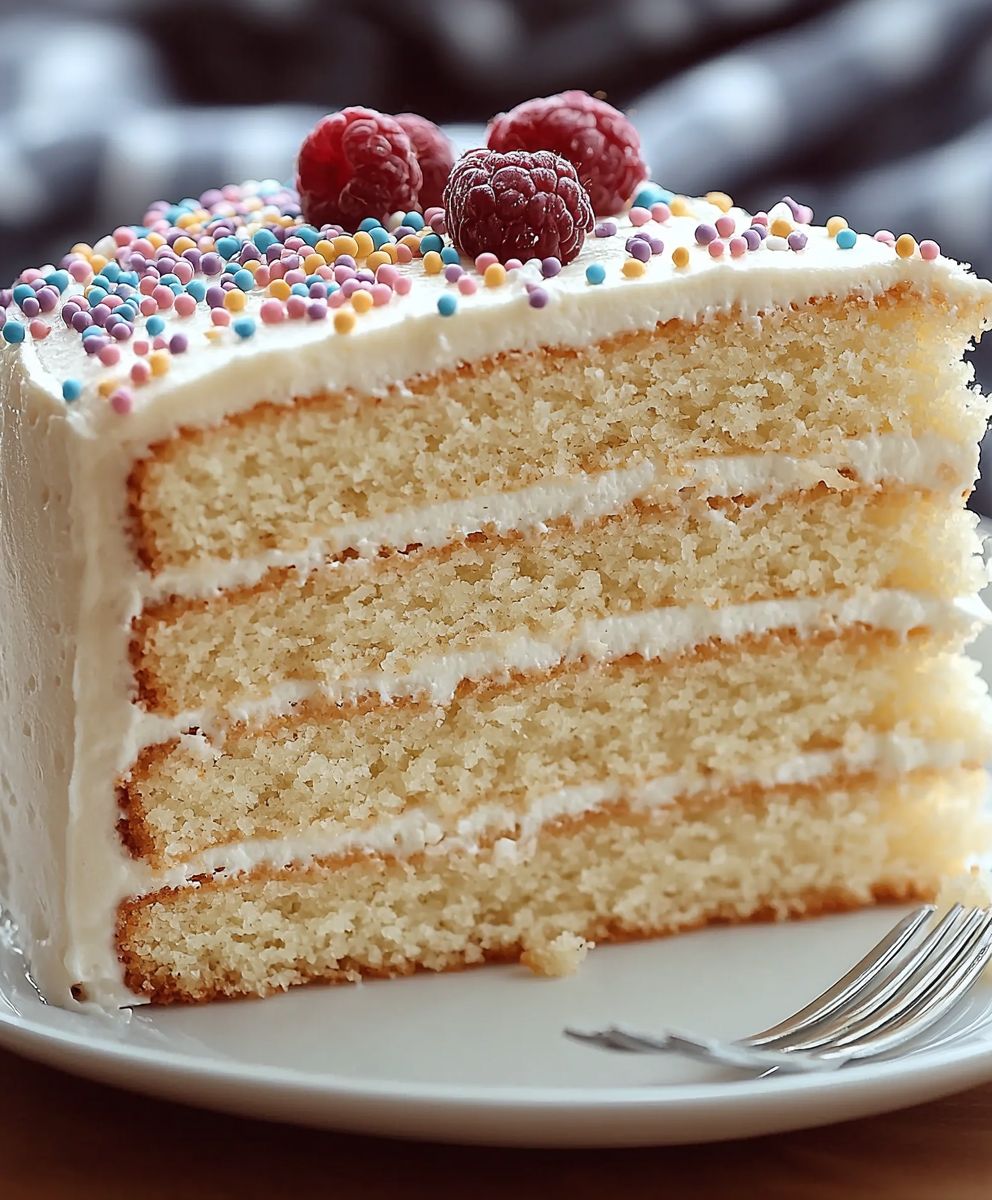
Moist Vanilla Layer Cake: Just the name conjures up images of celebrations, sweet indulgence, and pure, unadulterated joy, doesn’t it? I remember the first time I tasted a truly exceptional vanilla layer cake it was at my grandmother’s birthday, and the light, airy texture combined with the rich vanilla flavor was simply unforgettable. It wasn’t just dessert; it was a moment, a memory, a feeling of warmth and love.
The vanilla layer cake, in its many forms, has been a staple at gatherings for generations. While its exact origins are difficult to pinpoint, the rise of vanilla extract in the 19th century undoubtedly played a crucial role in its popularization. Vanilla, once a rare and expensive spice, became more accessible, allowing home bakers to infuse their creations with its delicate and captivating aroma. This accessibility helped cement the vanilla layer cake as a classic dessert.
But what is it about a moist vanilla layer cake that makes it so universally beloved? I think it’s the perfect balance of simplicity and sophistication. The flavor is comforting and familiar, yet the texture, when done right, is ethereally light and melts in your mouth. It’s also incredibly versatile! You can dress it up with elaborate frosting and decorations for a special occasion, or keep it simple with a dusting of powdered sugar for a casual treat. Whether you’re a seasoned baker or just starting out, this recipe is sure to become a favorite. So, let’s get baking and create a moist vanilla layer cake that will impress your friends and family!
Ingredients:
- For the Cake:
- 3 cups all-purpose flour, plus more for dusting the pans
- 1 tablespoon baking powder
- 1/2 teaspoon baking soda
- 1 teaspoon salt
- 1 cup (2 sticks) unsalted butter, softened
- 2 cups granulated sugar
- 4 large eggs
- 1 tablespoon vanilla extract
- 1 1/2 cups buttermilk
- For the Vanilla Buttercream Frosting:
- 1 cup (2 sticks) unsalted butter, softened
- 4 cups powdered sugar, sifted
- 1/2 cup heavy cream
- 2 tablespoons vanilla extract
- Pinch of salt
Preparing the Cake Batter:
- Preheat and Prepare the Pans: First things first, let’s get those ovens preheated! Set your oven to 350°F (175°C). While it’s heating up, grease and flour three 9-inch round cake pans. I like to use baking spray with flour already in it it saves a step! But if you don’t have that, just grease the pans with shortening or butter, then dust them with flour, tapping out any excess. This ensures your cakes release cleanly.
- Combine Dry Ingredients: In a large bowl, whisk together the flour, baking powder, baking soda, and salt. Whisking is key here to evenly distribute the leavening agents and prevent any pockets of baking powder or soda that could lead to uneven rising. Set this bowl aside for now.
- Cream Butter and Sugar: In a separate large bowl (or the bowl of your stand mixer), cream together the softened butter and granulated sugar until light and fluffy. This usually takes about 3-5 minutes on medium speed. The mixture should be noticeably lighter in color and have a smooth, airy texture. This step is crucial for incorporating air into the batter, which contributes to a light and tender cake.
- Add Eggs: Beat in the eggs one at a time, making sure each egg is fully incorporated before adding the next. After adding all the eggs, beat in the vanilla extract. Don’t rush this step! Each egg needs to be properly emulsified into the butter and sugar mixture.
- Alternate Adding Dry and Wet Ingredients: Gradually add the dry ingredients to the wet ingredients, alternating with the buttermilk. Begin and end with the dry ingredients. So, add about 1/3 of the dry ingredients, then 1/2 of the buttermilk, then another 1/3 of the dry ingredients, then the remaining buttermilk, and finally the last 1/3 of the dry ingredients. Mix on low speed until just combined after each addition. Be careful not to overmix! Overmixing develops the gluten in the flour, which can result in a tough cake.
- Final Mix: Give the batter one final mix on low speed just to ensure everything is evenly incorporated. Scrape down the sides and bottom of the bowl with a spatula to make sure no pockets of dry ingredients are hiding.
Baking the Cakes:
- Divide the Batter: Divide the cake batter evenly among the prepared cake pans. I find it helpful to use a kitchen scale to ensure each pan has the same amount of batter. This will help the cakes bake evenly and stack nicely.
- Bake: Bake in the preheated oven for 25-30 minutes, or until a wooden skewer inserted into the center comes out clean. The cakes should also be lightly golden brown on top and spring back lightly when touched.
- Cool in Pans: Let the cakes cool in the pans for 10-15 minutes before inverting them onto a wire rack to cool completely. Cooling them in the pans slightly helps them retain their shape and prevents them from sticking. Make sure they are completely cool before frosting!
Making the Vanilla Buttercream Frosting:
- Cream the Butter: In a large bowl (or the bowl of your stand mixer), beat the softened butter until smooth and creamy. This usually takes about 2-3 minutes on medium speed.
- Add Powdered Sugar: Gradually add the sifted powdered sugar, one cup at a time, beating on low speed until combined. Sifting the powdered sugar is important to prevent lumps in your frosting.
- Add Heavy Cream and Vanilla: Add the heavy cream and vanilla extract and beat on medium speed until light and fluffy. This usually takes about 3-5 minutes. The frosting should be smooth, creamy, and easy to spread.
- Adjust Consistency: If the frosting is too thick, add a little more heavy cream, one tablespoon at a time, until you reach the desired consistency. If it’s too thin, add a little more powdered sugar, one tablespoon at a time.
- Add Salt: Add a pinch of salt to balance the sweetness.
Assembling the Cake:
- Level the Cakes (Optional): If your cakes have a slight dome on top, you can use a serrated knife to level them. This will make stacking and frosting the cake easier. I usually don’t bother unless the domes are significant.
- Place First Layer: Place one cake layer on a cake stand or serving plate.
- Frost First Layer: Spread a generous layer of vanilla buttercream frosting evenly over the first cake layer.
- Add Second Layer: Carefully place the second cake layer on top of the frosting.
- Frost Second Layer: Spread another generous layer of vanilla buttercream frosting evenly over the second cake layer.
- Add Third Layer: Carefully place the third cake layer on top of the frosting.
- Crumb Coat: Apply a thin layer of frosting over the entire cake. This is called a crumb coat, and it helps to seal in any loose crumbs and create a smooth surface for the final layer of frosting. Refrigerate the cake for 30 minutes to allow the crumb coat to set.
- Final Frosting: Apply a final, thicker layer of vanilla buttercream frosting over the entire cake, smoothing it out as desired. You can use a spatula, an offset spatula, or even a cake decorating comb to create different textures.
- Decorate (Optional): Decorate the cake as desired. You can use sprinkles, fresh fruit, chocolate shavings, or anything else that strikes your fancy.
- Chill: Refrigerate the cake for at least 30 minutes before serving to allow the frosting to set. This will make it easier to slice and serve.
Conclusion:
And there you have it! This Moist Vanilla Layer Cake isn’t just another cake recipe; it’s an invitation to create something truly special, something that will have everyone asking for seconds (and the recipe!). From its unbelievably tender crumb to its delicate vanilla flavor, every element of this cake is designed to deliver pure baking bliss. I truly believe this will become your go-to vanilla cake recipe.
Why is this a must-try? Well, beyond the incredible taste and texture, it’s surprisingly straightforward to make. I’ve broken down each step to ensure success, even for novice bakers. Plus, the versatility of this cake is unmatched. It’s the perfect blank canvas for your creative decorating ideas. Think elegant buttercream swirls, fresh berries cascading down the sides, or a simple dusting of powdered sugar for a classic touch.
But the real magic lies in the moistness. Forget dry, crumbly cakes! This recipe guarantees a cake that stays incredibly moist for days, thanks to the carefully balanced ingredients and techniques. It’s the kind of cake that melts in your mouth with every bite, leaving you wanting more.
Now, let’s talk serving suggestions and variations. While this cake is divine on its own, a few simple additions can elevate it to the next level. For a classic pairing, serve it with a scoop of vanilla bean ice cream and a drizzle of homemade raspberry sauce. Or, for a more decadent treat, try layering it with chocolate ganache and chopped nuts.
Feeling adventurous? Consider these variations:
* **Lemon Vanilla Cake:** Add the zest of one lemon to the batter for a bright, citrusy twist.
* **Almond Vanilla Cake:** Substitute almond extract for half of the vanilla extract for a nutty, aromatic flavor.
* **Birthday Cake Extravaganza:** Load it up with sprinkles, colorful frosting, and candles for the ultimate birthday celebration.
* **Mini Cakes:** Bake the batter in muffin tins for individual mini cakes, perfect for parties or portion control.
The possibilities are endless! Don’t be afraid to experiment and make this Moist Vanilla Layer Cake your own.
I’m so excited for you to try this recipe! I poured my heart into perfecting it, and I know you’ll love the results. The aroma that fills your kitchen as it bakes, the satisfying feeling of creating something beautiful and delicious, and the joy of sharing it with loved ones it’s all part of the experience.
So, preheat your oven, gather your ingredients, and get ready to bake the best vanilla cake you’ve ever tasted. And most importantly, have fun! Baking should be a joyful and relaxing experience.
Once you’ve tried this recipe, I’d absolutely love to hear about your experience. Did you make any variations? What kind of frosting did you use? What did your family and friends think? Share your photos and stories in the comments below! Your feedback is invaluable, and it helps me continue to improve and create even more delicious recipes for you. Happy baking! I can’t wait to see your creations!
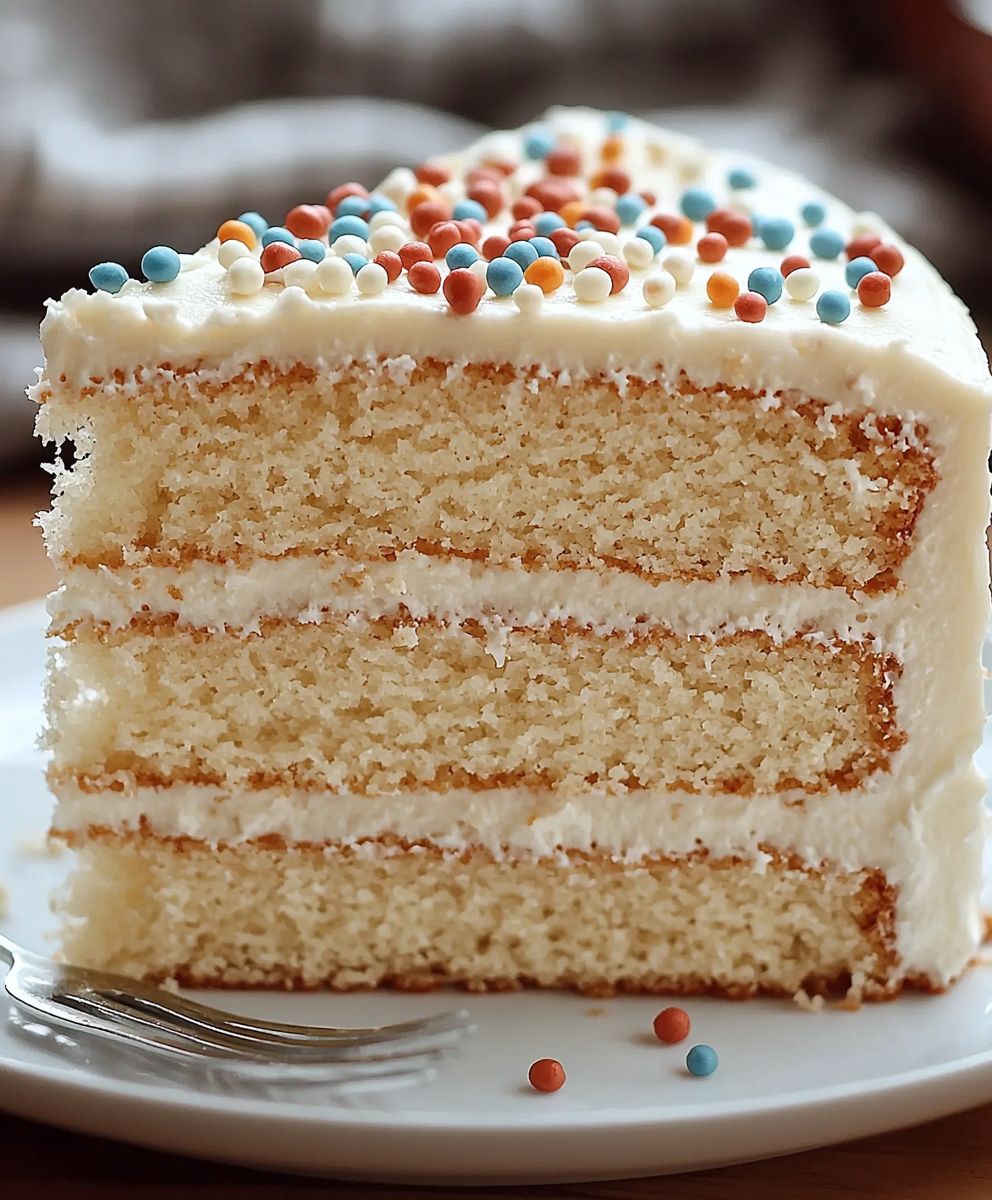
Moist Vanilla Layer Cake: The Ultimate Recipe for a Perfect Cake
Classic vanilla layer cake with light, fluffy vanilla buttercream. Perfect for birthdays, celebrations, or any occasion!
Ingredients
- 3 cups all-purpose flour, plus more for dusting the pans
- 1 tablespoon baking powder
- 1/2 teaspoon baking soda
- 1 teaspoon salt
- 1 cup (2 sticks) unsalted butter, softened
- 2 cups granulated sugar
- 4 large eggs
- 1 tablespoon vanilla extract
- 1 1/2 cups buttermilk
- 1 cup (2 sticks) unsalted butter, softened
- 4 cups powdered sugar, sifted
- 1/2 cup heavy cream
- 2 tablespoons vanilla extract
- Pinch of salt
Instructions
- Preheat and Prepare the Pans: Preheat oven to 350°F (175°C). Grease and flour three 9-inch round cake pans.
- Combine Dry Ingredients: In a large bowl, whisk together the flour, baking powder, baking soda, and salt.
- Cream Butter and Sugar: In a separate large bowl (or the bowl of your stand mixer), cream together the softened butter and granulated sugar until light and fluffy (3-5 minutes on medium speed).
- Add Eggs: Beat in the eggs one at a time, making sure each egg is fully incorporated before adding the next. After adding all the eggs, beat in the vanilla extract.
- Alternate Adding Dry and Wet Ingredients: Gradually add the dry ingredients to the wet ingredients, alternating with the buttermilk. Begin and end with the dry ingredients. Mix on low speed until just combined after each addition.
- Final Mix: Give the batter one final mix on low speed just to ensure everything is evenly incorporated. Scrape down the sides and bottom of the bowl with a spatula.
- Divide the Batter: Divide the cake batter evenly among the prepared cake pans.
- Bake: Bake in the preheated oven for 25-30 minutes, or until a wooden skewer inserted into the center comes out clean.
- Cool in Pans: Let the cakes cool in the pans for 10-15 minutes before inverting them onto a wire rack to cool completely.
- Cream the Butter (Frosting): In a large bowl (or the bowl of your stand mixer), beat the softened butter until smooth and creamy (2-3 minutes on medium speed).
- Add Powdered Sugar (Frosting): Gradually add the sifted powdered sugar, one cup at a time, beating on low speed until combined.
- Add Heavy Cream and Vanilla (Frosting): Add the heavy cream and vanilla extract and beat on medium speed until light and fluffy (3-5 minutes).
- Adjust Consistency (Frosting): If the frosting is too thick, add a little more heavy cream, one tablespoon at a time, until you reach the desired consistency. If it’s too thin, add a little more powdered sugar, one tablespoon at a time.
- Add Salt (Frosting): Add a pinch of salt to balance the sweetness.
- Level the Cakes (Optional): If your cakes have a slight dome on top, you can use a serrated knife to level them.
- Place First Layer: Place one cake layer on a cake stand or serving plate.
- Frost First Layer: Spread a generous layer of vanilla buttercream frosting evenly over the first cake layer.
- Add Second Layer: Carefully place the second cake layer on top of the frosting.
- Frost Second Layer: Spread another generous layer of vanilla buttercream frosting evenly over the second cake layer.
- Add Third Layer: Carefully place the third cake layer on top of the frosting.
- Crumb Coat: Apply a thin layer of frosting over the entire cake. Refrigerate the cake for 30 minutes to allow the crumb coat to set.
- Final Frosting: Apply a final, thicker layer of vanilla buttercream frosting over the entire cake, smoothing it out as desired.
- Decorate (Optional): Decorate the cake as desired.
- Chill: Refrigerate the cake for at least 30 minutes before serving to allow the frosting to set.
Notes
- Sifting the powdered sugar is important to prevent lumps in your frosting.
- Be careful not to overmix the cake batter. Overmixing develops the gluten in the flour, which can result in a tough cake.
- Using a kitchen scale to divide the batter ensures each pan has the same amount of batter, helping the cakes bake evenly.
- Cooling the cakes in the pans slightly helps them retain their shape and prevents them from sticking.
- A crumb coat helps to seal in any loose crumbs and create a smooth surface for the final layer of frosting.

Leave a Comment