
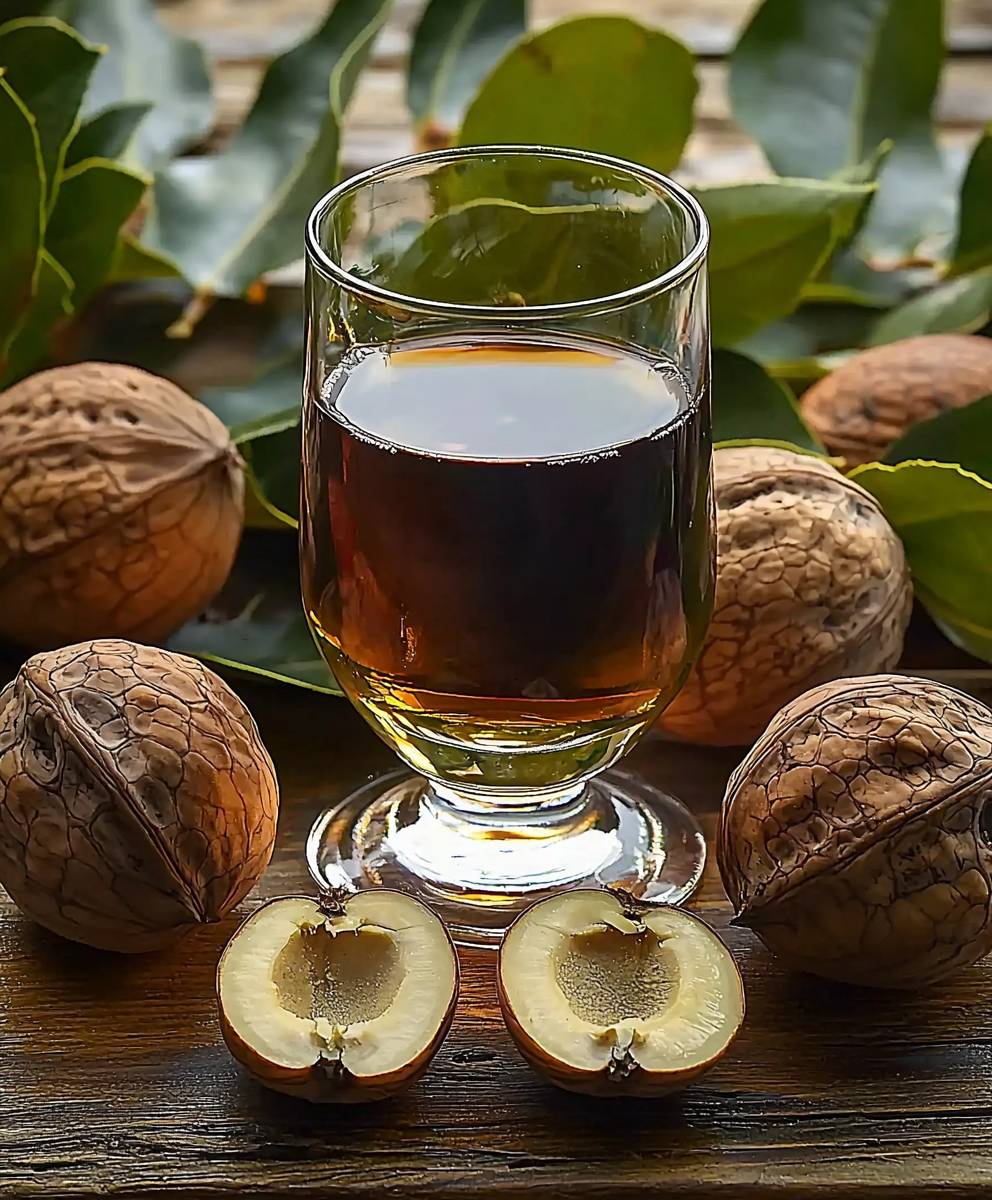
Walnut wine, a drink as intriguing as its name suggests, is more than just a beverage; it’s a journey through history and a celebration of autumnal flavors. Imagine a rich, dark liquid, hinting at the earthy depths of walnuts and the subtle warmth of spices, all culminating in a uniquely satisfying sip. Have I piqued your interest?
The tradition of crafting walnut wine, also known as “Nocino” in Italy and other variations across Europe, dates back centuries. Often associated with pagan rituals and celebrations of the summer solstice, it was believed to possess medicinal properties and even magical powers. While we can’t promise any spells, we can guarantee a delightful experience for your taste buds!
People adore walnut wine for its complex flavor profile. It’s not overly sweet, but rather offers a delightful balance of bitterness, spice, and a subtle nutty sweetness. The texture is smooth and velvety, making it a perfect digestif after a hearty meal or a unique addition to cocktails. Plus, making your own walnut wine is surprisingly simple and incredibly rewarding. It’s a fantastic way to connect with tradition and create something truly special to share with friends and family. So, let’s embark on this culinary adventure together and discover the secrets to crafting the perfect batch of homemade walnut wine!

Ingredients:
- 1 gallon (3.8 liters) water, preferably spring or filtered
- 2 lbs (900g) green walnuts, harvested in late June or early July when they are still soft enough to cut with a knife
- 2.5 lbs (1.1 kg) granulated sugar
- 1 packet wine yeast (Saccharomyces cerevisiae), such as Lalvin EC-1118 or similar
- 1 tsp yeast nutrient
- 1/2 tsp pectic enzyme
- 1 crushed Campden tablet (potassium metabisulfite) added 24 hours before yeast
- Optional: 1/2 tsp tannin powder (for added body and complexity)
Preparing the Walnuts:
- Wear gloves! Walnut juice will stain your hands brown. Trust me on this one.
- Wash the green walnuts thoroughly to remove any dirt or debris.
- Cut the walnuts into quarters. You should be able to cut through them relatively easily. If they are too hard, they are past their prime for this recipe. The inside should be jelly-like and white.
- Place the quartered walnuts into a sanitized primary fermentation bucket or food-grade container.
Preparing the Must:
- In a large pot, heat about half of the water (0.5 gallons or 1.9 liters) until it is warm, but not boiling.
- Add the sugar to the warm water and stir until it is completely dissolved. This creates a simple syrup.
- Pour the sugar syrup over the walnuts in the fermentation bucket.
- Add the remaining water to the bucket, ensuring the walnuts are submerged. If they aren’t, you can add a little more water, but keep track of the total volume for later calculations.
- Add the crushed Campden tablet to the must. This will sanitize the mixture and kill any wild yeasts or bacteria that might be present.
- Cover the bucket with a lid or clean cloth and let it sit for 24 hours. This allows the Campden tablet to do its job.
Adding Yeast and Nutrients:
- After 24 hours, add the pectic enzyme to the must. This will help to break down the pectin in the walnuts, resulting in a clearer wine.
- If using tannin powder, add it now.
- Rehydrate the wine yeast according to the manufacturer’s instructions. This usually involves dissolving the yeast in a small amount of warm water with a pinch of sugar. Let it sit for about 15-20 minutes until it becomes frothy.
- Add the rehydrated yeast to the must.
- Add the yeast nutrient to the must. This provides the yeast with the necessary nutrients to ferment properly.
- Stir the must well to ensure everything is evenly distributed.
Primary Fermentation:
- Cover the fermentation bucket with a lid and attach an airlock. The airlock allows carbon dioxide to escape while preventing air and contaminants from entering.
- Place the bucket in a cool, dark place with a consistent temperature, ideally between 65-75°F (18-24°C).
- Fermentation should begin within 24-48 hours. You’ll see bubbles forming in the airlock.
- Allow the wine to ferment for 7-10 days, or until the bubbling in the airlock slows down significantly.
- During the primary fermentation, it’s a good idea to gently stir the must every day or two to help release the flavors from the walnuts.
Racking and Secondary Fermentation:
- After the primary fermentation has slowed down, it’s time to rack the wine. This involves transferring the wine from the primary fermentation bucket to a sanitized glass carboy, leaving behind the sediment (lees) at the bottom of the bucket.
- Use a sanitized siphon to carefully transfer the wine to the carboy. Avoid disturbing the sediment as much as possible.
- Top up the carboy with additional water if necessary, leaving as little headspace as possible. Headspace can lead to oxidation.
- Attach an airlock to the carboy.
- Place the carboy back in a cool, dark place.
- Allow the wine to undergo secondary fermentation for several weeks or months. This allows the wine to clarify and mature.
- You may need to rack the wine again after a few months if more sediment accumulates.
Clearing and Stabilizing:
- After several months of secondary fermentation, the wine should be relatively clear. If it’s still cloudy, you can use a fining agent such as bentonite or sparkolloid to help clear it. Follow the manufacturer’s instructions for using fining agents.
- Once the wine is clear, it’s time to stabilize it. This prevents further fermentation in the bottle.
- Add another crushed Campden tablet (potassium metabisulfite) to the wine. This will kill any remaining yeast or bacteria.
- You can also add potassium sorbate to prevent any remaining yeast from reproducing. Follow the manufacturer’s instructions for dosage.
- Stir the wine well to ensure the stabilizers are evenly distributed.
Bottling:
- Sanitize your bottles and corks. You can use a bottle sanitizer or a solution of potassium metabisulfite and water.
- Using a sanitized siphon, carefully transfer the wine from the carboy to the bottles, leaving about an inch of headspace at the top.
- Cork the bottles using a corker.
- Store the bottles upright for a few days to allow the corks to expand and seal properly.
- Then, store the bottles on their sides in a cool, dark place.
Aging:
- Walnut wine benefits from aging. It will mellow and develop more complex flavors over time.
- Ideally, age the wine for at least 6 months, but longer is better. A year or more will result in a much smoother and more flavorful wine.
Tasting Notes and Serving Suggestions:
Walnut wine has a unique and distinctive flavor. It’s often described as having nutty, earthy, and slightly bitter notes. The flavor will vary depending on the ripeness of the walnuts and the aging process.
Serve walnut wine chilled or at room temperature. It pairs well with cheeses, nuts, and desserts. It can also be enjoyed as an aperitif or digestif.
Important Considerations:
Walnut Allergies:
This wine contains walnuts and should not be consumed by anyone with a walnut allergy.
Harvesting Walnuts:
The timing of the walnut harvest is crucial. The walnuts must be green and soft enough to cut easily. If they are too hard, they will not impart the desired flavor to the wine.
Sanitation:
Proper sanitation is essential to prevent spoilage and ensure a successful fermentation. Always sanitize your equipment thoroughly before use.
Patience:
Making wine takes time and patience. Don’t rush the process. Allow the wine to ferment and age properly for the best results.
Adjusting Sweetness:
If you prefer a sweeter wine, you can add more sugar to the must or backsweeten the wine after fermentation. However, be sure to stabilize the wine properly to prevent refermentation.
Experimentation:
Feel free to experiment with different variations of this recipe. You can add other fruits or spices to create your own unique flavor profile.
Enjoy Responsibly:
Always drink responsibly and in moderation.
Conclusion:
This walnut wine recipe isn’t just another drink; it’s a journey back in time, a taste of tradition, and a delightful surprise for your palate. I truly believe you’ll find it’s a must-try for anyone who appreciates unique and flavorful beverages. The deep, earthy notes of the walnuts, combined with the subtle sweetness and warmth of the wine, create a truly unforgettable experience. It’s more than just a drink; it’s a conversation starter, a perfect accompaniment to a cozy evening, and a fantastic gift for the discerning foodie in your life.
Think of it as a liquid hug on a chilly evening, or a sophisticated digestif after a hearty meal. The complex flavors unfold with each sip, revealing layers of nutty goodness and a hint of spice that will keep you coming back for more. And the best part? It’s surprisingly easy to make! While it requires a little patience during the maceration and aging process, the hands-on time is minimal, and the reward is absolutely worth the wait.
But don’t just take my word for it! I encourage you to embark on this culinary adventure and discover the magic of homemade walnut wine for yourself.
Serving Suggestions and Variations:
The possibilities are endless when it comes to enjoying your homemade walnut wine. Here are a few ideas to get you started:
* Neat: Serve it chilled or at room temperature in a small glass as an aperitif or digestif. This allows you to fully appreciate the complex flavors.
* With Cheese: Pair it with strong, aged cheeses like Parmesan, Gruyere, or blue cheese. The nutty notes of the wine complement the savory and pungent flavors of the cheese beautifully.
* Dessert Wine: Enjoy it with dark chocolate desserts, such as brownies, chocolate cake, or truffles. The bitterness of the chocolate balances the sweetness of the wine perfectly.
* Cocktail Ingredient: Get creative and use it as a unique ingredient in cocktails. Try adding a splash to an Old Fashioned or a Manhattan for a nutty twist.
* Mulled Wine Variation: During the colder months, gently warm the walnut wine with spices like cinnamon, cloves, and star anise for a cozy and festive drink.
* Walnut Wine Spritzer: Mix it with sparkling water or club soda for a refreshing and lighter option. Garnish with a slice of orange or a sprig of rosemary.
And don’t be afraid to experiment with variations! You can adjust the amount of sugar to your liking, add different spices to the maceration process, or even try using different types of wine as a base. Perhaps a ruby port for a richer, sweeter experience, or a dry sherry for a more complex and nuanced flavor profile. The beauty of homemade recipes is that you can tailor them to your own preferences.
I’m so excited for you to try this recipe and experience the unique flavors of homemade walnut wine. It’s a project that’s both rewarding and delicious, and I know you’ll be proud of the results.
Once you’ve made your own batch, I’d love to hear about your experience! Share your photos, tips, and variations in the comments below. Let’s create a community of walnut wine enthusiasts and inspire each other with our culinary creations. What wine did you use? What spices did you add? What was your favorite way to serve it? I can’t wait to see what you come up with! Happy winemaking!
Walnut Wine: The Ultimate Guide to Making and Enjoying It
A unique, homemade wine crafted from green walnuts, offering a distinctive flavor profile. Best enjoyed with cheeses, nuts, or desserts. Requires careful sanitation and a patient approach.
Ingredients
- 1 gallon (3.8 liters) water, preferably spring or filtered
- 2 lbs (900g) green walnuts, harvested in late June or early July when they are still soft enough to cut with a knife
- 2.5 lbs (1.1 kg) granulated sugar
- 1 packet wine yeast (Saccharomyces cerevisiae), such as Lalvin EC-1118 or similar
- 1 tsp yeast nutrient
- 1/2 tsp pectic enzyme
- 1 crushed Campden tablet (potassium metabisulfite) added 24 hours before yeast
- Optional: 1/2 tsp tannin powder (for added body and complexity)
Instructions
- Preparing the Walnuts:
- Wear gloves! Walnut juice will stain your hands brown.
- Wash the green walnuts thoroughly to remove any dirt or debris.
- Cut the walnuts into quarters. They should be easy to cut. If they are too hard, they are past their prime. The inside should be jelly-like and white.
- Place the quartered walnuts into a sanitized primary fermentation bucket or food-grade container.
- Preparing the Must:
- In a large pot, heat about half of the water (0.5 gallons or 1.9 liters) until it is warm, but not boiling.
- Add the sugar to the warm water and stir until it is completely dissolved. This creates a simple syrup.
- Pour the sugar syrup over the walnuts in the fermentation bucket.
- Add the remaining water to the bucket, ensuring the walnuts are submerged. If they aren’t, you can add a little more water, but keep track of the total volume for later calculations.
- Add the crushed Campden tablet to the must. This will sanitize the mixture.
- Cover the bucket with a lid or clean cloth and let it sit for 24 hours.
- Adding Yeast and Nutrients:
- After 24 hours, add the pectic enzyme to the must.
- If using tannin powder, add it now.
- Rehydrate the wine yeast according to the manufacturer’s instructions.
- Add the rehydrated yeast to the must.
- Add the yeast nutrient to the must.
- Stir the must well to ensure everything is evenly distributed.
- Primary Fermentation:
- Cover the fermentation bucket with a lid and attach an airlock.
- Place the bucket in a cool, dark place with a consistent temperature, ideally between 65-75°F (18-24°C).
- Fermentation should begin within 24-48 hours.
- Allow the wine to ferment for 7-10 days, or until the bubbling in the airlock slows down significantly.
- Gently stir the must every day or two to help release the flavors from the walnuts.
- Racking and Secondary Fermentation:
- After the primary fermentation has slowed down, rack the wine. Transfer the wine from the primary fermentation bucket to a sanitized glass carboy, leaving behind the sediment (lees).
- Use a sanitized siphon to carefully transfer the wine to the carboy.
- Top up the carboy with additional water if necessary, leaving as little headspace as possible.
- Attach an airlock to the carboy.
- Place the carboy back in a cool, dark place.
- Allow the wine to undergo secondary fermentation for several weeks or months.
- Rack the wine again after a few months if more sediment accumulates.
- Clearing and Stabilizing:
- After several months of secondary fermentation, the wine should be relatively clear. If it’s still cloudy, use a fining agent.
- Once the wine is clear, stabilize it.
- Add another crushed Campden tablet (potassium metabisulfite) to the wine.
- Add potassium sorbate to prevent any remaining yeast from reproducing.
- Stir the wine well to ensure the stabilizers are evenly distributed.
- Bottling:
- Sanitize your bottles and corks.
- Using a sanitized siphon, carefully transfer the wine from the carboy to the bottles, leaving about an inch of headspace at the top.
- Cork the bottles using a corker.
- Store the bottles upright for a few days to allow the corks to expand and seal properly.
- Then, store the bottles on their sides in a cool, dark place.
- Aging:
- Walnut wine benefits from aging.
- Ideally, age the wine for at least 6 months, but longer is better. A year or more will result in a much smoother and more flavorful wine.
Notes
- Walnut Allergies: This wine contains walnuts and should not be consumed by anyone with a walnut allergy.
- Harvesting Walnuts: The timing of the walnut harvest is crucial. The walnuts must be green and soft enough to cut easily.
- Sanitation: Proper sanitation is essential to prevent spoilage.
- Patience: Making wine takes time and patience.
- Adjusting Sweetness: If you prefer a sweeter wine, you can add more sugar or backsweeten. Be sure to stabilize the wine properly to prevent refermentation.
- Experimentation: Feel free to experiment with different variations of this recipe.
- Enjoy Responsibly: Always drink responsibly and in moderation.


Leave a Comment