
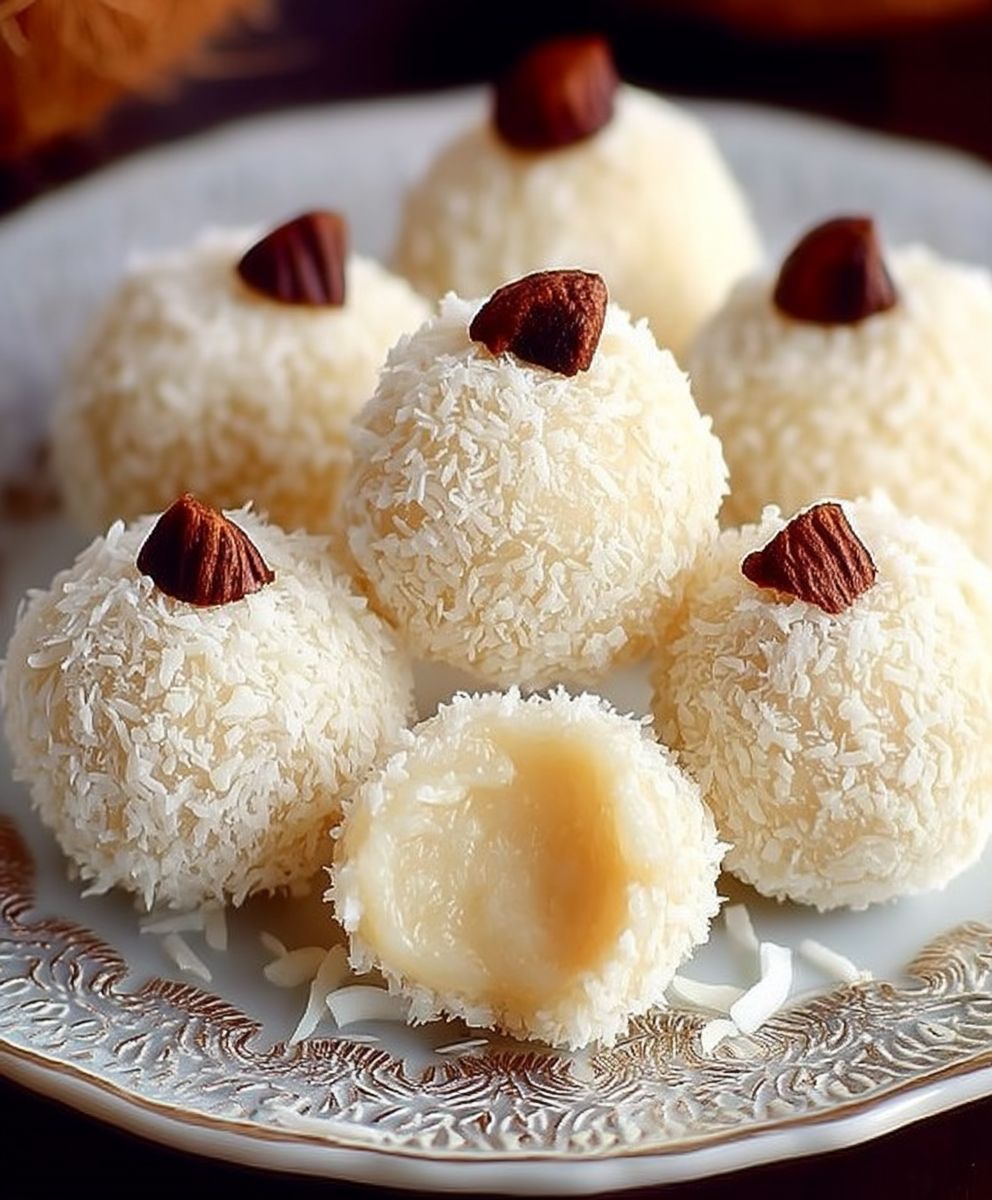
Coconut cream balls, those delightful little spheres of tropical bliss, are about to become your new favorite treat! Imagine sinking your teeth into a melt-in-your-mouth confection, the creamy coconut flavor exploding on your palate. These aren’t just any sweets; they’re a taste of paradise, perfect for satisfying your sweet cravings or impressing guests at your next gathering.
While the exact origins of coconut cream balls are somewhat shrouded in mystery, similar coconut-based sweets have been enjoyed in various cultures across the globe for centuries. Coconuts, revered for their versatility and deliciousness, have long been a staple ingredient in tropical cuisines. From the Caribbean to Southeast Asia, coconut finds its way into countless desserts, each region adding its unique twist. These little balls of joy are a testament to the enduring appeal of this incredible fruit.
So, why do people adore these delectable treats? It’s simple! The combination of creamy texture and intense coconut flavor is irresistible. They’re also incredibly easy to make, requiring minimal ingredients and effort. Whether you’re a seasoned baker or a kitchen novice, you can whip up a batch of these coconutty delights in no time. Plus, they’re naturally gluten-free, making them a fantastic option for those with dietary restrictions. Get ready to experience the magic of homemade coconut cream balls you won’t be disappointed!

Ingredients:
- 1 (14-ounce) can sweetened condensed milk
- 1/2 cup (1 stick) unsalted butter, softened
- 1 teaspoon vanilla extract
- 3 1/2 cups shredded coconut, divided (plus extra for rolling)
- 1/4 teaspoon salt
- Optional: 1/2 cup finely chopped macadamia nuts or almonds
- Optional: 1/4 cup white chocolate chips, melted
Preparing the Coconut Mixture:
- First, grab a large mixing bowl. This is where all the magic starts! Add the softened butter and sweetened condensed milk to the bowl. Make sure your butter is truly softened it should be easy to press with a finger. If it’s too cold, it won’t incorporate properly, and you’ll end up with lumps.
- Now, using an electric mixer (either a stand mixer or a hand mixer will work), cream together the butter and sweetened condensed milk until the mixture is light and fluffy. This usually takes about 2-3 minutes. Don’t rush this step; the creamier the base, the better the final texture of your coconut balls.
- Next, stir in the vanilla extract. Just a teaspoon will do, but it adds a lovely warmth and depth of flavor to the coconut balls. Mix until well combined.
- In a separate bowl, combine 3 1/2 cups of the shredded coconut and the salt. The salt helps to balance the sweetness of the condensed milk and coconut. Give it a good stir to ensure the salt is evenly distributed.
- Gradually add the coconut mixture to the wet ingredients (the butter, condensed milk, and vanilla). Mix on low speed until just combined. Be careful not to overmix, as this can make the coconut balls tough. You want everything to be nicely incorporated, but still light and airy.
- Optional Step: If you’re using nuts, now’s the time to add them! Gently fold in the chopped macadamia nuts or almonds until they’re evenly distributed throughout the coconut mixture.
Chilling the Dough:
- This is a crucial step, so don’t skip it! Cover the bowl tightly with plastic wrap. Make sure the plastic wrap is touching the surface of the coconut mixture to prevent a skin from forming.
- Refrigerate the mixture for at least 2 hours, or preferably overnight. This allows the coconut to absorb the moisture from the condensed milk, making the mixture easier to handle and preventing the coconut balls from spreading out too much when you roll them. The chilling process also helps the flavors meld together beautifully.
Forming and Coating the Coconut Balls:
- Once the coconut mixture is thoroughly chilled, remove it from the refrigerator. It should be firm enough to scoop and roll easily.
- Prepare a baking sheet by lining it with parchment paper or a silicone baking mat. This will prevent the coconut balls from sticking to the sheet.
- Place the remaining shredded coconut (the extra you set aside for rolling) in a shallow dish or bowl.
- Using a small cookie scoop or a spoon, scoop out about 1 tablespoon of the chilled coconut mixture. Roll it between your palms to form a smooth ball. Don’t worry if they’re not perfectly round; a little rustic charm is always welcome!
- Immediately roll the coconut ball in the shredded coconut, pressing gently to ensure it’s fully coated. The coconut coating not only adds a lovely texture but also helps to keep the balls from sticking together.
- Place the coated coconut ball on the prepared baking sheet.
- Repeat steps 4-6 with the remaining coconut mixture, spacing the balls evenly on the baking sheet.
Optional Drizzling (White Chocolate):
- If you’re feeling fancy, melt the white chocolate chips in a heatproof bowl set over a simmering pot of water (double boiler method) or in the microwave in 30-second intervals, stirring in between, until smooth. Be careful not to overheat the chocolate, as it can seize up.
- Once the white chocolate is melted and smooth, transfer it to a piping bag or a small zip-top bag. If using a zip-top bag, snip off a tiny corner of the bag.
- Drizzle the melted white chocolate over the coconut balls in a decorative pattern. You can do a simple zigzag pattern or get creative with your designs.
- Let the white chocolate set completely before serving or storing the coconut balls. This usually takes about 15-20 minutes at room temperature, or you can speed up the process by placing them in the refrigerator for a few minutes.
Storing the Coconut Balls:
- Store the coconut balls in an airtight container in the refrigerator for up to 1 week. They can also be frozen for up to 2 months. If freezing, thaw them in the refrigerator overnight before serving.
Tips and Variations:
- Toast the Coconut: For a deeper, nuttier flavor, toast the shredded coconut before using it in the recipe. Spread the coconut on a baking sheet and bake at 350°F (175°C) for 5-7 minutes, or until lightly golden brown, stirring occasionally to prevent burning. Let it cool completely before using.
- Add Extracts: Experiment with different extracts to customize the flavor of your coconut balls. Almond extract, rum extract, or even a hint of peppermint extract would be delicious additions.
- Use Different Nuts: Instead of macadamia nuts or almonds, try using chopped pecans, walnuts, or even pistachios.
- Dip in Chocolate: For an extra decadent treat, dip the coconut balls in melted dark chocolate or milk chocolate instead of drizzling them with white chocolate.
- Add Food Coloring: For a festive touch, add a few drops of food coloring to the coconut mixture. This is especially fun for holidays or special occasions.
- Make Mini Coconut Balls: For bite-sized treats, use a smaller cookie scoop or spoon to form smaller coconut balls.
- Use Unsweetened Coconut: If you prefer a less sweet treat, you can use unsweetened shredded coconut. You may need to adjust the amount of sweetened condensed milk to achieve the desired sweetness.
- Vegan Option: Substitute the sweetened condensed milk with a vegan sweetened condensed milk alternative and the butter with a vegan butter substitute.
Troubleshooting:
- Coconut mixture is too sticky: If the coconut mixture is too sticky to handle, add a little more shredded coconut, a tablespoon at a time, until it reaches the desired consistency.
- Coconut balls are too dry: If the coconut balls are too dry, add a little more sweetened condensed milk, a tablespoon at a time, until they reach the desired consistency.
- Coconut balls are spreading out: If the coconut balls are spreading out too much when you roll them, make sure the coconut mixture is thoroughly chilled. You can also try adding a little more shredded coconut to the mixture.
Enjoy your homemade coconut cream balls! They’re perfect for parties, holidays, or just a sweet treat to enjoy anytime.
Conclusion:
So there you have it! These Coconut Cream Balls are truly a must-try for anyone who loves a sweet treat that’s both simple to make and incredibly satisfying. From the creamy, melt-in-your-mouth texture to the delicate coconut flavor, every bite is a little piece of paradise. I know I’ve made them countless times, and they’re always a hit, whether it’s for a quick dessert after dinner, a potluck contribution, or a homemade gift for friends and family.
What makes these little spheres of joy so special is their versatility. While the base recipe is perfect as is, there are so many ways you can customize them to suit your own taste preferences. For a richer, more decadent experience, try dipping them in melted dark chocolate and sprinkling them with chopped nuts like almonds or pecans. The bitterness of the dark chocolate perfectly complements the sweetness of the coconut, creating a truly irresistible combination. Alternatively, you could roll them in toasted coconut flakes for an extra layer of texture and flavor. Toasting the coconut brings out its nutty notes, adding a delightful crunch to each bite.
If you’re looking for a lighter, more refreshing option, consider adding a touch of lime zest to the coconut mixture. The citrusy aroma and flavor will brighten up the balls and give them a zesty twist. You could also experiment with different extracts, such as vanilla, almond, or even rum extract, to create unique flavor profiles. For a festive touch, try adding a few drops of food coloring to the coconut mixture before rolling the balls. This is a great way to make them more visually appealing, especially for holidays or special occasions.
Serving suggestions are endless! These Coconut Cream Balls are delicious on their own, but they also pair well with a variety of other desserts. Try serving them alongside a scoop of vanilla ice cream or a slice of chocolate cake for a truly indulgent treat. They also make a great addition to a dessert platter, adding a touch of elegance and sophistication. For a more casual presentation, simply arrange them on a plate and let your guests help themselves. They’re perfect for parties, gatherings, or even just a quiet night in with a good book.
I’m confident that you’ll love these Coconut Cream Balls as much as I do. They’re so easy to make, even if you’re not an experienced baker. And the best part is, you probably already have most of the ingredients in your pantry. So what are you waiting for? Gather your ingredients, preheat your oven (or don’t, since this is a no-bake recipe!), and get ready to create some deliciousness. I promise you won’t be disappointed.
Don’t be afraid to experiment and put your own spin on the recipe. That’s the beauty of cooking it’s all about creativity and having fun. And most importantly, don’t forget to share your creations with your friends and family. They’ll be so impressed by your culinary skills, and you’ll get to enjoy the satisfaction of seeing them savor every bite.
I’m so excited for you to try this recipe! Once you do, please come back and share your experience in the comments below. I’d love to hear what you think, what variations you tried, and how much everyone enjoyed them. Happy baking (or rather, no-baking)! I can’t wait to hear all about your Coconut Cream Balls adventures!
Enjoy!
Coconut Cream Balls: The Ultimate No-Bake Recipe
Easy and delicious coconut balls made with sweetened condensed milk, butter, and shredded coconut. Perfect for a sweet treat or holiday gift!
Ingredients
- 1 (14-ounce) can sweetened condensed milk
- 1/2 cup (1 stick) unsalted butter, softened
- 1 teaspoon vanilla extract
- 3 1/2 cups shredded coconut, divided (plus extra for rolling)
- 1/4 teaspoon salt
- 1/2 cup finely chopped macadamia nuts or almonds (Optional)
- 1/4 cup white chocolate chips, melted (Optional)
Instructions
- Prepare the Coconut Mixture: In a large mixing bowl, cream together the softened butter and sweetened condensed milk with an electric mixer until light and fluffy (2-3 minutes).
- Stir in the vanilla extract until well combined.
- In a separate bowl, combine 3 1/2 cups of the shredded coconut and the salt.
- Gradually add the coconut mixture to the wet ingredients, mixing on low speed until just combined. Be careful not to overmix.
- (Optional): Gently fold in the chopped macadamia nuts or almonds, if using.
- Chill the Dough: Cover the bowl tightly with plastic wrap, pressing the wrap against the surface of the mixture.
- Refrigerate for at least 2 hours, or preferably overnight.
- Form and Coat the Coconut Balls: Remove the chilled coconut mixture from the refrigerator.
- Line a baking sheet with parchment paper or a silicone baking mat.
- Place the remaining shredded coconut in a shallow dish.
- Using a small cookie scoop or spoon, scoop out about 1 tablespoon of the chilled coconut mixture and roll it between your palms to form a ball.
- Immediately roll the coconut ball in the shredded coconut, pressing gently to coat.
- Place the coated coconut ball on the prepared baking sheet.
- Repeat with the remaining mixture.
- Optional Drizzling (White Chocolate): Melt the white chocolate chips using a double boiler or in the microwave in 30-second intervals, stirring in between, until smooth.
- Transfer the melted chocolate to a piping bag or zip-top bag with a snipped corner.
- Drizzle the melted white chocolate over the coconut balls.
- Let the white chocolate set completely before serving.
- Storing the Coconut Balls: Store in an airtight container in the refrigerator for up to 1 week or freeze for up to 2 months. Thaw in the refrigerator overnight before serving.
Notes
- Toast the Coconut: For a deeper flavor, toast the shredded coconut before using. Bake at 350°F (175°C) for 5-7 minutes, stirring occasionally.
- Add Extracts: Experiment with different extracts like almond, rum, or peppermint.
- Use Different Nuts: Try pecans, walnuts, or pistachios instead of macadamia nuts or almonds.
- Dip in Chocolate: Dip the coconut balls in melted dark or milk chocolate.
- Add Food Coloring: Add a few drops of food coloring for a festive touch.
- Make Mini Coconut Balls: Use a smaller scoop for bite-sized treats.
- Use Unsweetened Coconut: Adjust the amount of sweetened condensed milk if using unsweetened coconut.
- Vegan Option: Use vegan sweetened condensed milk and butter substitutes.
- Troubleshooting:
- Mixture too sticky: Add more shredded coconut.
- Balls too dry: Add more sweetened condensed milk.
- Balls spreading: Ensure mixture is thoroughly chilled and add more shredded coconut.


Leave a Comment