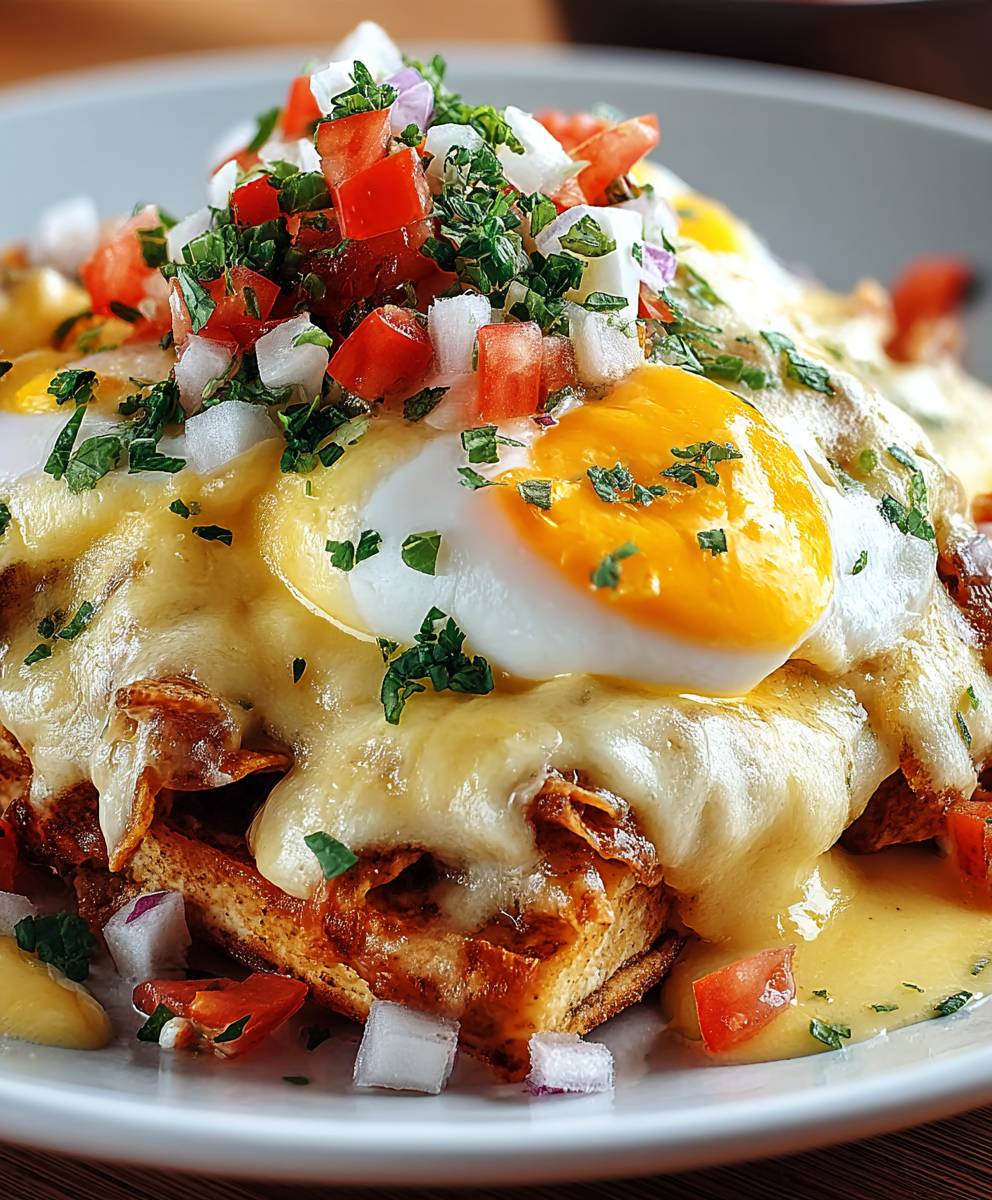
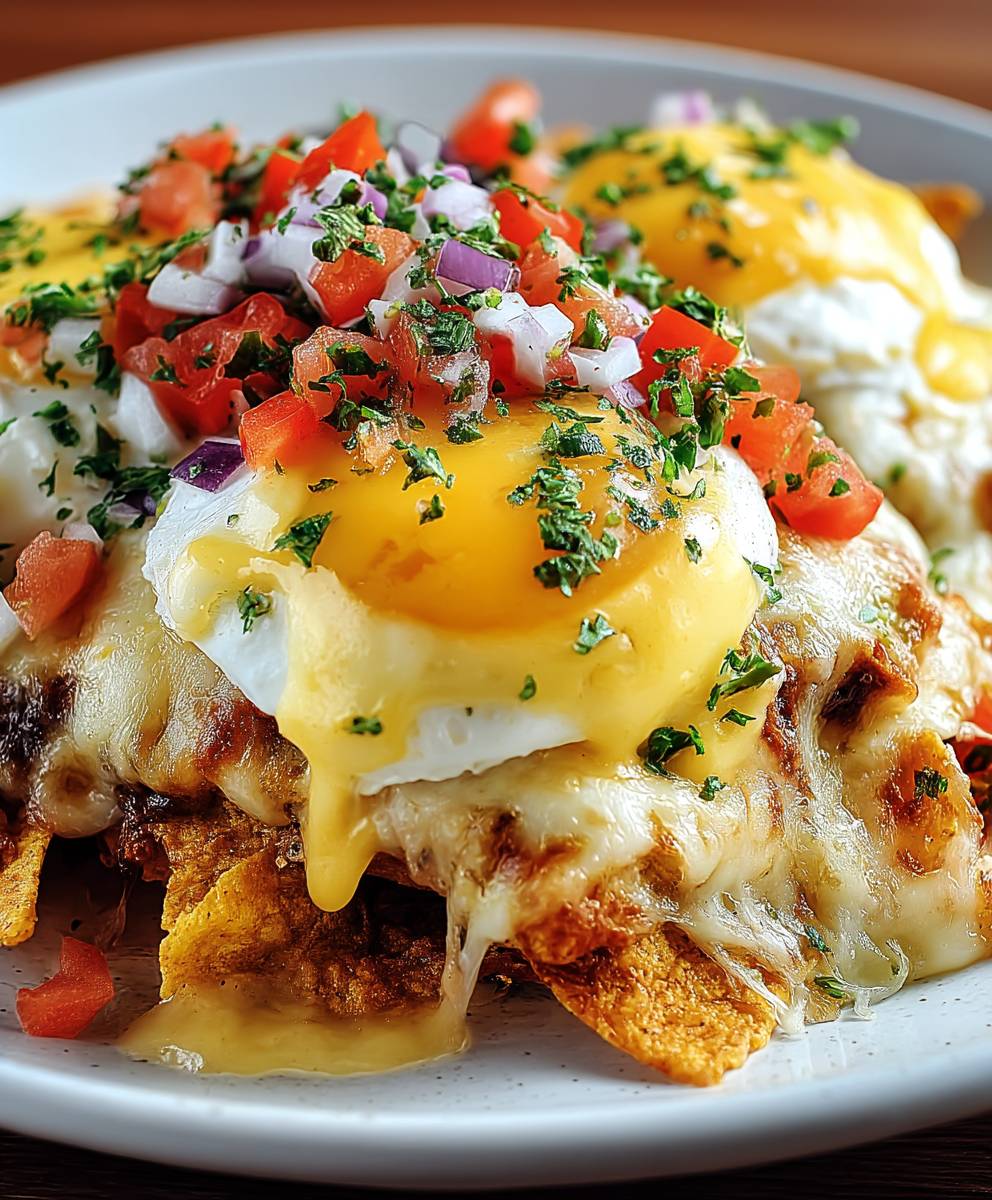
Chilaquiles Eggs Benedict: Prepare to have your brunch game forever transformed! Imagine the creamy decadence of a classic Eggs Benedict, but with a vibrant, south-of-the-border twist. We’re talking crispy tortilla chips bathed in a flavorful salsa, topped with perfectly poached eggs, a generous drizzle of hollandaise, and all your favorite Mexican fixings. Trust me, this isn’t just breakfast; it’s an experience.
Chilaquiles, a beloved staple in Mexican cuisine, has a rich history dating back centuries. Traditionally a way to use up leftover tortillas, this humble dish has evolved into a culinary masterpiece enjoyed throughout Mexico and beyond. The combination of textures and flavors the crunch of the chips, the tang of the salsa, and the richness of the toppings is simply irresistible.
What makes Chilaquiles Eggs Benedict so special? It’s the perfect marriage of comfort food and culinary innovation. People adore this dish because it offers a delightful explosion of flavors and textures in every bite. The creamy hollandaise sauce beautifully complements the spicy salsa, while the poached eggs add a touch of elegance. Plus, it’s surprisingly easy to make at home, making it a fantastic option for weekend brunch or a special occasion. Get ready to impress your friends and family with this unforgettable dish!
Ingredients:
- For the Chilaquiles:
- 1 pound corn tortillas, cut into quarters
- 4 tablespoons vegetable oil, divided
- 1/2 white onion, chopped
- 2 cloves garlic, minced
- 1 (28 ounce) can crushed tomatoes
- 1-2 chipotle peppers in adobo sauce, minced (adjust to your spice preference)
- 1 teaspoon dried oregano
- 1/2 teaspoon ground cumin
- 1/4 teaspoon sugar
- Salt and pepper to taste
- 1/2 cup chicken broth (or vegetable broth)
- For the Hollandaise Sauce:
- 3 large egg yolks
- 1 tablespoon lemon juice
- 1/4 teaspoon salt
- Pinch of cayenne pepper (optional)
- 1/2 cup (1 stick) unsalted butter, melted and hot
- For the Poached Eggs:
- 4 large eggs
- 1 tablespoon white vinegar
- Water
- For Assembly:
- 4 slices Canadian bacon (or ham), pan-fried
- 1/2 cup crumbled queso fresco (or cotija cheese)
- 1/4 cup chopped cilantro
- Optional: Sliced avocado, pickled onions, crema
Preparing the Chilaquiles:
- Fry the Tortilla Chips: In a large skillet or Dutch oven, heat 2 tablespoons of vegetable oil over medium-high heat. Working in batches, fry the tortilla quarters until golden brown and crispy, about 2-3 minutes per side. Be careful not to overcrowd the pan, as this will lower the oil temperature and result in soggy chips. Remove the fried chips with a slotted spoon and place them on a paper towel-lined plate to drain excess oil. Repeat until all the tortillas are fried.
- Make the Salsa: In the same skillet, heat the remaining 2 tablespoons of vegetable oil over medium heat. Add the chopped onion and cook until softened, about 5 minutes. Add the minced garlic and cook for another minute until fragrant.
- Simmer the Sauce: Pour in the crushed tomatoes, minced chipotle peppers, dried oregano, ground cumin, and sugar. Season with salt and pepper to taste. Stir well to combine. Bring the sauce to a simmer, then reduce the heat to low and cook for 15-20 minutes, stirring occasionally, to allow the flavors to meld.
- Add Broth and Chips: Stir in the chicken broth. Gently fold in the fried tortilla chips, making sure they are evenly coated with the sauce. Cook for another 2-3 minutes, or until the chips have softened slightly but still retain some crispness. You don’t want them to become completely soggy.
- Keep Warm: Cover the skillet and keep the chilaquiles warm while you prepare the hollandaise sauce and poached eggs.
Making the Hollandaise Sauce:
- Prepare a Double Boiler: Fill a saucepan with about 1-2 inches of water and bring it to a simmer over medium heat. Find a heatproof bowl that fits snugly over the saucepan without touching the water. This creates a double boiler.
- Whisk Egg Yolks and Lemon Juice: In the heatproof bowl, whisk together the egg yolks, lemon juice, salt, and cayenne pepper (if using) until the mixture is pale yellow and slightly thickened.
- Slowly Add Melted Butter: Place the bowl over the simmering water (making sure the bowl doesn’t touch the water). Slowly drizzle the hot melted butter into the egg yolk mixture, whisking constantly and vigorously. It’s crucial to add the butter in a slow and steady stream to emulsify the sauce properly. If you add the butter too quickly, the sauce may break (separate).
- Continue Whisking: Continue whisking until the sauce is thick, smooth, and glossy. This should take about 3-5 minutes. The sauce should be thick enough to coat the back of a spoon.
- Remove from Heat: Once the sauce has reached the desired consistency, remove the bowl from the heat and set it aside. If the sauce becomes too thick, you can whisk in a teaspoon or two of warm water to thin it out. If the sauce breaks, try whisking in a tablespoon of cold water.
- Keep Warm (Optional): To keep the hollandaise sauce warm while you prepare the poached eggs, you can place the bowl over a very low heat source (like a warming drawer) or cover it with plastic wrap, pressing the plastic wrap directly onto the surface of the sauce to prevent a skin from forming. Be careful not to overheat the sauce, as this can cause it to curdle.
Poaching the Eggs:
- Prepare the Water: Fill a large saucepan with about 3 inches of water. Add the white vinegar. The vinegar helps the egg whites coagulate quickly. Bring the water to a gentle simmer over medium heat. You should see small bubbles forming at the bottom of the pan, but the water should not be boiling vigorously.
- Crack the Eggs: Crack each egg into a small ramekin or bowl. This makes it easier to gently slide the eggs into the simmering water.
- Create a Whirlpool (Optional): Use a spoon to gently swirl the water in the saucepan, creating a whirlpool. This helps the egg whites wrap around the yolk and form a neat shape.
- Poach the Eggs: Gently slide each egg from the ramekin into the simmering water, one at a time. Try to keep the eggs separate so they don’t stick together.
- Cook the Eggs: Cook the eggs for 3-4 minutes, depending on how runny you like your yolks. The egg whites should be set, but the yolks should still be soft and runny.
- Remove the Eggs: Use a slotted spoon to carefully remove the poached eggs from the water. Gently pat them dry with a paper towel to remove any excess water.
Assembling the Chilaquiles Eggs Benedict:
- Prepare the Canadian Bacon: While you are preparing the other components, lightly pan-fry the Canadian bacon (or ham) until it is heated through and slightly browned. Set aside.
- Plate the Chilaquiles: Divide the chilaquiles evenly among four plates.
- Add Canadian Bacon: Top each portion of chilaquiles with a slice of pan-fried Canadian bacon.
- Place the Poached Eggs: Carefully place a poached egg on top of each slice of Canadian bacon.
- Drizzle with Hollandaise Sauce: Generously drizzle the hollandaise sauce over the poached eggs.
- Garnish: Sprinkle the crumbled queso fresco and chopped cilantro over the hollandaise sauce.
- Optional Garnishes: If desired, garnish with sliced avocado, pickled onions, and a dollop of crema.
- Serve Immediately: Serve the Chilaquiles Eggs Benedict immediately and enjoy! The runny yolks and creamy hollandaise sauce are best enjoyed fresh.

Conclusion:
And there you have it! This Chilaquiles Eggs Benedict is truly a must-try brunch experience. It’s a delightful fusion of Mexican comfort food and classic elegance, offering a symphony of flavors and textures that will tantalize your taste buds. The crispy tortilla chips bathed in vibrant salsa, the perfectly poached eggs with their runny yolks, and the creamy, tangy hollandaise sauce create an unforgettable culinary masterpiece. Trust me, once you try this, you’ll be adding it to your regular brunch rotation.
But the beauty of this recipe lies not only in its deliciousness but also in its versatility. Feel free to experiment and make it your own! For a spicier kick, use a hotter salsa or add a pinch of cayenne pepper to the hollandaise. If you prefer a milder flavor, opt for a tomatillo salsa or a creamy avocado-based sauce.
Serving Suggestions and Variations:
* Protein Power: Add shredded chicken, carnitas, or chorizo for a heartier meal. Grilled shrimp would also be a fantastic addition!
* Veggie Delight: Incorporate roasted vegetables like bell peppers, onions, zucchini, or corn for added nutrients and flavor. Black beans or pinto beans are also great vegetarian options.
* Cheese, Please!: Sprinkle crumbled queso fresco, cotija cheese, or Monterey Jack cheese on top for extra cheesy goodness.
* Spice it Up: Garnish with sliced jalapeños, pickled onions, or a drizzle of hot sauce for an extra layer of heat.
* Cool it Down: Top with a dollop of sour cream or Mexican crema to balance the spice and add a touch of coolness.
* Side Dish Sensations: Serve with a side of refried beans, Mexican rice, or a fresh fruit salad for a complete and satisfying brunch.
* Drink Pairings: This dish pairs perfectly with a refreshing margarita, a spicy Michelada, or a classic mimosa. For a non-alcoholic option, try a refreshing agua fresca or a cup of Mexican coffee.
I’m confident that you’ll love this Chilaquiles Eggs Benedict as much as I do. It’s the perfect dish to impress your friends and family at your next brunch gathering, or simply to treat yourself to a delicious and satisfying meal.
So, what are you waiting for? Gather your ingredients, put on your apron, and get ready to create a brunch masterpiece! Don’t be afraid to get creative and personalize the recipe to your liking. Remember, cooking should be fun and enjoyable.
Once you’ve tried this recipe, I’d love to hear about your experience! Share your photos and comments on social media using the hashtag #ChilaquilesEggsBenedict. Let me know what variations you tried and what you thought of the flavors. Your feedback is invaluable and helps me to continue creating delicious and inspiring recipes. I can’t wait to see your culinary creations! Happy cooking!
Chilaquiles Eggs Benedict: A Delicious Fusion Recipe
A delicious fusion of Mexican chilaquiles and classic Eggs Benedict. Crispy tortilla chips simmered in a flavorful tomato-chipotle sauce, topped with Canadian bacon, perfectly poached eggs, and creamy hollandaise sauce.
Ingredients
- 1 pound corn tortillas, cut into quarters
- 4 tablespoons vegetable oil, divided
- 1/2 white onion, chopped
- 2 cloves garlic, minced
- 1 (28 ounce) can crushed tomatoes
- 1-2 chipotle peppers in adobo sauce, minced (adjust to your spice preference)
- 1 teaspoon dried oregano
- 1/2 teaspoon ground cumin
- 1/4 teaspoon sugar
- Salt and pepper to taste
- 1/2 cup chicken broth (or vegetable broth)
- 3 large egg yolks
- 1 tablespoon lemon juice
- 1/4 teaspoon salt
- Pinch of cayenne pepper (optional)
- 1/2 cup (1 stick) unsalted butter, melted and hot
- 4 large eggs
- 1 tablespoon white vinegar
- Water
- 4 slices Canadian bacon (or ham), pan-fried
- 1/2 cup crumbled queso fresco (or cotija cheese)
- 1/4 cup chopped cilantro
- Optional: Sliced avocado, pickled onions, crema
Instructions
- Fry the Tortilla Chips: In a large skillet or Dutch oven, heat 2 tablespoons of vegetable oil over medium-high heat. Working in batches, fry the tortilla quarters until golden brown and crispy, about 2-3 minutes per side. Be careful not to overcrowd the pan, as this will lower the oil temperature and result in soggy chips. Remove the fried chips with a slotted spoon and place them on a paper towel-lined plate to drain excess oil. Repeat until all the tortillas are fried.
- Make the Salsa: In the same skillet, heat the remaining 2 tablespoons of vegetable oil over medium heat. Add the chopped onion and cook until softened, about 5 minutes. Add the minced garlic and cook for another minute until fragrant.
- Simmer the Sauce: Pour in the crushed tomatoes, minced chipotle peppers, dried oregano, ground cumin, and sugar. Season with salt and pepper to taste. Stir well to combine. Bring the sauce to a simmer, then reduce the heat to low and cook for 15-20 minutes, stirring occasionally, to allow the flavors to meld.
- Add Broth and Chips: Stir in the chicken broth. Gently fold in the fried tortilla chips, making sure they are evenly coated with the sauce. Cook for another 2-3 minutes, or until the chips have softened slightly but still retain some crispness. You don’t want them to become completely soggy.
- Keep Warm: Cover the skillet and keep the chilaquiles warm while you prepare the hollandaise sauce and poached eggs.
- Prepare a Double Boiler: Fill a saucepan with about 1-2 inches of water and bring it to a simmer over medium heat. Find a heatproof bowl that fits snugly over the saucepan without touching the water. This creates a double boiler.
- Whisk Egg Yolks and Lemon Juice: In the heatproof bowl, whisk together the egg yolks, lemon juice, salt, and cayenne pepper (if using) until the mixture is pale yellow and slightly thickened.
- Slowly Add Melted Butter: Place the bowl over the simmering water (making sure the bowl doesn’t touch the water). Slowly drizzle the hot melted butter into the egg yolk mixture, whisking constantly and vigorously. It’s crucial to add the butter in a slow and steady stream to emulsify the sauce properly. If you add the butter too quickly, the sauce may break (separate).
- Continue Whisking: Continue whisking until the sauce is thick, smooth, and glossy. This should take about 3-5 minutes. The sauce should be thick enough to coat the back of a spoon.
- Remove from Heat: Once the sauce has reached the desired consistency, remove the bowl from the heat and set it aside. If the sauce becomes too thick, you can whisk in a teaspoon or two of warm water to thin it out. If the sauce breaks, try whisking in a tablespoon of cold water.
- Keep Warm (Optional): To keep the hollandaise sauce warm while you prepare the poached eggs, you can place the bowl over a very low heat source (like a warming drawer) or cover it with plastic wrap, pressing the plastic wrap directly onto the surface of the sauce to prevent a skin from forming. Be careful not to overheat the sauce, as this can cause it to curdle.
- Prepare the Water: Fill a large saucepan with about 3 inches of water. Add the white vinegar. The vinegar helps the egg whites coagulate quickly. Bring the water to a gentle simmer over medium heat. You should see small bubbles forming at the bottom of the pan, but the water should not be boiling vigorously.
- Crack the Eggs: Crack each egg into a small ramekin or bowl. This makes it easier to gently slide the eggs into the simmering water.
- Create a Whirlpool (Optional): Use a spoon to gently swirl the water in the saucepan, creating a whirlpool. This helps the egg whites wrap around the yolk and form a neat shape.
- Poach the Eggs: Gently slide each egg from the ramekin into the simmering water, one at a time. Try to keep the eggs separate so they don’t stick together.
- Cook the Eggs: Cook the eggs for 3-4 minutes, depending on how runny you like your yolks. The egg whites should be set, but the yolks should still be soft and runny.
- Remove the Eggs: Use a slotted spoon to carefully remove the poached eggs from the water. Gently pat them dry with a paper towel to remove any excess water.
- Prepare the Canadian Bacon: While you are preparing the other components, lightly pan-fry the Canadian bacon (or ham) until it is heated through and slightly browned. Set aside.
- Plate the Chilaquiles: Divide the chilaquiles evenly among four plates.
- Add Canadian Bacon: Top each portion of chilaquiles with a slice of pan-fried Canadian bacon.
- Place the Poached Eggs: Carefully place a poached egg on top of each slice of Canadian bacon.
- Drizzle with Hollandaise Sauce: Generously drizzle the hollandaise sauce over the poached eggs.
- Garnish: Sprinkle the crumbled queso fresco and chopped cilantro over the hollandaise sauce.
- Optional Garnishes: If desired, garnish with sliced avocado, pickled onions, and a dollop of crema.
- Serve Immediately: Serve the Chilaquiles Eggs Benedict immediately and enjoy! The runny yolks and creamy hollandaise sauce are best enjoyed fresh.
Notes
- Adjust the amount of chipotle peppers to your desired spice level.
- Be careful not to overcrowd the pan when frying the tortilla chips.
- When making the hollandaise sauce, it’s crucial to add the melted butter in a slow and steady stream to emulsify the sauce properly.
- If the hollandaise sauce breaks, try whisking in a tablespoon of cold water.
- Poach the eggs to your desired level of doneness.


Leave a Comment