
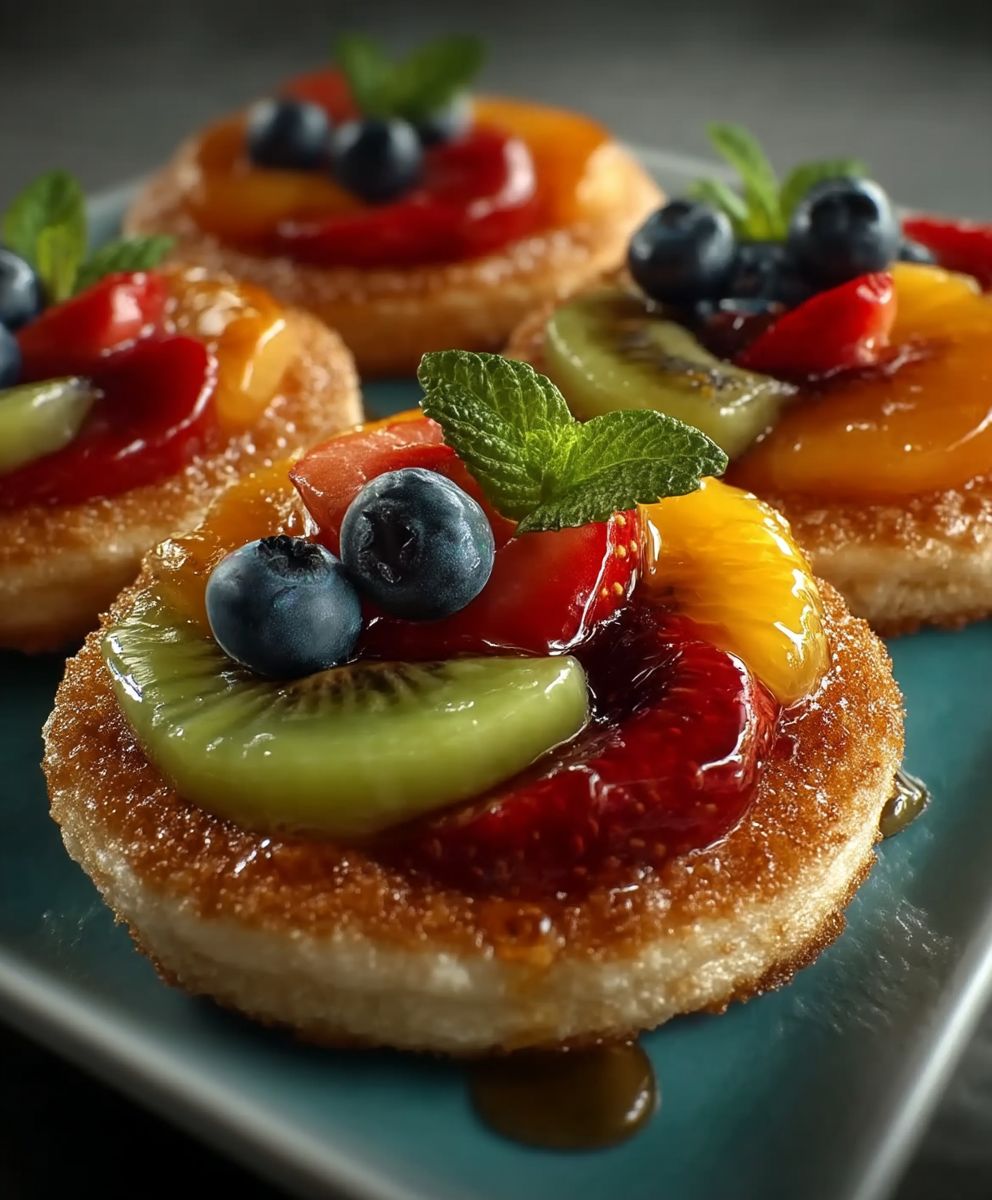
Bisquick fruit rings, a delightful blast from the past, are making a delicious comeback! Remember those effortlessly elegant desserts that graced holiday tables and potlucks? These golden rings, studded with colorful candied fruit and boasting a tender, crumbly texture, are easier to make than you might think. Forget spending hours in the kitchen; with the magic of Bisquick, you can whip up a stunning centerpiece in no time.
While the exact origins of this recipe are shrouded in a bit of mystery, it’s safe to say that Bisquick fruit rings gained immense popularity in the mid-20th century, coinciding with the rise of convenience baking mixes. They represent a time when home cooks were embracing new, faster ways to create impressive treats. The beauty of this recipe lies in its simplicity and adaptability. You can customize the fruit selection to your liking, making it perfect for any occasion.
People adore this dish for several reasons. First, the taste is simply irresistible a perfect balance of sweet and slightly tangy, with a satisfyingly crumbly texture. Second, the visual appeal is undeniable. The vibrant candied fruit creates a festive and inviting presentation. And finally, the convenience factor is a major draw. With just a few ingredients and minimal effort, you can create a show-stopping dessert that will impress your family and friends. So, dust off your bundt pan and get ready to rediscover the joy of this classic treat!

Ingredients:
- 2 cups Bisquick baking mix
- 2/3 cup milk
- 1/4 cup granulated sugar
- 1 teaspoon vanilla extract
- 1/2 teaspoon ground cinnamon
- 1/4 teaspoon ground nutmeg
- 1/4 cup melted butter, plus extra for brushing
- 1 cup mixed fruit, finely chopped (apples, pears, berries, peaches use your favorites!)
- Powdered sugar, for dusting (optional)
- Glaze (optional):
- 1 cup powdered sugar
- 2-3 tablespoons milk
- 1/2 teaspoon vanilla extract
Preparing the Dough:
Okay, let’s get started! First things first, we need to get our dough ready. This is super easy, thanks to Bisquick!
- Combine Dry Ingredients: In a large bowl, whisk together the Bisquick baking mix, granulated sugar, cinnamon, and nutmeg. Make sure everything is nicely combined so you get that lovely spiced flavor throughout the rings.
- Add Wet Ingredients: Pour in the milk, vanilla extract, and melted butter. Stir everything together until just combined. Don’t overmix! A few lumps are perfectly fine. Overmixing can lead to tougher rings, and we want them nice and tender.
- Incorporate the Fruit: Gently fold in the finely chopped mixed fruit. Make sure the fruit is evenly distributed throughout the dough. This is where the magic happens all those delicious fruit flavors will bake right into the rings!
Shaping and Baking the Fruit Rings:
Now comes the fun part shaping our rings! There are a couple of ways you can do this, so pick the method that works best for you.
- Prepare Your Work Surface: Lightly flour a clean work surface. This will prevent the dough from sticking and make it easier to handle.
- Turn Out the Dough: Turn the dough out onto the floured surface. Gently pat it down into a circle, about 1/2 inch thick.
- Cut Out the Rings: Use a 3-inch cookie cutter (or a glass with a similar diameter) to cut out circles from the dough. Then, use a smaller cookie cutter (about 1 inch) or a bottle cap to cut out the center of each circle, creating the ring shape. If you don’t have cookie cutters, you can use a knife to cut squares and then cut out the centers. They might not be perfectly round, but they’ll still taste amazing!
- Re-roll Scraps: Gather the dough scraps, gently knead them together, and re-roll them to cut out more rings. Keep doing this until you’ve used up all the dough.
- Arrange on Baking Sheet: Place the rings onto a baking sheet lined with parchment paper. This will prevent them from sticking and make cleanup a breeze.
- Brush with Butter: Brush the tops of the rings with melted butter. This will give them a beautiful golden-brown color and add a touch of richness.
- Bake: Bake in a preheated oven at 375°F (190°C) for 12-15 minutes, or until the rings are golden brown and cooked through. Keep an eye on them, as baking times can vary depending on your oven.
Cooling and Finishing Touches:
Almost there! Now we just need to let the rings cool and add any finishing touches we want.
- Cool on Wire Rack: Remove the baking sheet from the oven and transfer the rings to a wire rack to cool completely. This will prevent them from getting soggy.
- Dust with Powdered Sugar (Optional): Once the rings are cool, you can dust them with powdered sugar for a pretty presentation. Simply sprinkle the powdered sugar over the rings using a sifter or a fine-mesh sieve.
- Prepare the Glaze (Optional): If you want to add a glaze, whisk together the powdered sugar, milk, and vanilla extract in a small bowl until smooth. Add more milk, one teaspoon at a time, until you reach your desired consistency.
- Drizzle with Glaze (Optional): Drizzle the glaze over the cooled rings. You can use a spoon or a fork to create a decorative pattern.
- Enjoy! Let the glaze set for a few minutes before serving. These fruit rings are best enjoyed warm or at room temperature.
Tips and Variations:
Want to customize your fruit rings? Here are a few ideas:
- Different Fruits: Feel free to experiment with different types of fruit. Apples, pears, blueberries, raspberries, peaches, and nectarines all work well. You can even use dried fruit, such as cranberries or raisins.
- Nuts: Add chopped nuts, such as pecans or walnuts, to the dough for extra flavor and texture.
- Spices: Adjust the amount of cinnamon and nutmeg to your liking. You can also add other spices, such as ginger or cardamom.
- Citrus Zest: Add a teaspoon of lemon or orange zest to the dough for a bright, citrusy flavor.
- Chocolate Chips: Fold in mini chocolate chips for a chocolatey twist.
- Maple Glaze: Substitute maple syrup for the vanilla extract in the glaze for a maple-flavored glaze.
- Cream Cheese Glaze: For a richer glaze, whisk together 2 ounces of softened cream cheese with the powdered sugar, milk, and vanilla extract.
- Savory Rings: Omit the sugar and fruit and add savory ingredients, such as shredded cheese, herbs, and spices, for a savory version.
- Air Fryer Option: You can also cook these in an air fryer! Preheat your air fryer to 350°F (175°C). Place the rings in the air fryer basket in a single layer, being careful not to overcrowd. Cook for 8-10 minutes, or until golden brown.
Storage Instructions:
These fruit rings are best enjoyed fresh, but they can be stored in an airtight container at room temperature for up to 2 days. If you glaze them, they may become a little sticky over time. You can also freeze them for longer storage. Wrap them individually in plastic wrap and then place them in a freezer bag. They can be frozen for up to 2 months. Thaw them at room temperature before serving.
Serving Suggestions:
These Bisquick fruit rings are perfect for breakfast, brunch, or a snack. They’re also a great addition to a holiday dessert table. Serve them with a cup of coffee or tea, or a glass of milk. You can also serve them with a scoop of ice cream or a dollop of whipped cream for a more decadent treat.
Why This Recipe Works:
This recipe is a winner because it’s incredibly easy and quick to make, thanks to the convenience of Bisquick baking mix. The combination of spices and fruit creates a delicious and comforting flavor that everyone will love. The rings are also light and tender, making them a perfect treat for any occasion. Plus, the recipe is versatile, so you can easily customize it to your liking by adding different fruits, nuts, or spices.
Troubleshooting:
Here are a few common issues you might encounter and how to fix them:
- Rings are too dry: Make sure you’re not overbaking them. Check them after 12 minutes and remove them from the oven as soon as they’re golden brown. You can also add a little more milk to the dough if it seems too dry.
- Rings are too tough: Avoid overmixing the dough. Mix the ingredients until just combined. Overmixing develops the gluten in the flour, which can make the rings tough.
- Rings are not browning: Make sure your oven is preheated to the correct temperature. You can also brush the tops of the rings with melted butter or milk before baking to help them brown.
- Rings are sticking to the baking sheet: Line your baking sheet with parchment paper to prevent sticking.
Nutritional Information (Approximate):
Please note that the nutritional information is an estimate and may vary depending on the specific ingredients you use.
- Calories: 150-200 per ring
- Fat: 8-12 grams
- Saturated Fat: 4-6 grams
- Cholesterol: 20-30 mg
- Sodium: 200-300 mg
- Carbohydrates: 20-30 grams
- Sugar: 8-12 grams
- Protein: 2-3 grams
Enjoy your homemade Bisquick fruit
Conclusion:
This Bisquick fruit rings recipe isn’t just another dessert; it’s a gateway to effortless baking and guaranteed smiles. From its incredibly simple preparation to its customizable nature and delightful taste, it’s a recipe that deserves a permanent spot in your repertoire. I truly believe that once you try it, you’ll find yourself making it again and again, not just for special occasions, but for those everyday moments when you crave a little something sweet and satisfying.
Think of it: a warm, golden ring, studded with your favorite fruits, ready in under an hour. It’s the perfect solution for a last-minute brunch, a potluck contribution that will disappear in minutes, or simply a comforting treat to enjoy with a cup of coffee on a lazy afternoon. The beauty of this recipe lies in its adaptability. Feel free to experiment with different fruits berries, peaches, apples, even tropical fruits like mango or pineapple would be fantastic. You could also add a sprinkle of chopped nuts for extra crunch, or a drizzle of chocolate glaze for an extra touch of indulgence.
For serving suggestions, the possibilities are endless! A simple dusting of powdered sugar is always a classic and elegant choice. But you could also top it with a dollop of whipped cream or a scoop of vanilla ice cream for a more decadent dessert. If you’re serving it for brunch, consider pairing it with a side of crispy bacon or sausage for a sweet and savory combination. And for a truly special occasion, you could even flambé it with a little rum or brandy for a dramatic presentation.
Don’t be intimidated by baking! This recipe is so forgiving and easy to follow, even if you’re a complete beginner. The Bisquick mix takes all the guesswork out of the equation, ensuring a light and fluffy texture every time. And the simple instructions make it virtually foolproof. I promise, you’ll be amazed at how quickly and easily you can create such a beautiful and delicious dessert.
I’m so excited for you to try this recipe and experience the joy of baking these delightful Bisquick fruit rings for yourself. I know you’ll love it as much as I do. And I can’t wait to hear about your creations! Please, don’t hesitate to share your photos and feedback in the comments below. Let me know what fruits you used, what variations you tried, and how much your family and friends enjoyed it. Your experiences will not only inspire me but also help other readers discover new and exciting ways to enjoy this versatile recipe. Happy baking, and I hope you create some sweet memories with this one! I am confident that this will become a family favorite.
Bisquick Fruit Rings: Easy Recipe & Baking Tips
Quick and easy Bisquick fruit rings, perfect for breakfast, brunch, or a sweet snack! These tender rings are packed with fruit and spices, and can be customized with your favorite flavors.
Ingredients
- 2 cups Bisquick baking mix
- 2/3 cup milk
- 1/4 cup granulated sugar
- 1 teaspoon vanilla extract
- 1/2 teaspoon ground cinnamon
- 1/4 teaspoon ground nutmeg
- 1/4 cup melted butter, plus extra for brushing
- 1 cup mixed fruit, finely chopped (apples, pears, berries, peaches use your favorites!)
- Powdered sugar, for dusting (optional)
- 1 cup powdered sugar
- 2-3 tablespoons milk
- 1/2 teaspoon vanilla extract
Instructions
- Combine Dry Ingredients: In a large bowl, whisk together the Bisquick baking mix, granulated sugar, cinnamon, and nutmeg.
- Add Wet Ingredients: Pour in the milk, vanilla extract, and melted butter. Stir until just combined. Don’t overmix.
- Incorporate the Fruit: Gently fold in the finely chopped mixed fruit.
- Prepare Work Surface: Lightly flour a clean work surface.
- Turn Out the Dough: Turn the dough out onto the floured surface. Gently pat it down into a circle, about 1/2 inch thick.
- Cut Out the Rings: Use a 3-inch cookie cutter to cut out circles. Use a smaller cookie cutter (about 1 inch) to cut out the center of each circle.
- Re-roll Scraps: Gather the dough scraps, gently knead them together, and re-roll them to cut out more rings.
- Arrange on Baking Sheet: Place the rings onto a baking sheet lined with parchment paper.
- Brush with Butter: Brush the tops of the rings with melted butter.
- Bake: Bake in a preheated oven at 375°F (190°C) for 12-15 minutes, or until golden brown.
- Cool on Wire Rack: Remove the baking sheet from the oven and transfer the rings to a wire rack to cool completely.
- Dust with Powdered Sugar (Optional): Once the rings are cool, you can dust them with powdered sugar.
- Prepare the Glaze (Optional): Whisk together the powdered sugar, milk, and vanilla extract in a small bowl until smooth. Add more milk, one teaspoon at a time, until you reach your desired consistency.
- Drizzle with Glaze (Optional): Drizzle the glaze over the cooled rings.
- Enjoy! Let the glaze set for a few minutes before serving.
Notes
- Fruit Variations: Experiment with different fruits like apples, pears, blueberries, raspberries, peaches, or dried fruits.
- Nuts: Add chopped nuts for extra flavor and texture.
- Spices: Adjust the amount of cinnamon and nutmeg to your liking.
- Citrus Zest: Add lemon or orange zest for a bright flavor.
- Chocolate Chips: Fold in mini chocolate chips for a chocolatey twist.
- Maple Glaze: Substitute maple syrup for the vanilla extract in the glaze.
- Cream Cheese Glaze: Whisk together softened cream cheese with the powdered sugar, milk, and vanilla extract for a richer glaze.
- Air Fryer Option: Preheat your air fryer to 350°F (175°C). Place the rings in the air fryer basket in a single layer, being careful not to overcrowd. Cook for 8-10 minutes, or until golden brown.
- Storage: Store in an airtight container at room temperature for up to 2 days or freeze for up to 2 months.

Leave a Comment