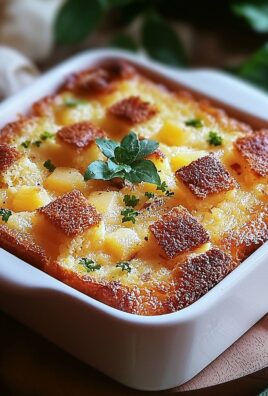
Egg Cheese Chaffle: Prepare to revolutionize your breakfast (or any meal, really!) with this incredibly simple, satisfying, and surprisingly versatile dish. Forget everything you thought you knew about waffles; we’re ditching the batter and embracing a low-carb, protein-packed alternative that will have you hooked from the very first bite.
While the exact origins of the “chaffle” are debated, its popularity exploded within the keto and low-carb communities as a quick and easy way to enjoy a waffle-like experience without the guilt. Think of it as a blank canvas for your culinary creativity! The beauty of the egg cheese chaffle lies in its simplicity: just eggs and cheese, cooked in a waffle maker. But don’t let the minimal ingredients fool you; the result is a crispy, cheesy delight that’s perfect on its own or as a base for countless toppings and fillings.
People adore chaffles for several reasons. First, they’re incredibly quick to make ready in just minutes! Second, they’re naturally gluten-free and low in carbohydrates, making them a fantastic option for those following specific dietary plans. But perhaps the biggest draw is the taste and texture. The combination of melted cheese and cooked egg creates a satisfyingly crispy exterior with a soft, chewy interior. Whether you’re craving a savory breakfast sandwich, a cheesy pizza crust alternative, or a sweet treat with berries and cream, the egg cheese chaffle is your new best friend in the kitchen. Let’s get cooking!
Ingredients:
- 2 large eggs
- 1 cup shredded mozzarella cheese (low-moisture, part-skim works best)
- 1/4 teaspoon garlic powder
- 1/4 teaspoon onion powder
- Pinch of salt
- Pinch of black pepper
- Optional toppings: Cooked bacon crumbles, sliced green onions, diced tomatoes, avocado slices, sour cream, hot sauce
Preparing the Chaffle Batter:
Okay, let’s get started! The beauty of the egg cheese chaffle is its simplicity. It requires minimal ingredients and effort, making it perfect for a quick breakfast, lunch, or even a keto-friendly snack. The key to a good chaffle is getting the right cheese-to-egg ratio, so pay attention to the measurements.
- Combine the Eggs and Cheese: In a medium-sized bowl, crack both eggs. Whisk them together really well until the yolks and whites are fully combined and slightly frothy. This will help create a lighter and airier chaffle.
- Add the Cheese: Now, add the shredded mozzarella cheese to the bowl with the eggs. Make sure the cheese is evenly distributed.
- Incorporate the Seasonings: Sprinkle in the garlic powder, onion powder, salt, and pepper. These seasonings add a savory depth of flavor to the chaffle. Don’t be afraid to experiment with other seasonings you enjoy, like Italian seasoning, paprika, or even a pinch of red pepper flakes for a little heat.
- Mix Thoroughly: Using a fork or whisk, mix all the ingredients together until they are well combined. The mixture should be somewhat thick and slightly sticky due to the melted cheese. Ensure there are no clumps of cheese remaining.
Cooking the Chaffles:
Now comes the fun part cooking the chaffles! You’ll need a mini waffle maker for this recipe. I highly recommend using a mini waffle maker because it creates the perfect size and shape for a chaffle. If you don’t have one, you can use a regular waffle maker, but you may need to adjust the cooking time and the amount of batter you use per waffle.
- Preheat the Waffle Maker: Plug in your mini waffle maker and let it preheat completely. This is crucial for ensuring the chaffles cook evenly and don’t stick to the plates. Most mini waffle makers have an indicator light that will turn on when it’s ready.
- Grease the Waffle Maker (Optional): While most non-stick waffle makers don’t require greasing, I like to lightly spray the plates with cooking spray (like avocado oil or coconut oil spray) just to be extra safe. This will help prevent the chaffles from sticking and make them easier to remove.
- Pour the Batter: Once the waffle maker is preheated, carefully pour half of the chaffle batter onto the bottom plate. Spread it out evenly to cover the surface. Be careful not to overfill the waffle maker, as the batter will expand as it cooks.
- Cook the Chaffle: Close the waffle maker and let the chaffle cook for 3-5 minutes, or until it’s golden brown and crispy. The cooking time will vary depending on your waffle maker, so keep an eye on it. You’ll know it’s done when the steam stops coming out and the chaffle is easy to remove.
- Remove the Chaffle: Carefully open the waffle maker and use a spatula to remove the chaffle. Be gentle, as it may be a little delicate at first. Place the cooked chaffle on a wire rack to cool slightly. This will help it stay crispy.
- Repeat: Repeat steps 3-5 with the remaining batter to make the second chaffle.
Serving and Topping Suggestions:
The best part about chaffles is their versatility! You can enjoy them plain, or you can load them up with your favorite toppings. Here are some of my favorite ways to serve and top egg cheese chaffles:
- Savory Breakfast: Top with cooked bacon crumbles, sliced green onions, and a dollop of sour cream.
- Avocado Toast Alternative: Spread mashed avocado on the chaffle and sprinkle with everything bagel seasoning.
- Pizza Chaffle: Top with marinara sauce, pepperoni, and extra mozzarella cheese. Broil in the oven for a minute or two until the cheese is melted and bubbly.
- Spicy Chaffle: Drizzle with hot sauce and top with diced tomatoes and jalapenos.
- Sandwich Bread: Use two chaffles as bread for a sandwich. Fill with your favorite deli meats, cheeses, and veggies.
- Burger Bun: Use two chaffles as buns for a burger.
Tips for the Perfect Chaffle:
- Use Low-Moisture Mozzarella: Low-moisture, part-skim mozzarella cheese works best for chaffles because it melts well and doesn’t release too much moisture. This helps the chaffle stay crispy.
- Don’t Overfill the Waffle Maker: Overfilling the waffle maker can cause the batter to spill out and make a mess. It can also prevent the chaffle from cooking evenly.
- Let the Chaffle Cool Slightly: Letting the chaffle cool on a wire rack for a few minutes after cooking will help it stay crispy.
- Experiment with Seasonings: Don’t be afraid to experiment with different seasonings to customize your chaffles.
- Store Leftovers Properly: Store leftover chaffles in an airtight container in the refrigerator for up to 3 days. Reheat them in a toaster oven or skillet to restore their crispiness.
Variations:
- Sweet Chaffles: For a sweet chaffle, omit the garlic powder, onion powder, salt, and pepper. Add a tablespoon of sweetener (like erythritol or stevia) and a dash of vanilla extract. Top with berries, whipped cream, or sugar-free syrup.
- Cheddar Chaffles: Substitute the mozzarella cheese with shredded cheddar cheese for a sharper flavor.
- Everything Bagel Chaffles: Add a tablespoon of everything bagel seasoning to the batter for a savory and flavorful chaffle.
- Coconut Flour Chaffles: Add a tablespoon of coconut flour to the batter for a slightly different texture. You may need to add a little extra liquid to compensate for the coconut flour’s absorbency.
Enjoy your delicious and easy egg cheese chaffles! They’re a fantastic way to enjoy a quick, healthy, and satisfying meal or snack.

Conclusion:
So there you have it! Our Egg Cheese Chaffle recipe is truly a game-changer for anyone looking for a quick, easy, and satisfying meal or snack. I genuinely believe this recipe is a must-try because it’s incredibly versatile, requiring minimal ingredients and effort. Forget complicated breakfasts or carb-heavy lunches; this chaffle is your new best friend.
But why is it so special? Well, beyond its simplicity, the Egg Cheese Chaffle offers a fantastic blank canvas for your culinary creativity. The basic recipe is delicious on its own, providing a cheesy, eggy goodness that’s perfect for a grab-and-go breakfast. However, the real magic happens when you start experimenting with additions and variations.
Think about it: you could add a sprinkle of everything bagel seasoning for an extra layer of savory flavor. Or, for a spicier kick, incorporate a pinch of red pepper flakes or a dash of your favorite hot sauce directly into the batter. If you’re feeling adventurous, consider adding finely chopped vegetables like bell peppers, onions, or spinach for a boost of nutrients and texture.
For serving suggestions, the possibilities are endless. I personally love topping my Egg Cheese Chaffle with a dollop of sour cream and some fresh chives for a light and refreshing lunch. It also pairs perfectly with a side of crispy bacon or sausage for a more substantial breakfast. And if you’re looking for a low-carb sandwich alternative, simply use two chaffles as the “bread” and fill them with your favorite deli meats, cheeses, and veggies.
Another fantastic variation is to use different types of cheese. While cheddar is a classic choice, you could also try mozzarella for a softer, meltier texture, or pepper jack for a spicy kick. Experiment with different cheese blends to find your perfect flavor combination. You could even add a sprinkle of parmesan cheese to the outside of the chaffle while it’s cooking for a crispy, cheesy crust.
Don’t be afraid to get creative with your toppings too! Avocado slices, salsa, guacamole, and even a fried egg are all delicious additions that can transform your Egg Cheese Chaffle into a gourmet meal. For a sweeter twist, consider adding a drizzle of sugar-free syrup or a sprinkle of cinnamon.
I’m confident that once you try this recipe, you’ll be hooked. It’s the perfect solution for busy mornings, quick lunches, or even a satisfying snack any time of day. The best part is that it’s so easy to customize to your own personal preferences.
So, what are you waiting for? Grab your waffle maker, gather your ingredients, and get ready to experience the deliciousness of the Egg Cheese Chaffle. I’m so excited for you to try it!
And most importantly, I’d love to hear about your experience! Once you’ve made your own version of the Egg Cheese Chaffle, please share your photos, variations, and serving suggestions in the comments below. Let’s inspire each other with our culinary creations and discover even more ways to enjoy this amazing recipe. I can’t wait to see what you come up with! Happy chaffle-ing!
Egg Cheese Chaffle: The Ultimate Keto Breakfast Recipe
Quick and easy egg and cheese chaffles! These versatile, keto-friendly waffles are perfect for breakfast, lunch, or a snack. Customize with your favorite toppings for a savory or sweet treat.
Ingredients
- 2 large eggs
- 1 cup shredded mozzarella cheese (low-moisture, part-skim works best)
- 1/4 teaspoon garlic powder
- 1/4 teaspoon onion powder
- Pinch of salt
- Pinch of black pepper
- Optional toppings: Cooked bacon crumbles, sliced green onions, diced tomatoes, avocado slices, sour cream, hot sauce
Instructions
- Combine Eggs and Cheese: In a medium-sized bowl, crack both eggs. Whisk them together until fully combined and slightly frothy.
- Add Cheese: Add the shredded mozzarella cheese to the bowl with the eggs, ensuring it’s evenly distributed.
- Incorporate Seasonings: Sprinkle in the garlic powder, onion powder, salt, and pepper.
- Mix Thoroughly: Using a fork or whisk, mix all ingredients together until well combined. The mixture should be somewhat thick and slightly sticky.
- Preheat Waffle Maker: Plug in your mini waffle maker and let it preheat completely.
- Grease Waffle Maker (Optional): Lightly spray the plates with cooking spray.
- Pour Batter: Carefully pour half of the chaffle batter onto the bottom plate, spreading it out evenly.
- Cook Chaffle: Close the waffle maker and cook for 3-5 minutes, or until golden brown and crispy.
- Remove Chaffle: Carefully open the waffle maker and use a spatula to remove the chaffle. Place on a wire rack to cool slightly.
- Repeat: Repeat steps 7-9 with the remaining batter.
- Serve: Top with your favorite toppings and enjoy!
Notes
- Low-moisture, part-skim mozzarella cheese works best.
- Don’t overfill the waffle maker.
- Let the chaffle cool slightly on a wire rack to maintain crispiness.
- Experiment with different seasonings.
- Store leftovers in an airtight container in the refrigerator for up to 3 days. Reheat in a toaster oven or skillet.


Leave a Comment