
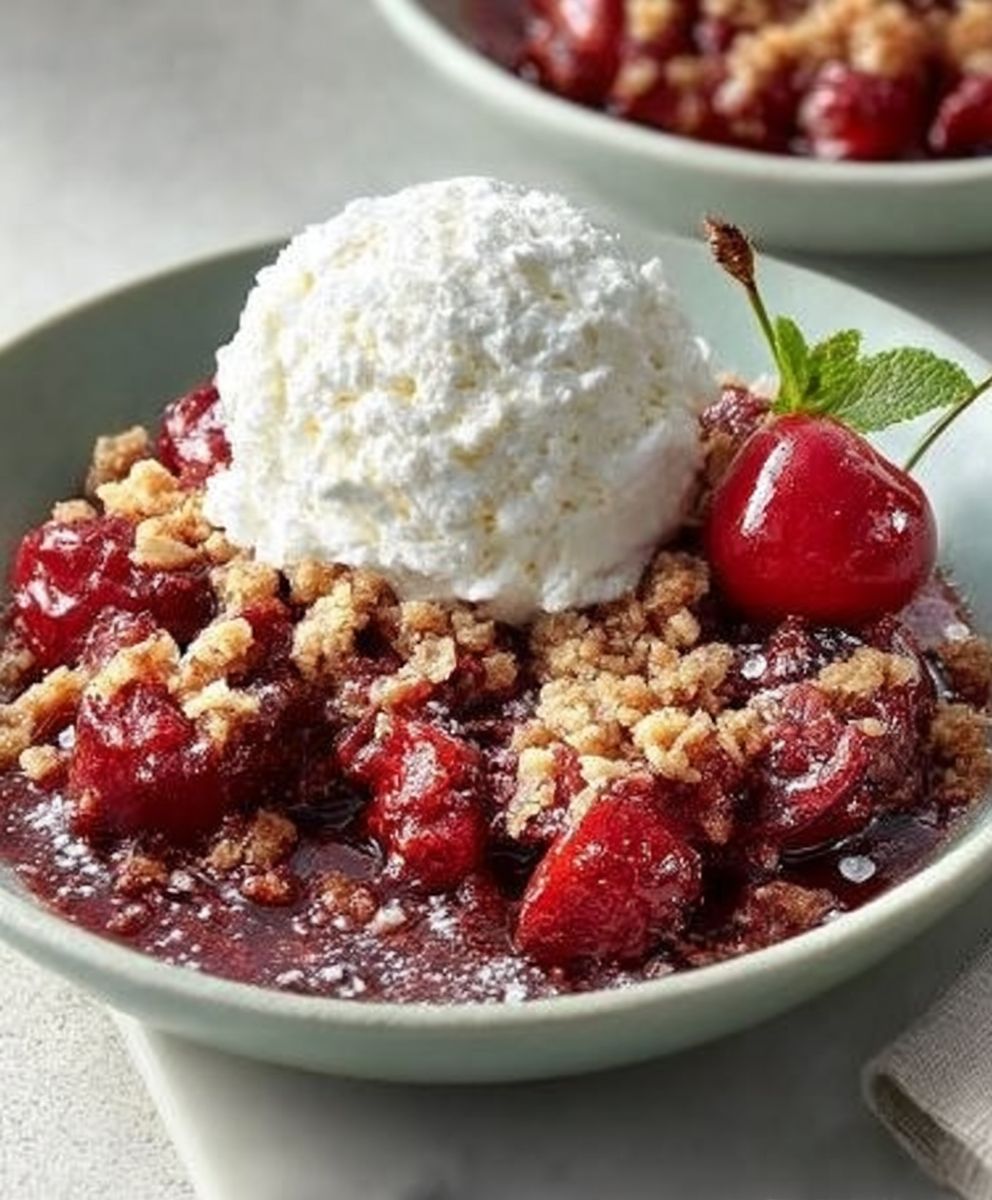
Cherry Crisp: the mere mention of it conjures up images of warm, bubbling fruit and a golden, crumbly topping. Is there anything more comforting on a cool evening? I think not! This classic dessert is a symphony of sweet and tart, a textural masterpiece that’s surprisingly simple to create.
While the exact origins of fruit crisps are debated, they gained immense popularity in America during World War II. With rationing limiting access to traditional pie ingredients like butter and flour for pastry crusts, resourceful cooks turned to oat-based toppings as a delicious and readily available alternative. This makes Cherry Crisp not just a tasty treat, but a testament to culinary ingenuity and a slice of history!
But why do people adore this dessert so much? Beyond its historical significance, the appeal lies in its delightful simplicity and irresistible flavor profile. The juicy, slightly tart cherries provide a burst of fruity goodness, perfectly balanced by the sweet, buttery, and wonderfully crunchy crisp topping. It’s a dessert that requires minimal effort but delivers maximum satisfaction. Plus, it’s incredibly versatile enjoy it warm with a scoop of vanilla ice cream, a dollop of whipped cream, or simply on its own. Get ready to experience the joy of homemade Cherry Crisp!

Ingredients:
- 6 cups fresh sweet cherries, pitted (about 2 pounds)
- 1 tablespoon lemon juice
- 1/4 cup granulated sugar
- 2 tablespoons cornstarch
- 1/4 teaspoon almond extract (optional, but highly recommended!)
Crisp Topping:
- 1 cup all-purpose flour
- 1 cup rolled oats (not instant)
- 1 cup packed light brown sugar
- 1/2 teaspoon baking powder
- 1/4 teaspoon salt
- 1/2 cup (1 stick) cold unsalted butter, cut into cubes
- 1/4 cup chopped pecans or walnuts (optional)
Instructions:
Preparing the Cherry Filling:
- Preheat your oven to 375°F (190°C). This is crucial to ensure even baking and a perfectly golden crisp topping. Make sure your oven rack is positioned in the center.
- Prepare the cherries. Wash your cherries thoroughly. Pitting them can be a bit tedious, but it’s essential for a pleasant eating experience. I like to use a cherry pitter, but you can also use a paring knife or even a clean paperclip. Just be careful!
- Combine the cherry filling ingredients. In a large bowl, gently toss the pitted cherries with the lemon juice, granulated sugar, cornstarch, and almond extract (if using). The lemon juice brightens the cherry flavor, the sugar adds sweetness, the cornstarch helps thicken the juices as it bakes, and the almond extract enhances the overall flavor profile.
- Transfer the cherry mixture to a baking dish. Pour the cherry mixture into a 9-inch square baking dish or a similar-sized oven-safe dish. You can also use a pie dish if you prefer a round presentation. Make sure the cherries are evenly distributed in the dish.
Making the Crisp Topping:
- Combine the dry ingredients. In a separate large bowl, whisk together the all-purpose flour, rolled oats, packed light brown sugar, baking powder, and salt. The oats provide a lovely texture, the brown sugar adds a caramel-like sweetness, the baking powder gives the topping a bit of lift, and the salt balances the sweetness.
- Cut in the butter. Add the cold, cubed butter to the dry ingredients. Use a pastry blender or your fingertips to cut the butter into the dry ingredients until the mixture resembles coarse crumbs. The key here is to keep the butter cold, as this will create pockets of air that result in a flaky and tender topping. If you don’t have a pastry blender, you can use two knives to cut the butter in.
- Add the nuts (optional). If you’re using pecans or walnuts, stir them into the crisp topping mixture. The nuts add a nice crunch and nutty flavor that complements the cherries beautifully.
Assembling and Baking the Cherry Crisp:
- Sprinkle the crisp topping over the cherries. Evenly distribute the crisp topping over the cherry mixture in the baking dish. Make sure to cover the cherries completely.
- Bake the cherry crisp. Bake in the preheated oven for 35-45 minutes, or until the topping is golden brown and the cherry filling is bubbling. The baking time may vary depending on your oven, so keep an eye on it. If the topping starts to brown too quickly, you can loosely tent it with aluminum foil.
- Let it cool slightly. Remove the cherry crisp from the oven and let it cool for at least 15-20 minutes before serving. This allows the filling to thicken slightly and prevents you from burning your mouth!
Serving Suggestions:
Cherry crisp is delicious served warm with a scoop of vanilla ice cream, a dollop of whipped cream, or a drizzle of caramel sauce. You can also enjoy it plain, as the flavors are wonderful on their own. It’s perfect for a summer dessert, a potluck, or any time you’re craving a sweet and comforting treat.
Tips and Variations:
- Use different fruits. While this recipe is for cherry crisp, you can easily adapt it to use other fruits, such as apples, peaches, blueberries, or raspberries. Just adjust the sugar and cornstarch as needed, depending on the sweetness and juiciness of the fruit.
- Add spices. A pinch of cinnamon, nutmeg, or ginger can add a warm and cozy flavor to the crisp.
- Make it gluten-free. To make this recipe gluten-free, simply substitute the all-purpose flour with a gluten-free all-purpose flour blend.
- Make it vegan. To make this recipe vegan, use a vegan butter substitute and ensure that your sugar is vegan-friendly (some granulated sugar is processed with bone char).
- Store leftovers. Leftover cherry crisp can be stored in the refrigerator for up to 3 days. Reheat it in the oven or microwave before serving.
- Freezing instructions. You can freeze unbaked cherry crisp for up to 3 months. Wrap it tightly in plastic wrap and then in aluminum foil. When ready to bake, thaw it in the refrigerator overnight and then bake as directed. You can also bake the crisp and then freeze it. Let it cool completely before wrapping it tightly and freezing. When ready to serve, thaw it in the refrigerator overnight and then reheat it in the oven.
- Adjusting sweetness. Taste the cherries before adding sugar. If they are very sweet, you may want to reduce the amount of sugar in the filling. If they are tart, you may need to add a little more.
- Preventing a soggy crust. To prevent the crust from becoming soggy, make sure to use enough cornstarch to thicken the cherry filling. You can also add a layer of crushed graham crackers or almond flour to the bottom of the baking dish before adding the cherry filling. This will help absorb any excess moisture.
- Using frozen cherries. If you don’t have fresh cherries, you can use frozen cherries. Thaw them completely before using and drain off any excess liquid. You may need to add a little more cornstarch to the filling to compensate for the extra moisture.
- Adding a crumble topping. For a different texture, you can use a crumble topping instead of a crisp topping. A crumble topping is similar to a crisp topping, but it doesn’t contain oats. To make a crumble topping, simply combine flour, sugar, butter, and any desired spices in a bowl and mix until it resembles coarse crumbs.
Troubleshooting:
- Topping is browning too quickly: If the topping is browning too quickly, loosely tent the baking dish with aluminum foil.
- Filling is too runny: If the filling is too runny, you can sprinkle a little more cornstarch over the cherries before baking.
- Topping is too dry: If the topping is too dry, you can drizzle a little melted butter over it before baking.
- Cherries are too tart: If the cherries are too tart, you can add a little more sugar to the filling.
I hope you enjoy this delicious cherry crisp recipe! It’s a classic dessert that’s sure to please everyone.
Conclusion:
This Cherry Crisp isn’t just another dessert; it’s a warm hug on a plate, a burst of summer sunshine even on the gloomiest of days. The sweet-tart cherries bubbling beneath that golden, buttery crumble are simply irresistible. I truly believe this recipe deserves a spot in your regular baking rotation. It’s quick, it’s easy, and it’s guaranteed to disappear fast!
But why is this particular Cherry Crisp a must-try? It’s all about the balance. The slight tang of the cherries is perfectly complemented by the sweetness of the crumble topping, creating a symphony of flavors that dance on your palate. Plus, the texture is divine the soft, juicy cherries against the crisp, buttery topping is a match made in dessert heaven. Forget complicated pastries and fussy cakes; this is simple, honest, and utterly delicious baking at its finest.
And the best part? It’s incredibly versatile! While I adore it served warm with a scoop of vanilla ice cream (who doesn’t?), there are so many other ways to enjoy this delightful treat. A dollop of freshly whipped cream adds a touch of elegance, while a drizzle of warm custard takes it to a whole new level of indulgence. For a lighter option, try serving it with a spoonful of Greek yogurt the tanginess of the yogurt cuts through the sweetness beautifully.
Looking for variations? Go wild! Feel free to experiment with different types of cherries. Rainier cherries will add an extra layer of sweetness, while Bing cherries offer a deeper, richer flavor. You can also add other fruits to the mix a handful of blueberries or raspberries would be a fantastic addition. For a hint of spice, try adding a pinch of cinnamon or nutmeg to the crumble topping. And if you’re feeling adventurous, a splash of almond extract to the cherry filling will elevate the flavor profile even further.
Don’t be afraid to get creative and make this recipe your own!
I’ve poured my heart into perfecting this recipe, and I’m confident that you’ll love it as much as I do. It’s the perfect dessert for a casual weeknight dinner, a potluck gathering, or any occasion that calls for a little bit of sweetness. It’s also a fantastic way to use up those fresh cherries you picked at the farmer’s market.
So, what are you waiting for? Preheat your oven, gather your ingredients, and get ready to bake up a batch of this incredible Cherry Crisp. I promise you won’t regret it!
And most importantly, I want to hear about your experience! Did you try the recipe? Did you make any variations? What did your family and friends think? Share your photos and stories in the comments below. I can’t wait to see your creations and hear all about your baking adventures. Happy baking! I am sure you will love this Cherry Crisp as much as I do!
Cherry Crisp: The Ultimate Guide to Baking the Perfect Dessert
A classic, comforting cherry crisp featuring a sweet-tart cherry filling and a buttery oat crisp topping. Best served warm with ice cream!
Ingredients
- 6 cups fresh sweet cherries, pitted (about 2 pounds)
- 1 tablespoon lemon juice
- 1/4 cup granulated sugar
- 2 tablespoons cornstarch
- 1/4 teaspoon almond extract (optional)
- 1 cup all-purpose flour
- 1 cup rolled oats (not instant)
- 1 cup packed light brown sugar
- 1/2 teaspoon baking powder
- 1/4 teaspoon salt
- 1/2 cup (1 stick) cold unsalted butter, cut into cubes
- 1/4 cup chopped pecans or walnuts (optional)
Instructions
- Preheat oven to 375°F (190°C).
- Wash and pit the cherries.
- In a large bowl, toss cherries with lemon juice, granulated sugar, cornstarch, and almond extract (if using).
- Pour cherry mixture into a 9-inch square baking dish (or similar).
- In a separate bowl, whisk together flour, oats, brown sugar, baking powder, and salt.
- Cut in cold butter using a pastry blender or fingertips until the mixture resembles coarse crumbs.
- Stir in chopped pecans or walnuts, if using.
- Evenly distribute the crisp topping over the cherry mixture.
- Bake for 35-45 minutes, or until the topping is golden brown and the cherry filling is bubbling. Tent with foil if browning too quickly.
- Let cool for at least 15-20 minutes before serving.
Notes
- Serve warm with vanilla ice cream, whipped cream, or caramel sauce.
- Fruit Variations: Use other fruits like apples, peaches, blueberries, or raspberries. Adjust sugar and cornstarch as needed.
- Spice it up: Add a pinch of cinnamon, nutmeg, or ginger.
- Gluten-Free: Use a gluten-free all-purpose flour blend.
- Vegan: Use vegan butter and ensure sugar is vegan-friendly.
- Storage: Store leftovers in the refrigerator for up to 3 days. Reheat in the oven or microwave.
- Freezing: Freeze unbaked crisp for up to 3 months. Thaw overnight before baking. Baked crisp can also be frozen.
- Adjust Sweetness: Taste cherries and adjust sugar accordingly.
- Prevent Soggy Crust: Use enough cornstarch. Add a layer of crushed graham crackers or almond flour to the bottom of the dish.
- Frozen Cherries: Thaw frozen cherries completely and drain excess liquid. Add extra cornstarch.
- Crumble Topping: For a different texture, use a crumble topping (no oats).
- Troubleshooting:
- Topping browning too quickly: Tent with foil.
- Filling too runny: Sprinkle more cornstarch.
- Topping too dry: Drizzle with melted butter.
- Cherries too tart: Add more sugar.


Leave a Comment