
Baked BLT Dip: Prepare to be amazed! Imagine all the savory, smoky, and tangy flavors of your favorite BLT sandwich transformed into a warm, gooey, and utterly irresistible dip. This isn’t just any appetizer; it’s a flavor explosion that will have everyone reaching for more. I’ve been making this for years, and it’s always the first thing to disappear at parties!
While the exact origins of combining bacon, lettuce, and tomato into a dip are a bit hazy, the BLT sandwich itself has a fascinating history. Emerging in the early 20th century, it quickly became a diner staple, a testament to the simple perfection of its ingredients. This Baked BLT Dip takes that classic combination and elevates it to a shareable, crowd-pleasing experience.
What makes this dip so beloved? It’s the perfect balance of textures and tastes. The creamy base, the crispy bacon, the juicy tomatoes, and the refreshing lettuce all come together in a harmonious blend. Plus, it’s incredibly easy to make! Whether you’re hosting a game day gathering, a casual get-together, or simply craving a comforting snack, this Baked BLT Dip is guaranteed to be a hit. Get ready to experience the BLT in a whole new, delicious way!

Ingredients:
- 16 ounces cream cheese, softened
- 1 cup mayonnaise
- 1/2 cup sour cream
- 1/2 cup shredded cheddar cheese
- 1/2 cup shredded Monterey Jack cheese
- 1/2 cup crumbled cooked bacon (about 8 slices)
- 1/2 cup chopped tomatoes, drained
- 1/4 cup chopped green onions
- 1 teaspoon garlic powder
- 1/2 teaspoon black pepper
- 1 loaf French bread, baguette, or sourdough, sliced
- Optional: Additional bacon crumbles and chopped tomatoes for garnish
Preparing the Dip:
Okay, let’s get started! First things first, we need to get our cream cheese nice and soft. This is super important because if it’s not soft enough, you’ll end up with a lumpy dip, and nobody wants that! I usually leave mine out on the counter for about an hour or two, but if you’re in a hurry, you can microwave it for about 30 seconds, just keep a close eye on it so it doesn’t melt.
- Combine the Cream Cheese, Mayonnaise, and Sour Cream: In a large bowl, add your softened cream cheese, mayonnaise, and sour cream. Now, using an electric mixer (handheld or stand mixer), beat these ingredients together until they are smooth and creamy. You want to make sure there are no lumps of cream cheese remaining. This usually takes about 2-3 minutes on medium speed. If you don’t have an electric mixer, you can use a sturdy whisk, but be prepared for a bit of an arm workout! Just make sure everything is well combined.
- Incorporate the Cheeses: Once the cream cheese mixture is smooth, add the shredded cheddar cheese and Monterey Jack cheese to the bowl. Gently fold these cheeses into the mixture using a spatula. You want to distribute the cheese evenly throughout the dip. Don’t overmix at this stage, just enough to combine. We want those cheesy pockets!
- Add the Bacon, Tomatoes, and Green Onions: Now for the best part the bacon! Add the crumbled cooked bacon, chopped tomatoes (make sure they are well-drained to prevent a soggy dip!), and chopped green onions to the bowl. Again, gently fold these ingredients into the cheese mixture until they are evenly distributed. The bacon adds that smoky, salty flavor, the tomatoes add a touch of sweetness and acidity, and the green onions add a nice fresh bite.
- Season with Garlic Powder and Pepper: To round out the flavors, add the garlic powder and black pepper to the dip. Give it one final gentle fold to incorporate the seasonings. You can always taste the dip at this point and adjust the seasonings to your liking. Some people like to add a pinch of salt, but I find the bacon and cheeses provide enough saltiness for my taste.
Baking the Dip:
Alright, the dip is looking amazing! Now it’s time to bake it and get that warm, gooey goodness. This step is crucial for melting the cheeses and bringing all the flavors together. Plus, the warm dip is just so much more satisfying than a cold one!
- Preheat the Oven: Preheat your oven to 350°F (175°C). This is the perfect temperature for baking the dip without burning the top. Make sure your oven is fully preheated before you put the dip in.
- Prepare the Baking Dish: Grease a 9-inch baking dish or pie plate with cooking spray. This will prevent the dip from sticking to the bottom of the dish and make it easier to serve. You can also use a cast iron skillet for a rustic presentation.
- Transfer the Dip to the Baking Dish: Pour the prepared dip into the greased baking dish, spreading it evenly. You want to make sure the dip is in a relatively even layer so it cooks evenly.
- Bake the Dip: Place the baking dish in the preheated oven and bake for 20-25 minutes, or until the dip is heated through and the cheese is melted and bubbly. The top should be lightly golden brown. Keep a close eye on it towards the end of the baking time to prevent it from burning.
- Optional Broiling (for extra browning): If you want a more golden-brown top, you can broil the dip for the last 1-2 minutes of baking. Just be sure to watch it very carefully, as it can burn quickly under the broiler.
Preparing the Bread:
While the dip is baking, let’s get the bread ready for dipping! You can use any type of bread you like, but I find that French bread, baguette, or sourdough work best. The crusty texture of these breads holds up well to the dip and provides a nice contrast to the creamy filling.
- Slice the Bread: Slice the bread into 1/2-inch to 1-inch thick slices. You can slice it straight across or on a slight angle for a more elegant presentation.
- Optional Toasting: If you want to toast the bread, you can do so in a toaster, under the broiler, or in a skillet with a little bit of olive oil. Toasting the bread adds a nice crunch and prevents it from getting soggy when dipped. If toasting under the broiler, watch carefully to prevent burning.
Serving and Garnishing:
The dip is baked, the bread is sliced (and maybe toasted!), now it’s time to serve and enjoy! This is the perfect appetizer for parties, game days, or any occasion where you want a crowd-pleasing dish.
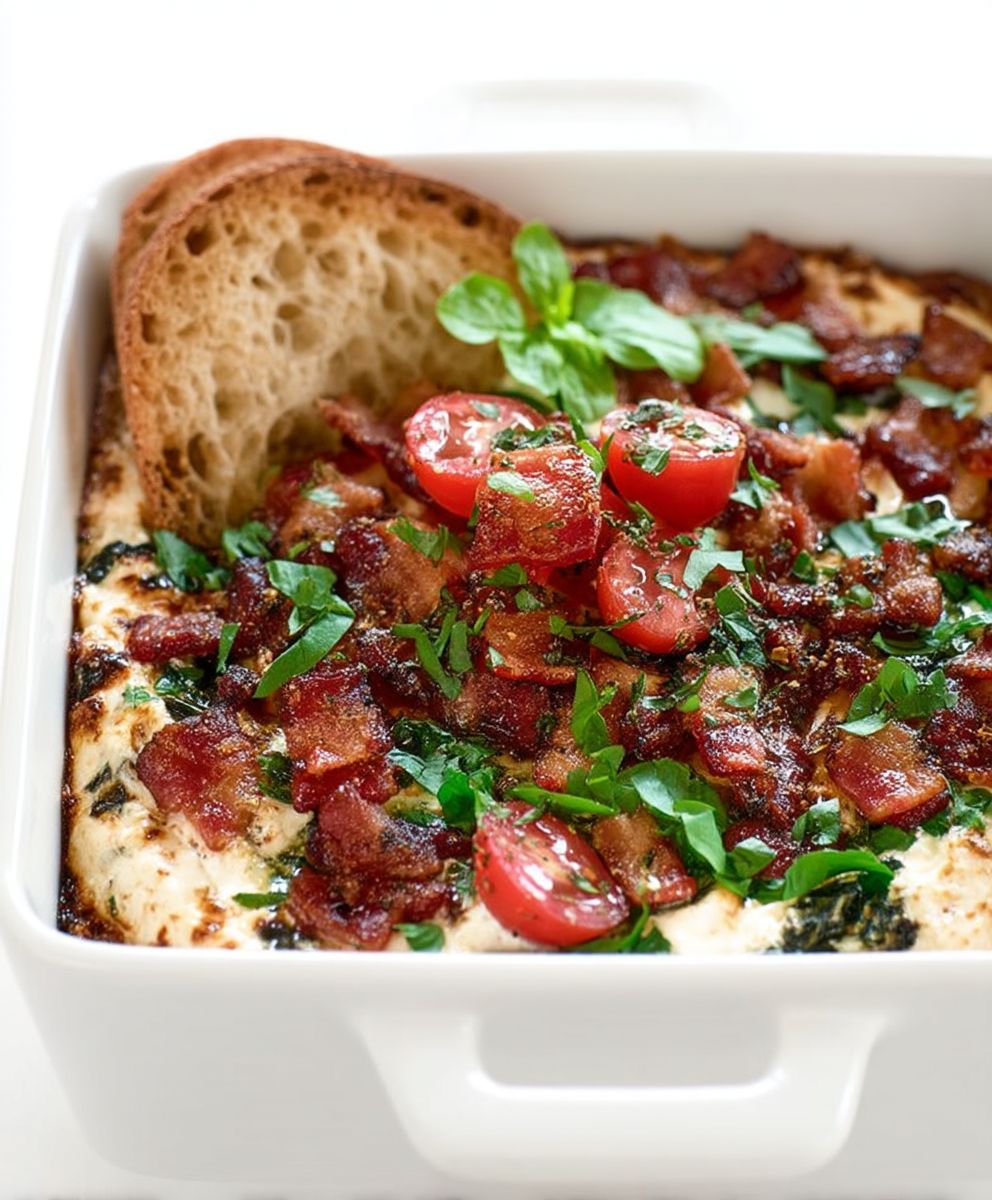
- Garnish the Dip (Optional): Once the dip is out of the oven, you can garnish it with additional bacon crumbles and chopped tomatoes for a pop of color and extra flavor. You can also sprinkle some fresh parsley or chives on top for a more elegant presentation.
- Serve Immediately: Serve the baked BLT dip immediately while it’s still warm and bubbly. Place the baking dish on a serving platter and arrange the sliced bread around it.
- Enjoy! Let your guests dig in and enjoy the deliciousness of the baked BLT dip! Be prepared for it to disappear quickly!
Tips and Variations:
This recipe is super versatile, and you can easily customize it to your liking. Here are a few tips and variations to try:
- Spice it up: Add a pinch of red pepper flakes or a dash of hot sauce to the dip for a little bit of heat.
- Add different cheeses: Experiment with different types of cheeses, such as Gruyere, Swiss, or pepper jack.
- Use different meats: Instead of bacon, try using cooked and crumbled sausage, ham, or even shredded chicken.
- Add vegetables: Add other chopped vegetables, such as bell peppers, onions, or mushrooms.
- Make it lighter: Use light cream cheese, light mayonnaise, and light sour cream to reduce the fat content.
- Serve with different dippers: Instead of bread, serve the dip with tortilla chips, crackers, or even vegetable sticks.
- Make it ahead: You can prepare the dip ahead of time and store it in the refrigerator for up to 24 hours. Just add a few minutes to the baking time to ensure it’s heated through.
Storage Instructions:
If you happen to have any leftovers (which is unlikely!), you can store them in an airtight container in the refrigerator for up to 3 days. Reheat in the oven or microwave before serving.
Enjoy!
I hope you enjoy this Baked BLT Dip as much as I do! It’s a guaranteed crowd-pleaser that’s perfect for any occasion. Happy dipping!
Conclusion:
This Baked BLT Dip is truly a must-try, and I’m not just saying that! It’s the perfect combination of creamy, smoky, and savory flavors, all baked into one irresistible dish. The warm, melty cheese, the crispy bacon, the juicy tomatoes it’s a flavor explosion in every bite. Forget boring appetizers; this dip is guaranteed to be the star of your next gathering. It’s incredibly easy to make, requires minimal prep time, and is always a crowd-pleaser. Seriously, what’s not to love?
Think of it: you’re hosting a game night, a potluck, or even just a casual get-together with friends. You want something delicious and impressive, but you don’t want to spend hours in the kitchen. This Baked BLT Dip is your answer. It comes together in minutes, bakes to golden-brown perfection, and is ready to be devoured. Plus, the aroma that fills your kitchen while it’s baking is simply divine!
But the best part? It’s incredibly versatile! Serve it with toasted baguette slices, tortilla chips, sturdy crackers, or even fresh vegetables like celery sticks and carrot sticks for a lighter option. For a heartier meal, spread it on toasted bread for an open-faced sandwich or use it as a topping for baked potatoes. The possibilities are endless!
Looking for variations? I’ve got you covered! For a spicier kick, add a pinch of red pepper flakes or a dash of your favorite hot sauce. If you’re a fan of avocado, dice one up and stir it in after baking for a creamy, cool contrast. You could also experiment with different types of cheese. Gruyere or smoked gouda would add a delicious depth of flavor. And for a vegetarian version, simply omit the bacon and add some sun-dried tomatoes for a similar smoky flavor.
I’m confident that this Baked BLT Dip will become a staple in your recipe repertoire. It’s the perfect appetizer for any occasion, and it’s so easy to customize to your liking. So, what are you waiting for? Gather your ingredients, preheat your oven, and get ready to experience the ultimate dip sensation!
I truly encourage you to try this recipe. It’s a guaranteed winner, and I know you’ll love it as much as I do. And once you’ve made it (and devoured it!), I’d love to hear about your experience! Did you make any variations? What did you serve it with? What did your friends and family think? Share your photos and comments below I can’t wait to see your creations! Let me know if you have any questions, too. Happy dipping!
Baked BLT Dip: The Ultimate Party Appetizer Recipe
Warm, cheesy Baked BLT Dip with cream cheese, bacon, cheddar, and more! Perfect for parties, game days, or any gathering. Serve with sliced bread for dipping.
Ingredients
- 16 ounces cream cheese, softened
- 1 cup mayonnaise
- 1/2 cup sour cream
- 1/2 cup shredded cheddar cheese
- 1/2 cup shredded Monterey Jack cheese
- 1/2 cup crumbled cooked bacon (about 8 slices)
- 1/2 cup chopped tomatoes, drained
- 1/4 cup chopped green onions
- 1 teaspoon garlic powder
- 1/2 teaspoon black pepper
- 1 loaf French bread, baguette, or sourdough, sliced
- Optional: Additional bacon crumbles and chopped tomatoes for garnish
Instructions
- Combine Cream Cheese Mixture: In a large bowl, beat together softened cream cheese, mayonnaise, and sour cream with an electric mixer until smooth and creamy.
- Incorporate Cheeses: Fold in shredded cheddar and Monterey Jack cheese until evenly distributed.
- Add BLT Components: Gently fold in crumbled cooked bacon, drained chopped tomatoes, and chopped green onions.
- Season: Add garlic powder and black pepper. Mix well. Taste and adjust seasonings as needed.
- Preheat Oven: Preheat oven to 350°F (175°C).
- Prepare Baking Dish: Grease a 9-inch baking dish or pie plate with cooking spray.
- Transfer to Dish: Pour the prepared dip into the greased baking dish, spreading evenly.
- Bake: Bake for 20-25 minutes, or until the dip is heated through and the cheese is melted and bubbly.
- Optional Broil: For a more golden-brown top, broil for the last 1-2 minutes, watching carefully to prevent burning.
- Prepare Bread: Slice the bread into 1/2-inch to 1-inch thick slices. Toast if desired.
- Garnish (Optional): Garnish the baked dip with additional bacon crumbles and chopped tomatoes.
- Serve: Serve immediately with sliced bread for dipping.
Notes
- Soften cream cheese completely for a smooth dip.
- Drain tomatoes well to prevent a soggy dip.
- Adjust seasonings to your preference.
- Use any type of bread you like for dipping.
- For a spicier dip, add a pinch of red pepper flakes or a dash of hot sauce.
- Experiment with different cheeses or meats.
- Make it lighter by using light cream cheese, mayonnaise, and sour cream.
- Prepare the dip ahead of time and store it in the refrigerator for up to 24 hours.
- Store leftovers in an airtight container in the refrigerator for up to 3 days. Reheat in the oven or microwave before serving.


Leave a Comment