
Cherry pie filling, that luscious, ruby-red concoction, is the secret weapon in my baking arsenal. Forget slaving over pitting hundreds of cherries with this easy recipe, you can have a perfectly sweet and tart filling ready in minutes! Have you ever wondered about the history of cherry pie? While the exact origins are debated, pies filled with fruit have been enjoyed since ancient times. The modern cherry pie, as we know it, gained popularity in America, becoming a symbol of comfort and home baking.
What makes a good cherry pie filling so irresistible? It’s the perfect balance of sweet and tart, the satisfyingly plump texture of the cherries, and the comforting warmth it brings to any dessert. Whether you’re using it in a classic pie, topping pancakes, or swirling it into yogurt, this versatile filling is a guaranteed crowd-pleaser. I personally love how convenient it is to have on hand for quick and easy desserts. Plus, the vibrant color just brightens up any dish! So, ditch the store-bought stuff and let’s make a homemade version that’s bursting with fresh cherry flavor!

Ingredients:
- For the Crust:
- 2 ½ cups all-purpose flour, plus more for dusting
- 1 teaspoon salt
- 1 cup (2 sticks) unsalted butter, very cold and cut into ½-inch cubes
- ½ cup vegetable shortening, very cold
- 6-8 tablespoons ice water
- 1 tablespoon granulated sugar (for sprinkling)
- For the Cherry Pie Filling:
- 6 cups fresh or frozen pitted cherries (if frozen, thaw slightly)
- ¾ cup granulated sugar (adjust to taste depending on cherry sweetness)
- ¼ cup cornstarch
- ¼ teaspoon almond extract
- 1 tablespoon lemon juice
- Pinch of salt
- 2 tablespoons unsalted butter, cut into small pieces
- For the Egg Wash (optional):
- 1 large egg
- 1 tablespoon milk or water
Preparing the Pie Crust:
- Combine Dry Ingredients: In a large bowl, whisk together the flour and salt. This ensures the salt is evenly distributed throughout the crust, which is crucial for flavor.
- Cut in the Fat: Add the cold butter and shortening to the flour mixture. Using a pastry blender or your fingertips (work quickly to keep the fat cold!), cut the fat into the flour until the mixture resembles coarse crumbs. You should have some pea-sized pieces of butter and shortening remaining these are what create flaky layers in the crust. Don’t overmix!
- Add Ice Water: Gradually add the ice water, one tablespoon at a time, mixing lightly after each addition. Use a fork or your hands to gently bring the dough together. Be careful not to add too much water; you want the dough to be moist enough to hold together but not sticky. The amount of water needed can vary depending on the humidity and the flour you’re using.
- Form Dough Disks: Divide the dough in half. Gently flatten each half into a disk about 1 inch thick. Wrap each disk tightly in plastic wrap and refrigerate for at least 2 hours, or preferably overnight. This allows the gluten to relax, which will make the crust more tender and easier to roll out.
Making the Cherry Pie Filling:
- Combine Cherry Filling Ingredients: In a large saucepan, combine the cherries, sugar, cornstarch, almond extract, lemon juice, and salt. Stir well to ensure the cornstarch is evenly distributed.
- Cook the Filling: Place the saucepan over medium heat and cook, stirring constantly, until the mixture comes to a simmer and thickens. This usually takes about 5-7 minutes. The filling should be glossy and able to coat the back of a spoon.
- Add Butter: Remove the saucepan from the heat and stir in the butter until it is melted and incorporated. This adds richness and shine to the filling.
- Cool Slightly: Let the filling cool slightly while you prepare the pie crust. This prevents the crust from becoming soggy.
Assembling and Baking the Pie:
- Preheat Oven: Preheat your oven to 400°F (200°C). Place a baking sheet on the lower rack of the oven to catch any drips.
- Roll Out Bottom Crust: On a lightly floured surface, roll out one of the dough disks into a 12-inch circle. Gently transfer the dough to a 9-inch pie plate. Trim the edges of the dough, leaving about a 1-inch overhang.
- Add Filling: Pour the cooled cherry pie filling into the pie crust. Spread it evenly.
- Dot with Butter: Dot the top of the filling with the remaining 2 tablespoons of butter, cut into small pieces. This adds extra richness and flavor to the filling as it bakes.
- Roll Out Top Crust: Roll out the second dough disk into a 12-inch circle. You can either place the entire crust over the filling or cut it into strips for a lattice top.
- Create a Lattice Top (Optional): If making a lattice top, cut the dough into strips about ¾ inch wide. Arrange half of the strips across the pie filling, spacing them evenly. Fold back every other strip and place another strip perpendicular to the first ones. Repeat with the remaining strips, weaving them together to create a lattice pattern.
- Seal and Crimp the Edges: Trim the edges of the top crust (or lattice strips) to match the bottom crust. Fold the overhanging dough under the bottom crust and crimp the edges using your fingers or a fork to create a decorative seal. This helps to prevent the filling from leaking out during baking.
- Cut Vents: Cut several slits in the top crust (or lattice top) to allow steam to escape during baking. This prevents the crust from puffing up and cracking.
- Egg Wash (Optional): In a small bowl, whisk together the egg and milk (or water). Brush the top crust with the egg wash. This will give the crust a golden brown and glossy finish.
- Sprinkle with Sugar: Sprinkle the top crust with granulated sugar. This adds a touch of sweetness and sparkle.
- Bake the Pie: Place the pie on the preheated baking sheet in the oven. Bake for 45-55 minutes, or until the crust is golden brown and the filling is bubbling. If the crust starts to brown too quickly, you can cover the edges with aluminum foil.
- Cool Completely: Remove the pie from the oven and let it cool completely on a wire rack before slicing and serving. This allows the filling to set properly. Cooling can take several hours, so be patient!
Tips for the Perfect Cherry Pie:
- Keep Ingredients Cold: The key to a flaky pie crust is to keep all of your ingredients cold, especially the butter and shortening. This prevents the fat from melting into the flour, which would result in a tough crust.
- Don’t Overmix the Dough: Overmixing the dough develops the gluten, which can make the crust tough. Mix the dough just until it comes together.
- Use a Pastry Blender: A pastry blender is a handy tool for cutting the fat into the flour. If you don’t have one, you can use your fingertips, but be sure to work quickly to keep the fat cold.
- Chill the Dough: Chilling the dough allows the gluten to relax, which will make the crust more tender and easier to roll out. It also helps to prevent the crust from shrinking during baking.
- Use a Baking Sheet: Baking the pie on a baking sheet will catch any drips and prevent them from burning on the bottom of the oven.
- Cover the Edges with Foil: If the crust starts to brown too quickly, you can cover the edges with aluminum foil. This will prevent them from burning.
- Let the Pie Cool Completely: Letting the pie cool completely allows the filling to set properly. If you slice into it while it’s still warm, the filling will be runny.
- Adjust Sugar to Taste: The amount of sugar in the filling can be adjusted to taste depending on the sweetness of the cherries. If your cherries are very tart, you may need to add more sugar.
- Use High-Quality Cherries: The quality of the cherries will greatly affect the flavor of the pie. Use fresh, ripe cherries if possible. If using frozen cherries, thaw them slightly before using.
- Experiment with Flavors: Feel free to experiment with different flavors in the filling. A pinch of cinnamon or nutmeg can add a warm, comforting flavor. You can also add a splash of Kirsch (cherry liqueur) for a more sophisticated flavor.
Serving Suggestions:
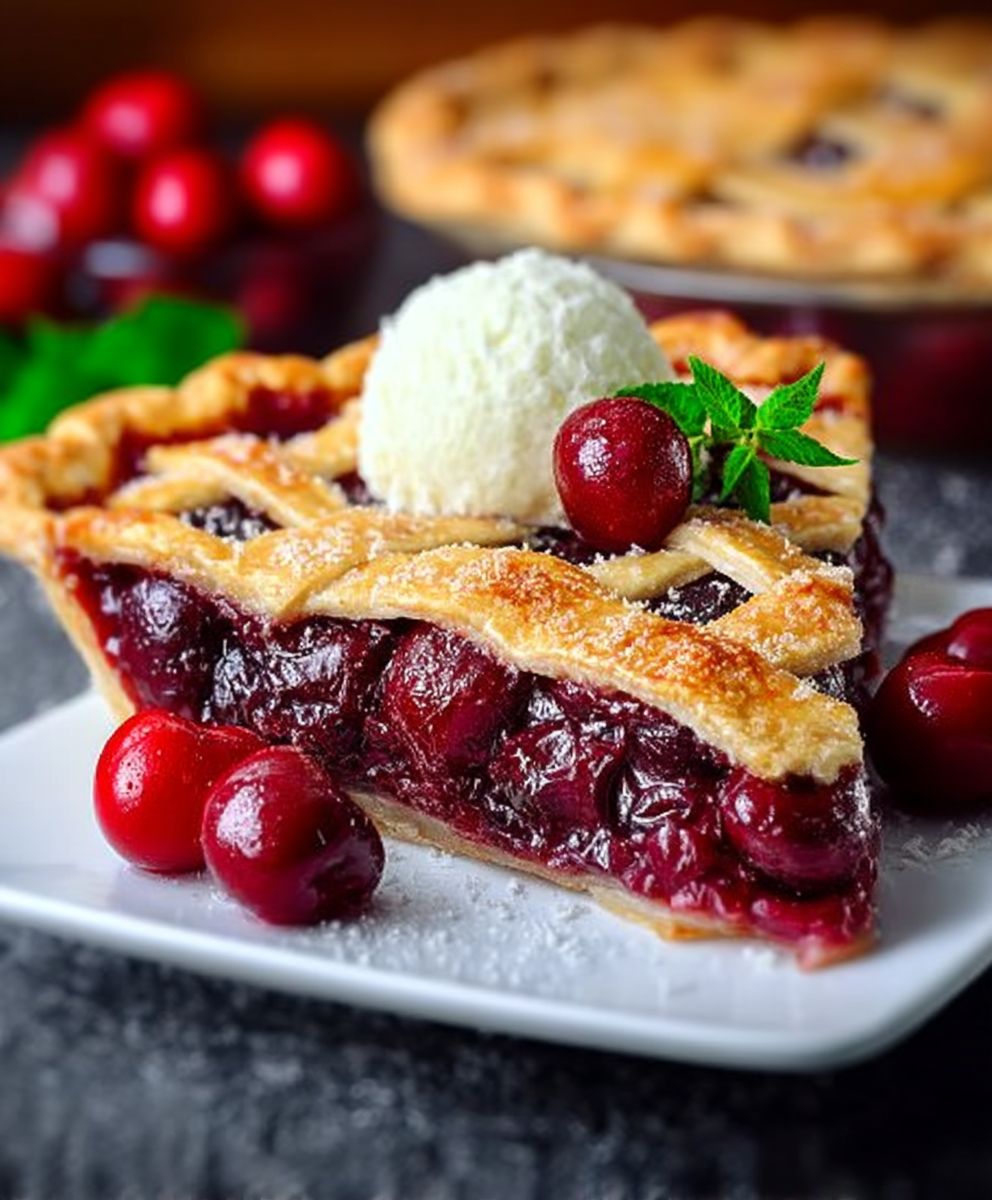
- Serve warm or at room temperature.
- Top with a scoop of vanilla ice cream or whipped cream.
- Dust with powdered sugar.
- Serve with a slice of sharp cheddar cheese (a classic pairing!).
Conclusion:
Okay, friends, let’s be honest you’ve scrolled this far because you’re intrigued by the promise of homemade cherry pie filling that’s bursting with flavor and ridiculously easy to make. And I’m here to tell you, you absolutely should be! This isn’t your average, run-of-the-mill canned stuff. This is cherry pie filling elevated to a whole new level, a testament to the power of fresh ingredients and a little bit of love.
Why is this a must-try? Because it’s the real deal. We’re talking plump, juicy cherries simmered to perfection in a sweet and slightly tart sauce that’s thick enough to hold its shape but still delightfully gooey. It’s the kind of filling that makes you want to grab a spoon and dig right in (and trust me, I wouldn’t blame you if you did!). Plus, you control the sweetness! Tired of overly sugary fillings? This recipe lets you adjust the sugar to your exact preference, creating a pie that’s perfectly balanced and utterly irresistible.
But the best part? It’s incredibly versatile! Of course, the most obvious use is in a classic cherry pie. Imagine that flaky, golden crust enveloping this luscious filling pure bliss! But don’t stop there! This cherry pie filling is also fantastic spooned over vanilla ice cream for a quick and easy dessert. Or, how about using it as a topping for cheesecake? The possibilities are endless!
Looking for variations? I’ve got you covered! For a hint of warmth, add a pinch of cinnamon or nutmeg to the filling while it’s simmering. If you’re feeling adventurous, a splash of almond extract can really enhance the cherry flavor. And for a truly decadent treat, try adding a tablespoon of Kirsch (cherry liqueur) after the filling has cooled slightly. Just remember to adjust the sugar accordingly if you’re adding something sweet.
Serving Suggestions:
* Classic Cherry Pie: The ultimate comfort food!
* Cherry Pie Parfaits: Layer the filling with whipped cream and crumbled graham crackers for a delightful treat.
* Cherry Pie Scones: Fold the filling into your favorite scone recipe for a burst of fruity flavor.
* Cherry Pie Hand Pies: Perfect for on-the-go snacking!
* Cherry Pie French Toast Casserole: A delicious and impressive brunch option.
I truly believe that everyone deserves to experience the joy of homemade cherry pie filling. It’s a simple pleasure that can transform any dessert into something truly special. So, ditch the canned stuff and give this recipe a try. I promise you won’t regret it!
And now, for the most important part: I want to hear from you! Once you’ve made this incredible cherry pie filling, please come back and share your experience in the comments below. Did you make any variations? What did you serve it with? What did your family and friends think? I’m so excited to hear all about your culinary adventures! Don’t be shy your feedback is invaluable and helps other bakers discover the magic of this recipe. Happy baking! Let me know if you have any questions, and I’ll do my best to help. I can’t wait to see all the delicious creations you come up with!
Cherry Pie Filling: The Ultimate Guide to Homemade & Store-Bought
A classic homemade cherry pie featuring a flaky, buttery crust and a delightful sweet-tart cherry filling.
Ingredients
- 2 ½ cups all-purpose flour, plus more for dusting
- 1 teaspoon salt
- 1 cup (2 sticks) unsalted butter, very cold and cut into ½-inch cubes
- ½ cup vegetable shortening, very cold
- 6-8 tablespoons ice water
- 1 tablespoon granulated sugar (for sprinkling)
- 6 cups fresh or frozen pitted cherries (if frozen, thaw slightly)
- ¾ cup granulated sugar (adjust to taste depending on cherry sweetness)
- ¼ cup cornstarch
- ¼ teaspoon almond extract
- 1 tablespoon lemon juice
- Pinch of salt
- 2 tablespoons unsalted butter, cut into small pieces
- 1 large egg
- 1 tablespoon milk or water
Instructions
- In a large bowl, whisk together the flour and salt.
- Add the cold butter and shortening to the flour mixture. Using a pastry blender or your fingertips (work quickly to keep the fat cold!), cut the fat into the flour until the mixture resembles coarse crumbs. You should have some pea-sized pieces of butter and shortening remaining.
- Gradually add the ice water, one tablespoon at a time, mixing lightly after each addition. Use a fork or your hands to gently bring the dough together. Be careful not to add too much water.
- Divide the dough in half. Gently flatten each half into a disk about 1 inch thick. Wrap each disk tightly in plastic wrap and refrigerate for at least 2 hours, or preferably overnight.
- In a large saucepan, combine the cherries, sugar, cornstarch, almond extract, lemon juice, and salt. Stir well to ensure the cornstarch is evenly distributed.
- Place the saucepan over medium heat and cook, stirring constantly, until the mixture comes to a simmer and thickens. This usually takes about 5-7 minutes.
- Remove the saucepan from the heat and stir in the butter until it is melted and incorporated.
- Let the filling cool slightly while you prepare the pie crust.
- Preheat your oven to 400°F (200°C). Place a baking sheet on the lower rack of the oven to catch any drips.
- On a lightly floured surface, roll out one of the dough disks into a 12-inch circle. Gently transfer the dough to a 9-inch pie plate. Trim the edges of the dough, leaving about a 1-inch overhang.
- Pour the cooled cherry pie filling into the pie crust. Spread it evenly.
- Dot the top of the filling with the remaining 2 tablespoons of butter, cut into small pieces.
- Roll out the second dough disk into a 12-inch circle. You can either place the entire crust over the filling or cut it into strips for a lattice top.
- If making a lattice top, cut the dough into strips about ¾ inch wide. Arrange half of the strips across the pie filling, spacing them evenly. Fold back every other strip and place another strip perpendicular to the first ones. Repeat with the remaining strips, weaving them together to create a lattice pattern.
- Trim the edges of the top crust (or lattice strips) to match the bottom crust. Fold the overhanging dough under the bottom crust and crimp the edges using your fingers or a fork to create a decorative seal.
- Cut several slits in the top crust (or lattice top) to allow steam to escape during baking.
- In a small bowl, whisk together the egg and milk (or water). Brush the top crust with the egg wash.
- Sprinkle the top crust with granulated sugar.
- Place the pie on the preheated baking sheet in the oven. Bake for 45-55 minutes, or until the crust is golden brown and the filling is bubbling. If the crust starts to brown too quickly, you can cover the edges with aluminum foil.
- Remove the pie from the oven and let it cool completely on a wire rack before slicing and serving.
Notes
- Keep ingredients cold for a flaky crust.
- Don’t overmix the dough.
- Chill the dough for at least 2 hours, or preferably overnight.
- Bake on a baking sheet to catch drips.
- Cover edges with foil if they brown too quickly.
- Let the pie cool completely before slicing.
- Adjust sugar in filling to taste.
- Use high-quality cherries.
- Experiment with flavors like cinnamon, nutmeg, or Kirsch.
- Serve warm or at room temperature.
- Top with ice cream or whipped cream.
- Dust with powdered sugar.
- Serve with a slice of sharp cheddar cheese.


Leave a Comment