
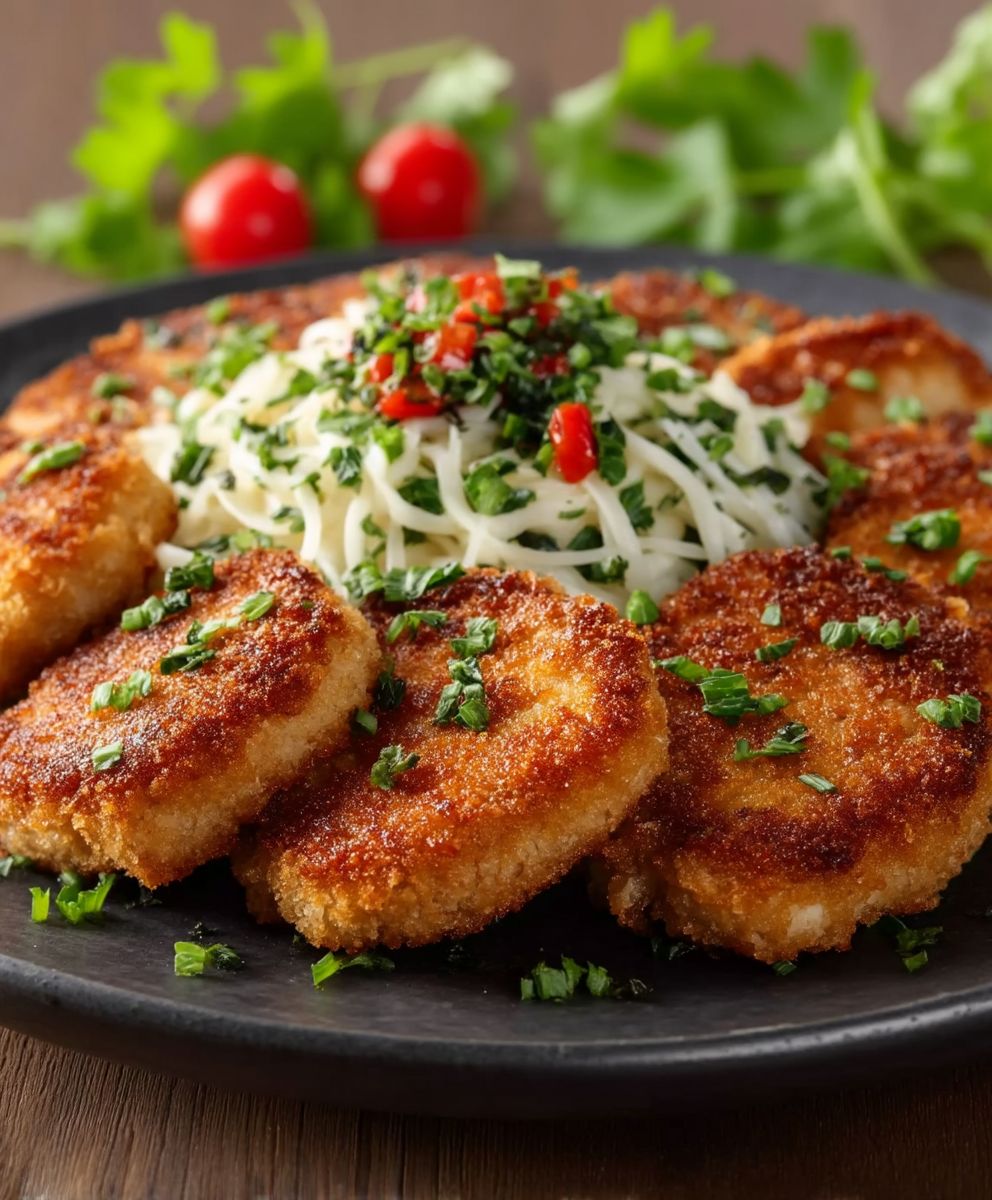
Italian chicken cutlet, or cotoletta di pollo alla milanese as it’s known in Italy, is more than just fried chicken; it’s a culinary hug on a plate! Imagine sinking your teeth into a perfectly crisp, golden-brown crust that gives way to tender, juicy chicken. Are you drooling yet? I know I am just thinking about it!
While its exact origins are debated, the Italian chicken cutlet shares a lineage with the famed cotoletta alla milanese, a veal cutlet dish that’s been a staple in Milan for centuries. Over time, resourceful cooks adapted the recipe, swapping veal for the more readily available and affordable chicken, giving birth to the beloved dish we know and adore today. This adaptation made it a family favorite across Italy and beyond.
What makes the Italian chicken cutlet so irresistible? It’s the symphony of textures and flavors! The crunchy breadcrumb coating, often seasoned with Parmesan cheese, herbs, and garlic, provides a delightful contrast to the moist chicken inside. It’s also incredibly versatile. Enjoy it as a quick weeknight dinner, a satisfying sandwich filling, or even a sophisticated appetizer at your next gathering. Plus, it’s a dish that appeals to everyone, from picky eaters to seasoned foodies. So, let’s get cooking and bring a little taste of Italy to your kitchen!

Ingredients:
- 4 boneless, skinless chicken breasts (about 6 ounces each)
- 1 cup all-purpose flour
- 2 large eggs, lightly beaten
- 2 cups Italian seasoned breadcrumbs
- 1/2 cup grated Parmesan cheese
- 1 teaspoon garlic powder
- 1/2 teaspoon dried oregano
- 1/4 teaspoon red pepper flakes (optional)
- Salt and freshly ground black pepper to taste
- 1/2 cup olive oil, for frying
- Lemon wedges, for serving (optional)
- Fresh parsley, chopped, for garnish (optional)
Preparing the Chicken:
- Pound the chicken breasts: Place each chicken breast between two sheets of plastic wrap or in a resealable plastic bag. Using a meat mallet or rolling pin, pound the chicken to an even thickness of about 1/4 inch. This ensures even cooking and tenderizes the chicken. Don’t over-pound, or you’ll end up with shredded chicken!
- Season the chicken: Season both sides of each chicken breast generously with salt and freshly ground black pepper. This is crucial for flavorful cutlets. Don’t be shy with the seasoning!
Setting Up the Breading Station:
- Prepare the flour: Place the all-purpose flour in a shallow dish or pie plate. This will be the first step in the breading process, helping the egg adhere properly.
- Prepare the egg wash: In a second shallow dish, whisk the eggs lightly. Make sure the yolks and whites are fully combined. A smooth egg wash ensures even coverage.
- Prepare the breadcrumb mixture: In a third shallow dish, combine the Italian seasoned breadcrumbs, Parmesan cheese, garlic powder, oregano, and red pepper flakes (if using). Mix well to ensure all the ingredients are evenly distributed. The Parmesan adds a lovely nutty flavor and helps the breadcrumbs crisp up nicely.
Breading the Chicken:
- Dredge in flour: Take one chicken breast and dredge it in the flour, making sure to coat both sides completely. Shake off any excess flour. The flour helps the egg wash stick to the chicken.
- Dip in egg wash: Dip the floured chicken breast into the egg wash, ensuring it’s fully coated. Let any excess egg drip off.
- Coat in breadcrumbs: Transfer the chicken breast to the breadcrumb mixture. Press the breadcrumbs firmly onto both sides of the chicken, making sure it’s completely covered. You want a nice, thick coating of breadcrumbs for maximum crispiness.
- Repeat: Repeat the breading process with the remaining chicken breasts.
- Rest (optional but recommended): Place the breaded chicken breasts on a wire rack and let them rest for about 10-15 minutes. This helps the breadcrumbs adhere better and prevents them from falling off during cooking.
Cooking the Chicken:
- Heat the oil: In a large skillet, heat the olive oil over medium heat. You want the oil to be hot enough to sizzle when you add the chicken, but not so hot that it burns the breadcrumbs. A good way to test the oil is to drop a small breadcrumb into it; if it sizzles and turns golden brown in a few seconds, the oil is ready.
- Fry the chicken: Carefully place the breaded chicken breasts in the hot oil, being careful not to overcrowd the pan. Cook for about 4-5 minutes per side, or until the chicken is golden brown and cooked through. The internal temperature of the chicken should reach 165°F (74°C).
- Don’t overcrowd the pan: If your skillet isn’t large enough to fit all the chicken breasts without overcrowding, cook them in batches. Overcrowding the pan will lower the oil temperature and result in soggy cutlets.
- Monitor the heat: Adjust the heat as needed to prevent the breadcrumbs from burning. If they’re browning too quickly, reduce the heat slightly.
- Remove and drain: Once the chicken is cooked through and golden brown, remove it from the skillet and place it on a wire rack lined with paper towels to drain off any excess oil. This helps keep the cutlets crispy.
Serving:
- Serve immediately: Serve the Italian chicken cutlets immediately while they’re still hot and crispy.
- Garnish (optional): Garnish with fresh chopped parsley and serve with lemon wedges for squeezing over the chicken. The lemon juice adds a bright, zesty flavor that complements the richness of the cutlets.
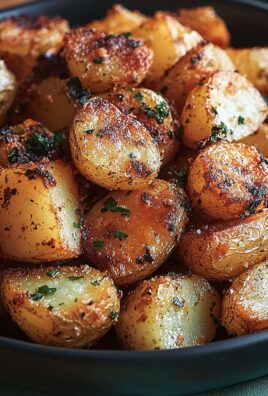
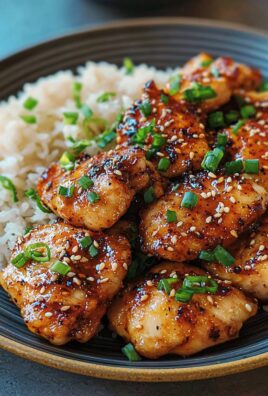
- Serving suggestions: These Italian chicken cutlets are delicious served on their own, or you can use them to make chicken Parmesan, chicken sandwiches, or chicken Caesar salad. They also pair well with pasta, mashed potatoes, or roasted vegetables.
Tips and Variations:
- Use different cheeses: Instead of Parmesan cheese, try using Pecorino Romano or Asiago cheese in the breadcrumb mixture.
- Add herbs: Experiment with different herbs in the breadcrumb mixture, such as basil, thyme, or rosemary.
- Make it spicy: Add more red pepper flakes to the breadcrumb mixture for a spicier kick.
- Bake the chicken: For a healthier option, you can bake the chicken instead of frying it. Preheat your oven to 400°F (200°C). Place the breaded chicken breasts on a baking sheet lined with parchment paper and bake for 20-25 minutes, or until cooked through and golden brown.
- Air Fryer Option: Preheat your air fryer to 375°F (190°C). Lightly spray the breaded chicken cutlets with cooking oil. Air fry for 12-15 minutes, flipping halfway through, until golden brown and cooked through. This is a great way to get crispy cutlets with less oil.
- Make ahead: You can bread the chicken breasts ahead of time and store them in the refrigerator for up to 24 hours. Just make sure to cover them tightly to prevent them from drying out.
- Freezing: Breaded chicken cutlets can be frozen before cooking. Place them on a baking sheet lined with parchment paper and freeze until solid. Then, transfer them to a freezer bag or container. When ready to cook, thaw them in the refrigerator overnight and cook as directed.
- Gluten-Free Option: Use gluten-free all-purpose flour and gluten-free breadcrumbs to make this recipe gluten-free.
- Pounding the Chicken Properly: When pounding the chicken, start from the center and work your way outwards. This helps to create an even thickness without tearing the chicken.
- Breadcrumb Consistency: If your breadcrumbs are too coarse, you can pulse them in a food processor until they are finer. This will help them adhere better to the chicken.
- Don’t Overcook: Overcooked chicken will be dry and tough. Use a meat thermometer to ensure the chicken is cooked to an internal temperature of 165°F (74°C).
- Resting the Chicken After Cooking: Allowing the chicken to rest for a few minutes after cooking helps the juices redistribute, resulting in a more tender and flavorful cutlet.
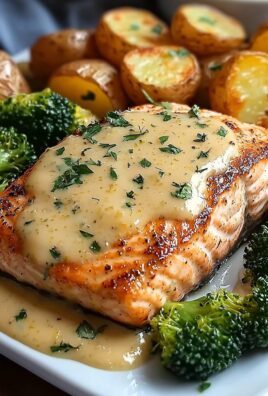
- Serving with Sauce: Consider serving these cutlets with marinara sauce, pesto, or a creamy lemon sauce for added flavor.
Troubleshooting:
- Breadcrumbs falling off: Make sure you’re pressing the breadcrumbs firmly onto the chicken. Resting the breaded chicken for a few minutes before cooking also helps.
- Chicken not cooking evenly: Make sure the chicken breasts are pounded to an even thickness. Also, don’t overcrowd the pan.
- Breadcrumbs burning: Reduce the heat slightly. You may also need to add more oil to the pan.
- Chicken is dry: Don’t overcook the chicken. Use a meat thermometer to ensure it’s cooked to the correct temperature.
Conclusion:
And there you have it! This isn’t just another chicken recipe; it’s a journey to Italy right in your own kitchen. I truly believe this Italian chicken cutlet recipe is a must-try for anyone who loves crispy, flavorful, and satisfying meals. The combination of the perfectly seasoned breadcrumbs, the tender chicken, and that hint of Parmesan cheese creates a symphony of flavors that will have you coming back for more. It’s simple enough for a weeknight dinner, yet impressive enough to serve to guests.
But why is it a must-try? Because it’s more than just a recipe; it’s an experience. It’s the joy of creating something delicious from scratch, the satisfaction of seeing your family enjoy a home-cooked meal, and the pride of mastering a classic dish. Plus, let’s be honest, who can resist a perfectly crispy, golden-brown chicken cutlet?
Serving Suggestions and Variations:
Now, let’s talk about how you can enjoy these delectable cutlets. The possibilities are endless! For a classic Italian meal, serve them alongside a generous helping of spaghetti with marinara sauce and a sprinkle of fresh basil. A simple salad with a light vinaigrette adds a refreshing contrast to the richness of the cutlets.
But don’t stop there! These cutlets are incredibly versatile. Try slicing them and adding them to a Caesar salad for a protein-packed lunch. Or, create a mouthwatering chicken Parmesan sandwich by layering them with marinara sauce, mozzarella cheese, and a toasted bun.
Feeling adventurous? Experiment with different variations of the recipe. Add a pinch of red pepper flakes to the breadcrumb mixture for a spicy kick. Or, try using different types of cheese, such as provolone or Asiago, for a unique flavor profile. You could even dip the cooked cutlets in a lemon butter sauce for an extra touch of richness.
For a healthier option, you can bake the cutlets instead of frying them. Simply place them on a baking sheet lined with parchment paper and bake at 400°F (200°C) for about 20-25 minutes, or until they are cooked through and golden brown. While they won’t be quite as crispy as the fried version, they will still be incredibly delicious.
Another great variation is to use panko breadcrumbs instead of regular breadcrumbs. Panko breadcrumbs are larger and flakier, which will give the cutlets an even crispier texture.
Your Turn to Cook!
I’m so excited for you to try this Italian chicken cutlet recipe. I know you’ll love it as much as I do. It’s a guaranteed crowd-pleaser that will become a staple in your kitchen.
So, what are you waiting for? Gather your ingredients, put on your apron, and get cooking! I promise you won’t be disappointed.
And most importantly, don’t forget to share your experience with me! I’d love to hear how the recipe turned out for you, what variations you tried, and what your family thought. You can leave a comment below, tag me on social media, or send me an email. I’m always eager to hear from my readers and see their culinary creations.
Happy cooking, and Buon Appetito! I hope this recipe brings as much joy to your table as it has to mine. Remember, cooking is all about experimenting, having fun, and creating memories. So, don’t be afraid to get creative and make this recipe your own. I can’t wait to see what you come up with! Let me know if you have any questions, and I’ll be happy to help. Enjoy!
Italian Chicken Cutlet: The Ultimate Crispy Recipe
Crispy, golden-brown Italian chicken cutlets, perfectly seasoned and pan-fried to tender perfection. A classic dish that's easy to make and always a crowd-pleaser.
Ingredients
- 4 boneless, skinless chicken breasts (about 6 ounces each)
- 1 cup all-purpose flour
- 2 large eggs, lightly beaten
- 2 cups Italian seasoned breadcrumbs
- 1/2 cup grated Parmesan cheese
- 1 teaspoon garlic powder
- 1/2 teaspoon dried oregano
- 1/4 teaspoon red pepper flakes (optional)
- Salt and freshly ground black pepper to taste
- 1/2 cup olive oil, for frying
- Lemon wedges, for serving (optional)
- Fresh parsley, chopped, for garnish (optional)
Instructions
- Prepare the Chicken: Place each chicken breast between two sheets of plastic wrap. Pound to 1/4 inch thickness. Season both sides with salt and pepper.
- Set Up Breading Station: Place flour in a shallow dish. Whisk eggs in a second dish. Combine breadcrumbs, Parmesan, garlic powder, oregano, and red pepper flakes (if using) in a third dish.
- Bread the Chicken: Dredge each chicken breast in flour, shake off excess. Dip in egg wash, let excess drip off. Coat in breadcrumb mixture, pressing firmly. Repeat with remaining chicken. Let rest on a wire rack for 10-15 minutes (optional).
- Cook the Chicken: Heat olive oil in a large skillet over medium heat. Carefully place chicken in the hot oil, don’t overcrowd. Cook 4-5 minutes per side, until golden brown and internal temperature reaches 165°F (74°C).
- Remove and Drain: Place cooked chicken on a wire rack lined with paper towels to drain excess oil.
- Serve: Serve immediately, garnished with fresh parsley and lemon wedges (optional).
Notes
- Pounding the chicken ensures even cooking and tenderizes it.
- Resting the breaded chicken helps the breadcrumbs adhere better.
- Don’t overcrowd the pan when frying to maintain oil temperature and prevent soggy cutlets.
- Use a meat thermometer to ensure the chicken is cooked to a safe internal temperature of 165°F (74°C).
- For a healthier option, bake at 400°F (200°C) for 20-25 minutes or air fry at 375°F (190°C) for 12-15 minutes, flipping halfway.
- Breaded chicken can be made ahead and refrigerated for up to 24 hours or frozen for longer storage.
- For gluten-free, use gluten-free flour and breadcrumbs.
- Serve with marinara sauce, pesto, or a creamy lemon sauce for added flavor.
Leave a Comment