
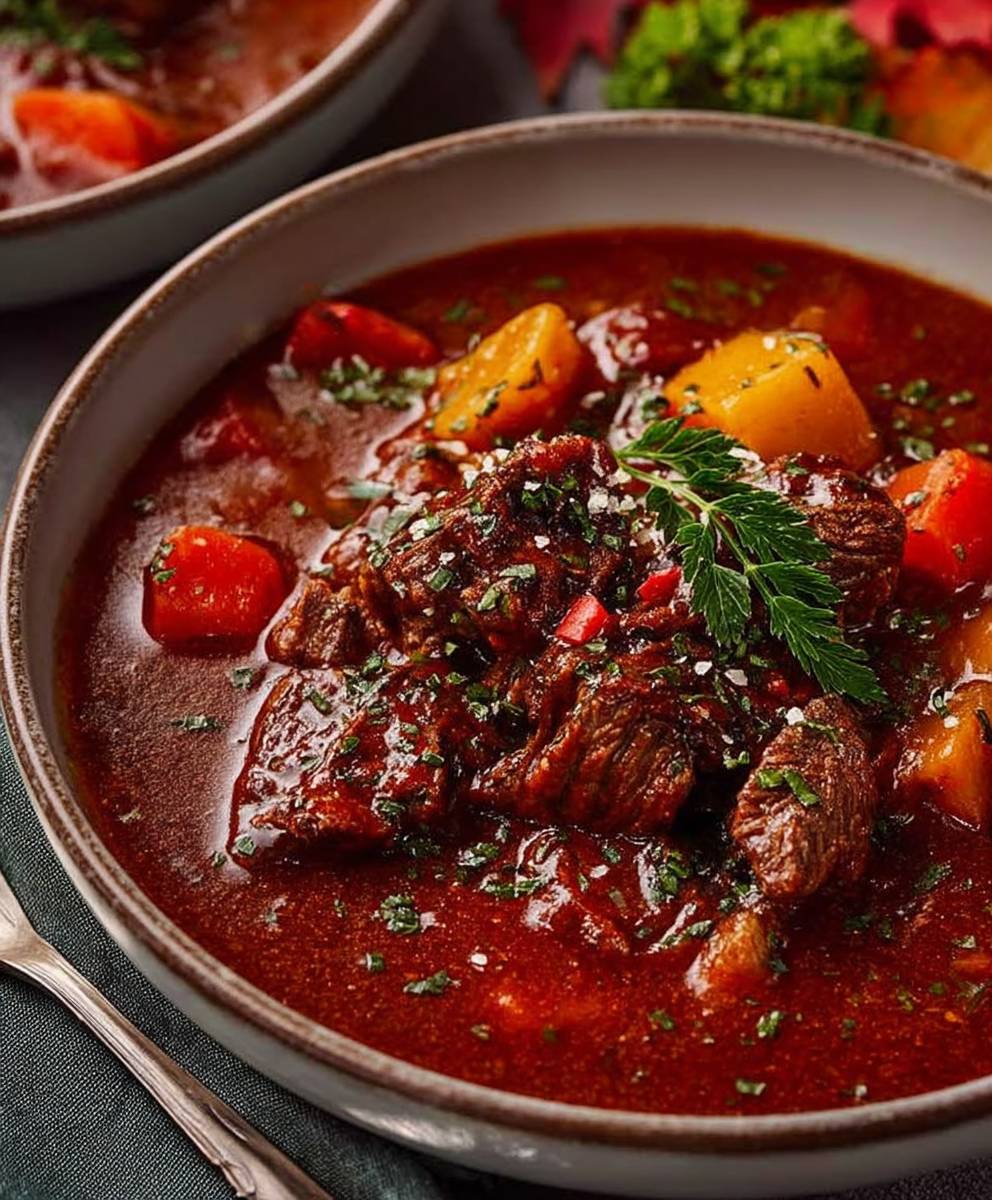
Hungarian Beef Goulash: just the name conjures images of hearty, comforting warmth, doesn’t it? Imagine sinking your spoon into a rich, paprika-infused stew, the tender beef practically melting in your mouth. This isn’t just a recipe; it’s an experience, a culinary journey to the heart of Hungary.
Goulash, or “gulyás” as it’s known in its homeland, has a fascinating history. Originating as a simple herdsman’s stew cooked over an open fire on the plains of Hungary, it was a practical and nourishing meal for those who spent long days tending livestock. Over time, it evolved from a basic peasant dish into a national treasure, with countless regional variations and family secrets passed down through generations.
What makes Hungarian Beef Goulash so beloved? It’s the perfect marriage of robust flavors and satisfying textures. The combination of tender beef, sweet onions, smoky paprika, and a hint of caraway creates a symphony of taste that dances on your palate. The slow cooking process allows the flavors to meld and deepen, resulting in a stew that is both comforting and complex. Beyond its incredible taste, goulash is also surprisingly versatile. It’s perfect for a cozy weeknight dinner, a festive gathering, or even a make-ahead meal that gets better with age. So, are you ready to embark on this delicious adventure? Let’s get cooking!

Ingredients:
- 2 lbs beef chuck, cut into 1-inch cubes
- 2 large onions, chopped
- 2 tablespoons sweet paprika
- 1 tablespoon smoked paprika
- 1 teaspoon caraway seeds, crushed
- 1/2 teaspoon marjoram
- 1/4 teaspoon cayenne pepper (optional)
- 2 tablespoons tomato paste
- 2 tablespoons all-purpose flour
- 4 tablespoons olive oil or lard
- 6 cups beef broth
- 2 red bell peppers, cored, seeded, and chopped
- 4 medium potatoes, peeled and cubed
- 2 cloves garlic, minced
- 1 teaspoon salt, or to taste
- 1/2 teaspoon black pepper, or to taste
- 1 bay leaf
- 1 tablespoon red wine vinegar (optional)
- Fresh parsley, chopped, for garnish
- Sour cream or Greek yogurt, for serving (optional)
Preparing the Beef and Aromatics
- Prepare the Beef: Pat the beef cubes dry with paper towels. This is crucial for getting a good sear, which adds depth of flavor to the goulash. Season the beef generously with salt and pepper.
- Sear the Beef: In a large, heavy-bottomed pot or Dutch oven, heat 2 tablespoons of olive oil or lard over medium-high heat. Add the beef in batches, being careful not to overcrowd the pot. Overcrowding will lower the temperature and cause the beef to steam instead of sear. Sear each batch on all sides until nicely browned, about 3-5 minutes per batch. Remove the seared beef from the pot and set aside.
- Sauté the Onions: Add the remaining 2 tablespoons of olive oil or lard to the pot. Reduce the heat to medium and add the chopped onions. Cook, stirring occasionally, until the onions are softened and translucent, about 8-10 minutes. Don’t rush this step; allowing the onions to caramelize slightly will add sweetness and complexity to the goulash.
- Bloom the Spices: Add the minced garlic to the pot and cook for another minute until fragrant. Stir in the sweet paprika, smoked paprika, caraway seeds, marjoram, and cayenne pepper (if using). Cook for about 30 seconds, stirring constantly, until the spices are fragrant. This process, called “blooming,” helps to release the essential oils in the spices and intensify their flavor. Be careful not to burn the spices, as this will make them bitter.
- Add Tomato Paste and Flour: Stir in the tomato paste and cook for another minute, stirring constantly. Then, sprinkle the flour over the onions and spices and cook for 1-2 minutes, stirring constantly, until the flour is lightly browned. This will help to thicken the goulash.
Building the Goulash
- Deglaze the Pot: Pour in a small amount of beef broth (about 1/2 cup) and scrape the bottom of the pot to loosen any browned bits (fond). These browned bits are packed with flavor and will add richness to the goulash.
- Combine Ingredients: Return the seared beef to the pot. Pour in the remaining beef broth, making sure the beef is mostly submerged. Add the bay leaf.
- Simmer: Bring the mixture to a simmer, then reduce the heat to low, cover the pot, and simmer for at least 2-3 hours, or until the beef is very tender. The longer the goulash simmers, the more flavorful it will become. Check the goulash occasionally and add more beef broth if needed to keep the beef submerged.
Adding Vegetables and Finishing Touches
- Add Vegetables: After the beef has simmered for at least 2 hours, add the chopped red bell peppers and cubed potatoes to the pot. Stir to combine.
- Continue Simmering: Cover the pot and continue to simmer for another 30-45 minutes, or until the potatoes are tender.
- Season to Taste: Remove the bay leaf. Taste the goulash and adjust the seasoning with salt and pepper as needed. If you like, stir in the red wine vinegar for a touch of acidity.
- Serve: Ladle the goulash into bowls and garnish with fresh parsley. Serve hot with a dollop of sour cream or Greek yogurt, if desired. This goulash is also delicious served with egg noodles or dumplings.
Tips for the Best Goulash
- Use Good Quality Beef: The quality of the beef will greatly affect the flavor of the goulash. Choose a cut of beef that is well-marbled, such as beef chuck.
- Don’t Skip the Searing: Searing the beef is essential for developing a rich, deep flavor. Make sure to sear the beef in batches to avoid overcrowding the pot.
- Be Patient: Goulash is a dish that benefits from slow cooking. The longer it simmers, the more flavorful it will become.
- Adjust the Spices to Your Taste: Feel free to adjust the amount of spices to your liking. If you prefer a spicier goulash, add more cayenne pepper.
- Make it Ahead: Goulash is even better the next day, as the flavors have had time to meld together. You can make it ahead of time and reheat it before serving.
- Freezing: Goulash freezes well. Allow it to cool completely before transferring it to freezer-safe containers. It can be stored in the freezer for up to 3 months. Thaw overnight in the refrigerator before reheating.
Variations
- Spicy Goulash: Add more cayenne pepper or a pinch of chili flakes for a spicier goulash. You can also use hot paprika instead of sweet paprika.
- Vegetarian Goulash: Substitute the beef with mushrooms or other vegetables, such as zucchini or eggplant. Use vegetable broth instead of beef broth.
- Goulash with Dumplings: Serve the goulash with homemade or store-bought dumplings.
- Bean Goulash: Add a can of drained and rinsed kidney beans or cannellini beans to the goulash during the last 30 minutes of cooking.
Serving Suggestions
- Serve with egg noodles, spaetzle, or mashed potatoes.
- Serve with a side of crusty bread for soaking up the delicious sauce.
- Top with a dollop of sour cream or Greek yogurt.
- Garnish with fresh parsley or dill.
- Serve with a side salad.
Equipment
- Large, heavy-bottomed pot or Dutch oven
- Cutting board
- Knife
- Measuring cups and spoons
- Wooden spoon or spatula
Nutritional Information (approximate, per serving)
- Calories: 450-550
- Protein: 35-45g
- Fat: 20-30g
- Carbohydrates: 30-40g
Enjoy your homemade Hungarian Beef Goulash! It’s a hearty and flavorful dish that’s perfect for a cold winter day.
Conclusion:
This isn’t just another recipe; it’s an invitation to experience the pure joy of crispy rice. From the satisfying crunch to the subtle, nutty flavor, this dish is a textural and taste sensation that will elevate any meal. I truly believe that once you try this, it will become a staple in your kitchen. It’s incredibly versatile, surprisingly easy to make, and guaranteed to impress your family and friends.
Think of it as a blank canvas for culinary creativity. Serve it as a delightful side dish alongside grilled chicken or fish, adding a delightful textural contrast to your main course. Or, get adventurous and use it as a base for a vibrant and colorful rice bowl, topped with your favorite vegetables, proteins, and sauces. Imagine a bowl filled with this golden, crispy rice, piled high with avocado, edamame, spicy tuna, and a drizzle of sriracha mayo the possibilities are endless!
For a vegetarian option, try topping the crispy rice with sautéed mushrooms, roasted vegetables like bell peppers and zucchini, and a sprinkle of toasted sesame seeds. A drizzle of teriyaki sauce or a dollop of hummus would complete the dish perfectly. If you’re feeling particularly fancy, you could even use it as a base for miniature appetizers, topping each crispy rice cake with smoked salmon and a dollop of crème fraîche, or with a vibrant salsa and a sprinkle of cotija cheese.
But the fun doesn’t stop there! Feel free to experiment with different types of rice. While I’ve used long-grain rice in this recipe, you could also try using short-grain rice for a slightly stickier texture, or even brown rice for a nuttier flavor and added health benefits. You can also infuse the cooking water with different herbs and spices to add another layer of flavor to the rice. A bay leaf, a sprig of thyme, or even a pinch of saffron can make a world of difference.
And don’t be afraid to play around with the cooking process. If you prefer a slightly softer texture, you can reduce the cooking time in the oven. If you want an even crispier result, you can broil the rice for a minute or two at the end of the cooking process, keeping a close eye on it to prevent burning.
I’m so excited for you to try this recipe and discover the magic of crispy rice for yourself. It’s a dish that’s both comforting and exciting, simple yet sophisticated, and guaranteed to bring a smile to your face.
So, what are you waiting for? Gather your ingredients, preheat your oven, and get ready to embark on a culinary adventure. I promise you won’t be disappointed. And once you’ve made it, I would absolutely love to hear about your experience. Share your photos, your variations, and your thoughts in the comments below. Let’s create a community of crispy rice enthusiasts and inspire each other with our culinary creations! I can’t wait to see what you come up with! Happy cooking!
Crispy Rice: The Ultimate Guide to Making Perfect Crispy Rice
I need the recipe to provide a description. Please provide the recipe details.


Leave a Comment