
Mozaik Pasta, a vibrant and visually stunning dish, is about to become your new favorite way to enjoy pasta! Imagine a plate bursting with colorful vegetables, perfectly cooked pasta, and a light, flavorful sauce that ties everything together. This isn’t just a meal; it’s an edible work of art that’s as delicious as it is beautiful.
While the exact origins of Mozaik Pasta are somewhat elusive, the concept of incorporating a variety of colorful vegetables into pasta dishes has roots in Italian cuisine, where fresh, seasonal ingredients are celebrated. The name itself, “Mozaik,” perfectly captures the dish’s essence a mosaic of flavors and textures that come together in perfect harmony.
People adore this dish for several reasons. First, it’s incredibly versatile. You can easily adapt it to your liking by swapping out vegetables based on what’s in season or what you have on hand. Second, it’s a fantastic way to sneak in extra veggies, making it a hit with both kids and adults. Finally, the combination of tender pasta, crisp-tender vegetables, and a light, flavorful sauce is simply irresistible. It’s a dish that’s both satisfying and refreshing, perfect for a quick weeknight dinner or a potluck gathering. Get ready to experience a pasta dish that’s as fun to make as it is to eat!

Ingredients:
- 1 pound mosaic pasta (rotini, farfalle, penne in various colors)
- 1/4 cup olive oil, extra virgin
- 1 large onion, finely chopped
- 2 cloves garlic, minced
- 1 red bell pepper, seeded and diced
- 1 yellow bell pepper, seeded and diced
- 1 green bell pepper, seeded and diced
- 1 (28 ounce) can crushed tomatoes
- 1 (15 ounce) can tomato sauce
- 1 (6 ounce) can tomato paste
- 1 teaspoon dried oregano
- 1 teaspoon dried basil
- 1/2 teaspoon dried thyme
- 1/4 teaspoon red pepper flakes (optional)
- 1 cup vegetable broth
- 1/2 cup heavy cream (optional, for a richer sauce)
- 1/4 cup grated Parmesan cheese, plus more for serving
- Salt and freshly ground black pepper to taste
- Fresh basil leaves, for garnish
- 1 pound Italian sausage, sweet or hot (optional, for a heartier dish)
- 1 (15 ounce) can cannellini beans, rinsed and drained (optional, for added protein)
- 1 cup frozen peas (optional, for added vegetables)
Preparing the Sauce:
- Sauté the Aromatics: Heat the olive oil in a large, heavy-bottomed pot or Dutch oven over medium heat. Add the chopped onion and cook until softened and translucent, about 5-7 minutes. Stir occasionally to prevent burning.
- Add the Garlic and Bell Peppers: Add the minced garlic and diced bell peppers (red, yellow, and green) to the pot. Cook for another 3-5 minutes, stirring frequently, until the peppers are slightly softened and fragrant. Be careful not to burn the garlic, as it can become bitter.
- Incorporate the Tomatoes: Stir in the crushed tomatoes, tomato sauce, and tomato paste. Mix well to combine all the ingredients. The tomato paste will add richness and depth of flavor to the sauce.
- Season the Sauce: Add the dried oregano, dried basil, dried thyme, and red pepper flakes (if using). Season with salt and freshly ground black pepper to taste. Remember that you can always add more seasoning later, but it’s difficult to remove it, so start with a smaller amount and adjust as needed.
- Simmer the Sauce: Pour in the vegetable broth. Bring the sauce to a simmer, then reduce the heat to low, cover, and let it simmer for at least 30 minutes, or up to an hour, stirring occasionally. The longer the sauce simmers, the more the flavors will meld together and deepen. This step is crucial for developing a rich and flavorful sauce.
- Optional Additions (Sausage): If using Italian sausage, remove the sausage from its casing (if applicable) and crumble it into the pot while the vegetables are sautéing. Cook the sausage until browned, breaking it up with a spoon. Drain off any excess grease before adding the tomatoes. This will add a meaty and savory element to the sauce.
- Optional Additions (Beans and Peas): If using cannellini beans and frozen peas, stir them into the sauce during the last 15 minutes of simmering. This will allow them to heat through without becoming mushy. The beans will add protein and a creamy texture, while the peas will add a touch of sweetness and freshness.
- Finishing Touches (Cream): If you want a richer and creamier sauce, stir in the heavy cream during the last 5 minutes of simmering. This will add a luxurious texture and a subtle sweetness to the sauce. Be careful not to boil the sauce after adding the cream, as it may curdle.
Cooking the Pasta:
- Boil Water: While the sauce is simmering, bring a large pot of salted water to a rolling boil. Use plenty of water to ensure that the pasta cooks evenly and doesn’t stick together. A good rule of thumb is to use at least 6 quarts of water for every pound of pasta.
- Cook the Pasta: Add the mosaic pasta to the boiling water and cook according to the package directions, usually about 8-10 minutes, or until al dente. Al dente means “to the tooth” in Italian, and it refers to pasta that is cooked but still firm to the bite.
- Drain the Pasta: Once the pasta is cooked, drain it well in a colander. Do not rinse the pasta unless you are using it in a cold salad. Rinsing removes the starch that helps the sauce cling to the pasta.
Combining and Serving:
- Combine Pasta and Sauce: Add the drained pasta to the pot with the sauce. Toss well to coat the pasta evenly with the sauce. Make sure every piece of pasta is covered in the delicious tomato sauce.
- Add Parmesan Cheese: Stir in 1/4 cup of grated Parmesan cheese. This will add a salty and savory flavor to the dish and help to thicken the sauce slightly.
- Serve Immediately: Serve the mosaic pasta immediately in bowls. Garnish with fresh basil leaves and additional grated Parmesan cheese. A sprinkle of red pepper flakes can also be added for extra heat, if desired.
- Serving Suggestions: This mosaic pasta is delicious on its own, but it can also be served with a side of garlic bread, a simple salad, or roasted vegetables. It’s a versatile dish that can be enjoyed for lunch or dinner.
- Leftovers: Leftover mosaic pasta can be stored in an airtight container in the refrigerator for up to 3 days. Reheat gently in a saucepan or microwave before serving. You may need to add a splash of water or broth to the pasta when reheating to prevent it from drying out.
Tips and Variations:
- Vegetarian Option: To make this dish vegetarian, simply omit the Italian sausage. The cannellini beans will provide a good source of protein.
- Vegan Option: To make this dish vegan, omit the Italian sausage and heavy cream. You can substitute the heavy cream with a plant-based cream alternative, such as cashew cream or coconut cream. Also, ensure the Parmesan cheese is replaced with a vegan alternative.
- Spice Level: Adjust the amount of red pepper flakes to your liking. If you prefer a milder dish, omit the red pepper flakes altogether.
- Vegetable Variations: Feel free to add other vegetables to the sauce, such as zucchini, mushrooms, or spinach. Add them during the last 15 minutes of simmering to prevent them from becoming overcooked.
- Herb Variations: Experiment with different herbs, such as rosemary, sage, or marjoram. Add them to the sauce along with the other dried herbs.
- Cheese Variations: Instead of Parmesan cheese, you can use other types of cheese, such as Pecorino Romano, Asiago, or mozzarella.
- Make Ahead: The sauce can be made ahead of time and stored in the refrigerator for up to 3 days. Simply reheat the sauce and cook the pasta when you are ready to serve.
- Freezing: The sauce can also be frozen for up to 2 months. Thaw the sauce in the refrigerator overnight before reheating.
- Pasta Shapes: While mosaic pasta is visually appealing, you can use any type of pasta you prefer, such as penne, rigatoni, or fusilli.
- Tomato Paste Tip: To prevent the tomato paste from burning, sauté it with the onions and garlic for a minute or two before adding the other ingredients. This will help to caramelize the tomato paste and enhance its flavor.
- Salt Your Pasta Water: Don’t be afraid to salt your pasta water generously. This will help to season the pasta from the inside out. The water should taste like the sea.
- Save Some Pasta Water: Before draining the pasta, reserve about 1/2 cup of the pasta water. This starchy water can be added to the sauce to help thicken it and create a creamier consistency.
- Don’t Overcook the Pasta: Overcooked pasta is mushy and unappetizing. Cook the pasta until it is al dente, which means it is firm to the bite.
- Garnish Generously: Don’t be shy with the garnishes. Fresh basil leaves and grated Parmesan cheese will add flavor and visual appeal to the dish.
Enjoy your delicious and colorful Mosaic Pasta!
Conclusion:
And there you have it! This Chocolate Ice Cream Homemade recipe is truly a game-changer. Forget store-bought tubs filled with artificial flavors and preservatives. This is the real deal: rich, decadent, and bursting with intense chocolate flavor that will leave you craving more. I know, I know, I might be biased, but trust me on this one it’s worth every single minute of effort.
Why is this recipe a must-try? Well, beyond the incredible taste, it’s about the experience. There’s something incredibly satisfying about creating something so delicious from scratch. You control the ingredients, ensuring only the highest quality chocolate and freshest cream go into your masterpiece. Plus, the aroma that fills your kitchen as the custard chills is simply divine! It’s a sensory experience that store-bought ice cream simply can’t replicate.
But the best part? The possibilities are endless! While this recipe is fantastic on its own, feel free to get creative with your serving suggestions and variations. For a classic treat, serve it in a waffle cone or a sundae dish with a generous dollop of whipped cream and a sprinkle of chocolate shavings. Or, for a more sophisticated dessert, try pairing it with warm brownies or a slice of rich chocolate cake.
Looking for variations? Oh, I’ve got you covered! If you’re a fan of nuts, stir in some chopped walnuts, pecans, or almonds after churning. For a touch of sweetness and texture, add mini chocolate chips or chunks of your favorite chocolate bar. And if you’re feeling adventurous, try infusing the cream with a hint of espresso or a splash of your favorite liqueur. A little bit of Kahlua or Baileys Irish Cream can elevate this Chocolate Ice Cream Homemade to a whole new level of indulgence.
Another fun variation is to create a rocky road version. Simply add mini marshmallows and chopped nuts to the ice cream after it’s churned. Or, for a mint chocolate chip ice cream, add a few drops of peppermint extract and some mini chocolate chips. The possibilities are truly endless, so don’t be afraid to experiment and find your perfect combination.
I truly believe that everyone should experience the joy of making homemade ice cream at least once in their lives. It’s a rewarding and delicious experience that you won’t soon forget. And this Chocolate Ice Cream Homemade recipe is the perfect place to start. It’s relatively simple to follow, even for beginner ice cream makers, and the results are guaranteed to impress.
So, what are you waiting for? Gather your ingredients, dust off your ice cream maker, and get ready to embark on a chocolatey adventure. I promise you won’t regret it. And once you’ve made your first batch, I’d love to hear about your experience! Share your photos, your variations, and your thoughts in the comments below. Let’s create a community of homemade ice cream enthusiasts and spread the joy of delicious, homemade treats. I can’t wait to see what you create! Happy churning!
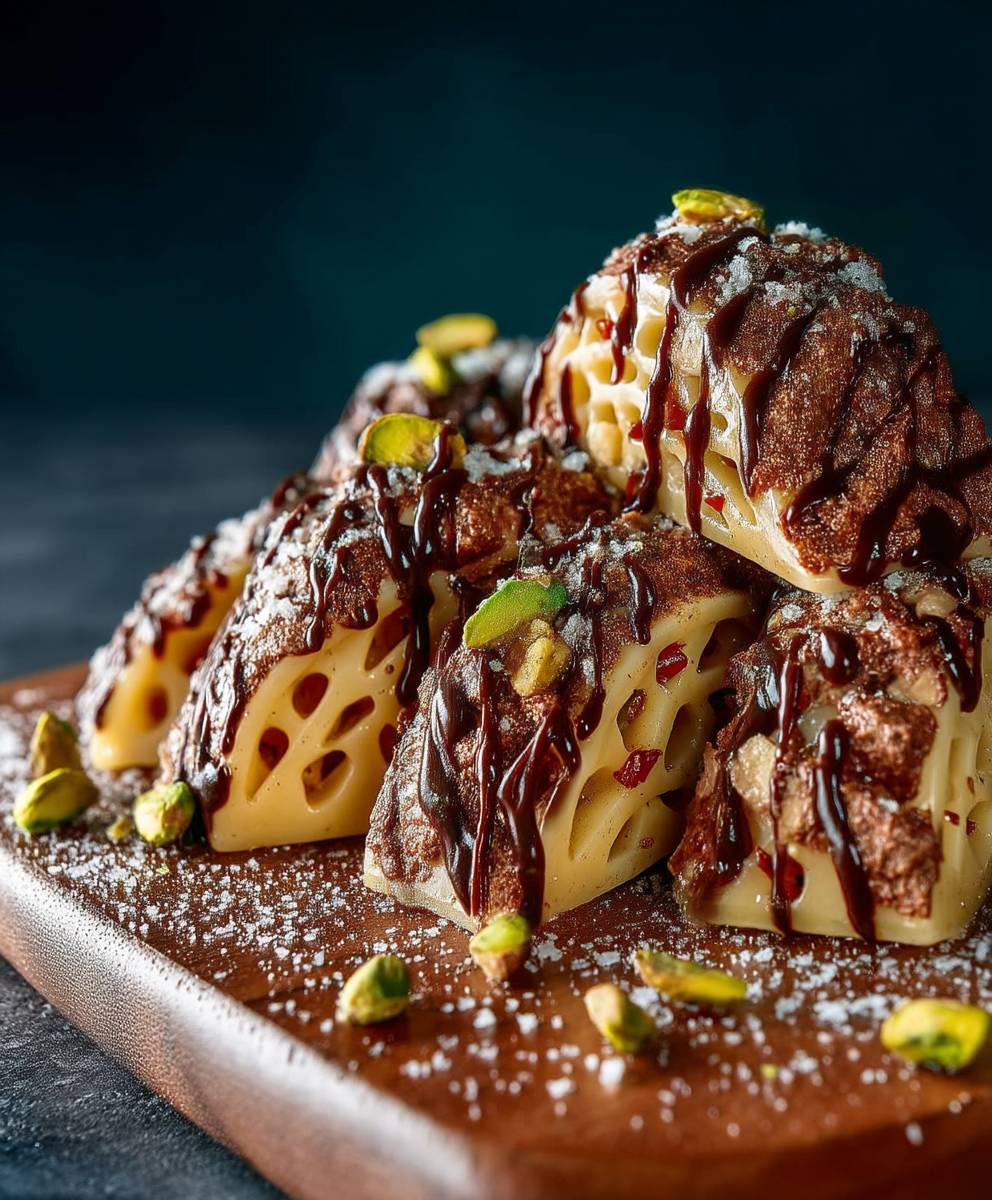
Mozaik Pasta: The Ultimate Guide to Making Turkish Mosaic Cake
A vibrant and flavorful mosaic pasta dish featuring a rich tomato sauce, colorful bell peppers, and optional additions like Italian sausage, cannellini beans, and a touch of cream.
Ingredients
- 1 pound mosaic pasta (rotini, farfalle, penne in various colors)
- 1/4 cup olive oil, extra virgin
- 1 large onion, finely chopped
- 2 cloves garlic, minced
- 1 red bell pepper, seeded and diced
- 1 yellow bell pepper, seeded and diced
- 1 green bell pepper, seeded and diced
- 1 (28 ounce) can crushed tomatoes
- 1 (15 ounce) can tomato sauce
- 1 (6 ounce) can tomato paste
- 1 teaspoon dried oregano
- 1 teaspoon dried basil
- 1/2 teaspoon dried thyme
- 1/4 teaspoon red pepper flakes (optional)
- 1 cup vegetable broth
- 1/2 cup heavy cream (optional, for a richer sauce)
- 1/4 cup grated Parmesan cheese, plus more for serving
- Salt and freshly ground black pepper to taste
- Fresh basil leaves, for garnish
- 1 pound Italian sausage, sweet or hot (optional, for a heartier dish)
- 1 (15 ounce) can cannellini beans, rinsed and drained (optional, for added protein)
- 1 cup frozen peas (optional, for added vegetables)
Instructions
- Heat the olive oil in a large, heavy-bottomed pot or Dutch oven over medium heat. Add the chopped onion and cook until softened and translucent, about 5-7 minutes. Stir occasionally to prevent burning.
- Add the minced garlic and diced bell peppers (red, yellow, and green) to the pot. Cook for another 3-5 minutes, stirring frequently, until the peppers are slightly softened and fragrant. Be careful not to burn the garlic, as it can become bitter.
- Stir in the crushed tomatoes, tomato sauce, and tomato paste. Mix well to combine all the ingredients. The tomato paste will add richness and depth of flavor to the sauce.
- Add the dried oregano, dried basil, dried thyme, and red pepper flakes (if using). Season with salt and freshly ground black pepper to taste. Remember that you can always add more seasoning later, but it’s difficult to remove it, so start with a smaller amount and adjust as needed.
- Pour in the vegetable broth. Bring the sauce to a simmer, then reduce the heat to low, cover, and let it simmer for at least 30 minutes, or up to an hour, stirring occasionally. The longer the sauce simmers, the more the flavors will meld together and deepen. This step is crucial for developing a rich and flavorful sauce.
- If using Italian sausage, remove the sausage from its casing (if applicable) and crumble it into the pot while the vegetables are sautéing. Cook the sausage until browned, breaking it up with a spoon. Drain off any excess grease before adding the tomatoes. This will add a meaty and savory element to the sauce.
- If using cannellini beans and frozen peas, stir them into the sauce during the last 15 minutes of simmering. This will allow them to heat through without becoming mushy. The beans will add protein and a creamy texture, while the peas will add a touch of sweetness and freshness.
- If you want a richer and creamier sauce, stir in the heavy cream during the last 5 minutes of simmering. This will add a luxurious texture and a subtle sweetness to the sauce. Be careful not to boil the sauce after adding the cream, as it may curdle.
- While the sauce is simmering, bring a large pot of salted water to a rolling boil. Use plenty of water to ensure that the pasta cooks evenly and doesn’t stick together. A good rule of thumb is to use at least 6 quarts of water for every pound of pasta.
- Add the mosaic pasta to the boiling water and cook according to the package directions, usually about 8-10 minutes, or until al dente. Al dente means “to the tooth” in Italian, and it refers to pasta that is cooked but still firm to the bite.
- Once the pasta is cooked, drain it well in a colander. Do not rinse the pasta unless you are using it in a cold salad. Rinsing removes the starch that helps the sauce cling to the pasta.
- Add the drained pasta to the pot with the sauce. Toss well to coat the pasta evenly with the sauce. Make sure every piece of pasta is covered in the delicious tomato sauce.
- Stir in 1/4 cup of grated Parmesan cheese. This will add a salty and savory flavor to the dish and help to thicken the sauce slightly.
- Serve the mosaic pasta immediately in bowls. Garnish with fresh basil leaves and additional grated Parmesan cheese. A sprinkle of red pepper flakes can also be added for extra heat, if desired.
- This mosaic pasta is delicious on its own, but it can also be served with a side of garlic bread, a simple salad, or roasted vegetables. It’s a versatile dish that can be enjoyed for lunch or dinner.
- Leftover mosaic pasta can be stored in an airtight container in the refrigerator for up to 3 days. Reheat gently in a saucepan or microwave before serving. You may need to add a splash of water or broth to the pasta when reheating to prevent it from drying out.
Notes
- Vegetarian Option: To make this dish vegetarian, simply omit the Italian sausage. The cannellini beans will provide a good source of protein.
- Vegan Option: To make this dish vegan, omit the Italian sausage and heavy cream. You can substitute the heavy cream with a plant-based cream alternative, such as cashew cream or coconut cream. Also, ensure the Parmesan cheese is replaced with a vegan alternative.
- Spice Level: Adjust the amount of red pepper flakes to your liking. If you prefer a milder dish, omit the red pepper flakes altogether.
- Vegetable Variations: Feel free to add other vegetables to the sauce, such as zucchini, mushrooms, or spinach. Add them during the last 15 minutes of simmering to prevent them from becoming overcooked.
- Herb Variations: Experiment with different herbs, such as rosemary, sage, or marjoram. Add them to the sauce along with the other dried herbs.
- Cheese Variations: Instead of Parmesan cheese, you can use other types of cheese, such as Pecorino Romano, Asiago, or mozzarella.
- Make Ahead: The sauce can be made ahead of time and stored in the refrigerator for up to 3 days. Simply reheat the sauce and cook the pasta when you are ready to serve.
- Freezing: The sauce can also be frozen for up to 2 months. Thaw the sauce in the refrigerator overnight before reheating.
- Pasta Shapes: While mosaic pasta is visually appealing, you can use any type of pasta you prefer, such as penne, rigatoni, or fusilli.
- Tomato Paste Tip: To prevent the tomato paste from burning, sauté it with the onions and garlic for a minute or two before adding the other ingredients. This will help to caramelize the tomato paste and enhance its flavor.
- Salt Your Pasta Water: Don’t be afraid to salt your pasta water generously. This will help to season the pasta from the inside out. The water should taste like the sea.
- Save Some Pasta Water: Before draining the pasta, reserve about 1/2 cup of the pasta water. This starchy water can be added to the sauce to help thicken it and create a creamier consistency.
- Don’t Overcook the Pasta: Overcooked pasta is mushy and unappetizing. Cook the pasta until it is al dente, which means it is firm to the bite.
- Garnish Generously: Don’t be shy with the garnishes. Fresh basil leaves and grated Parmesan cheese will add flavor and visual appeal to the dish.


Leave a Comment