
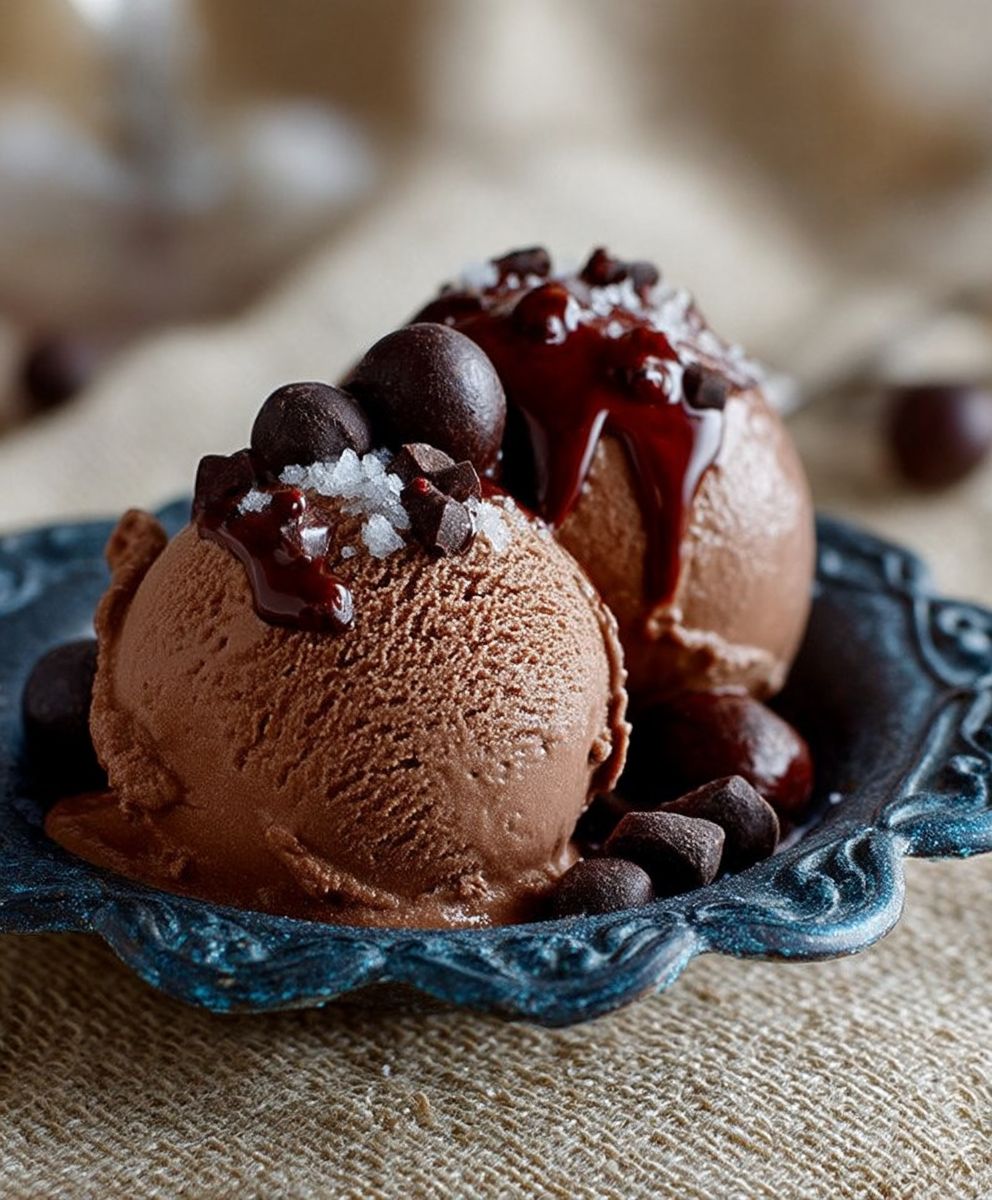
Chocolate Ice Cream Homemade: Is there anything more universally loved than a scoop of rich, decadent chocolate ice cream? I think not! Imagine sinking your spoon into a velvety smooth, intensely chocolatey creation, made entirely from scratch in your own kitchen. Forget the store-bought stuff we’re talking about a truly unforgettable frozen treat that will have everyone begging for seconds.
While the exact origins of ice cream are debated, frozen desserts have been enjoyed for centuries. Some historians trace early versions back to ancient China and Rome, where emperors enjoyed flavored ices. Chocolate, as a flavor, gained popularity much later, following the arrival of cacao beans in Europe. The combination of chocolate and ice cream is a match made in dessert heaven, offering a delightful contrast of sweet and slightly bitter notes.
People adore chocolate ice cream homemade because it’s more than just a dessert; it’s an experience. The creamy texture, the intense chocolate flavor, and the sheer joy of indulging in something so delicious are simply irresistible. Plus, making it at home allows you to control the ingredients, ensuring a high-quality, preservative-free treat. Get ready to embark on a culinary adventure that will transform your understanding of what truly great chocolate ice cream can be!

Ingredients:
- 1 cup (240ml) heavy cream
- 2 cups (480ml) whole milk
- ¾ cup (150g) granulated sugar
- ½ cup (50g) unsweetened cocoa powder, preferably Dutch-processed
- ? teaspoon salt
- 6 ounces (170g) bittersweet chocolate, finely chopped
- 1 teaspoon vanilla extract
- Optional: ¼ cup chocolate chips or chunks for added texture
Preparing the Chocolate Base:
Okay, let’s get started! The key to amazing homemade chocolate ice cream is a rich, flavorful base. We’re going to create that by gently heating the dairy with cocoa powder and sugar, then melting in the chocolate for a super smooth texture.
- Combine Dairy, Sugar, Cocoa, and Salt: In a medium saucepan, whisk together the heavy cream, whole milk, granulated sugar, cocoa powder, and salt. Make sure the cocoa powder is fully incorporated to avoid any lumps. Nobody wants lumpy ice cream!
- Heat the Mixture: Place the saucepan over medium heat. Stir constantly with a whisk to prevent scorching on the bottom. We want the sugar to dissolve completely and the mixture to become warm, but not boiling. Aim for a temperature around 170-175°F (77-79°C). If you don’t have a thermometer, just watch for steam and tiny bubbles forming around the edges of the pan.
- Melt the Chocolate: Remove the saucepan from the heat. Add the finely chopped bittersweet chocolate to the warm dairy mixture. Let it sit for about a minute to soften the chocolate.
- Whisk Until Smooth: Now, whisk vigorously until the chocolate is completely melted and the mixture is smooth and glossy. This might take a minute or two, but be patient and keep whisking! You should have a beautiful, rich chocolate sauce.
- Incorporate Vanilla Extract: Stir in the vanilla extract. This adds a lovely depth of flavor to the ice cream.
Chilling the Chocolate Base:
This is a crucial step! Chilling the base allows the flavors to meld together and the mixture to thicken slightly, resulting in a smoother, creamier ice cream. Don’t skip this!
- Cool Slightly: Let the chocolate mixture cool slightly at room temperature for about 30 minutes. This will prevent condensation from forming when you transfer it to the refrigerator.
- Refrigerate Thoroughly: Pour the cooled chocolate mixture into an airtight container. Cover it tightly and refrigerate for at least 4 hours, or preferably overnight. The longer it chills, the better the flavor and texture will be. I usually make this the day before I plan to churn the ice cream.
Churning the Ice Cream:
Finally, the fun part! Churning incorporates air into the mixture, creating that light and airy texture we all love in ice cream. Make sure your ice cream maker bowl is properly frozen before you start.
- Prepare Your Ice Cream Maker: Ensure your ice cream maker bowl is completely frozen. This usually requires at least 15-24 hours in the freezer, depending on your machine. Check your ice cream maker’s instructions for specific recommendations.
- Pour in the Chilled Base: Remove the chilled chocolate base from the refrigerator and give it a quick whisk to ensure it’s smooth. Pour the mixture into the frozen ice cream maker bowl.
- Churn According to Manufacturer’s Instructions: Turn on your ice cream maker and churn the mixture according to the manufacturer’s instructions. This usually takes about 20-30 minutes, or until the ice cream reaches a soft-serve consistency. The ice cream should be thick and creamy, but still slightly soft.
- Add Chocolate Chips (Optional): If you’re using chocolate chips or chunks, add them during the last few minutes of churning. This will ensure they are evenly distributed throughout the ice cream.
Freezing and Storing the Ice Cream:
While you could technically eat the ice cream straight from the ice cream maker (and I won’t judge you if you do!), it will be much better if you freeze it for a few hours to firm it up.
- Transfer to an Airtight Container: Transfer the soft-serve ice cream to an airtight container. A freezer-safe container with a tight-fitting lid is ideal.
- Press Plastic Wrap Against the Surface: To prevent ice crystals from forming on the surface of the ice cream, press a piece of plastic wrap directly onto the top of the ice cream before sealing the container.
- Freeze for at Least 2-3 Hours: Freeze the ice cream for at least 2-3 hours, or until it reaches your desired consistency. This will allow it to firm up and become scoopable.
- Store Properly: Store the ice cream in the freezer for up to 2 weeks. After that, it may start to develop ice crystals and lose some of its flavor.
Tips for the Best Homemade Chocolate Ice Cream:
- Use High-Quality Ingredients: The better the ingredients, the better the ice cream! Use good quality heavy cream, whole milk, and bittersweet chocolate for the best flavor.
- Dutch-Processed Cocoa Powder: Dutch-processed cocoa powder has a smoother, less acidic flavor than natural cocoa powder. It also gives the ice cream a darker color.
- Finely Chop the Chocolate: Finely chopping the chocolate ensures that it melts quickly and evenly into the warm dairy mixture.
- Don’t Over-Churn: Over-churning can result in a grainy texture. Churn the ice cream until it reaches a soft-serve consistency, then transfer it to the freezer to firm up.
- Chill Thoroughly: Chilling the base for at least 4 hours, or preferably overnight, is essential for a smooth, creamy texture.
- Prevent Ice Crystals: Pressing plastic wrap against the surface of the ice cream before freezing helps to prevent ice crystals from forming.
- Softening Before Serving: Let the ice cream sit at room temperature for a few minutes before scooping to soften it slightly. This will make it easier to scoop and improve the texture.
Variations:
Want to get creative? Here are a few ideas for variations:
- Mint Chocolate Chip: Add ½ teaspoon of peppermint extract and ½ cup of mini chocolate chips during the last few minutes of churning.
- Chocolate Peanut Butter: Swirl in ½ cup of peanut butter during the last few minutes of churning.
- Rocky Road: Add ½ cup of mini marshmallows, ½ cup of chopped walnuts, and ½ cup of chocolate chips during the last few minutes of churning.
- Mexican Chocolate: Add ¼ teaspoon of ground cinnamon and a pinch of cayenne pepper to the chocolate base.
- Espresso Chocolate: Add 1-2 teaspoons of instant espresso powder to the chocolate base.
Enjoy!
I hope you enjoy this recipe for homemade chocolate ice cream! It’s a labor of love, but the results are so worth it. There’s nothing quite like the taste of homemade ice cream, and this recipe is sure to impress your friends and family. Happy churning!
Conclusion:
And there you have it! This recipe for Roasted Chicken Pieces is truly a game-changer. It’s not just about throwing some chicken in the oven; it’s about achieving that perfect balance of crispy skin, juicy meat, and incredible flavor with minimal effort. Honestly, if you’re looking for a weeknight dinner that feels special without requiring hours in the kitchen, this is it. I promise, your family (and you!) will thank you.
But why is this recipe a must-try? Beyond the ease of preparation, it’s the versatility that really shines. You can easily adapt the seasonings to your liking. Feeling spicy? Add a pinch of cayenne pepper or some chili flakes to the spice rub. Prefer a more herby flavor? Load up on the rosemary, thyme, and oregano. The possibilities are endless! And because we’re using individual pieces, the cooking time is significantly reduced compared to roasting a whole chicken, making it perfect for those busy evenings.
Now, let’s talk serving suggestions. These Roasted Chicken Pieces are fantastic served alongside a simple green salad and some roasted vegetables like broccoli, carrots, or Brussels sprouts. For a heartier meal, try pairing them with mashed potatoes, creamy polenta, or even a side of quinoa. And don’t forget the gravy! A simple pan gravy made with the chicken drippings will elevate this dish to a whole new level of deliciousness.
Looking for variations? Consider marinating the chicken pieces before roasting for even more intense flavor. A lemon-herb marinade or a buttermilk marinade would work beautifully. You could also experiment with different cuts of chicken. While this recipe is written for bone-in, skin-on chicken pieces, you could certainly use boneless, skinless chicken breasts or thighs, just be sure to adjust the cooking time accordingly. Another fun idea is to add some vegetables directly to the roasting pan with the chicken. Potatoes, onions, and bell peppers would all roast up nicely alongside the chicken, creating a complete one-pan meal.
I truly believe that this recipe for Roasted Chicken Pieces will become a staple in your kitchen. It’s simple, flavorful, and incredibly versatile. It’s the kind of recipe that you can rely on time and time again, knowing that it will always deliver a delicious and satisfying meal.
So, what are you waiting for? Preheat your oven, gather your ingredients, and get ready to experience the joy of perfectly roasted chicken. I’m confident that you’ll love this recipe as much as I do.
And most importantly, I want to hear about your experience! Did you try this recipe? What variations did you make? What did you serve it with? Share your thoughts, photos, and tips in the comments below. I can’t wait to see what you create! Happy cooking! I am sure you will love this Roasted Chicken Pieces recipe.
Chocolate Ice Cream Homemade: The Ultimate Guide
Rich, creamy homemade chocolate ice cream made with quality ingredients for an unforgettable dessert.
Ingredients
- 1 cup (240ml) heavy cream
- 2 cups (480ml) whole milk
- ¾ cup (150g) granulated sugar
- ½ cup (50g) unsweetened cocoa powder, preferably Dutch-processed
- ? teaspoon salt
- 6 ounces (170g) bittersweet chocolate, finely chopped
- 1 teaspoon vanilla extract
- Optional: ¼ cup chocolate chips or chunks for added texture
Instructions
- Combine Dairy, Sugar, Cocoa, and Salt: In a medium saucepan, whisk together the heavy cream, whole milk, granulated sugar, cocoa powder, and salt. Ensure the cocoa powder is fully incorporated.
- Heat the Mixture: Place the saucepan over medium heat. Stir constantly with a whisk until the sugar dissolves and the mixture is warm (around 170-175°F or 77-79°C), but not boiling.
- Melt the Chocolate: Remove from heat. Add the finely chopped bittersweet chocolate and let it sit for a minute to soften.
- Whisk Until Smooth: Whisk vigorously until the chocolate is completely melted and the mixture is smooth and glossy.
- Incorporate Vanilla Extract: Stir in the vanilla extract.
- Cool Slightly: Let the chocolate mixture cool slightly at room temperature for about 30 minutes.
- Refrigerate Thoroughly: Pour the cooled mixture into an airtight container and refrigerate for at least 4 hours, or preferably overnight.
- Prepare Your Ice Cream Maker: Ensure your ice cream maker bowl is completely frozen (usually 15-24 hours).
- Pour in the Chilled Base: Remove the chilled chocolate base from the refrigerator and whisk to ensure it’s smooth. Pour the mixture into the frozen ice cream maker bowl.
- Churn According to Manufacturer’s Instructions: Turn on your ice cream maker and churn the mixture according to the manufacturer’s instructions (usually 20-30 minutes), until it reaches a soft-serve consistency.
- Add Chocolate Chips (Optional): If using, add chocolate chips or chunks during the last few minutes of churning.
- Transfer to an Airtight Container: Transfer the soft-serve ice cream to an airtight container.
- Press Plastic Wrap Against the Surface: Press a piece of plastic wrap directly onto the top of the ice cream before sealing the container.
- Freeze for at Least 2-3 Hours: Freeze the ice cream for at least 2-3 hours, or until it reaches your desired consistency.
- Store Properly: Store the ice cream in the freezer for up to 2 weeks.
Notes
- Use high-quality ingredients for the best flavor.
- Dutch-processed cocoa powder is recommended for a smoother, less acidic flavor.
- Finely chop the chocolate for even melting.
- Don’t over-churn the ice cream.
- Chilling the base thoroughly is essential for a smooth, creamy texture.
- Pressing plastic wrap against the surface prevents ice crystals.
- Let the ice cream soften slightly before serving for easier scooping.


Leave a Comment