
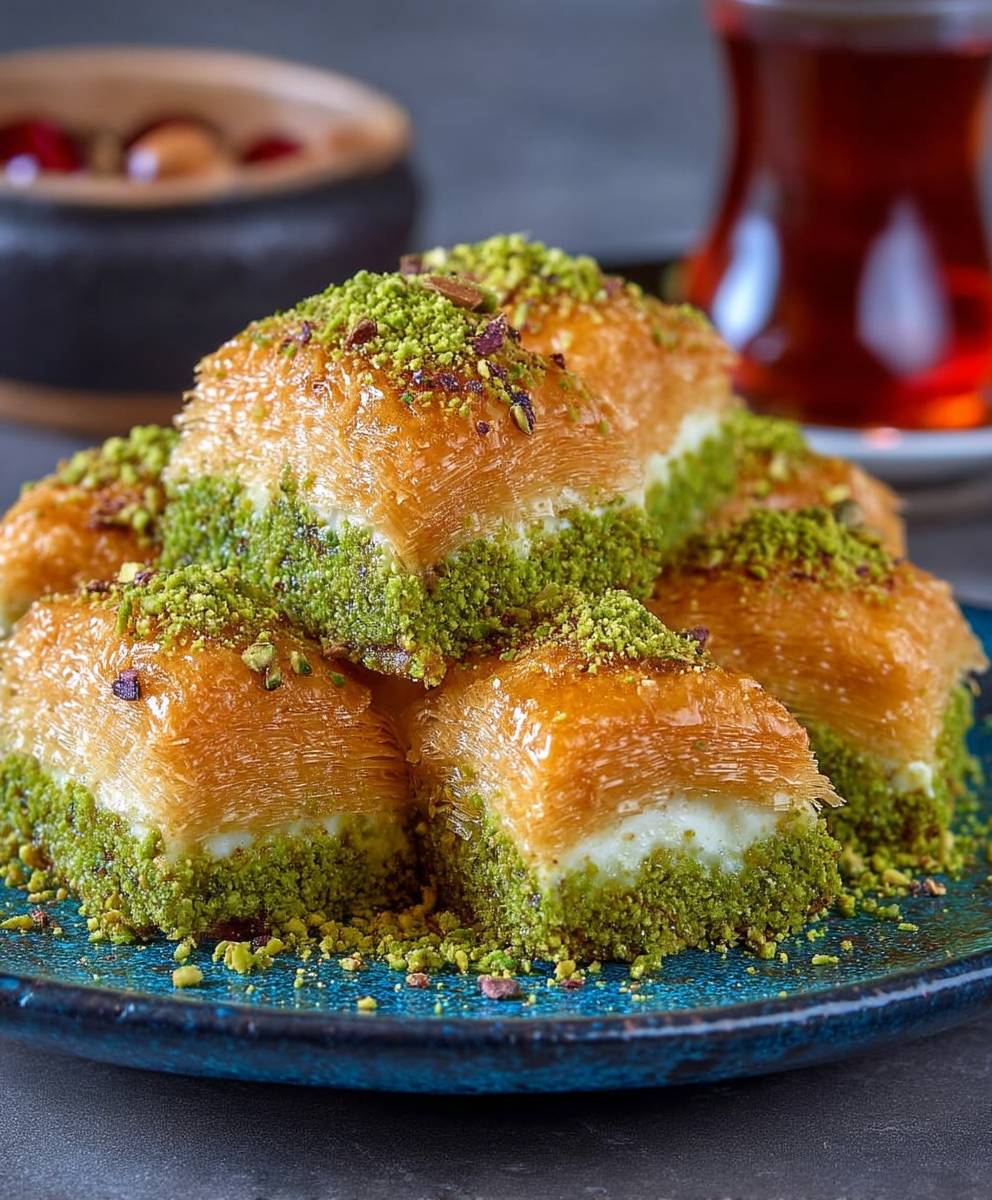
Turkish desserts: Prepare to embark on a culinary journey to the heart of Turkey, where sweetness reigns supreme! Forget everything you thought you knew about after-dinner treats because we’re diving headfirst into a world of syrupy delights, nutty textures, and aromatic spices that will tantalize your taste buds. Have you ever wondered what it would be like to taste a cloud of pistachio-studded pastry soaked in honey? Or perhaps a creamy, milk-based pudding infused with rosewater?
Turkish desserts are more than just sweet endings; they’re a reflection of the country’s rich history and cultural heritage. Many of these recipes have been passed down through generations, evolving over centuries within the Ottoman Empire and beyond. Think of baklava, for example, a dessert with roots stretching back to ancient Mesopotamia, perfected over time by skilled Ottoman bakers.
What makes Turkish desserts so irresistible? It’s the perfect balance of flavors and textures. The combination of flaky pastry, crunchy nuts, and sweet syrup is simply divine. Plus, many of these desserts are surprisingly easy to make at home, allowing you to bring a taste of Turkey to your own kitchen. Whether you’re craving something rich and decadent or light and refreshing, there’s a Turkish dessert out there to satisfy every sweet tooth. So, let’s get baking and discover the magic of Turkish sweets together!

Ingredients:
- For the Baklava:
- 1 pound phyllo dough, thawed
- 1 1/2 cups (3 sticks) unsalted butter, melted
- 1 1/2 cups chopped walnuts
- 1/2 cup chopped pistachios (optional)
- 1 teaspoon ground cinnamon
- 1/4 teaspoon ground cloves
- For the Syrup:
- 2 cups granulated sugar
- 1 cup water
- 1/4 cup honey
- 1 tablespoon lemon juice
- 1 teaspoon orange blossom water (optional)
- For the Künefe:
- 1 pound kaday?f (shredded phyllo dough)
- 1/2 cup unsalted butter, melted
- 8 ounces unsalted mozzarella cheese, shredded (or künefe cheese if available)
- 2 tablespoons unsalted butter, for greasing the pan
- For the Künefe Syrup:
- 1 cup granulated sugar
- 1/2 cup water
- 1 tablespoon lemon juice
- For the Turkish Delight (Lokum):
- 2 cups granulated sugar
- 1 1/2 cups water, divided
- 1 cup cornstarch
- 1/4 teaspoon cream of tartar
- 1 tablespoon rosewater (or other flavoring, like lemon or orange)
- Food coloring (optional)
- Powdered sugar, for dusting
Making Baklava:
- Prepare the Nut Mixture: In a bowl, combine the chopped walnuts, pistachios (if using), cinnamon, and cloves. Mix well and set aside. This aromatic mixture is what gives baklava its signature flavor.
- Prepare the Phyllo Dough: Unroll the phyllo dough on a clean, dry surface. Keep it covered with a damp towel to prevent it from drying out. Phyllo dries out incredibly quickly, so this step is crucial.
- Assemble the Baklava: Preheat your oven to 350°F (175°C). Grease a 9×13 inch baking pan with some of the melted butter. Place one sheet of phyllo dough in the pan, brush it generously with melted butter. Repeat this process with 5-6 sheets of phyllo dough, buttering each layer thoroughly.
- Add the Nut Filling: Spread half of the nut mixture evenly over the buttered phyllo layers.
- Continue Layering: Add another 5-6 sheets of phyllo dough, buttering each layer as before. Spread the remaining nut mixture over the phyllo.
- Finish with Phyllo: Top with the remaining phyllo sheets, buttering each layer. You should have a good stack of buttery, flaky layers.
- Cut the Baklava: Before baking, use a sharp knife to cut the baklava into diamond or square shapes. Cut all the way through the layers. This is important for even baking and syrup absorption.
- Bake the Baklava: Bake in the preheated oven for 45-50 minutes, or until golden brown and crispy. Keep a close eye on it to prevent burning.
- Prepare the Syrup While Baking: While the baklava is baking, prepare the syrup. In a saucepan, combine the sugar, water, and honey. Bring to a boil over medium heat, stirring until the sugar is dissolved. Reduce the heat and simmer for 10-15 minutes, or until the syrup has thickened slightly.
- Add Lemon Juice and Orange Blossom Water: Remove the syrup from the heat and stir in the lemon juice and orange blossom water (if using). The lemon juice helps prevent the syrup from crystallizing.
- Pour the Syrup: Once the baklava is out of the oven, immediately pour the hot syrup evenly over the hot baklava. The sizzling sound is a good sign! Make sure the syrup gets into all the cuts.
- Let it Rest: Let the baklava cool completely and absorb the syrup for at least 4-6 hours, or preferably overnight, before serving. This allows the flavors to meld together beautifully.
Making Künefe:
- Prepare the Kaday?f: If the kaday?f is in long strands, use your hands to break it into smaller pieces. Place the kaday?f in a large bowl and pour the melted butter over it. Use your hands to thoroughly mix the butter into the kaday?f, ensuring that all the strands are coated.
- Prepare the Künefe Syrup: In a saucepan, combine the sugar and water. Bring to a boil over medium heat, stirring until the sugar is dissolved. Reduce the heat and simmer for 5-7 minutes, or until the syrup has thickened slightly. Remove from heat and stir in the lemon juice. Set aside to cool slightly.
- Assemble the Künefe: Grease two small, oven-safe pans (about 6-8 inches in diameter) with the remaining butter. Divide the buttered kaday?f in half. Press half of the kaday?f firmly into the bottom of each pan, creating a compact layer.
- Add the Cheese: Sprinkle the shredded mozzarella cheese (or künefe cheese) evenly over the kaday?f layer in each pan, leaving a small border around the edges.
- Top with Kaday?f: Top the cheese with the remaining kaday?f, pressing it down gently to create another compact layer.
- Cook the Künefe: There are a few ways to cook künefe. You can cook it on the stovetop over medium-low heat, rotating the pan occasionally, until the bottom is golden brown and crispy (about 10-15 minutes). Alternatively, you can bake it in a preheated oven at 350°F (175°C) for 15-20 minutes, or until golden brown. I prefer the stovetop method for a crispier result.
- Flip and Cook the Other Side (Stovetop Method): If cooking on the stovetop, carefully flip the künefe onto a plate and then slide it back into the pan to cook the other side until golden brown and crispy (another 5-10 minutes).
- Pour the Syrup: Immediately pour the warm syrup evenly over the hot künefe.
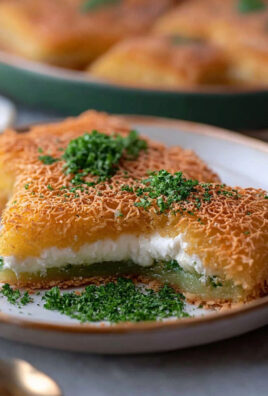
- Serve Immediately: Serve the künefe immediately while it’s hot and the cheese is melted and gooey. Garnish with chopped pistachios, if desired.
Making Turkish Delight (Lokum):
- Prepare the Cornstarch Mixture: In a small bowl, whisk together 1/2 cup of the water and the cornstarch until smooth. Set aside. This is your thickening agent.
- Prepare the Sugar Syrup: In a large, heavy-bottomed saucepan, combine the sugar and the remaining 1 cup of water. Bring to a boil over medium heat, stirring until the sugar is dissolved.
- Add Cream of Tartar: Add the cream of tartar to the boiling sugar syrup. This helps prevent crystallization and gives the lokum its chewy texture.
- Simmer the Syrup: Reduce the heat to low and simmer the syrup for about 20 minutes, or until it thickens slightly. It should coat the back of a spoon.
- Add the Cornstarch Mixture: Gradually whisk the cornstarch mixture into the simmering syrup. Be careful, as it will thicken quickly.
- Cook the Mixture: Continue to cook the mixture over low heat, stirring constantly, for about 1-1.5 hours. This is the most crucial step. The mixture will become very thick and sticky, and it will change from opaque to translucent. It requires patience and constant stirring to prevent burning. The mixture is ready when it pulls away from the sides of the pan and forms a ball.
- Add Flavoring and Coloring: Remove the saucepan from the heat and stir in the rosewater (or other flavoring) and food coloring (if using). Mix well.
- Prepare the Pan: Lightly grease an 8×8 inch baking pan and dust it generously with powdered sugar.
- Pour the Mixture: Pour the lokum mixture into the prepared pan and spread it evenly.
- Let it Set: Let the lokum set at room temperature for at least 4-6 hours, or preferably overnight, until firm.
- Cut and Coat: Once the lokum is firm, dust a cutting board with powdered sugar. Turn the lokum out onto the cutting board and cut it into small squares or cubes.
- Coat with Powder
Conclusion:
This Roasted Onion Salad isn’t just another salad; it’s a flavor explosion waiting to happen! The sweetness of the caramelized onions, the tangy dressing, and the fresh herbs all come together to create a dish that’s both comforting and sophisticated. I truly believe this recipe is a must-try for anyone looking to elevate their salad game. It’s incredibly versatile, surprisingly easy to make, and guaranteed to impress your family and friends.
Think of it as a blank canvas for your culinary creativity. While I’ve outlined my favorite combination of ingredients, feel free to experiment and make it your own. For a heartier meal, try adding grilled chicken or shrimp. The smoky char complements the sweetness of the onions beautifully. Alternatively, crumbled goat cheese or feta would add a delightful creamy tang. Toasted nuts, like pecans or walnuts, would provide a satisfying crunch.
Serving suggestions are endless! This Roasted Onion Salad makes a fantastic side dish for grilled meats, roasted vegetables, or even a simple piece of fish. It’s also wonderful served warm or at room temperature, making it perfect for potlucks and picnics. I’ve even enjoyed it as a light lunch, topped with a poached egg for added protein.
For a variation, consider using different types of onions. Red onions will add a beautiful color and a slightly sharper flavor, while shallots will provide a more delicate sweetness. You could also experiment with different herbs. Thyme, rosemary, or even a touch of chili flakes would add a unique twist. Don’t be afraid to get creative with the dressing too! A balsamic vinaigrette would be a classic choice, or you could try a lemon-herb vinaigrette for a brighter flavor. A honey-mustard dressing would also pair well with the sweetness of the onions.
I’m so excited for you to try this recipe and experience the magic of perfectly roasted onions. It’s one of those dishes that I find myself making again and again, and I’m confident that you’ll love it just as much as I do. The key is to be patient with the onions and allow them to caramelize properly. This is where the real flavor develops. Don’t rush the process, and you’ll be rewarded with the most delicious, sweet, and savory onions you’ve ever tasted.
So, what are you waiting for? Gather your ingredients, preheat your oven, and get ready to create a culinary masterpiece. I promise you won’t be disappointed. And once you’ve tried it, I’d love to hear about your experience! Share your photos and comments on social media using #RoastedOnionSalad or tag me in your posts. I can’t wait to see your creations and hear about your favorite variations. Happy cooking! I am sure that you will enjoy this Roasted Onion Salad as much as I do. It is a recipe that I have been perfecting for years, and I am finally ready to share it with the world. I hope you enjoy it!
Turkish Desserts: A Guide to the Sweetest Treats in Turkey
Flaky, buttery layers of phyllo dough filled with a spiced nut mixture, soaked in a sweet, lemony syrup. A classic Middle Eastern dessert.
Ingredients
“`html- 1 pound phyllo dough, thawed
- 1 1/2 cups (3 sticks) unsalted butter, melted
- 1 1/2 cups chopped walnuts
- 1/2 cup chopped pistachios (optional)
- 1 teaspoon ground cinnamon
- 1/4 teaspoon ground cloves
- 2 cups granulated sugar
- 1 cup water
- 1/4 cup honey
- 1 tablespoon lemon juice
- 1 teaspoon orange blossom water (optional)
- 1 pound kaday?f (shredded phyllo dough)
- 1/2 cup unsalted butter, melted
- 8 ounces unsalted mozzarella cheese, shredded (or künefe cheese if available)
- 2 tablespoons unsalted butter, for greasing the pan
- 1 cup granulated sugar
- 1/2 cup water
- 1 tablespoon lemon juice
- 2 cups granulated sugar
- 1 1/2 cups water, divided
- 1 cup cornstarch
- 1/4 teaspoon cream of tartar
- 1 tablespoon rosewater (or other flavoring, like lemon or orange)
- Food coloring (optional)
- Powdered sugar, for dusting
“`
Instructions
- Prepare the Nut Mixture: In a bowl, combine the chopped walnuts, pistachios (if using), cinnamon, and cloves. Mix well and set aside.
- Prepare the Phyllo Dough: Unroll the phyllo dough on a clean, dry surface. Keep it covered with a damp towel to prevent it from drying out.
- Assemble the Baklava: Preheat your oven to 350°F (175°C). Grease a 9×13 inch baking pan with some of the melted butter. Place one sheet of phyllo dough in the pan, brush it generously with melted butter. Repeat this process with 5-6 sheets of phyllo dough, buttering each layer thoroughly.
- Add the Nut Filling: Spread half of the nut mixture evenly over the buttered phyllo layers.
- Continue Layering: Add another 5-6 sheets of phyllo dough, buttering each layer as before. Spread the remaining nut mixture over the phyllo.
- Finish with Phyllo: Top with the remaining phyllo sheets, buttering each layer.
- Cut the Baklava: Before baking, use a sharp knife to cut the baklava into diamond or square shapes. Cut all the way through the layers.
- Bake the Baklava: Bake in the preheated oven for 45-50 minutes, or until golden brown and crispy.
- Prepare the Syrup While Baking: While the baklava is baking, prepare the syrup. In a saucepan, combine the sugar, water, and honey. Bring to a boil over medium heat, stirring until the sugar is dissolved. Reduce the heat and simmer for 10-15 minutes, or until the syrup has thickened slightly.
- Add Lemon Juice and Orange Blossom Water: Remove the syrup from the heat and stir in the lemon juice and orange blossom water (if using).
- Pour the Syrup: Once the baklava is out of the oven, immediately pour the hot syrup evenly over the hot baklava.
- Let it Rest: Let the baklava cool completely and absorb the syrup for at least 4-6 hours, or preferably overnight, before serving.
- Prepare the Kaday?f: If the kaday?f is in long strands, use your hands to break it into smaller pieces. Place the kaday?f in a large bowl and pour the melted butter over it. Use your hands to thoroughly mix the butter into the kaday?f, ensuring that all the strands are coated.
- Prepare the Künefe Syrup: In a saucepan, combine the sugar and water. Bring to a boil over medium heat, stirring until the sugar is dissolved. Reduce the heat and simmer for 5-7 minutes, or until the syrup has thickened slightly. Remove from heat and stir in the lemon juice. Set aside to cool slightly.
- Assemble the Künefe: Grease two small, oven-safe pans (about 6-8 inches in diameter) with the remaining butter. Divide the buttered kaday?f in half. Press half of the kaday?f firmly into the bottom of each pan, creating a compact layer.
- Add the Cheese: Sprinkle the shredded mozzarella cheese (or künefe cheese) evenly over the kaday?f layer in each pan, leaving a small border around the edges.
- Top with Kaday?f: Top the cheese with the remaining kaday?f, pressing it down gently to create another compact layer.
- Cook the Künefe: You can cook it on the stovetop over medium-low heat, rotating the pan occasionally, until the bottom is golden brown and crispy (about 10-15 minutes). Alternatively, you can bake it in a preheated oven at 350°F (175°C) for 15-20 minutes, or until golden brown.
- Flip and Cook the Other Side (Stovetop Method): If cooking on the stovetop, carefully flip the künefe onto a plate and then slide it back into the pan to cook the other side until golden brown and crispy (another 5-10 minutes).
- Pour the Syrup: Immediately pour the warm syrup evenly over the hot künefe.
- Serve Immediately: Serve the künefe immediately while it’s hot and the cheese is melted and gooey. Garnish with chopped pistachios, if desired.
- Prepare the Cornstarch Mixture: In a small bowl, whisk together 1/2 cup of the water and the cornstarch until smooth. Set aside.
- Prepare the Sugar Syrup: In a large, heavy-bottomed saucepan, combine the sugar and the remaining 1 cup of water. Bring to a boil over medium heat, stirring until the sugar is dissolved.
- Add Cream of Tartar: Add the cream of tartar to the boiling sugar syrup.
- Simmer the Syrup: Reduce the heat to low and simmer the syrup for about 20 minutes, or until it thickens slightly. It should coat the back of a spoon.
- Add the Cornstarch Mixture: Gradually whisk the cornstarch mixture into the simmering syrup. Be careful, as it will thicken quickly.
- Cook the Mixture: Continue to cook the mixture over low heat, stirring constantly, for about 1-1.5 hours. The mixture will become very thick and sticky, and it will change from opaque to translucent. It requires patience and constant stirring to prevent burning. The mixture is ready when it pulls away from the sides of the pan and forms a ball.
- Add Flavoring and Coloring: Remove the saucepan from the heat and stir in the rosewater (or other flavoring) and
Notes
- Phyllo dough dries out very quickly, so keep it covered with a damp towel at all times.
- Cutting the baklava before baking is essential for even baking and syrup absorption.
- The sizzling sound when you pour the hot syrup over the hot baklava is a good sign!
- Letting the baklava rest overnight allows the flavors to meld together beautifully.
- Using künefe cheese will give you the most authentic flavor, but mozzarella is a good substitute.
- The stovetop method is preferred for a crispier result.
- Serve immediately while hot and gooey!


Leave a Comment