
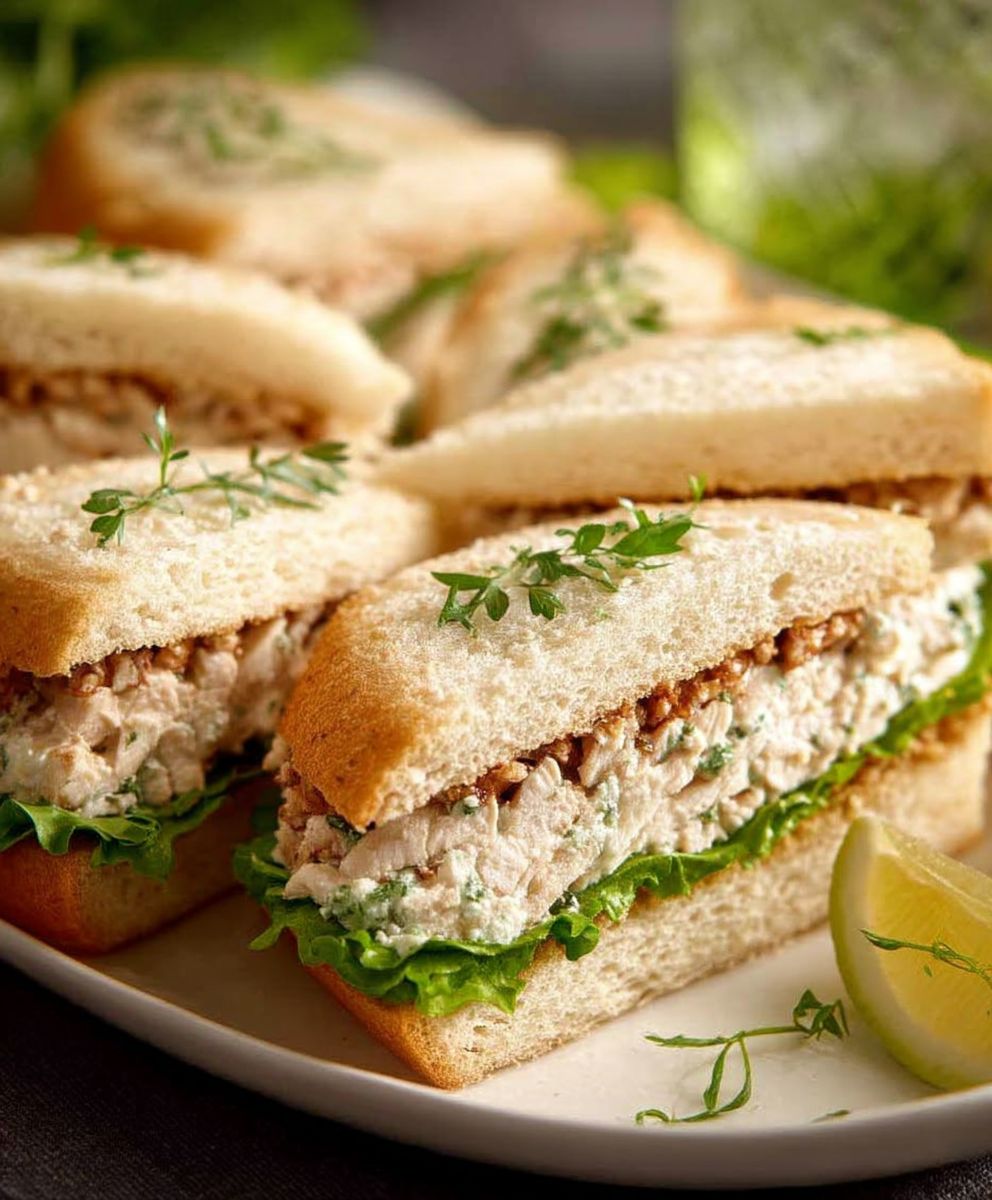
Chicken sandwiches, ah, the quintessential crowd-pleaser! Is there anything quite like biting into a juicy, perfectly seasoned chicken sandwich at a summer barbecue or a casual get-together? I think not! This isn’t just about slapping some chicken between two slices of bread; it’s about creating an experience, a moment of pure, unadulterated deliciousness that brings people together.
The humble chicken sandwich has a surprisingly rich history. While its exact origins are debated, many trace its modern form back to the early 20th century in the United States. From simple diner fare to gourmet creations, the chicken sandwich has evolved, adapting to regional tastes and culinary trends. Its a testament to its versatility and enduring appeal.
But what is it about chicken sandwiches that makes them such a beloved staple at gatherings? Well, for starters, they’re incredibly convenient. Easy to eat, relatively mess-free (depending on your toppings!), and endlessly customizable, they’re the perfect handheld meal for mingling and enjoying good company. And let’s not forget the taste! The combination of crispy or tender chicken, flavorful sauces, and fresh toppings creates a symphony of textures and flavors that tantalizes the taste buds. Whether you prefer a classic fried chicken sandwich with pickles and mayo or a grilled chicken version with avocado and chipotle aioli, there’s a chicken sandwich out there for everyone. So, let’s dive in and explore how to make the ultimate chicken sandwich that will be the star of your next gathering!

Ingredients:
- For the Chicken:
- 2 lbs boneless, skinless chicken breasts
- 1 cup buttermilk
- 2 tablespoons hot sauce (such as Frank’s RedHot)
- 1 teaspoon salt
- 1/2 teaspoon black pepper
- 1 teaspoon garlic powder
- 1 teaspoon paprika
- 1/2 teaspoon cayenne pepper (optional, for extra heat)
- For the Dredge:
- 2 cups all-purpose flour
- 1/2 cup cornstarch
- 2 tablespoons paprika
- 2 tablespoons garlic powder
- 1 tablespoon onion powder
- 1 tablespoon dried oregano
- 1 tablespoon dried thyme
- 1 tablespoon salt
- 1 teaspoon black pepper
- 1/2 teaspoon cayenne pepper (optional, for extra heat)
- For Frying:
- Vegetable oil or peanut oil, for frying (about 6-8 cups)
- For the Buns & Toppings:
- 6-8 brioche buns (or your favorite sandwich buns)
- Mayonnaise
- Shredded lettuce
- Sliced tomatoes
- Pickles (dill or sweet, your preference)
- Your favorite cheese slices (cheddar, pepper jack, provolone, etc.) – optional
- Optional Spicy Mayo:
- 1/2 cup mayonnaise
- 1-2 tablespoons hot sauce (adjust to your spice preference)
- 1 teaspoon sriracha (optional)
- 1/2 teaspoon garlic powder
Marinating the Chicken:
- Prepare the Chicken: First, you’ll want to get your chicken breasts ready. I like to pound them to an even thickness (about 1/2 inch) using a meat mallet. This helps them cook evenly and quickly. You can also slice thicker breasts horizontally to create thinner cutlets. This step is crucial for tender and juicy chicken!
- Make the Marinade: In a large bowl, whisk together the buttermilk, hot sauce, salt, pepper, garlic powder, and paprika. The buttermilk helps to tenderize the chicken and the hot sauce adds a subtle kick. Don’t worry, it won’t be overly spicy!
- Marinate the Chicken: Add the chicken breasts to the buttermilk mixture, making sure they are fully submerged. Cover the bowl with plastic wrap and refrigerate for at least 2 hours, or preferably overnight. The longer the chicken marinates, the more flavorful and tender it will become. I usually aim for at least 4 hours.
Preparing the Dredge:
- Combine Dry Ingredients: In a large, shallow dish (like a baking dish or pie plate), whisk together the flour, cornstarch, paprika, garlic powder, onion powder, dried oregano, dried thyme, salt, pepper, and cayenne pepper (if using). The cornstarch helps to create a crispy coating. Make sure everything is well combined so the spices are evenly distributed.
Frying the Chicken:
- Heat the Oil: Pour the vegetable or peanut oil into a large, heavy-bottomed pot or Dutch oven. You’ll want the oil to be at least 3 inches deep. Heat the oil over medium-high heat until it reaches 350°F (175°C). Use a deep-fry thermometer to monitor the temperature. Maintaining the correct oil temperature is key to crispy, golden-brown chicken. If the oil is too cold, the chicken will be greasy. If it’s too hot, the outside will burn before the inside is cooked.
- Dredge the Chicken: Remove a chicken breast from the buttermilk marinade, letting any excess drip off. Dredge it thoroughly in the flour mixture, pressing the flour into the chicken to ensure it’s fully coated. Then, place the dredged chicken on a wire rack. Repeat with the remaining chicken breasts. Letting the dredged chicken rest on a wire rack for about 10-15 minutes helps the coating adhere better and prevents it from becoming soggy during frying.
- Fry the Chicken: Carefully lower the chicken breasts into the hot oil, being careful not to overcrowd the pot. Fry 2-3 chicken breasts at a time, depending on the size of your pot. Overcrowding the pot will lower the oil temperature and result in greasy chicken.
- Cook Until Golden Brown and Cooked Through: Fry the chicken for about 6-8 minutes per side, or until it’s golden brown and the internal temperature reaches 165°F (74°C). Use a meat thermometer to check the internal temperature.
- Remove and Drain: Remove the fried chicken from the oil and place it on a wire rack lined with paper towels to drain excess oil. This helps to keep the chicken crispy.
Preparing the Spicy Mayo (Optional):
- Combine Ingredients: In a small bowl, whisk together the mayonnaise, hot sauce, sriracha (if using), and garlic powder. Adjust the amount of hot sauce to your desired level of spiciness.
- Taste and Adjust: Taste the spicy mayo and adjust the seasonings as needed. You might want to add a pinch of salt or a squeeze of lemon juice for extra flavor.
Assembling the Sandwiches:
- Toast the Buns (Optional): I like to lightly toast the brioche buns for a little extra texture and flavor. You can toast them in a toaster, under the broiler, or in a dry skillet.
- Spread the Mayo: Spread mayonnaise (or spicy mayo, if you made it) on both the top and bottom buns.
- Add the Lettuce and Tomato: Place a layer of shredded lettuce on the bottom bun, followed by sliced tomatoes.
- Add the Chicken: Place a fried chicken breast on top of the tomatoes.
- Add Cheese (Optional): If using cheese, place a slice of your favorite cheese on top of the chicken while it’s still hot so it melts slightly.
- Add Pickles: Add pickles to your liking. I personally love dill pickles, but sweet pickles are also a great option.
- Top with the Bun: Place the top bun on the sandwich.
- Serve Immediately: Serve the chicken sandwiches immediately while they’re hot and crispy. These are best enjoyed fresh!
Tips for the Best Chicken Sandwiches:
- Don’t Overcrowd the Pot: When frying the chicken, make sure not to overcrowd the pot. This will lower the oil temperature and result in greasy chicken. Fry in batches, allowing the oil to return to the correct temperature between batches.
- Use a Thermometer: Use a deep-fry thermometer to monitor the oil temperature and a meat thermometer to check the internal temperature of the chicken. This will ensure that the chicken is cooked through and not overcooked.
- Let the Chicken Rest: After dredging the chicken, let it rest on a wire rack for about 10-15 minutes before frying. This helps the coating adhere better and prevents it from becoming soggy.
- Keep the Chicken Warm: If you’re making a large batch of sandwiches, you can keep the fried chicken warm in a preheated oven (200°F) while you assemble the sandwiches.
- Customize Your Toppings: Feel free to customize the toppings to your liking. Some other great options include coleslaw, onion rings, bacon, avocado, and different types of sauces.
Variations:
- Nashville Hot Chicken Sandwich: For a Nashville Hot Chicken Sandwich, add a generous amount of cayenne pepper to the dredge and brush the fried chicken with a mixture of melted butter, cayenne pepper, brown sugar, and paprika after frying.
- Honey Mustard Chicken Sandwich: Use honey mustard instead of mayonnaise on the buns.
- BBQ Chicken Sandwich: Use BBQ sauce instead of mayonnaise and add some coleslaw to the sandwich.
- Grilled Chicken Sandwich: For a healthier option, grill the chicken breasts instead of frying them. Marinate the chicken in the buttermilk mixture as directed, then grill until cooked through.
Make Ahead Tips:
- Marinate the Chicken: You can marinate the chicken up to 24 hours in advance.
- Prepare the Dredge: You can prepare the dredge mixture several days in advance and store it in an airtight container.
- Spicy Mayo: The spicy mayo can be made up to
Conclusion:
This isn’t just any slaw; it’s a vibrant explosion of Caribbean sunshine in a bowl! The sweet, tangy, and slightly spicy flavors of this Jamaican Slaw will completely transform your perception of what slaw can be. Forget the bland, mayonnaise-laden versions you’re used to this recipe is a must-try because it’s fresh, flavorful, and incredibly easy to make. It’s the perfect side dish to brighten up any meal, from grilled chicken and fish to pulled pork sandwiches and veggie burgers.
But the reasons to try this recipe go beyond just taste. It’s also incredibly versatile! Looking for serving suggestions? I’ve got you covered. This slaw is fantastic served alongside jerk chicken or pork, instantly transporting you to a tropical paradise. It also makes a fantastic topping for fish tacos, adding a delightful crunch and zesty kick. For a lighter meal, try it as a bed for grilled shrimp or tofu.
And speaking of versatility, don’t be afraid to experiment with variations! If you like a little extra heat, add a pinch of cayenne pepper or a finely chopped Scotch bonnet pepper (use with caution!). For a sweeter slaw, increase the amount of mango or pineapple. You can also add other vegetables like bell peppers or red onion for extra color and crunch. If you’re vegan, simply ensure your mayonnaise is plant-based. The possibilities are truly endless!
I truly believe this Jamaican Slaw will become a staple in your kitchen. It’s the kind of recipe that you’ll find yourself making again and again, not only because it’s delicious but also because it’s so quick and easy to prepare. It’s a guaranteed crowd-pleaser, perfect for potlucks, barbecues, or even a simple weeknight dinner.
Why You Should Make This Slaw Today:
* Unforgettable Flavor: The combination of sweet, tangy, and spicy is simply irresistible.
* Easy to Make: This recipe requires minimal effort and ingredients.
* Versatile: Perfect as a side dish, topping, or even a light meal.
* Crowd-Pleasing: Guaranteed to be a hit at any gathering.
* Healthy and Fresh: Packed with vitamins and nutrients from fresh vegetables and fruits.So, what are you waiting for? Gather your ingredients, put on some reggae music, and get ready to experience the taste of the Caribbean! I’m confident that you’ll love this Jamaican Slaw as much as I do.
I’m so excited for you to try this recipe! Once you’ve made it, please come back and share your experience in the comments below. Let me know what variations you tried, what you served it with, and what your family and friends thought. I can’t wait to hear all about it! Happy cooking! Don’t forget to rate the recipe too! Your feedback helps other readers discover this amazing slaw.
Chicken Sandwiches Gatherings: Delicious Recipes & Tips
Crispy, juicy fried chicken sandwiches with your favorite toppings! Marinated in buttermilk and coated in a flavorful spice blend, this recipe delivers a restaurant-quality sandwich at home.
Ingredients
- 2 lbs boneless, skinless chicken breasts
- 1 cup buttermilk
- 2 tablespoons hot sauce (such as Frank’s RedHot)
- 1 teaspoon salt
- 1/2 teaspoon black pepper
- 1 teaspoon garlic powder
- 1 teaspoon paprika
- 1/2 teaspoon cayenne pepper (optional, for extra heat)
- 2 cups all-purpose flour
- 1/2 cup cornstarch
- 2 tablespoons paprika
- 2 tablespoons garlic powder
- 1 tablespoon onion powder
- 1 tablespoon dried oregano
- 1 tablespoon dried thyme
- 1 tablespoon salt
- 1 teaspoon black pepper
- 1/2 teaspoon cayenne pepper (optional, for extra heat)
- Vegetable oil or peanut oil, for frying (about 6-8 cups)
- 6-8 brioche buns (or your favorite sandwich buns)
- Mayonnaise
- Shredded lettuce
- Sliced tomatoes
- Pickles (dill or sweet, your preference)
- Your favorite cheese slices (cheddar, pepper jack, provolone, etc.) – optional
- 1/2 cup mayonnaise
- 1-2 tablespoons hot sauce (adjust to your spice preference)
- 1 teaspoon sriracha (optional)
- 1/2 teaspoon garlic powder
Instructions
- Prepare the Chicken: Pound chicken breasts to an even thickness (about 1/2 inch) or slice thicker breasts horizontally.
- Make the Marinade: In a large bowl, whisk together the buttermilk, hot sauce, salt, pepper, garlic powder, and paprika.
- Marinate the Chicken: Add the chicken breasts to the buttermilk mixture, ensuring they are fully submerged. Cover and refrigerate for at least 2 hours, preferably overnight.
- Combine Dry Ingredients: In a large, shallow dish, whisk together the flour, cornstarch, paprika, garlic powder, onion powder, dried oregano, dried thyme, salt, pepper, and cayenne pepper (if using).
- Heat the Oil: Pour vegetable or peanut oil into a large, heavy-bottomed pot or Dutch oven (at least 3 inches deep). Heat over medium-high heat until it reaches 350°F (175°C). Use a deep-fry thermometer.
- Dredge the Chicken: Remove a chicken breast from the marinade, letting excess drip off. Dredge thoroughly in the flour mixture, pressing the flour into the chicken. Place on a wire rack. Repeat with remaining chicken. Let rest for 10-15 minutes.
- Fry the Chicken: Carefully lower chicken breasts into the hot oil, being careful not to overcrowd the pot. Fry 2-3 at a time.
- Cook Until Golden Brown and Cooked Through: Fry for about 6-8 minutes per side, or until golden brown and the internal temperature reaches 165°F (74°C). Use a meat thermometer.
- Remove and Drain: Remove the fried chicken from the oil and place it on a wire rack lined with paper towels to drain excess oil.
- Combine Ingredients: In a small bowl, whisk together the mayonnaise, hot sauce, sriracha (if using), and garlic powder.
- Taste and Adjust: Taste and adjust seasonings as needed.
- Toast the Buns (Optional): Lightly toast the brioche buns.
- Spread the Mayo: Spread mayonnaise (or spicy mayo) on both buns.
- Add the Lettuce and Tomato: Place a layer of shredded lettuce on the bottom bun, followed by sliced tomatoes.
- Add the Chicken: Place a fried chicken breast on top of the tomatoes.
- Add Cheese (Optional): If using cheese, place a slice on top of the chicken while it’s still hot.
- Add Pickles: Add pickles to your liking.
- Top with the Bun: Place the top bun on the sandwich.
- Serve Immediately: Serve the chicken sandwiches immediately.
Notes
- Don’t overcrowd the pot when frying.
- Use a thermometer to monitor oil and chicken temperature.
- Let the chicken rest after dredging.
- Customize toppings to your liking.
- For Nashville Hot Chicken, add cayenne to the dredge and brush fried chicken with a butter/cayenne/brown sugar/paprika mixture.
- Variations: Honey Mustard, BBQ, Grilled Chicken.
- Make Ahead: Marinate chicken up to 24 hours, prepare dredge in advance, make spicy mayo in advance.


Leave a Comment