
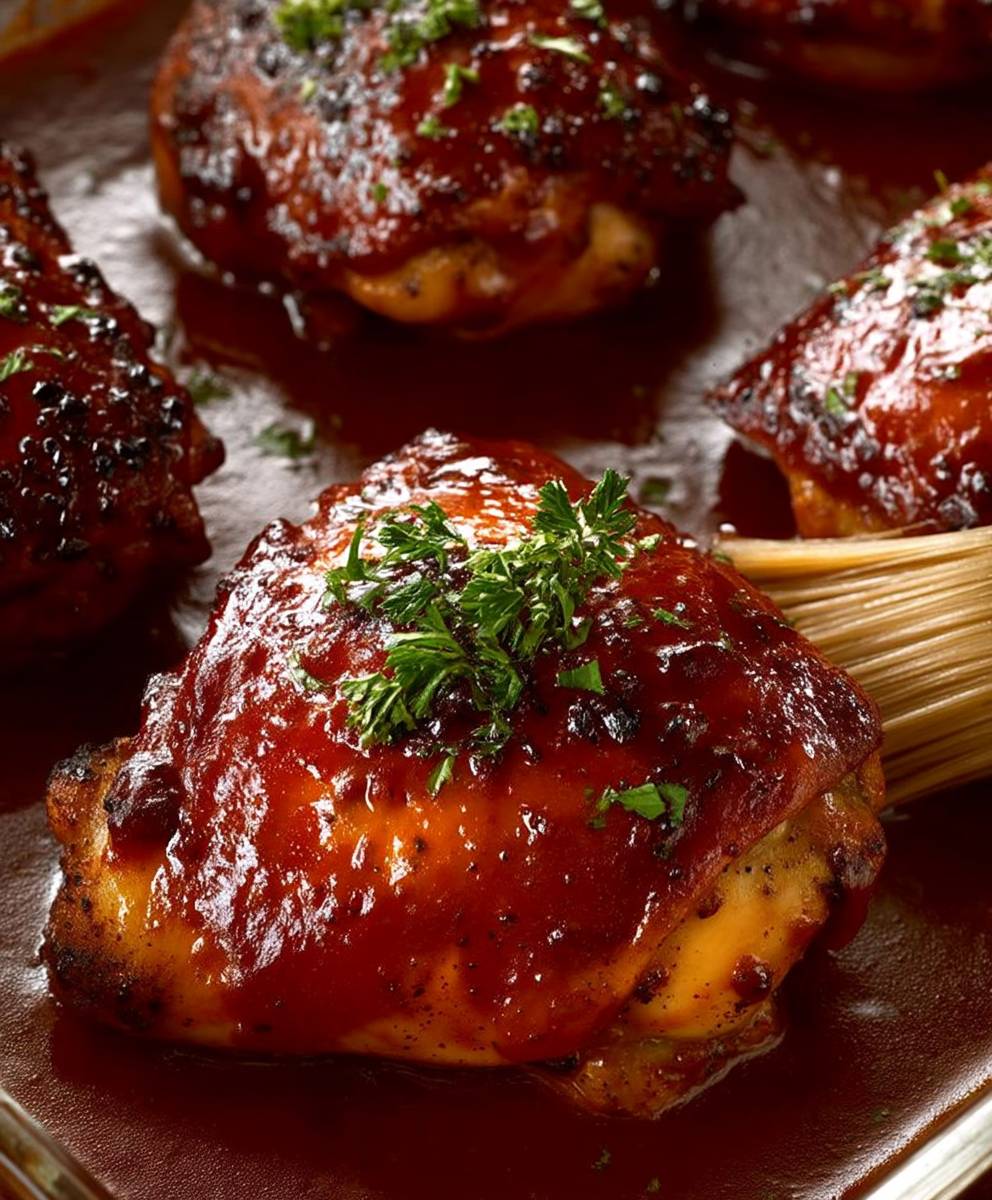
Oven Baked BBQ Chicken: Is there anything more comforting than the aroma of barbecue wafting through your home? Forget firing up the grill we’re bringing that smoky, tangy goodness right into your kitchen with this incredibly easy and delicious recipe! Imagine sinking your teeth into juicy, fall-off-the-bone chicken, coated in a rich, homemade BBQ sauce that’s bursting with flavor. This isn’t just dinner; it’s a culinary hug.
Barbecue, in its many forms, has a long and storied history, deeply rooted in American culture. From humble beginnings as a slow-cooking method for tough cuts of meat, it has evolved into a beloved tradition enjoyed by families and friends across the nation. While regional variations abound, the essence of barbecue remains the same: bringing people together over delicious food.
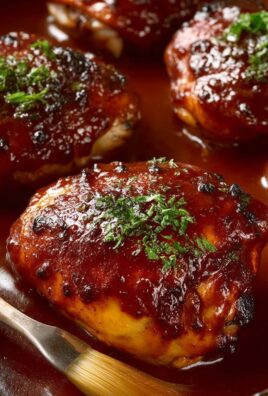
What makes Oven Baked BBQ Chicken so irresistible? It’s the perfect combination of sweet, savory, and smoky flavors, all wrapped up in a tender, satisfying package. The oven method ensures that the chicken stays incredibly moist, while the BBQ sauce caramelizes beautifully, creating a sticky, flavorful crust. Plus, it’s incredibly convenient! No need to brave the elements or spend hours tending to a grill. Simply pop it in the oven and let the magic happen. Whether you’re looking for a quick weeknight meal or a crowd-pleasing dish for your next gathering, this recipe is guaranteed to be a hit.

Ingredients:
- Chicken: 3 lbs bone-in, skin-on chicken pieces (thighs, drumsticks, and breasts work well)
- BBQ Sauce: 1 ½ cups of your favorite BBQ sauce (I prefer a smoky and slightly sweet one)
- Olive Oil: 2 tablespoons
- Paprika: 2 teaspoons
- Garlic Powder: 1 ½ teaspoons
- Onion Powder: 1 ½ teaspoons
- Dried Thyme: 1 teaspoon
- Dried Oregano: 1 teaspoon
- Salt: 1 ½ teaspoons (or to taste)
- Black Pepper: 1 teaspoon (or to taste)
- Brown Sugar: 1 tablespoon (packed)
- Worcestershire Sauce: 1 tablespoon
- Optional: 1 teaspoon of cayenne pepper for a little kick
- Optional Garnish: Fresh parsley, chopped
Preparing the Chicken and Dry Rub:
- Preheat the Oven: First things first, let’s get that oven preheating! Set it to 375°F (190°C). This temperature allows the chicken to cook through evenly while the skin gets nice and crispy.
- Prepare the Chicken: Pat the chicken pieces dry with paper towels. This is a crucial step! Removing excess moisture helps the skin crisp up beautifully in the oven. Trust me, you don’t want soggy chicken skin.
- Mix the Dry Rub: In a medium-sized bowl, combine the paprika, garlic powder, onion powder, dried thyme, dried oregano, salt, black pepper, brown sugar, and cayenne pepper (if using). Whisk everything together until it’s well combined. This dry rub is the foundation of our flavor, so make sure it’s evenly mixed.
- Season the Chicken: Now, generously sprinkle the dry rub all over the chicken pieces. Make sure to coat every nook and cranny! I like to use my hands to really rub the spices into the chicken. Don’t be shy; the more seasoning, the more flavor! Get some under the skin if you can, especially on the breasts, for extra flavor penetration.
- Drizzle with Olive Oil: Drizzle the olive oil over the seasoned chicken. This will help the spices adhere to the chicken and also contribute to that crispy skin we’re after. Rub the oil into the chicken to ensure even coverage.
Baking the BBQ Chicken:
- Arrange the Chicken: Place the chicken pieces in a single layer in a baking dish. I recommend using a baking dish that’s large enough to accommodate all the chicken without overcrowding. If the pieces are too close together, they’ll steam instead of bake, and we want that crispy skin! A 9×13 inch baking dish usually works well.
- First Bake: Bake the chicken in the preheated oven for 45 minutes. This initial bake allows the chicken to cook through partially and the skin to start rendering its fat.
- Prepare the BBQ Sauce: While the chicken is baking, prepare your BBQ sauce. In a small bowl, combine your favorite BBQ sauce with the Worcestershire sauce. The Worcestershire sauce adds a depth of flavor that complements the BBQ sauce perfectly.
- Baste with BBQ Sauce: After 45 minutes, remove the chicken from the oven. Using a brush, generously baste the chicken pieces with the BBQ sauce mixture. Make sure to coat every surface of the chicken.
- Second Bake: Return the chicken to the oven and bake for another 15-20 minutes, or until the internal temperature reaches 165°F (74°C) and the juices run clear when pierced with a fork. The exact baking time will depend on the size and thickness of your chicken pieces, so it’s always best to use a meat thermometer to ensure it’s cooked through.
- Optional Broiling: For extra crispy and caramelized skin, you can broil the chicken for the last 2-3 minutes. Keep a close eye on it, as it can burn quickly under the broiler. I like to broil it just until the skin is nicely browned and bubbly.
- Rest the Chicken: Once the chicken is cooked through, remove it from the oven and let it rest for 5-10 minutes before serving. This allows the juices to redistribute, resulting in a more tender and flavorful chicken.
Serving and Storage:
- Garnish (Optional): Garnish with fresh chopped parsley for a pop of color and freshness.
- Serving Suggestions: Serve the oven-baked BBQ chicken with your favorite sides, such as mashed potatoes, coleslaw, corn on the cob, baked beans, or a simple salad. It’s also delicious served on a bun as a BBQ chicken sandwich.
- Storage: Store any leftover chicken in an airtight container in the refrigerator for up to 3-4 days.
- Reheating: Reheat the chicken in the oven at 350°F (175°C) until heated through, or in the microwave. You can also reheat it in a skillet on the stovetop with a little bit of oil.
Tips for the Best Oven Baked BBQ Chicken:
- Don’t overcrowd the pan: Make sure the chicken pieces have enough space around them so they can bake properly and the skin can crisp up. If you need to, use two baking dishes.
- Use a meat thermometer: The best way to ensure your chicken is cooked through is to use a meat thermometer. Insert it into the thickest part of the chicken (without touching the bone) and make sure it reaches 165°F (74°C).
- Adjust the BBQ sauce: Feel free to adjust the amount of BBQ sauce to your liking. If you prefer a more saucy chicken, use more sauce. If you prefer a less saucy chicken, use less sauce.
- Experiment with different BBQ sauces: There are so many different types of BBQ sauces out there, so feel free to experiment and find your favorite. Some popular options include smoky BBQ sauce, sweet BBQ sauce, tangy BBQ sauce, and spicy BBQ sauce.
- Add a touch of smoke: For an extra smoky flavor, you can add a teaspoon of smoked paprika to the dry rub.
- Make it ahead of time: You can prepare the chicken ahead of time by seasoning it with the dry rub and storing it in the refrigerator for up to 24 hours. This will allow the flavors to meld together and result in an even more flavorful chicken.
- Use different cuts of chicken: While this recipe calls for bone-in, skin-on chicken pieces, you can also use boneless, skinless chicken breasts or thighs. Just be sure to adjust the baking time accordingly. Boneless, skinless chicken will cook faster than bone-in, skin-on chicken.
- Add vegetables to the pan: For a complete meal, you can add vegetables to the baking dish along with the chicken. Some good options include potatoes, carrots, onions, and bell peppers.
Conclusion:
This isn’t just another soup recipe; it’s an invitation to experience the vibrant, comforting flavors of Vietnam right in your own kitchen. This Vietnamese Chicken Pho is a must-try because it’s more than just a meal; it’s an experience. The aromatic broth, the tender chicken, the perfectly cooked noodles, and the fresh herbs all come together in a symphony of taste that will tantalize your senses and leave you feeling completely satisfied. Trust me, once you’ve tasted homemade pho, you’ll never go back to the instant stuff!
But what truly sets this recipe apart is its versatility. While the classic version is undeniably delicious, there’s plenty of room to experiment and make it your own. Feeling adventurous? Try adding a star anise or two to the broth for a deeper, more complex flavor. For a spicier kick, incorporate a finely chopped chili pepper or a drizzle of sriracha. If you’re a fan of vegetables, feel free to add some sliced mushrooms, bok choy, or bean sprouts to the bowl.
Serving suggestions are endless! This Vietnamese Chicken Pho is perfect as a light lunch, a comforting dinner, or even a revitalizing breakfast (as it’s traditionally enjoyed in Vietnam!). Garnish generously with fresh cilantro, mint, and Thai basil. A squeeze of lime juice adds a bright, citrusy note that perfectly complements the rich broth. And don’t forget the bean sprouts and sliced jalapeños for that authentic pho experience.
For a heartier meal, consider adding some thinly sliced beef or shrimp to the broth along with the chicken. You can also experiment with different types of noodles, such as rice vermicelli or even udon noodles. If you’re short on time, you can use pre-cooked rotisserie chicken to speed up the process. Just shred the chicken and add it to the broth during the last few minutes of cooking.
And for those who are vegetarian or vegan, don’t despair! You can easily adapt this recipe by using vegetable broth instead of chicken broth and substituting the chicken with tofu or tempeh. Just be sure to marinate the tofu or tempeh in a flavorful sauce before adding it to the broth to give it that extra boost of flavor.
I know making pho from scratch might seem a little daunting at first, but I promise you, it’s easier than you think. And the reward a steaming bowl of fragrant, flavorful pho is well worth the effort. This recipe is designed to be approachable and easy to follow, even for beginner cooks.
So, what are you waiting for? Gather your ingredients, put on some music, and get ready to embark on a culinary adventure. I’m confident that you’ll love this Vietnamese Chicken Pho as much as I do.
I’m so excited for you to try this recipe! Once you’ve made it, please come back and share your experience in the comments below. I’d love to hear about your variations, your serving suggestions, and any tips or tricks you discovered along the way. Let’s build a community of pho lovers and share our passion for this amazing dish! Don’t forget to rate the recipe too! Happy cooking!
Oven Baked BBQ Chicken: The Ultimate Guide to Juicy Perfection
Juicy and flavorful oven-baked BBQ chicken with crispy skin, seasoned with a delicious dry rub and basted in your favorite BBQ sauce.
Ingredients
- 3 lbs bone-in, skin-on chicken pieces (thighs, drumsticks, and breasts work well)
- 1 ½ cups of your favorite BBQ sauce (I prefer a smoky and slightly sweet one)
- 2 tablespoons olive oil
- 2 teaspoons paprika
- 1 ½ teaspoons garlic powder
- 1 ½ teaspoons onion powder
- 1 teaspoon dried thyme
- 1 teaspoon dried oregano
- 1 ½ teaspoons salt (or to taste)
- 1 teaspoon black pepper (or to taste)
- 1 tablespoon brown sugar (packed)
- 1 tablespoon Worcestershire sauce
- Optional: 1 teaspoon of cayenne pepper for a little kick
- Optional Garnish: Fresh parsley, chopped
Instructions
- Preheat oven to 375°F (190°C).
- Pat the chicken pieces dry with paper towels.
- In a medium bowl, combine paprika, garlic powder, onion powder, dried thyme, dried oregano, salt, black pepper, brown sugar, and cayenne pepper (if using). Whisk well.
- Generously sprinkle the dry rub all over the chicken pieces, ensuring every part is coated. Rub the spices into the chicken.
- Drizzle olive oil over the seasoned chicken and rub it in.
- Place the chicken pieces in a single layer in a baking dish (9×13 inch recommended).
- Bake the chicken in the preheated oven for 45 minutes.
- While the chicken is baking, combine BBQ sauce and Worcestershire sauce in a small bowl.
- After 45 minutes, remove the chicken from the oven and generously baste with the BBQ sauce mixture.
- Return the chicken to the oven and bake for another 15-20 minutes, or until the internal temperature reaches 165°F (74°C) and the juices run clear when pierced with a fork.
- For extra crispy skin, broil the chicken for the last 2-3 minutes, watching carefully to prevent burning.
- Remove from the oven and let rest for 5-10 minutes before serving.
- Garnish with fresh chopped parsley.
- Serve with your favorite sides, such as mashed potatoes, coleslaw, corn on the cob, baked beans, or a simple salad.
Notes
- Don’t overcrowd the pan. Use two baking dishes if needed.
- Use a meat thermometer to ensure the chicken is cooked through (165°F/74°C).
- Adjust the amount of BBQ sauce to your liking.
- Experiment with different BBQ sauces.
- Add a teaspoon of smoked paprika to the dry rub for a smoky flavor.
- Prepare the chicken ahead of time by seasoning it with the dry rub and storing it in the refrigerator for up to 24 hours.
- Use different cuts of chicken, adjusting the baking time accordingly.
- Add vegetables to the pan for a complete meal.
- Storage: Store any leftover chicken in an airtight container in the refrigerator for up to 3-4 days.
- Reheating: Reheat the chicken in the oven at 350°F (175°C) until heated through, or in the microwave. You can also reheat it in a skillet on the stovetop with a little bit of oil.

Leave a Comment