
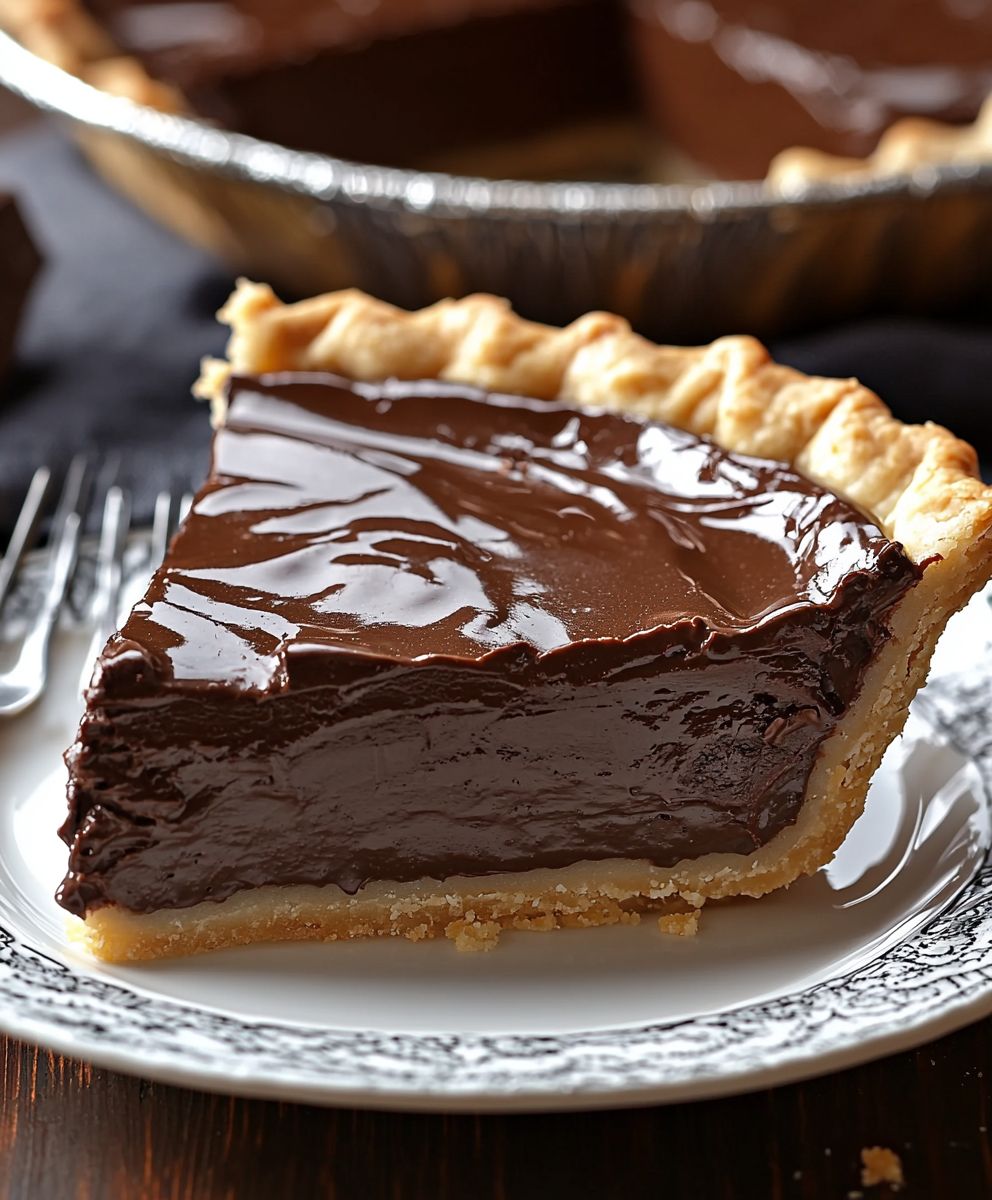
Chocolate Pie, oh, where do I even begin? Imagine sinking your fork into a slice of pure decadence, a symphony of rich, velvety chocolate that melts in your mouth with every blissful bite. This isn’t just dessert; it’s an experience, a comforting hug on a plate that has captivated hearts (and taste buds!) for generations.
While the exact origins of Chocolate Pie are debated, its roots can be traced back to the rise of chocolate as a culinary ingredient in the 17th century. As chocolate became more accessible, creative cooks began experimenting, incorporating it into various desserts, and thus, the chocolate pie was born. It quickly became a staple in American households, particularly in the South, where it’s often associated with warmth, family gatherings, and cherished traditions.
But what is it about this pie that makes it so universally loved? It’s the perfect balance of textures the flaky, buttery crust providing a delightful contrast to the smooth, creamy filling. The intense chocolate flavor is undeniably satisfying, offering a comforting sweetness that’s hard to resist. Plus, it’s surprisingly easy to make! Whether you’re a seasoned baker or a kitchen novice, this recipe is straightforward and yields impressive results every time. So, are you ready to embark on a chocolatey adventure? Let’s get baking!
Ingredients:
- For the Crust:
- 1 ½ cups all-purpose flour
- ½ teaspoon salt
- ½ cup (1 stick) unsalted butter, cold and cut into cubes
- ¼ cup vegetable shortening, cold
- 5-7 tablespoons ice water
- For the Chocolate Filling:
- 1 ½ cups granulated sugar
- ½ cup unsweetened cocoa powder
- ¼ teaspoon salt
- 3 tablespoons cornstarch
- 3 cups whole milk
- 4 large egg yolks, lightly beaten
- 2 tablespoons unsalted butter
- 1 teaspoon vanilla extract
- 6 ounces bittersweet chocolate, chopped
- For the Whipped Cream Topping (Optional):
- 1 ½ cups heavy cream
- 3 tablespoons powdered sugar
- ½ teaspoon vanilla extract
Preparing the Crust:
- In a large bowl, whisk together the flour and salt.
- Cut in the cold butter and vegetable shortening using a pastry blender or your fingertips until the mixture resembles coarse crumbs. You should still see small pieces of butter and shortening this is what creates flaky layers!
- Gradually add the ice water, one tablespoon at a time, mixing gently after each addition. Stop adding water when the dough just comes together. Be careful not to overmix, as this will develop the gluten and make the crust tough.
- Form the dough into a disc, wrap it tightly in plastic wrap, and refrigerate for at least 30 minutes, or up to 2 hours. This allows the gluten to relax and makes the dough easier to roll out.
- On a lightly floured surface, roll out the dough into a 12-inch circle.
- Carefully transfer the dough to a 9-inch pie plate. Trim the edges and crimp them decoratively. You can use a fork to create a simple crimped edge, or get fancy with your fingers!
- Prick the bottom of the crust all over with a fork. This prevents the crust from puffing up during baking.
- Blind Bake the Crust: Line the crust with parchment paper and fill it with pie weights (or dried beans or rice). This will help the crust maintain its shape.
- Bake in a preheated oven at 375°F (190°C) for 20 minutes.
- Remove the parchment paper and pie weights and bake for another 10-15 minutes, or until the crust is golden brown.
- Let the crust cool completely before filling.
Making the Chocolate Filling:
- In a medium saucepan, whisk together the granulated sugar, cocoa powder, salt, and cornstarch. This ensures that the cocoa powder and cornstarch are evenly distributed, preventing lumps in the filling.
- Gradually whisk in the milk until smooth. Make sure there are no lumps of cocoa powder or cornstarch remaining.
- Cook over medium heat, stirring constantly, until the mixture begins to thicken and simmer. This usually takes about 5-7 minutes.
- In a small bowl, whisk the egg yolks lightly.
- Temper the egg yolks: Slowly drizzle about ½ cup of the hot milk mixture into the egg yolks, whisking constantly. This prevents the egg yolks from scrambling when added to the hot mixture.
- Pour the tempered egg yolk mixture back into the saucepan with the remaining milk mixture.
- Continue to cook over medium heat, stirring constantly, until the filling is very thick and glossy. This should take about 1-2 minutes. Be careful not to let the filling boil, as this can cause the eggs to curdle.
- Remove the saucepan from the heat and stir in the butter, vanilla extract, and chopped bittersweet chocolate. Stir until the butter and chocolate are completely melted and the filling is smooth and creamy.
Assembling the Pie:
- Pour the warm chocolate filling into the cooled pie crust.
- Smooth the top of the filling with a spatula.
- Cover the pie with plastic wrap, pressing it directly onto the surface of the filling. This will prevent a skin from forming.
- Refrigerate the pie for at least 4 hours, or preferably overnight, to allow the filling to set completely.
Preparing the Whipped Cream Topping (Optional):
- In a large bowl, combine the heavy cream, powdered sugar, and vanilla extract.
- Beat with an electric mixer on medium-high speed until stiff peaks form. Be careful not to overwhip, as this can turn the cream into butter.
- Once the pie is chilled and set, remove the plastic wrap.
- Spread the whipped cream evenly over the top of the pie, or pipe it on using a piping bag and tip for a more decorative look.
- You can also garnish the pie with chocolate shavings, cocoa powder, or fresh berries.
Tips for Success:
- Use Cold Ingredients: Cold butter and shortening are essential for creating a flaky pie crust. Make sure your ingredients are well-chilled before you start.
- Don’t Overmix the Dough: Overmixing the pie dough will develop the gluten and make the crust tough. Mix just until the dough comes together.
- Blind Bake the Crust Properly: Blind baking the crust prevents it from becoming soggy when you add the filling. Use pie weights or dried beans to weigh down the crust.
- Temper the Egg Yolks: Tempering the egg yolks prevents them from scrambling when added to the hot milk mixture.
- Chill the Pie Thoroughly: Chilling the pie for at least 4 hours, or preferably overnight, allows the filling to set completely.
- Use High-Quality Chocolate: The quality of the chocolate will greatly affect the flavor of the pie. Use a good-quality bittersweet chocolate for the best results.
- Adjust Sweetness to Your Liking: If you prefer a less sweet pie, you can reduce the amount of sugar in the filling.
- Make it Ahead: The pie crust and chocolate filling can be made ahead of time and stored separately. Assemble the pie just before serving.
- Variations: You can add different flavorings to the chocolate filling, such as espresso powder, peppermint extract, or orange zest. You can also top the pie with different toppings, such as chopped nuts, caramel sauce, or a sprinkle of sea salt.
Serving Suggestions:
This chocolate pie is delicious served cold, straight from the refrigerator. It’s perfect for a special occasion or a simple weeknight dessert. Serve it with a scoop of vanilla ice cream, a dollop of whipped cream, or a sprinkle of cocoa powder. Enjoy!
Conclusion:
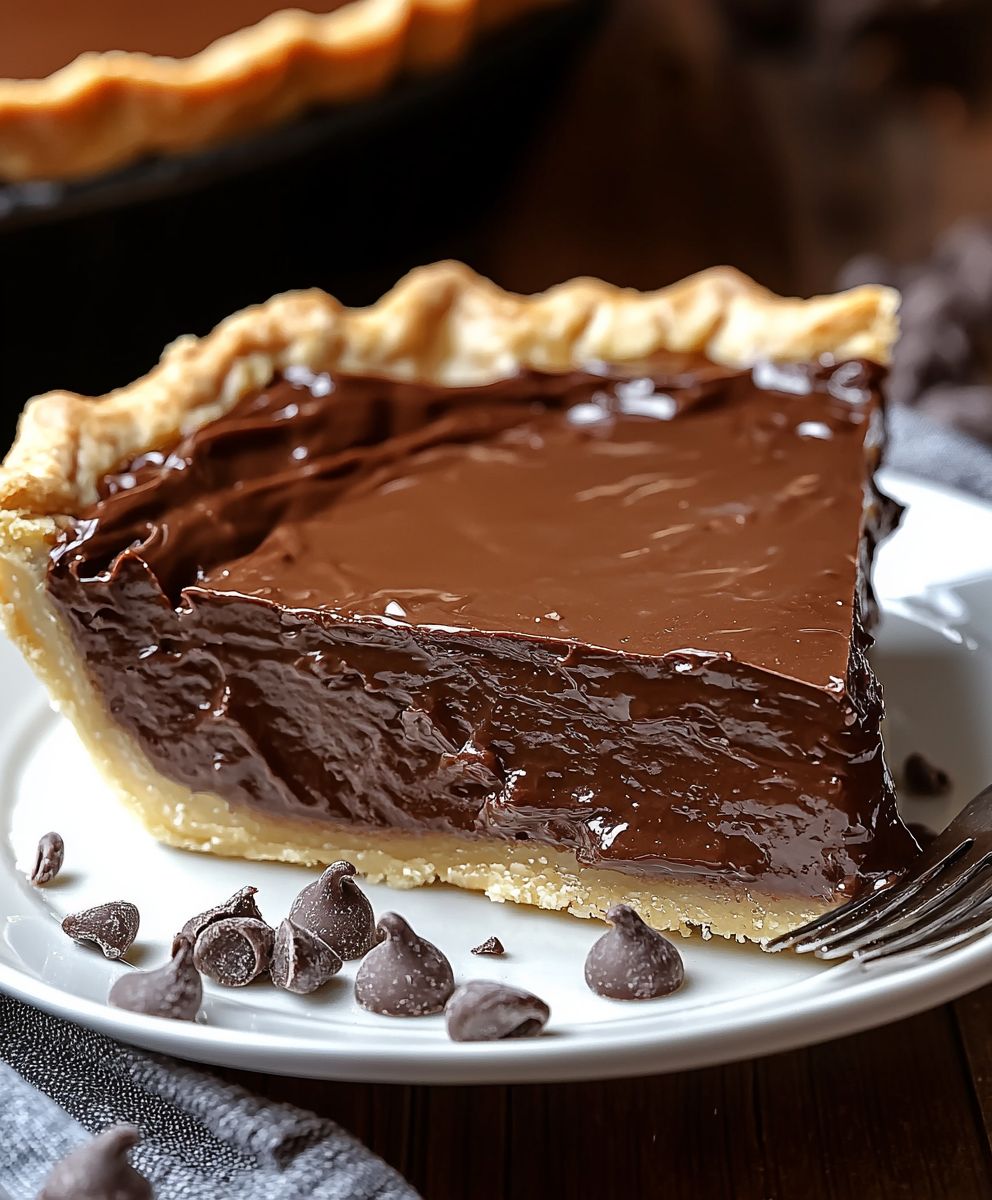
This Chocolate Pie isn’t just a dessert; it’s an experience. From the rich, decadent filling to the perfectly crisp crust, every bite is a symphony of textures and flavors that will leave you wanting more. I truly believe this recipe is a must-try for any chocolate lover, and here’s why: it’s surprisingly simple to make, uses readily available ingredients, and delivers a restaurant-quality result that will impress your friends and family. Forget store-bought pies once you taste this homemade masterpiece, you’ll never go back! But the best part? It’s incredibly versatile! While this recipe is fantastic as is, there are so many ways to customize it to your liking. For a classic touch, top each slice with a dollop of freshly whipped cream and a sprinkle of cocoa powder. If you’re feeling adventurous, try adding a layer of salted caramel sauce beneath the chocolate filling for a sweet and salty sensation. Or, for a truly decadent experience, drizzle melted dark chocolate over the top and garnish with chocolate shavings. Serving suggestions are endless! This Chocolate Pie is perfect for any occasion, from a casual weeknight dessert to a special celebration. Serve it chilled straight from the refrigerator for a refreshing treat, or let it sit at room temperature for a slightly softer, more intense chocolate flavor. Pair it with a scoop of vanilla ice cream for a classic combination, or try it with a scoop of raspberry sorbet for a contrasting burst of fruity flavor. For a truly elegant presentation, dust the plate with powdered sugar and garnish with fresh berries. And don’t be afraid to experiment with the crust! While the recipe calls for a traditional pie crust, you can easily substitute it with a graham cracker crust for a different texture and flavor. Or, for a gluten-free option, use a gluten-free pie crust or even a crushed almond crust. The possibilities are endless! I’ve poured my heart and soul into perfecting this recipe, and I’m confident that you’ll love it as much as I do. It’s the perfect balance of rich, creamy, and decadent, and it’s guaranteed to satisfy even the most intense chocolate cravings. So, what are you waiting for? Gather your ingredients, preheat your oven, and get ready to create a Chocolate Pie that will become a family favorite for years to come. I promise you won’t regret it! And most importantly, I want to hear about your experience! Did you try any variations? Did you make any substitutions? What did your friends and family think? Share your photos and stories in the comments below. I can’t wait to see your creations and hear about your baking adventures. Happy baking! Let me know if you have any questions, and I’ll do my best to help. I’m so excited for you to try this recipe and experience the joy of homemade chocolate pie! PrintChocolate Pie: The Ultimate Guide to Baking Perfection

Decadent chocolate pie with a flaky homemade crust and rich, creamy chocolate filling. Top with whipped cream for the ultimate treat!
- Prep Time: 45 minutes
- Cook Time: 35 minutes
- Total Time: 320 minutes
- Yield: 8 servings 1x
Ingredients
- 1 ½ cups all-purpose flour
- ½ teaspoon salt
- ½ cup (1 stick) unsalted butter, cold and cut into cubes
- ¼ cup vegetable shortening, cold
- 5–7 tablespoons ice water
- 1 ½ cups granulated sugar
- ½ cup unsweetened cocoa powder
- ¼ teaspoon salt
- 3 tablespoons cornstarch
- 3 cups whole milk
- 4 large egg yolks, lightly beaten
- 2 tablespoons unsalted butter
- 1 teaspoon vanilla extract
- 6 ounces bittersweet chocolate, chopped
- 1 ½ cups heavy cream
- 3 tablespoons powdered sugar
- ½ teaspoon vanilla extract
Instructions
- In a large bowl, whisk together the flour and salt.
- Cut in the cold butter and vegetable shortening using a pastry blender or your fingertips until the mixture resembles coarse crumbs. You should still see small pieces of butter and shortening this is what creates flaky layers!
- Gradually add the ice water, one tablespoon at a time, mixing gently after each addition. Stop adding water when the dough just comes together. Be careful not to overmix, as this will develop the gluten and make the crust tough.
- Form the dough into a disc, wrap it tightly in plastic wrap, and refrigerate for at least 30 minutes, or up to 2 hours. This allows the gluten to relax and makes the dough easier to roll out.
- On a lightly floured surface, roll out the dough into a 12-inch circle.
- Carefully transfer the dough to a 9-inch pie plate. Trim the edges and crimp them decoratively. You can use a fork to create a simple crimped edge, or get fancy with your fingers!
- Prick the bottom of the crust all over with a fork. This prevents the crust from puffing up during baking.
- Line the crust with parchment paper and fill it with pie weights (or dried beans or rice). This will help the crust maintain its shape.
- Bake in a preheated oven at 375°F (190°C) for 20 minutes.
- Remove the parchment paper and pie weights and bake for another 10-15 minutes, or until the crust is golden brown.
- Let the crust cool completely before filling.
- In a medium saucepan, whisk together the granulated sugar, cocoa powder, salt, and cornstarch. This ensures that the cocoa powder and cornstarch are evenly distributed, preventing lumps in the filling.
- Gradually whisk in the milk until smooth. Make sure there are no lumps of cocoa powder or cornstarch remaining.
- Cook over medium heat, stirring constantly, until the mixture begins to thicken and simmer. This usually takes about 5-7 minutes.
- In a small bowl, whisk the egg yolks lightly.
- Temper the egg yolks: Slowly drizzle about ½ cup of the hot milk mixture into the egg yolks, whisking constantly. This prevents the egg yolks from scrambling when added to the hot mixture.
- Pour the tempered egg yolk mixture back into the saucepan with the remaining milk mixture.
- Continue to cook over medium heat, stirring constantly, until the filling is very thick and glossy. This should take about 1-2 minutes. Be careful not to let the filling boil, as this can cause the eggs to curdle.
- Remove the saucepan from the heat and stir in the butter, vanilla extract, and chopped bittersweet chocolate. Stir until the butter and chocolate are completely melted and the filling is smooth and creamy.
- Pour the warm chocolate filling into the cooled pie crust.
- Smooth the top of the filling with a spatula.
- Cover the pie with plastic wrap, pressing it directly onto the surface of the filling. This will prevent a skin from forming.
- Refrigerate the pie for at least 4 hours, or preferably overnight, to allow the filling to set completely.
- In a large bowl, combine the heavy cream, powdered sugar, and vanilla extract.
- Beat with an electric mixer on medium-high speed until stiff peaks form. Be careful not to overwhip, as this can turn the cream into butter.
- Once the pie is chilled and set, remove the plastic wrap.
- Spread the whipped cream evenly over the top of the pie, or pipe it on using a piping bag and tip for a more decorative look.
- You can also garnish the pie with chocolate shavings, cocoa powder, or fresh berries.
Notes
- Use cold ingredients for the pie crust.
- Don’t overmix the pie dough.
- Blind bake the crust properly using pie weights.
- Temper the egg yolks to prevent scrambling.
- Chill the pie thoroughly for at least 4 hours.
- Use high-quality chocolate for the best flavor.
- Adjust sweetness to your liking.
- Make the crust and filling ahead of time.
- Add flavor variations to the filling or toppings.


Leave a Comment