
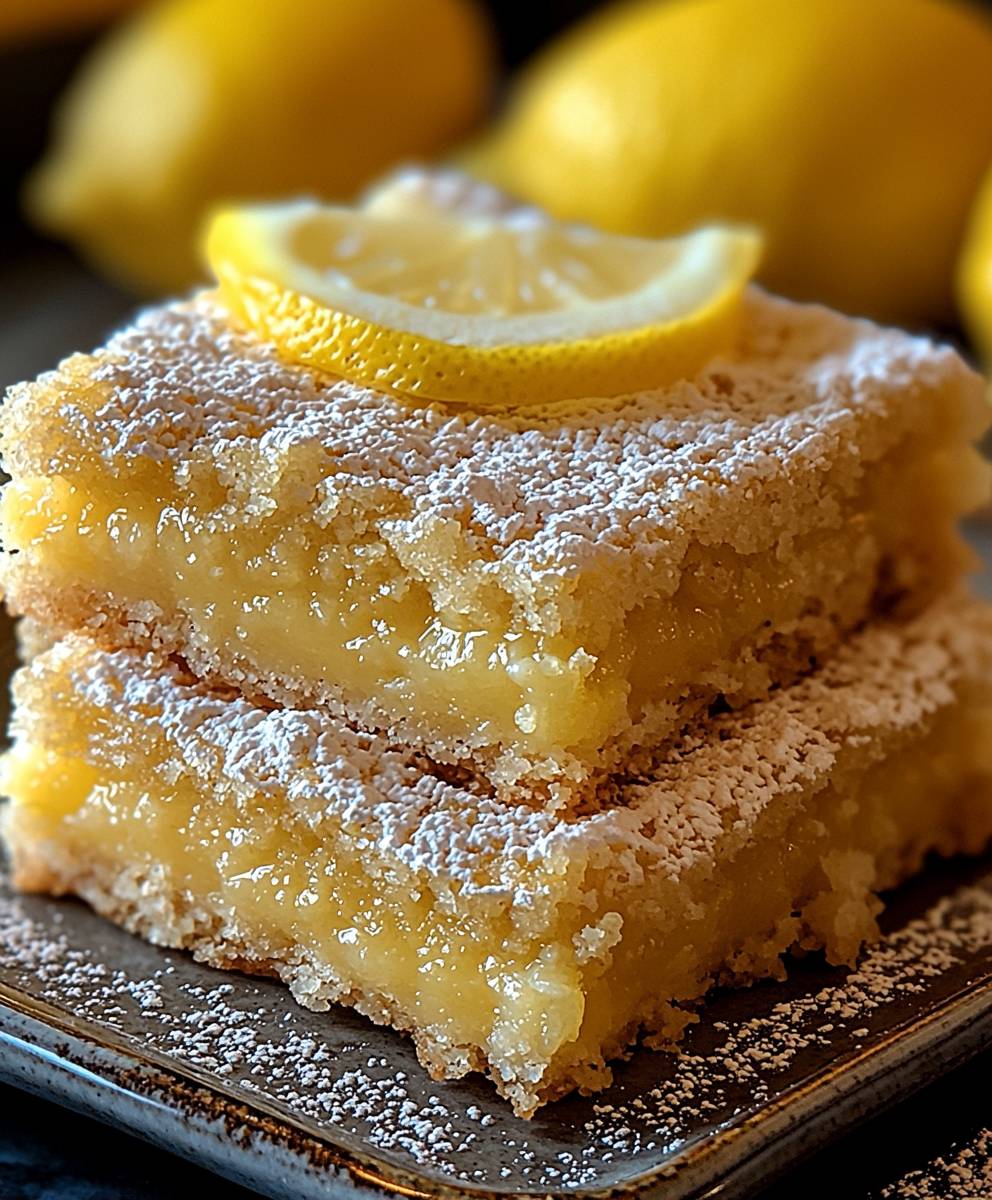
Lemon Cake Bars: Prepare to be transported to a sun-drenched citrus grove with every single bite! These aren’t just any dessert; they’re a burst of sunshine on a cloudy day, a sweet and tangy symphony that will leave you craving more. I’m thrilled to share this recipe with you, a delightful twist on the classic lemon bar that’s incredibly easy to make and even easier to devour.
The allure of lemon desserts stretches back centuries, with lemons themselves being prized for their medicinal and culinary properties. While the exact origins of the lemon bar are debated, its popularity soared in the mid-20th century, becoming a staple at bake sales and family gatherings. What makes these lemon cake bars so irresistible? It’s the perfect balance of flavors and textures. The buttery, crumbly base provides a comforting foundation for the vibrant, tangy lemon filling. The smooth, creamy filling contrasts beautifully with the slightly crisp edges, creating a truly satisfying experience.
Beyond the exquisite taste, these bars are incredibly convenient. They require minimal ingredients, come together quickly, and are perfect for potlucks, picnics, or simply a sweet treat to brighten your afternoon. So, gather your ingredients, preheat your oven, and let’s embark on a baking adventure that will fill your kitchen with the intoxicating aroma of fresh lemons!

Ingredients:
- For the Crust:
- 1 1/2 cups (180g) all-purpose flour
- 1/2 cup (100g) granulated sugar
- 1/2 teaspoon salt
- 1/2 cup (113g) cold unsalted butter, cut into cubes
- 1 large egg yolk
- 2 tablespoons ice water
- For the Lemon Filling:
- 4 large eggs
- 1 1/2 cups (300g) granulated sugar
- 1/4 cup (30g) all-purpose flour
- 1/4 teaspoon salt
- 1 cup (240ml) freshly squeezed lemon juice (from about 5-6 lemons)
- 2 tablespoons lemon zest (from about 3-4 lemons)
- 1/4 cup (57g) unsalted butter, melted
- For the Powdered Sugar Topping (optional):
- 1/4 cup powdered sugar
Preparing the Crust:
- Combine Dry Ingredients: In a large bowl, whisk together the flour, sugar, and salt. This ensures the salt is evenly distributed, which is crucial for flavor.
- Cut in the Butter: Add the cold, cubed butter to the flour mixture. Using a pastry blender or your fingertips, cut the butter into the flour until the mixture resembles coarse crumbs. The smaller the butter pieces, the flakier the crust will be. If using your fingertips, work quickly to prevent the butter from melting.
- Add Egg Yolk and Water: In a small bowl, whisk together the egg yolk and ice water. Pour this mixture over the flour and butter mixture.
- Mix the Dough: Using a fork or your hands, gently mix the ingredients until a dough starts to come together. Be careful not to overmix, as this can develop the gluten in the flour and result in a tough crust. The dough should be slightly crumbly but hold together when pressed.
- Press into Pan: Press the dough evenly into the bottom of an ungreased 9×13 inch baking pan. I like to use the bottom of a measuring cup to ensure it’s packed down firmly and evenly. This helps prevent the crust from shrinking during baking.
- Pre-bake the Crust: Preheat your oven to 350°F (175°C). Bake the crust for 18-20 minutes, or until it’s lightly golden brown. This pre-baking step is essential to prevent a soggy crust. Let the crust cool slightly while you prepare the lemon filling.
Making the Lemon Filling:
- Whisk Eggs and Sugar: In a large bowl, whisk together the eggs and sugar until light and slightly thickened. This usually takes about 2-3 minutes.
- Add Dry Ingredients: Whisk in the flour and salt until well combined. Make sure there are no lumps of flour remaining.
- Incorporate Lemon Juice and Zest: Gradually whisk in the lemon juice and lemon zest. The mixture will become quite liquid at this point, which is perfectly normal. The lemon juice is what gives these bars their signature tangy flavor.
- Add Melted Butter: Slowly drizzle in the melted butter while whisking constantly. This helps to emulsify the butter into the mixture and create a smooth, creamy filling.
Baking the Lemon Bars:
- Pour Filling over Crust: Pour the lemon filling evenly over the pre-baked crust.
- Bake: Bake in the preheated oven for 25-30 minutes, or until the filling is set but still slightly jiggly in the center. The edges should be lightly golden brown. Be careful not to overbake, as this can result in a dry or cracked filling.
- Cool Completely: Remove the lemon bars from the oven and let them cool completely in the pan on a wire rack. This is crucial for the filling to set properly. I know it’s tempting to cut into them while they’re still warm, but trust me, they’re much better when fully cooled.
Cutting and Serving:
- Chill (Optional): For even cleaner cuts, you can chill the lemon bars in the refrigerator for at least 30 minutes before cutting. This helps the filling to firm up even more.
- Cut into Bars: Using a sharp knife, cut the lemon bars into squares or rectangles. Wipe the knife clean between each cut for the neatest results.
- Dust with Powdered Sugar (Optional): If desired, dust the lemon bars with powdered sugar before serving. This adds a touch of sweetness and makes them look extra pretty.
- Serve and Enjoy: Serve the lemon bars chilled or at room temperature. They’re delicious on their own or with a scoop of vanilla ice cream.
Tips for Success:
- Use Fresh Lemon Juice: Bottled lemon juice just doesn’t compare to the flavor of freshly squeezed lemon juice. It’s worth the extra effort to squeeze your own.
- Don’t Overbake: Overbaking will result in a dry, cracked filling. The filling should be set but still slightly jiggly in the center when you remove it from the oven.
- Cool Completely: This is the most important step! The filling needs time to set properly. Be patient and let the bars cool completely before cutting.
- Lemon Zest is Key: Don’t skip the lemon zest! It adds a ton of lemon flavor and aroma to the bars.
- Adjust Sweetness to Taste: If you prefer a less tart lemon bar, you can increase the amount of sugar in the filling by a tablespoon or two.
- Storage: Store leftover lemon bars in an airtight container in the refrigerator for up to 3 days.
Variations:
- Lime Bars: Substitute lime juice and zest for the lemon juice and zest for a tangy lime version.
- Orange Bars: Use orange juice and zest instead of lemon for a citrusy orange treat.
- Coconut Crust: Add 1/2 cup of shredded coconut to the crust for a tropical twist.
- Berry Topping: Top the baked lemon bars with fresh berries before dusting with powdered sugar.
Troubleshooting:
- Soggy Crust: Make sure to pre-bake the crust and let it cool slightly before adding the filling. Also, ensure the crust is packed down firmly and evenly in the pan.
- Cracked Filling: Avoid overbaking the bars. The filling should be set but still slightly jiggly in the center when you remove it from the oven.
- Filling Not Setting: Ensure you’re using the correct amount of flour in the filling. Also, make sure the bars are cooled completely before cutting.
- Too Tart: Adjust the amount of sugar in the filling to your liking. You can add a tablespoon or two more sugar to reduce the tartness.
Conclusion:
And there you have it! These Lemon Cake Bars are truly a ray of sunshine in dessert form, and I genuinely believe they’re a must-try for anyone who loves a bright, citrusy treat. From the incredibly moist and tender cake base to the tangy and sweet lemon glaze, every bite is an explosion of flavor that will leave you wanting more. I’ve made these bars countless times, and they’re always a hit, whether it’s for a casual afternoon snack, a potluck gathering, or even a slightly fancier dessert spread. What makes these bars so special, in my opinion, is their simplicity. They require minimal effort and ingredients, yet the result is something truly extraordinary. You don’t need to be a seasoned baker to whip up a batch of these beauties. The recipe is straightforward and easy to follow, making it perfect for both beginner and experienced bakers alike. Plus, the vibrant lemon flavor is incredibly versatile and pairs well with so many things. Speaking of pairings, let’s talk about serving suggestions! These Lemon Cake Bars are delicious on their own, but they can also be elevated with a few simple additions. A dollop of freshly whipped cream or a scoop of vanilla ice cream adds a touch of richness and creaminess that complements the tartness of the lemon perfectly. You could also sprinkle them with fresh berries, such as raspberries or blueberries, for a pop of color and added flavor. For a more sophisticated presentation, try dusting them with powdered sugar or drizzling them with a white chocolate ganache. And if you’re feeling adventurous, there are plenty of variations you can try to customize these bars to your liking. For a more intense lemon flavor, add a teaspoon of lemon extract to the batter. You could also incorporate other citrus fruits, such as orange or lime, for a unique twist. If you’re a fan of nuts, try adding chopped pecans or walnuts to the batter for a bit of crunch. And for a truly decadent treat, you could even add a layer of cream cheese frosting on top. The possibilities are endless! I’ve poured my heart into perfecting this recipe, and I’m so excited to share it with you. I truly believe that these Lemon Cake Bars will become a staple in your baking repertoire. They’re the perfect balance of sweet and tart, and they’re guaranteed to brighten up any day. So, what are you waiting for? Grab your ingredients, preheat your oven, and get ready to bake up a batch of these irresistible Lemon Cake Bars. I promise you won’t be disappointed. And once you’ve tried them, I’d love to hear about your experience! Share your photos and comments on social media using #LemonCakeBarMagic or tag me in your posts. I can’t wait to see your creations and hear what you think! Happy baking! I am sure you will love this recipe as much as I do. Let me know if you have any questions, and I’ll do my best to help. Enjoy! PrintLemon Cake Bars: The Ultimate Guide to Baking Perfection

Tangy and sweet lemon bars with a buttery shortbread crust and a bright, citrusy filling. A classic dessert that’s easy to make and perfect for any occasion.
- Prep Time: 20 minutes
- Cook Time: 45 minutes
- Total Time: 65 minutes
- Yield: 24 bars 1x
Ingredients
- 1 1/2 cups (180g) all-purpose flour
- 1/2 cup (100g) granulated sugar
- 1/2 teaspoon salt
- 1/2 cup (113g) cold unsalted butter, cut into cubes
- 1 large egg yolk
- 2 tablespoons ice water
- 4 large eggs
- 1 1/2 cups (300g) granulated sugar
- 1/4 cup (30g) all-purpose flour
- 1/4 teaspoon salt
- 1 cup (240ml) freshly squeezed lemon juice (from about 5–6 lemons)
- 2 tablespoons lemon zest (from about 3–4 lemons)
- 1/4 cup (57g) unsalted butter, melted
- 1/4 cup powdered sugar
Instructions
- Combine Dry Ingredients: In a large bowl, whisk together the flour, sugar, and salt.
- Cut in the Butter: Add the cold, cubed butter to the flour mixture. Using a pastry blender or your fingertips, cut the butter into the flour until the mixture resembles coarse crumbs.
- Add Egg Yolk and Water: In a small bowl, whisk together the egg yolk and ice water. Pour this mixture over the flour and butter mixture.
- Mix the Dough: Using a fork or your hands, gently mix the ingredients until a dough starts to come together. Be careful not to overmix.
- Press into Pan: Press the dough evenly into the bottom of an ungreased 9×13 inch baking pan.
- Pre-bake the Crust: Preheat your oven to 350°F (175°C). Bake the crust for 18-20 minutes, or until it’s lightly golden brown. Let the crust cool slightly while you prepare the lemon filling.
- Whisk Eggs and Sugar: In a large bowl, whisk together the eggs and sugar until light and slightly thickened.
- Add Dry Ingredients: Whisk in the flour and salt until well combined.
- Incorporate Lemon Juice and Zest: Gradually whisk in the lemon juice and lemon zest.
- Add Melted Butter: Slowly drizzle in the melted butter while whisking constantly.
- Pour Filling over Crust: Pour the lemon filling evenly over the pre-baked crust.
- Bake: Bake in the preheated oven for 25-30 minutes, or until the filling is set but still slightly jiggly in the center. The edges should be lightly golden brown.
- Cool Completely: Remove the lemon bars from the oven and let them cool completely in the pan on a wire rack.
- Chill (Optional): For even cleaner cuts, you can chill the lemon bars in the refrigerator for at least 30 minutes before cutting.
- Cut into Bars: Using a sharp knife, cut the lemon bars into squares or rectangles. Wipe the knife clean between each cut for the neatest results.
- Dust with Powdered Sugar (Optional): If desired, dust the lemon bars with powdered sugar before serving.
- Serve and Enjoy: Serve the lemon bars chilled or at room temperature.
Notes
- Use fresh lemon juice for the best flavor.
- Don’t overbake the bars; the filling should be slightly jiggly.
- Cool the bars completely before cutting for a clean slice.
- Lemon zest is key for a strong lemon flavor.
- Adjust sweetness to taste by adding more sugar.
- Store leftover lemon bars in an airtight container in the refrigerator for up to 3 days.


Leave a Comment