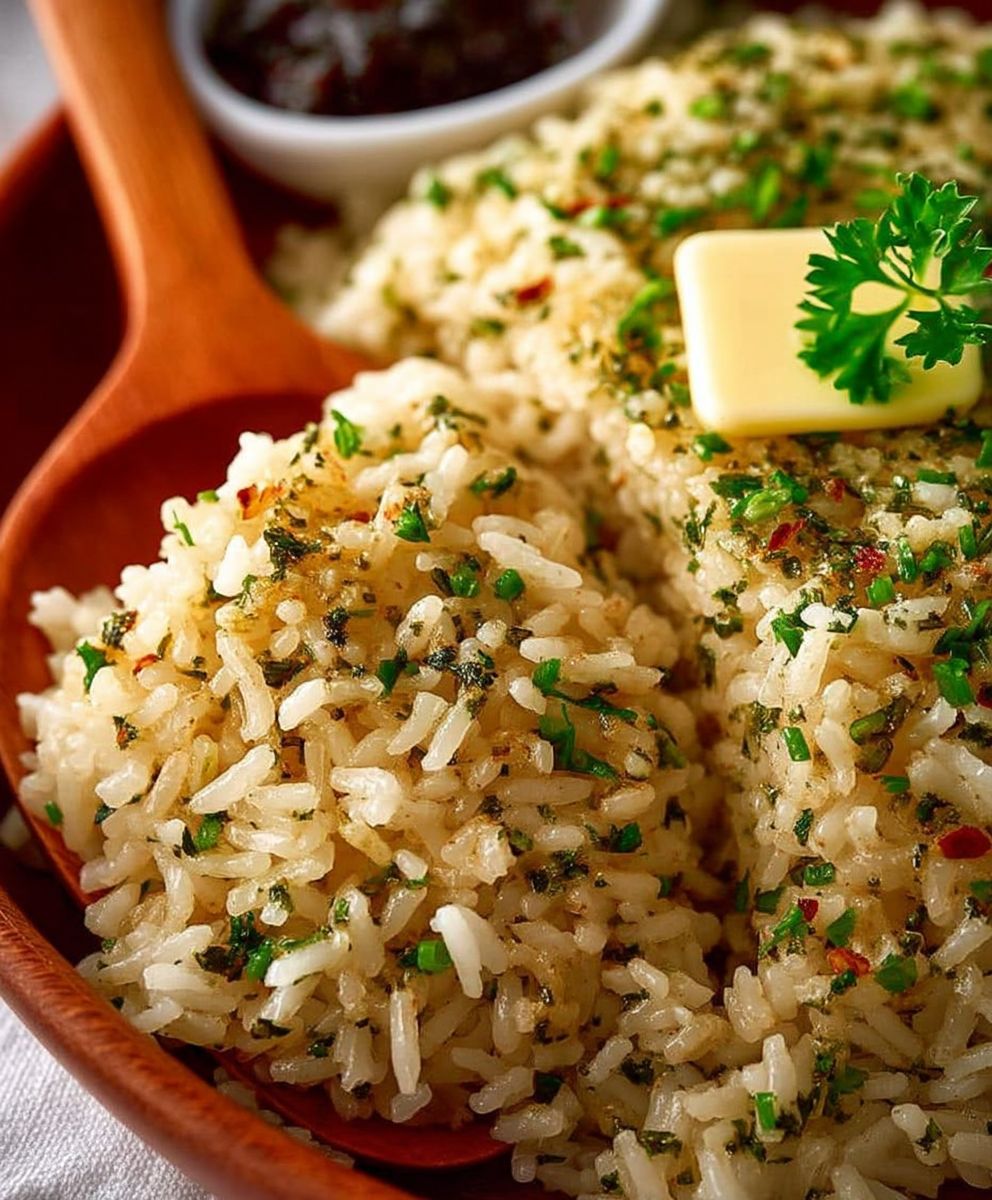
Buttery Seasoned Rice: Prepare to elevate your weeknight dinners from ordinary to extraordinary with this simple yet incredibly flavorful side dish! Have you ever wished you could create restaurant-quality rice at home, the kind that’s perfectly fluffy, subtly seasoned, and melts in your mouth? Well, now you can! This recipe unlocks the secret to achieving just that, and it’s easier than you might think.
Rice, a staple in countless cultures around the world, has a rich and fascinating history. From its origins in Asia thousands of years ago to its present-day prominence on tables globally, rice has nourished generations. While often enjoyed plain, transforming it into something special with a few simple additions is a culinary tradition in many families. My grandmother, for instance, always added a touch of butter and herbs to her rice, a practice I’ve lovingly adapted and perfected over the years.
People adore this Buttery Seasoned Rice because it’s the perfect balance of comfort and sophistication. The buttery richness adds a luxurious touch, while the carefully selected seasonings enhance the natural flavor of the rice without overpowering it. It’s incredibly versatile, pairing beautifully with everything from grilled chicken and fish to roasted vegetables and hearty stews. Plus, it’s quick and easy to prepare, making it an ideal choice for busy weeknights when you crave a delicious and satisfying meal without spending hours in the kitchen. The fluffy texture and savory taste will have everyone asking for seconds!
Ingredients:
- 2 cups long-grain rice, rinsed
- 4 cups chicken broth (or vegetable broth for a vegetarian option)
- 4 tablespoons unsalted butter
- 1 medium yellow onion, finely chopped
- 2 cloves garlic, minced
- 1 teaspoon dried thyme
- 1 teaspoon dried rosemary
- 1/2 teaspoon dried sage
- 1/4 teaspoon red pepper flakes (optional, for a little heat)
- 1 teaspoon salt (or to taste)
- 1/2 teaspoon black pepper (or to taste)
- 2 tablespoons chopped fresh parsley, for garnish
- 1 tablespoon chopped fresh chives, for garnish
Preparing the Aromatic Base:
This step is crucial for infusing the rice with incredible flavor. Don’t skip it!
-
Melt the Butter: In a large, heavy-bottomed pot or Dutch oven, melt the butter over medium heat. Make sure the pot is large enough to hold all the rice and broth later without overflowing. The heavy bottom will prevent scorching.
-
Sauté the Onion: Add the finely chopped onion to the melted butter. Cook, stirring occasionally, until the onion is softened and translucent, about 5-7 minutes. You want it to be soft and sweet, not browned.
-
Add the Garlic: Add the minced garlic to the pot and cook for another minute, stirring constantly, until fragrant. Be careful not to burn the garlic, as it will become bitter. The aroma should be intoxicating!
-
Bloom the Herbs and Spices: Stir in the dried thyme, dried rosemary, dried sage, and red pepper flakes (if using). Cook for about 30 seconds, stirring constantly, until fragrant. This process, called “blooming,” releases the essential oils in the herbs and spices, intensifying their flavor.
Cooking the Rice:
Now for the main event! This is where the magic happens. Pay close attention to the liquid ratio and cooking time for perfectly cooked, fluffy rice.
-
Add the Rice: Add the rinsed rice to the pot and stir to coat it evenly with the butter, onion, garlic, herbs, and spices. Toast the rice for about 2-3 minutes, stirring frequently. This helps to prevent the rice from becoming sticky and adds a nutty flavor.
-
Pour in the Broth: Pour in the chicken broth (or vegetable broth). Bring the mixture to a boil over high heat. Make sure all the rice is submerged in the broth.
-
Season and Simmer: Stir in the salt and pepper. Once the mixture is boiling, reduce the heat to low, cover the pot tightly with a lid, and simmer for 18-20 minutes, or until all the liquid has been absorbed and the rice is tender. Do not lift the lid during this time! This is crucial for even cooking and preventing the rice from becoming mushy.
-
Check for Doneness: After 18 minutes, check the rice. If there is still liquid in the pot, continue to simmer for a few more minutes, checking every minute or two, until the liquid is absorbed. The rice should be tender and fluffy.
Resting and Fluffing:
Patience is key! This resting period allows the rice to fully absorb any remaining moisture and become perfectly fluffy.
-
Rest the Rice: Once the rice is cooked, remove the pot from the heat and let it stand, covered, for 10 minutes. This allows the steam to redistribute and the rice to finish cooking.
-
Fluff with a Fork: After 10 minutes, remove the lid and fluff the rice gently with a fork. This separates the grains and prevents them from sticking together.
Serving and Garnishing:
The final touches! A sprinkle of fresh herbs adds a pop of color and freshness.
-
Garnish: Sprinkle the chopped fresh parsley and chives over the rice. This adds a vibrant color and fresh flavor.
-
Serve: Serve the buttery seasoned rice hot as a side dish with your favorite protein or vegetables. It’s delicious with grilled chicken, roasted fish, or sautéed vegetables.
Tips and Variations:
-
Broth Options: Chicken broth adds a richer flavor, but vegetable broth works perfectly well for a vegetarian option. You can also use beef broth for a heartier flavor.
-
Herb Variations: Feel free to experiment with different herbs. Italian seasoning, herbes de Provence, or even a bay leaf added during cooking can add a unique flavor profile.
-
Vegetable Additions: Add diced carrots, celery, or peas to the pot along with the onion for a more substantial side dish.
-
Mushroom Enhancement: Sauté sliced mushrooms with the onion and garlic for an earthy flavor.
-
Cheese Please: Stir in a handful of grated Parmesan cheese after fluffing the rice for a cheesy twist.
-
Spice it Up: Adjust the amount of red pepper flakes to your liking, or add a pinch of cayenne pepper for extra heat.
-
Lemon Zest: Add the zest of one lemon along with the herbs for a bright and citrusy flavor.
-
Toasted Nuts: Sprinkle toasted almonds or pine nuts over the rice for added texture and flavor.
-
Make it Ahead: You can prepare the rice ahead of time and reheat it in the microwave or oven. Add a splash of broth or water to prevent it from drying out.
-
Rice Cooker Option: If you prefer, you can make this recipe in a rice cooker. Simply combine all the ingredients in the rice cooker and cook according to the manufacturer’s instructions.
Troubleshooting:
-
Rice is Mushy: You likely used too much liquid or cooked the rice for too long. Next time, reduce the amount of broth or shorten the cooking time.
-
Rice is Crunchy: You likely didn’t use enough liquid or didn’t cook the rice for long enough. Add a little more broth and continue to simmer until the rice is tender.
-
Rice is Sticky: Rinsing the rice before cooking helps to remove excess starch and prevent it from becoming sticky. Also, avoid stirring the rice too much during cooking.
-
Rice is Scorched: Use a heavy-bottomed pot to prevent scorching. Also, make sure the heat is low enough during simmering.
Storage Instructions:
Store leftover rice in an airtight container in the refrigerator for up to 3 days. Reheat in the microwave or oven until heated through.

Conclusion:
And there you have it! This Slow Roast Leg of Lamb recipe isn’t just another Sunday roast; it’s an experience. The incredibly tender, fall-off-the-bone meat, infused with the aromatic herbs and garlic, is guaranteed to impress even the most discerning palate. I truly believe this is a must-try recipe for anyone looking to elevate their cooking game and create a memorable meal.
Why is it a must-try? Because it’s surprisingly simple! Despite the impressive results, the hands-on time is minimal. The slow roasting process does all the work, transforming a humble leg of lamb into a culinary masterpiece. Plus, the aroma that fills your kitchen while it’s cooking is simply divine a true testament to the magic happening in your oven. Forget dry, tough lamb; this method ensures perfectly cooked, succulent meat every single time.
But the best part? The versatility! While I’ve shared my go-to method, feel free to experiment with different herbs and spices to create your own signature flavor profile. Rosemary and thyme are classic choices, but don’t be afraid to add a pinch of smoked paprika for a hint of smokiness, or a sprinkle of chili flakes for a touch of heat. You could even try marinating the lamb overnight in a mixture of yogurt, lemon juice, and garlic for an extra layer of tenderness and flavor.
Serving suggestions are endless! I personally love serving this Slow Roast Leg of Lamb with roasted root vegetables like carrots, parsnips, and potatoes. The sweetness of the vegetables complements the richness of the lamb beautifully. A dollop of mint sauce or a vibrant gremolata adds a refreshing contrast. For a more Mediterranean twist, serve it with a side of couscous or quinoa, and a generous helping of tzatziki sauce. And don’t forget the gravy! The pan juices, reduced and thickened, make a truly exceptional gravy that will have everyone clamoring for more.
Serving Variations:
* Lamb Sandwiches: Leftover lamb makes incredible sandwiches! Pile it high on crusty bread with your favorite toppings.
* Lamb Shepherd’s Pie: Transform the leftovers into a comforting shepherd’s pie with a creamy mashed potato topping.
* Lamb Curry: Dice the lamb and add it to your favorite curry recipe for a hearty and flavorful meal.
* Lamb Salad: Shred the lamb and toss it with mixed greens, feta cheese, olives, and a lemon vinaigrette for a light and refreshing salad.
I’m so excited for you to try this recipe! I know you’ll love it as much as I do. The key is patience let the slow roasting process work its magic. Trust me, the wait is worth it.
So, go ahead, gather your ingredients, preheat your oven, and prepare to be amazed. Once you’ve tried this Slow Roast Leg of Lamb, I have a feeling it will become a staple in your recipe repertoire.
And finally, I’d absolutely love to hear about your experience! Did you try any variations? What sides did you serve it with? What did your family and friends think? Please share your photos and comments below. Your feedback is invaluable, and I can’t wait to see your culinary creations! Happy cooking!
Buttery Seasoned Rice: The Ultimate Guide to Flavorful Rice
Fluffy and flavorful buttery seasoned rice, infused with aromatic herbs and spices. A simple yet elegant side dish perfect for any meal.
Ingredients
- 2 cups long-grain rice, rinsed
- 4 cups chicken broth (or vegetable broth for a vegetarian option)
- 4 tablespoons unsalted butter
- 1 medium yellow onion, finely chopped
- 2 cloves garlic, minced
- 1 teaspoon dried thyme
- 1 teaspoon dried rosemary
- 1/2 teaspoon dried sage
- 1/4 teaspoon red pepper flakes (optional, for a little heat)
- 1 teaspoon salt (or to taste)
- 1/2 teaspoon black pepper (or to taste)
- 2 tablespoons chopped fresh parsley, for garnish
- 1 tablespoon chopped fresh chives, for garnish
Instructions
- Melt the Butter: In a large, heavy-bottomed pot or Dutch oven, melt the butter over medium heat.
- Sauté the Onion: Add the finely chopped onion to the melted butter. Cook, stirring occasionally, until the onion is softened and translucent, about 5-7 minutes.
- Add the Garlic: Add the minced garlic to the pot and cook for another minute, stirring constantly, until fragrant. Be careful not to burn the garlic, as it will become bitter.
- Bloom the Herbs and Spices: Stir in the dried thyme, dried rosemary, dried sage, and red pepper flakes (if using). Cook for about 30 seconds, stirring constantly, until fragrant.
- Add the Rice: Add the rinsed rice to the pot and stir to coat it evenly with the butter, onion, garlic, herbs, and spices. Toast the rice for about 2-3 minutes, stirring frequently.
- Pour in the Broth: Pour in the chicken broth (or vegetable broth). Bring the mixture to a boil over high heat.
- Season and Simmer: Stir in the salt and pepper. Once the mixture is boiling, reduce the heat to low, cover the pot tightly with a lid, and simmer for 18-20 minutes, or until all the liquid has been absorbed and the rice is tender. Do not lift the lid during this time!
- Check for Doneness: After 18 minutes, check the rice. If there is still liquid in the pot, continue to simmer for a few more minutes, checking every minute or two, until the liquid is absorbed. The rice should be tender and fluffy.
- Rest the Rice: Once the rice is cooked, remove the pot from the heat and let it stand, covered, for 10 minutes.
- Fluff with a Fork: After 10 minutes, remove the lid and fluff the rice gently with a fork.
- Garnish: Sprinkle the chopped fresh parsley and chives over the rice.
- Serve: Serve the buttery seasoned rice hot as a side dish.
Notes
- Broth Options: Chicken broth adds a richer flavor, but vegetable broth works perfectly well for a vegetarian option. You can also use beef broth for a heartier flavor.
- Herb Variations: Feel free to experiment with different herbs. Italian seasoning, herbes de Provence, or even a bay leaf added during cooking can add a unique flavor profile.
- Vegetable Additions: Add diced carrots, celery, or peas to the pot along with the onion for a more substantial side dish.
- Mushroom Enhancement: Sauté sliced mushrooms with the onion and garlic for an earthy flavor.
- Cheese Please: Stir in a handful of grated Parmesan cheese after fluffing the rice for a cheesy twist.
- Spice it Up: Adjust the amount of red pepper flakes to your liking, or add a pinch of cayenne pepper for extra heat.
- Lemon Zest: Add the zest of one lemon along with the herbs for a bright and citrusy flavor.
- Toasted Nuts: Sprinkle toasted almonds or pine nuts over the rice for added texture and flavor.
- Make it Ahead: You can prepare the rice ahead of time and reheat it in the microwave or oven. Add a splash of broth or water to prevent it from drying out.
- Rice Cooker Option: If you prefer, you can make this recipe in a rice cooker. Simply combine all the ingredients in the rice cooker and cook according to the manufacturer’s instructions.
- Storage Instructions: Store leftover rice in an airtight container in the refrigerator for up to 3 days. Reheat in the microwave or oven until heated through.


Leave a Comment