
Cherry Hibiscus Iced Tea: Prepare to be transported to a sun-drenched paradise with every sip of this vibrant and refreshing drink! Forget those sugary, artificial iced teas we’re diving headfirst into a world of natural sweetness and floral aromas that will tantalize your taste buds. Have you ever imagined a drink that perfectly balances the tartness of cherries with the delicate, slightly tangy notes of hibiscus? Well, dream no more!
Hibiscus tea, known for its stunning crimson hue and potential health benefits, has been enjoyed for centuries in various cultures. From ancient Egypt, where it was a favorite beverage of pharaohs, to the Caribbean, where it’s often enjoyed as a festive drink, hibiscus has a rich and fascinating history. Combining it with the juicy sweetness of cherries elevates it to a whole new level of deliciousness.
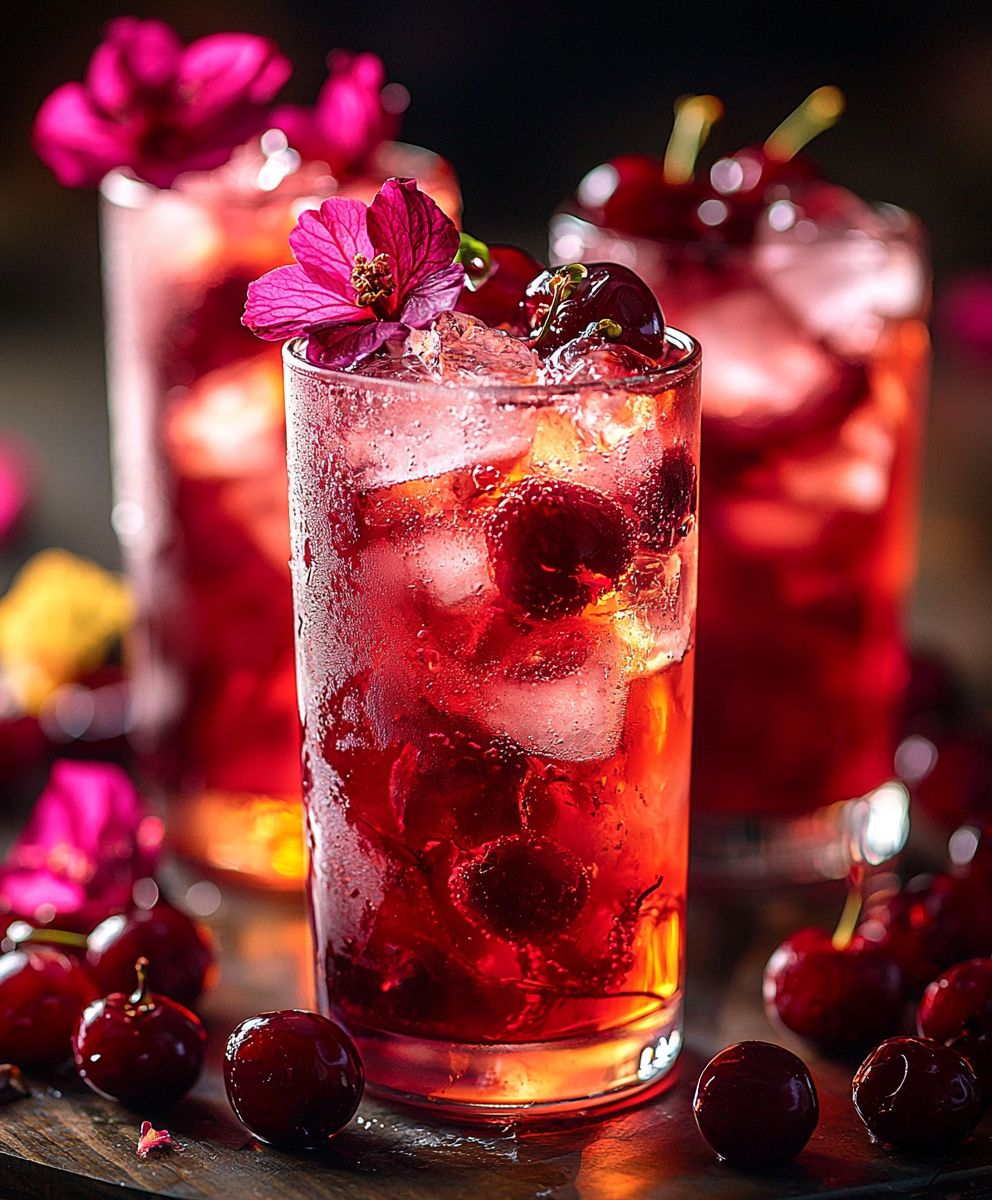
What makes this Cherry Hibiscus Iced Tea so irresistible? It’s the perfect marriage of flavors the bright, fruity cherry notes dance harmoniously with the floral, slightly acidic hibiscus. The result is a drink that’s both incredibly refreshing and deeply satisfying. Plus, it’s incredibly easy to make! Whether you’re looking for a delightful afternoon treat, a stunning addition to your next brunch, or a healthy and flavorful alternative to sugary drinks, this recipe is guaranteed to become a new favorite. I promise you, once you try this, you’ll never go back to store-bought iced tea again!

Ingredients:
- For the Cherry Hibiscus Syrup:
- 1 cup dried hibiscus flowers
- 2 cups fresh or frozen pitted cherries
- 2 cups granulated sugar
- 2 cups water
- 1 tablespoon lemon juice
- For the Iced Tea:
- 6 cups water
- 6 black tea bags (or loose leaf equivalent)
- Ice cubes
- Fresh cherries, for garnish (optional)
- Hibiscus flowers, for garnish (optional)
- Lemon slices, for garnish (optional)
Making the Cherry Hibiscus Syrup
Okay, let’s start with the heart of this delicious drink: the Cherry Hibiscus Syrup. This is where all the magic happens, and trust me, it’s easier than you think! This syrup is not only fantastic in iced tea, but you can also use it in cocktails, sparkling water, or even drizzle it over pancakes. It’s a versatile flavor bomb!
- Combine Ingredients: In a medium saucepan, combine the dried hibiscus flowers, cherries, sugar, and water. Give it a good stir to make sure the sugar starts to dissolve.
- Bring to a Boil: Place the saucepan over medium-high heat and bring the mixture to a rolling boil. Keep a close eye on it, as it can bubble up quickly!
- Simmer and Reduce: Once boiling, reduce the heat to low and let the mixture simmer gently for about 20-25 minutes. You’ll notice the liquid reducing and thickening slightly. The cherries will soften and release their juices, and the hibiscus will infuse its beautiful color and tartness. Stir occasionally to prevent sticking.
- Strain the Syrup: After simmering, remove the saucepan from the heat. Place a fine-mesh sieve over a heat-proof bowl or jar. Carefully pour the cherry hibiscus mixture through the sieve, pressing down on the solids with a spoon or spatula to extract as much syrup as possible. Discard the solids (or save them for another use, like adding to oatmeal!).
- Add Lemon Juice: Stir in the lemon juice. The lemon juice not only brightens the flavor but also acts as a natural preservative.
- Cool and Store: Let the syrup cool completely before transferring it to an airtight container or jar. Store in the refrigerator for up to 2 weeks. The syrup will thicken further as it cools.
Brewing the Black Tea
Now that our amazing syrup is ready, let’s move on to brewing the black tea. You can use your favorite type of black tea English Breakfast, Earl Grey, or even a flavored black tea would work beautifully. The key is to brew a strong tea that will stand up to the sweetness and tartness of the cherry hibiscus syrup.
- Heat the Water: Bring 6 cups of water to a boil in a kettle or saucepan.
- Steep the Tea: Once the water is boiling, remove it from the heat and add the black tea bags (or loose leaf tea in a tea infuser). Let the tea steep for 3-5 minutes, depending on your preference for strength. I usually go for 4 minutes for a good, strong brew.
- Remove Tea Bags: After steeping, remove the tea bags or infuser. Don’t squeeze the tea bags, as this can release bitter tannins.
- Cool the Tea: Allow the tea to cool completely. You can speed up this process by placing the tea in the refrigerator. This is important because adding ice to hot tea will dilute it and make it taste weak.
Assembling the Cherry Hibiscus Iced Tea
Alright, we’re in the home stretch! We have our gorgeous cherry hibiscus syrup and our perfectly brewed black tea. Now it’s time to put it all together and create the most refreshing iced tea you’ve ever tasted. This is where you can really customize the drink to your liking, adjusting the amount of syrup to achieve your desired level of sweetness and tartness.
- Fill Glasses with Ice: Fill your glasses with ice cubes. The amount of ice you use will depend on the size of your glasses and how cold you like your iced tea.
- Add Cherry Hibiscus Syrup: Pour 2-3 tablespoons of cherry hibiscus syrup into each glass. Start with less and add more to taste. Remember, you can always add more, but you can’t take it away!
- Pour in the Black Tea: Fill the glasses with the cooled black tea, leaving a little room at the top.
- Stir Well: Stir the iced tea well to combine the syrup and tea. Make sure the syrup is evenly distributed throughout the drink.
- Taste and Adjust: Taste the iced tea and adjust the sweetness and tartness to your liking. If it’s not sweet enough, add more syrup. If it’s too sweet, add a little more black tea or a squeeze of lemon juice.
- Garnish (Optional): Garnish with fresh cherries, hibiscus flowers, and/or lemon slices for a beautiful and refreshing presentation. A sprig of mint would also be a lovely addition.
- Serve and Enjoy!: Serve immediately and enjoy your homemade Cherry Hibiscus Iced Tea! This is the perfect drink for a hot summer day, a picnic, or any time you need a refreshing pick-me-up.
Tips and Variations:
- Adjusting Sweetness: The amount of sugar in the syrup can be adjusted to your preference. If you prefer a less sweet syrup, reduce the amount of sugar by 1/4 cup. You can also use a sugar substitute like honey or agave nectar, but keep in mind that this will affect the flavor of the syrup.
- Using Different Teas: Feel free to experiment with different types of tea. Green tea, white tea, or even herbal teas like chamomile or rooibos would all work well in this recipe.
- Adding Sparkling Water: For a fizzy twist, top off the iced tea with sparkling water or club soda. This will add a refreshing effervescence to the drink.
- Making a Cocktail: Turn this iced tea into a cocktail by adding a shot of vodka, gin, or rum. A splash of lime juice would also be a great addition.
- Freezing for Later: You can freeze the cherry hibiscus syrup in ice cube trays for easy use later. Simply pop out a few cubes and add them to your iced tea or other beverages.
- Cherry Variety: Use any variety of cherries you like! Bing cherries will give a deeper color and richer flavor, while Rainier cherries will be sweeter and more delicate.
Make it Ahead:
The cherry hibiscus syrup can be made several days in advance and stored in the refrigerator. The black tea can also be brewed ahead of time and stored in the refrigerator. This makes it easy to assemble the iced tea quickly when you’re ready to serve it.
Serving Suggestions:
This Cherry Hibiscus Iced Tea is perfect for serving at parties, picnics, or barbecues. It’s also a great drink to enjoy on a hot summer day. Serve it with a slice of lemon or lime, a sprig of mint, and a few fresh cherries for a beautiful and refreshing presentation.
Conclusion:
This Cherry Hibiscus Iced Tea isn’t just a drink; it’s an experience. The vibrant ruby color, the tantalizing aroma, and the perfectly balanced sweet and tart flavors all combine to create a truly unforgettable refreshment. I genuinely believe this recipe is a must-try because it’s so much more than just throwing a few ingredients together. It’s about crafting a moment of pure bliss, a little escape from the everyday hustle. The depth of flavor achieved through the hibiscus and cherry combination is simply unparalleled, offering a sophisticated twist on classic iced tea that will impress your guests and delight your taste buds. But the best part? It’s incredibly versatile! While I adore it served chilled over ice with a sprig of mint, there are so many ways to customize this recipe to your liking. For a sparkling version, try topping it off with club soda or sparkling water just before serving. This adds a delightful fizz that elevates the drink to a whole new level. If you’re feeling adventurous, a splash of rum or vodka can transform it into a delightful cocktail for a summer evening. For a non-alcoholic twist, consider adding a few slices of fresh ginger during the brewing process. The ginger will impart a subtle warmth and spice that complements the cherry and hibiscus beautifully. You could also experiment with different sweeteners. While I prefer honey for its natural sweetness and floral notes, agave nectar or maple syrup would also work wonderfully. And don’t be afraid to play around with the fruit! Adding a handful of fresh raspberries or blackberries during the brewing process will infuse the tea with even more fruity goodness. Serving suggestions are endless! This Cherry Hibiscus Iced Tea is the perfect accompaniment to a summer barbecue, a picnic in the park, or simply a relaxing afternoon on the porch. It pairs beautifully with grilled chicken or fish, salads, and light desserts. You can even use it as a base for popsicles or granitas for a refreshing frozen treat. I personally love serving it in mason jars with a slice of lemon and a few fresh cherries for a rustic and charming presentation. I’ve poured my heart into perfecting this recipe, and I’m confident that you’ll love it as much as I do. The key to a truly exceptional Cherry Hibiscus Iced Tea lies in using high-quality ingredients and allowing the flavors to meld together properly during the brewing process. Don’t rush the steeping time; patience is key to extracting the full potential of the hibiscus and cherries. So, what are you waiting for? Gather your ingredients, follow the simple steps, and prepare to be amazed. I truly believe this recipe will become a staple in your summer rotation. I’m so excited for you to try this recipe! Once you’ve had a chance to make it, I would absolutely love to hear about your experience. Did you make any variations? What did you serve it with? What did your friends and family think? Please, share your thoughts and photos in the comments below! Your feedback is invaluable, and I can’t wait to see your creations. Happy brewing! Let me know if you have any questions, I’m always happy to help. PrintCherry Hibiscus Iced Tea: The Ultimate Refreshing Summer Drink

Homemade black tea infused with vibrant cherry hibiscus syrup. Perfect for hot days!
- Prep Time: 15 minutes
- Cook Time: 25 minutes
- Total Time: 40 minutes
- Yield: 6 servings 1x
Ingredients
- 1 cup dried hibiscus flowers
- 2 cups fresh or frozen pitted cherries
- 2 cups granulated sugar
- 2 cups water
- 1 tablespoon lemon juice
- 6 cups water
- 6 black tea bags (or loose leaf equivalent)
- Ice cubes
- Fresh cherries, for garnish (optional)
- Hibiscus flowers, for garnish (optional)
- Lemon slices, for garnish (optional)
Instructions
- Combine Ingredients: In a medium saucepan, combine the dried hibiscus flowers, cherries, sugar, and water. Stir well to dissolve the sugar.
- Bring to a Boil: Place the saucepan over medium-high heat and bring to a rolling boil.
- Simmer and Reduce: Reduce heat to low and simmer gently for 20-25 minutes, stirring occasionally. The liquid should reduce and thicken slightly.
- Strain the Syrup: Remove from heat. Place a fine-mesh sieve over a heat-proof bowl or jar. Pour the mixture through the sieve, pressing down on the solids to extract as much syrup as possible. Discard the solids.
- Add Lemon Juice: Stir in the lemon juice.
- Cool and Store: Let the syrup cool completely before transferring to an airtight container. Store in the refrigerator for up to 2 weeks.
- Heat the Water: Bring 6 cups of water to a boil.
- Steep the Tea: Remove from heat and add the black tea bags (or loose leaf tea). Steep for 3-5 minutes.
- Remove Tea Bags: Remove the tea bags or infuser.
- Cool the Tea: Allow the tea to cool completely. Refrigerate to speed up the process.
- Fill Glasses with Ice: Fill glasses with ice cubes.
- Add Cherry Hibiscus Syrup: Pour 2-3 tablespoons of cherry hibiscus syrup into each glass (adjust to taste).
- Pour in the Black Tea: Fill the glasses with the cooled black tea.
- Stir Well: Stir well to combine the syrup and tea.
- Taste and Adjust: Taste and adjust the sweetness and tartness to your liking.
- Garnish (Optional): Garnish with fresh cherries, hibiscus flowers, and/or lemon slices.
- Serve and Enjoy!
Notes
- Adjusting Sweetness: Adjust the amount of sugar in the syrup to your preference.
- Using Different Teas: Experiment with different types of tea like green tea or herbal teas.
- Adding Sparkling Water: Top off the iced tea with sparkling water or club soda for a fizzy twist.
- Making a Cocktail: Add a shot of vodka, gin, or rum for a cocktail version.
- Freezing for Later: Freeze the cherry hibiscus syrup in ice cube trays for later use.
- Cherry Variety: Use any variety of cherries you like!


Leave a Comment