
Chocolate Covered Pretzels: the sweet and salty snack that’s impossible to resist! Have you ever wondered how such a simple combination could create such an addictive treat? I know I have! These aren’t just a quick snack; they’re a delightful experience, a perfect harmony of textures and flavors that dance on your palate.
While the exact origins are a bit hazy, the marriage of chocolate and pretzels seems to have gained popularity in the latter half of the 20th century. It’s a testament to American ingenuity, taking two beloved snacks and uniting them into something even greater. Think of it as the culinary equivalent of a power couple!
But what makes chocolate covered pretzels so universally adored? It’s the satisfying crunch of the pretzel, followed by the smooth, melting sweetness of the chocolate. The saltiness of the pretzel cuts through the richness of the chocolate, preventing it from becoming overly sweet. Plus, they’re incredibly easy to make at home, perfect for a quick treat, a party snack, or a thoughtful homemade gift. Whether you prefer milk chocolate, dark chocolate, or even white chocolate, there’s a chocolate covered pretzel variation out there for everyone. So, let’s dive into this easy recipe and create some magic in your kitchen!

Ingredients:
- 1 (16 ounce) bag of pretzel rods or mini pretzels (your preference!)
- 24 ounces of high-quality chocolate (milk, dark, or white or a combination!)
- 1 tablespoon vegetable shortening (optional, but helps with smooth melting)
- Assorted sprinkles, chopped nuts, shredded coconut, sea salt, crushed candies, or any other toppings you desire!
- Parchment paper or wax paper
Preparation:
1. Prepare your workspace: Line a baking sheet with parchment paper or wax paper. This will prevent the chocolate-covered pretzels from sticking and make cleanup a breeze. Make sure you have enough space to lay out all the pretzels you plan to dip. 2. Choose your chocolate: Select your favorite type of chocolate. I personally love using a combination of milk chocolate and dark chocolate for a richer flavor profile. White chocolate is also fantastic, especially when paired with colorful sprinkles. 3. Prepare your toppings: Get all your toppings ready in small bowls. This will make the dipping and decorating process much smoother. Think about the flavors you want to combine. For example, dark chocolate with sea salt is a classic, while milk chocolate with chopped nuts is always a crowd-pleaser. Get creative!Melting the Chocolate:
1. Chop the chocolate: Finely chop the chocolate into small, even pieces. This will help it melt more evenly and prevent burning. If you’re using chocolate chips, you can skip this step. 2. Choose your melting method: You have two main options for melting chocolate: the double boiler method or the microwave method. I’ll explain both: * Double Boiler Method: Fill a saucepan with about an inch or two of water and bring it to a simmer over medium heat. Place a heat-safe bowl (glass or stainless steel) on top of the saucepan, making sure the bottom of the bowl doesn’t touch the water. Add the chopped chocolate and vegetable shortening (if using) to the bowl. Stir constantly until the chocolate is completely melted and smooth. Be patient and don’t let any water get into the chocolate, as this can cause it to seize up. * Microwave Method: Place the chopped chocolate and vegetable shortening (if using) in a microwave-safe bowl. Microwave in 30-second intervals, stirring well after each interval, until the chocolate is almost completely melted. Continue stirring until the remaining chocolate melts from the residual heat and the mixture is smooth. Be very careful not to overheat the chocolate, as it can burn easily. 3. Check the consistency: The melted chocolate should be smooth and easily pourable. If it seems too thick, you can add a tiny bit more vegetable shortening (a teaspoon at a time) to thin it out.Dipping the Pretzels:
1. Dip the pretzels: Hold a pretzel rod (or mini pretzel) by one end and dip it into the melted chocolate, coating it completely or partially, depending on your preference. Use a fork or dipping tool to help remove any excess chocolate. 2. Decorate immediately: While the chocolate is still wet, sprinkle with your desired toppings. Work quickly, as the chocolate will start to set relatively fast. If you’re using larger toppings like chopped nuts, gently press them into the chocolate to ensure they adhere properly. 3. Place on parchment paper: Carefully place the chocolate-covered pretzel onto the prepared baking sheet lined with parchment paper or wax paper. 4. Repeat: Continue dipping and decorating the remaining pretzels until you’ve used up all the chocolate or pretzels.Setting the Chocolate:
1. Chill in the refrigerator (optional): For faster setting, place the baking sheet with the chocolate-covered pretzels in the refrigerator for about 15-20 minutes, or until the chocolate is firm. This is especially helpful if you live in a warm climate. 2. Allow to set at room temperature: Alternatively, you can let the chocolate set at room temperature. This will take longer, usually about 30-60 minutes, but it will result in a smoother, shinier finish.Tips and Tricks:
* Use high-quality chocolate: The quality of the chocolate will significantly impact the taste of your chocolate-covered pretzels. Opt for a good-quality chocolate that you enjoy eating on its own. * Don’t overheat the chocolate: Overheated chocolate can become grainy and difficult to work with. Be patient and melt the chocolate slowly and gently. * Keep the chocolate warm: If the chocolate starts to cool and thicken while you’re dipping, you can gently reheat it in the microwave for a few seconds at a time, stirring well after each interval. * Get creative with toppings: The possibilities for toppings are endless! Experiment with different combinations of sprinkles, nuts, candies, and other ingredients to create your own unique flavor profiles. * Add a drizzle: Once the chocolate has set, you can add a drizzle of melted white chocolate or another contrasting color for an extra touch of elegance. Simply melt a small amount of chocolate and drizzle it over the pretzels using a fork or piping bag. * Store properly: Store the chocolate-covered pretzels in an airtight container at room temperature or in the refrigerator. They will stay fresh for several days. * Customize for holidays: Use holiday-themed sprinkles and colors to make these pretzels festive for any occasion. Red and green for Christmas, pastel colors for Easter, orange and black for Halloween the possibilities are endless! * Add flavor extracts: For an extra burst of flavor, add a few drops of your favorite extract to the melted chocolate. Peppermint extract is delicious with dark chocolate, while almond extract pairs well with white chocolate. * Make them vegan: Use vegan chocolate and toppings to make these pretzels suitable for vegans. There are many delicious vegan chocolate options available these days. * Use different pretzel shapes: Don’t just stick to pretzel rods! Try using mini pretzels, pretzel squares, or even pretzel thins for a variety of shapes and textures. * Add a touch of spice: For a unique twist, add a pinch of chili powder or cayenne pepper to the melted chocolate. This will give the pretzels a subtle kick that pairs perfectly with the sweetness of the chocolate. * Make them gluten-free: Use gluten-free pretzels to make this treat accessible to those with gluten sensitivities. * Consider using candy melts: Candy melts are a great option if you want vibrant colors and a smooth, glossy finish. They are also easier to melt than regular chocolate and come in a wide variety of colors. * Don’t be afraid to experiment: The best part about making chocolate-covered pretzels is that you can customize them to your own taste. Don’t be afraid to try new things and see what you come up with! * Package them nicely: If you’re giving these pretzels as a gift, package them in a cute box or bag with a ribbon. This will make them even more special. * Make a pretzel bark: Spread the melted chocolate on a parchment-lined baking sheet, then sprinkle with pretzels and toppings. Let it set, then break it into pieces for a delicious pretzel bark. * Use a dipping tool: A dipping tool can be helpful for coating the pretzels evenly and removing excess chocolate. You can find dipping tools at most kitchen supply stores. * Work in batches: If you’re making a large batch of pretzels, it’s best to work in smaller batches to prevent the chocolate from cooling and thickening too quickly. * Have fun! Making chocolate-covered pretzels should be a fun and enjoyable experience. Relax, get creative, and enjoy the process! Enjoy your delicious homemade chocolate-covered pretzels! They’re perfect for parties, holidays, or just a sweet treat any time of day.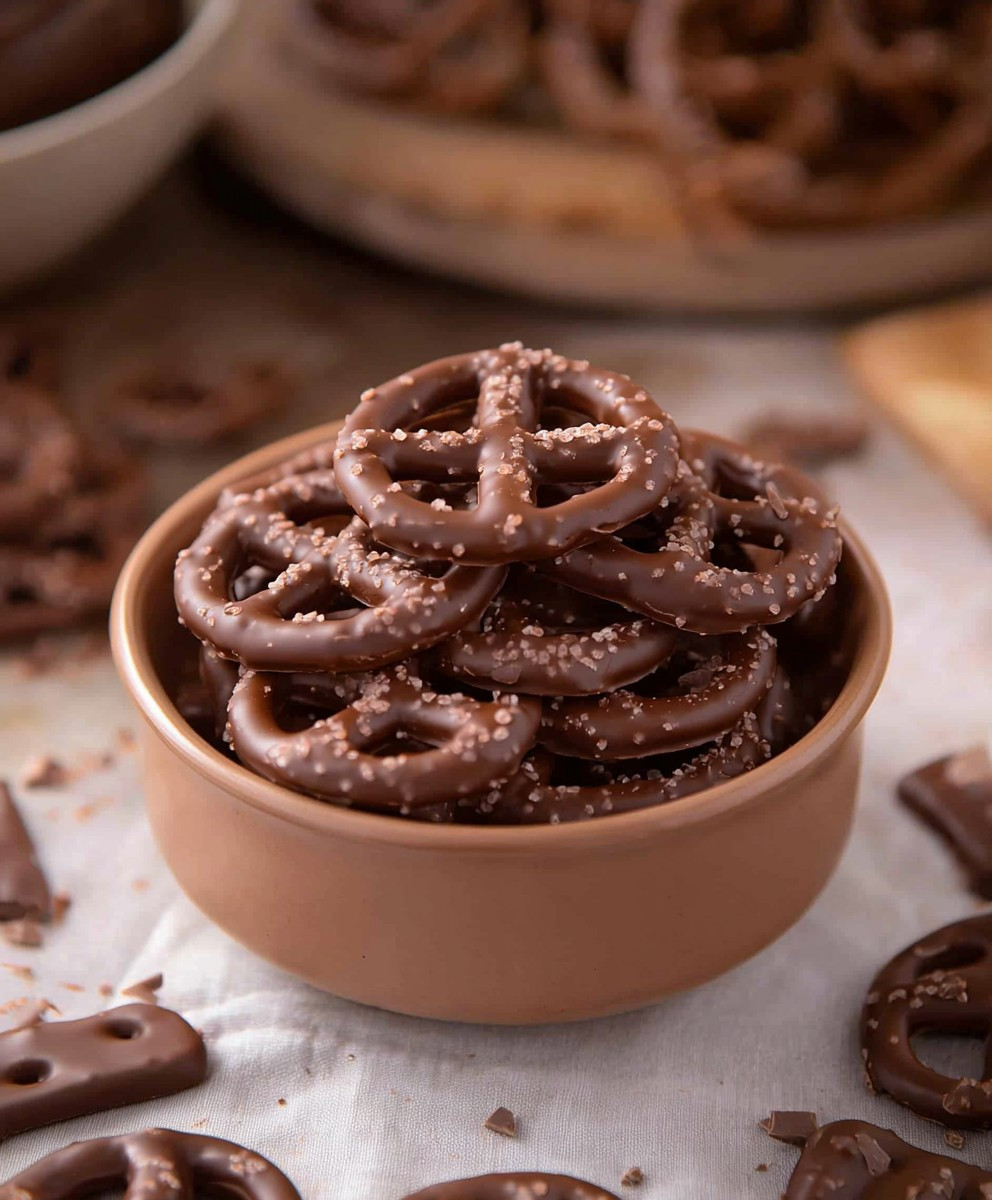
Conclusion:
So, there you have it! These Chocolate Covered Pretzels are truly a must-try for anyone looking for a simple, satisfying, and utterly addictive treat. I know, I know, I might be a little biased, but trust me on this one. The combination of salty, crunchy pretzel and smooth, rich chocolate is a match made in snack heaven. It’s the kind of treat that disappears way faster than you anticipate, leaving you wanting just one more (and then another, and another…). But why are these pretzels so special? It’s the ease of preparation, the minimal ingredients, and the sheer versatility. You don’t need to be a master baker to whip up a batch of these beauties. In fact, it’s a fantastic activity to do with kids they’ll love dipping and decorating! And the best part? You can customize them to your heart’s content. Looking for serving suggestions? These Chocolate Covered Pretzels are perfect for just about any occasion. Serve them as a sweet and salty snack at your next party, package them up as thoughtful homemade gifts, or simply enjoy them as a delightful treat after dinner. They’re also a fantastic addition to a dessert board or a holiday cookie platter. Now, let’s talk variations! The possibilities are truly endless. Want to add a little spice? Sprinkle a pinch of cayenne pepper into the melted chocolate for a surprising kick. Craving something nutty? Roll the dipped pretzels in chopped pecans, walnuts, or almonds before the chocolate sets. For a festive touch, use colored sprinkles or edible glitter. You could even drizzle them with white chocolate or peanut butter for an extra layer of flavor. Consider using different types of chocolate too! Dark chocolate offers a more intense and sophisticated flavor, while milk chocolate provides a classic sweetness. White chocolate is perfect for creating a visually stunning contrast. And don’t forget about flavored chocolates, like mint or raspberry, for a unique twist. Another fun variation is to use different types of pretzels. Try pretzel rods for a longer, more elegant treat, or pretzel crisps for a thinner, crunchier bite. You can even use gluten-free pretzels for those with dietary restrictions. I’ve made these Chocolate Covered Pretzels countless times, and each time I experiment with different flavors and toppings. It’s a fun and creative way to express your personality and create a truly unique treat. So, what are you waiting for? Gather your ingredients, melt your chocolate, and get ready to create some delicious magic. I promise you won’t regret it! I’m so excited for you to try this recipe. Once you do, I’d absolutely love to hear about your experience. Did you try any of the variations I suggested? Did you come up with your own creative toppings? Share your photos and stories in the comments below! Let’s spread the pretzel love and inspire others to create their own delicious masterpieces. Happy dipping! I am sure you will love these Chocolate Covered Pretzels as much as I do. PrintChocolate Covered Pretzels: The Ultimate Sweet and Salty Treat
Easy, customizable chocolate-covered pretzels! Dip pretzel rods or mini pretzels in melted chocolate and decorate with sprinkles, nuts, and more for a sweet and salty treat.
- Prep Time: 15 minutes
- Cook Time: 15 minutes
- Total Time: 45 minutes
- Yield: 20–30 pretzels 1x
Ingredients
- 1 (16 ounce) bag of pretzel rods or mini pretzels
- 24 ounces of high-quality chocolate (milk, dark, or white, or a combination)
- 1 tablespoon vegetable shortening (optional)
- Assorted sprinkles, chopped nuts, shredded coconut, sea salt, crushed candies, or other toppings
- Parchment paper or wax paper
Instructions
- Prepare Workspace: Line a baking sheet with parchment or wax paper.
- Choose Chocolate: Select your favorite type of chocolate.
- Prepare Toppings: Get all toppings ready in small bowls.
- Chop Chocolate: Finely chop the chocolate into small, even pieces.
- Melt Chocolate (Double Boiler Method): Fill a saucepan with about an inch or two of water and bring it to a simmer over medium heat. Place a heat-safe bowl (glass or stainless steel) on top of the saucepan, making sure the bottom of the bowl doesn’t touch the water. Add the chopped chocolate and vegetable shortening (if using) to the bowl. Stir constantly until the chocolate is completely melted and smooth. Be patient and don’t let any water get into the chocolate, as this can cause it to seize up.
- Melt Chocolate (Microwave Method): Place the chopped chocolate and vegetable shortening (if using) in a microwave-safe bowl. Microwave in 30-second intervals, stirring well after each interval, until the chocolate is almost completely melted. Continue stirring until the remaining chocolate melts from the residual heat and the mixture is smooth. Be very careful not to overheat the chocolate, as it can burn easily.
- Check Consistency: The melted chocolate should be smooth and easily pourable. If it seems too thick, you can add a tiny bit more vegetable shortening (a teaspoon at a time) to thin it out.
- Dip Pretzels: Hold a pretzel rod (or mini pretzel) by one end and dip it into the melted chocolate, coating it completely or partially. Use a fork or dipping tool to remove excess chocolate.
- Decorate Immediately: While the chocolate is still wet, sprinkle with desired toppings.
- Place on Parchment Paper: Carefully place the chocolate-covered pretzel onto the prepared baking sheet.
- Repeat: Continue dipping and decorating the remaining pretzels.
- Chill (Optional): For faster setting, place the baking sheet in the refrigerator for 15-20 minutes.
- Set at Room Temperature: Alternatively, let the chocolate set at room temperature for 30-60 minutes.
Notes
- Use high-quality chocolate for the best flavor.
- Don’t overheat the chocolate.
- Keep the chocolate warm while dipping.
- Get creative with toppings!
- Add a drizzle of melted white chocolate for an extra touch.
- Store in an airtight container at room temperature or in the refrigerator.
- Customize for holidays with themed sprinkles.
- Add flavor extracts to the melted chocolate.
- Make them vegan by using vegan chocolate and toppings.
- Use different pretzel shapes for variety.
- Add a touch of spice with chili powder or cayenne pepper.
- Make them gluten-free by using gluten-free pretzels.
- Consider using candy melts for vibrant colors.
- Don’t be afraid to experiment with different flavors and toppings.
- Package them nicely if giving as a gift.
- Make a pretzel bark by spreading the melted chocolate on a baking sheet and sprinkling with pretzels and toppings.
- Use a dipping tool for even coating.
- Work in batches to prevent the chocolate from cooling too quickly.
- Have fun and enjoy the process!


Leave a Comment