
Chocolate Mint Ice Cream, a symphony of cool refreshment and decadent delight, is the perfect dessert to invigorate your senses. Imagine a velvety smooth, intensely chocolatey ice cream, swirled with the invigorating essence of fresh mint. It’s a flavor combination that dances on your tongue, leaving you feeling utterly satisfied and refreshed.
While the exact origins of combining chocolate and mint are debated, the pairing gained significant popularity in the early 20th century, quickly becoming a beloved classic. Some historians suggest that the combination was inspired by traditional herbal remedies, where mint was used to aid digestion after rich meals. Whatever the genesis, the marriage of these two distinct flavors has proven to be an enduring culinary success.
What makes Chocolate Mint Ice Cream so irresistible? It’s the harmonious balance of contrasting elements. The rich, bittersweet chocolate provides a grounding depth, while the cool, herbaceous mint offers a bright and cleansing counterpoint. The creamy texture further enhances the experience, creating a luxurious treat that’s both comforting and exciting. Whether you’re enjoying it on a hot summer day or as a sophisticated after-dinner indulgence, this ice cream is guaranteed to please. I find that people love this dish because it is easy to make and the taste is amazing. Let’s dive into the recipe and create your own batch of this delightful frozen dessert!

Ingredients:
- 1 pint (2 cups) heavy cream
- 1 cup whole milk
- ¾ cup granulated sugar
- ? teaspoon salt
- 6 large egg yolks
- 6 ounces bittersweet chocolate, finely chopped
- 1 teaspoon pure vanilla extract
- ½ teaspoon peppermint extract (adjust to taste)
- ½ cup fresh mint leaves, finely chopped (packed)
- Green food coloring (optional, for a more vibrant color)
Preparing the Chocolate Mint Infusion
Okay, let’s get started! The first step is to infuse our cream with that wonderful minty chocolate flavor. This is where the magic really begins, and trust me, it’s worth the extra effort.
- Combine Cream, Milk, and Mint: In a medium saucepan, combine the heavy cream, whole milk, and finely chopped fresh mint leaves. Make sure you’ve really chopped those mint leaves finely; we want all that minty goodness to release into the cream.
- Heat Gently: Place the saucepan over medium heat. We’re not looking to boil anything here, just gently heat the mixture until it’s steaming and small bubbles start to form around the edges. This should take about 5-7 minutes. Stir occasionally to prevent scorching.
- Infuse the Flavor: Once the cream is steaming, remove the saucepan from the heat. Cover it tightly with a lid and let it steep for at least 30 minutes, or even better, an hour. The longer it steeps, the more intense the mint flavor will be. This is where the cream absorbs all the lovely essence of the fresh mint.
- Strain the Cream: After steeping, strain the cream mixture through a fine-mesh sieve into a clean bowl. This will remove all the mint leaves, leaving you with a beautifully mint-infused cream. Press down on the mint leaves with a spoon to extract as much flavor as possible. Discard the spent mint leaves.
- Reheat the Cream: Pour the strained cream back into the saucepan. We need to reheat it before we can temper the eggs. Place the saucepan over medium-low heat and warm it gently.
Creating the Custard Base
Now, we’re going to create a rich and creamy custard base. This is the foundation of our ice cream, and it’s important to get it right. Don’t be intimidated; just follow the steps carefully, and you’ll be fine!
- Whisk Egg Yolks and Sugar: In a medium bowl, whisk together the egg yolks, granulated sugar, and salt until the mixture is pale yellow and slightly thickened. This usually takes about 2-3 minutes. The sugar helps to break down the egg yolks and create a smooth, emulsified base.
- Temper the Egg Yolks: This is a crucial step to prevent the egg yolks from scrambling. Slowly drizzle about ½ cup of the warm cream mixture into the egg yolk mixture, whisking constantly. This gradually raises the temperature of the egg yolks, preventing them from cooking too quickly when added to the hot cream.
- Combine and Cook: Pour the tempered egg yolk mixture into the saucepan with the remaining warm cream. Place the saucepan over low heat and cook, stirring constantly with a wooden spoon or heat-resistant spatula, until the custard thickens enough to coat the back of the spoon. This usually takes about 5-8 minutes.
- Check for Doneness: To test if the custard is ready, dip the back of the spoon into the custard and run your finger across the coated spoon. If the line remains distinct and doesn’t run back together, the custard is ready. Be careful not to overcook the custard, or it will curdle. If you see any signs of curdling, immediately remove the saucepan from the heat and whisk vigorously.
- Strain the Custard: Immediately strain the custard through a fine-mesh sieve into a clean bowl. This will remove any lumps or cooked egg particles, resulting in a perfectly smooth and creamy base.
Adding the Chocolate and Flavorings
Time to add the chocolate and those final touches that will make our ice cream truly special!
- Melt the Chocolate: Add the finely chopped bittersweet chocolate to the strained custard. Let it sit for a minute or two to soften, then gently stir until the chocolate is completely melted and the custard is smooth and glossy.
- Incorporate Vanilla and Peppermint Extracts: Stir in the vanilla extract and peppermint extract. Start with ½ teaspoon of peppermint extract and taste. You can add a little more if you want a stronger mint flavor, but be careful not to overdo it, as peppermint extract can be quite potent.
- Add Green Food Coloring (Optional): If you want to give your ice cream a more vibrant green color, add a few drops of green food coloring. Stir until the color is evenly distributed. Remember, a little goes a long way!
- Chill the Base: Cover the bowl with plastic wrap, pressing it directly onto the surface of the custard to prevent a skin from forming. Refrigerate for at least 4 hours, or preferably overnight. This allows the flavors to meld together and the custard to chill completely, which is essential for proper freezing.
Churning the Ice Cream
The moment we’ve been waiting for! It’s time to churn our ice cream base into a frozen delight.
- Prepare Your Ice Cream Maker: Follow the manufacturer’s instructions for your ice cream maker. If you’re using a freezer bowl type, make sure it’s been properly frozen for at least 24 hours.
- Pour in the Base: Pour the chilled ice cream base into the prepared ice cream maker.
- Churn According to Instructions: Churn the ice cream according to your ice cream maker’s instructions. This usually takes about 20-30 minutes, or until the ice cream has reached a soft-serve consistency.
Freezing and Serving
Almost there! A little more patience, and you’ll be enjoying your homemade chocolate mint ice cream.
- Transfer to a Container: Transfer the soft-serve ice cream to an airtight container.
- Harden in the Freezer: Place the container in the freezer and freeze for at least 2-3 hours, or until the ice cream has hardened to your desired consistency. This allows the ice cream to firm up and develop a more scoopable texture.
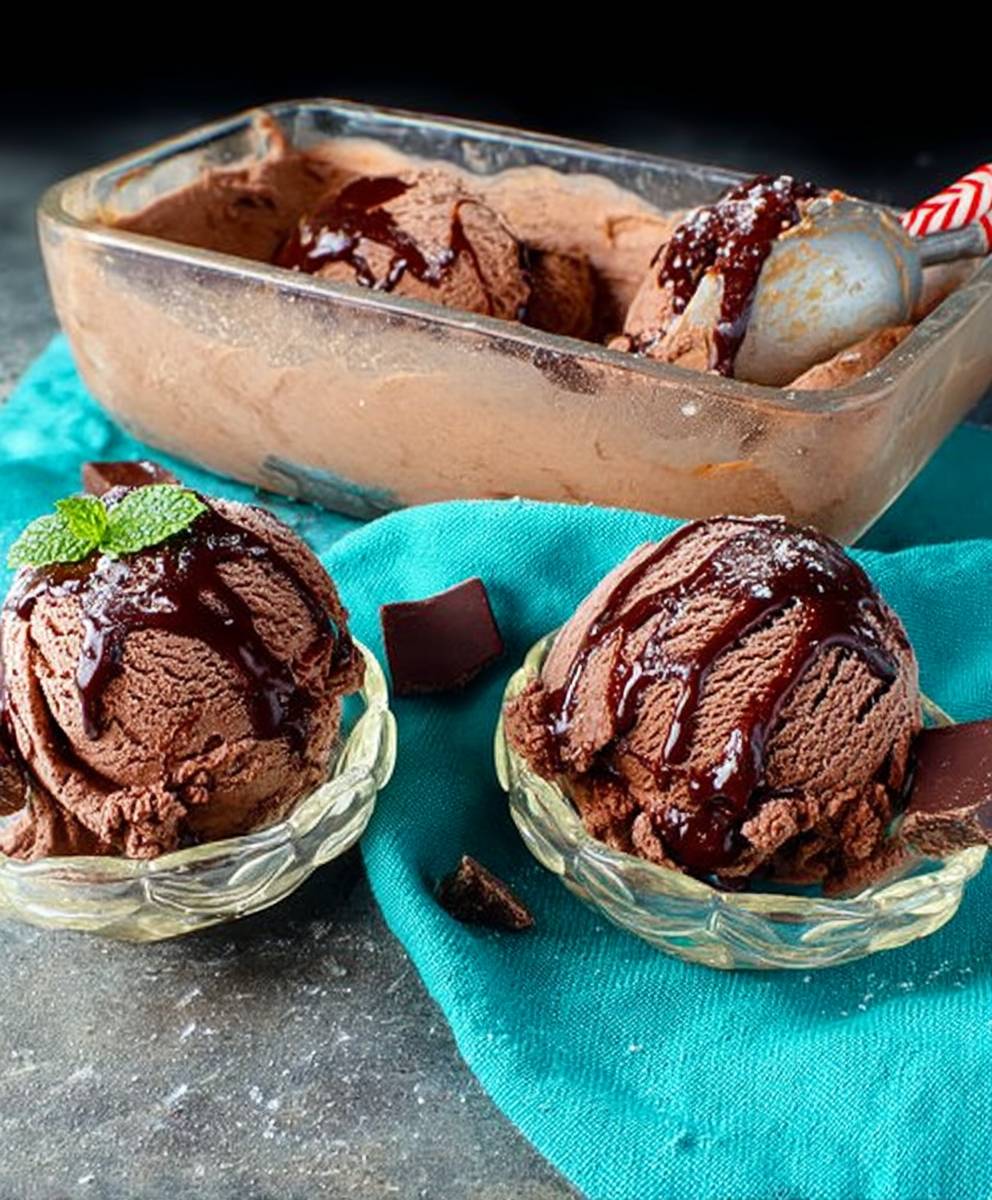
- Serve and Enjoy: Scoop the ice cream into bowls or cones and enjoy! You can garnish with chocolate shavings, fresh mint leaves, or a drizzle of chocolate sauce, if desired.
Tips for Success:
- Use High-Quality Ingredients: The better the ingredients, the better the ice cream. Use fresh, high-quality cream, milk, and chocolate for the best results.
- Don’t Overcook the Custard: Overcooked custard will curdle and ruin the texture of your ice cream. Keep a close eye on it and remove it from the heat as soon as it’s thick enough to coat the back of a spoon.
- Chill the Base Thoroughly: Chilling the ice cream base for at least 4 hours, or preferably overnight, is crucial for proper freezing and flavor development.
- Adjust the Peppermint Extract to Taste: Peppermint extract can be quite potent, so start with a small amount and add more to taste.
- Experiment with Variations: Feel free to experiment with different variations of this recipe. You could add chocolate chips, chopped nuts, or even a swirl of fudge sauce.
Storage Instructions:
Store your homemade chocolate mint ice cream in an airtight container in the freezer for up to 2 weeks. After that, the texture may start to deteriorate.
Conclusion:
So, there you have it! This Chocolate Mint Ice Cream recipe is more than just a dessert; it’s an experience. It’s the perfect balance of rich, decadent chocolate and the refreshing coolness of mint, creating a symphony of flavors that will dance on your taste buds. I truly believe this is a must-try recipe for anyone who loves ice cream, and especially for those who appreciate a classic flavor combination done exceptionally well.
Why is it a must-try? Because it’s incredibly easy to make, even without an ice cream maker! The no-churn method means you don’t need any fancy equipment, just a few simple ingredients and a little bit of patience. Plus, the homemade aspect elevates it far beyond anything you can buy in the store. The fresh mint infusion gives it a vibrant, natural flavor that you just can’t replicate with artificial extracts. And let’s be honest, who can resist the allure of creamy, dreamy chocolate mint ice cream on a hot day (or any day, really)?
But the best part is the versatility! While this recipe is fantastic as is, there are so many ways you can customize it to your liking. For a richer, more intense chocolate flavor, try using dark chocolate instead of semi-sweet. If you’re a fan of chocolate chunks, stir in some chopped chocolate pieces or even chocolate-covered pretzels for a salty-sweet twist. Want to add a little crunch? Fold in some crushed Oreo cookies or chopped nuts.
Serving suggestions are endless! Of course, it’s delicious served straight from the freezer in a bowl or cone. But you can also get creative. Try using it to make ice cream sandwiches with chocolate wafers or homemade cookies. It’s also amazing as a topping for brownies, waffles, or even pancakes. For a truly decadent treat, blend it into a milkshake or smoothie. And if you’re feeling fancy, you can even use it to make an ice cream cake!
Here are a few more ideas to get your creative juices flowing:
- Mint Chocolate Chip Ice Cream: Add mini chocolate chips for extra chocolatey goodness.
- Peppermint Chocolate Ice Cream: Use peppermint extract instead of fresh mint for a stronger peppermint flavor, especially festive around the holidays.
- Vegan Chocolate Mint Ice Cream: Substitute the heavy cream and condensed milk with coconut cream and sweetened condensed coconut milk for a delicious dairy-free version.
- Chocolate Mint Brownie Sundae: Warm up a fudgy brownie, top it with a scoop of this ice cream, drizzle with hot fudge sauce, and sprinkle with chopped nuts.
I’m so excited for you to try this recipe! I know you’ll love it as much as I do. It’s the perfect treat for any occasion, whether you’re celebrating a special event or just craving something sweet and refreshing.
So, what are you waiting for? Gather your ingredients, follow the simple steps, and get ready to indulge in the most amazing Chocolate Mint Ice Cream you’ve ever tasted. And please, don’t be shy! I’d love to hear about your experience. Share your photos and comments on social media using [Your Hashtag Here] and let me know what variations you tried. I can’t wait to see what you create!
Happy ice cream making!
Chocolate Mint Ice Cream: The Ultimate Guide to Homemade Perfection
Rich, creamy homemade chocolate mint ice cream infused with fresh mint. A refreshing and decadent treat!
Ingredients
- 1 pint (2 cups) heavy cream
- 1 cup whole milk
- ¾ cup granulated sugar
- ? teaspoon salt
- 6 large egg yolks
- 6 ounces bittersweet chocolate, finely chopped
- 1 teaspoon pure vanilla extract
- ½ teaspoon peppermint extract (adjust to taste)
- ½ cup fresh mint leaves, finely chopped (packed)
- Green food coloring (optional, for a more vibrant color)
Instructions
- Combine Cream, Milk, and Mint: In a medium saucepan, combine the heavy cream, whole milk, and finely chopped fresh mint leaves.
- Heat Gently: Place the saucepan over medium heat. Heat until steaming and small bubbles form around the edges (5-7 minutes). Stir occasionally.
- Infuse the Flavor: Remove from heat, cover tightly, and let steep for at least 30 minutes (or up to an hour for stronger flavor).
- Strain the Cream: Strain the cream mixture through a fine-mesh sieve into a clean bowl, pressing down on the mint leaves to extract flavor. Discard the mint leaves.
- Reheat the Cream: Pour the strained cream back into the saucepan. Place the saucepan over medium-low heat and warm it gently.
- Whisk Egg Yolks and Sugar: In a medium bowl, whisk together the egg yolks, granulated sugar, and salt until pale yellow and slightly thickened (2-3 minutes).
- Temper the Egg Yolks: Slowly drizzle about ½ cup of the warm cream mixture into the egg yolk mixture, whisking constantly.
- Combine and Cook: Pour the tempered egg yolk mixture into the saucepan with the remaining warm cream. Place the saucepan over low heat and cook, stirring constantly with a wooden spoon or heat-resistant spatula, until the custard thickens enough to coat the back of the spoon (5-8 minutes).
- Check for Doneness: Dip the back of the spoon into the custard and run your finger across the coated spoon. If the line remains distinct and doesn’t run back together, the custard is ready.
- Strain the Custard: Immediately strain the custard through a fine-mesh sieve into a clean bowl.
- Melt the Chocolate: Add the finely chopped bittersweet chocolate to the strained custard. Let it sit for a minute or two to soften, then gently stir until the chocolate is completely melted and the custard is smooth and glossy.
- Incorporate Vanilla and Peppermint Extracts: Stir in the vanilla extract and peppermint extract. Start with ½ teaspoon of peppermint extract and taste. You can add a little more if you want a stronger mint flavor, but be careful not to overdo it, as peppermint extract can be quite potent.
- Add Green Food Coloring (Optional): If you want to give your ice cream a more vibrant green color, add a few drops of green food coloring. Stir until the color is evenly distributed. Remember, a little goes a long way!
- Chill the Base: Cover the bowl with plastic wrap, pressing it directly onto the surface of the custard to prevent a skin from forming. Refrigerate for at least 4 hours, or preferably overnight.
- Prepare Your Ice Cream Maker: Follow the manufacturer’s instructions for your ice cream maker. If you’re using a freezer bowl type, make sure it’s been properly frozen for at least 24 hours.
- Pour in the Base: Pour the chilled ice cream base into the prepared ice cream maker.
- Churn According to Instructions: Churn the ice cream according to your ice cream maker’s instructions. This usually takes about 20-30 minutes, or until the ice cream has reached a soft-serve consistency.
- Transfer to a Container: Transfer the soft-serve ice cream to an airtight container.
- Harden in the Freezer: Place the container in the freezer and freeze for at least 2-3 hours, or until the ice cream has hardened to your desired consistency.
- Serve and Enjoy: Scoop the ice cream into bowls or cones and enjoy! You can garnish with chocolate shavings, fresh mint leaves, or a drizzle of chocolate sauce, if desired.
Notes
- Use high-quality ingredients for the best flavor.
- Be careful not to overcook the custard.
- Chill the base thoroughly for proper freezing.
- Adjust the peppermint extract to taste.
- Experiment with variations like chocolate chips or fudge sauce.
- Store in an airtight container in the freezer for up to 2 weeks.


Leave a Comment