
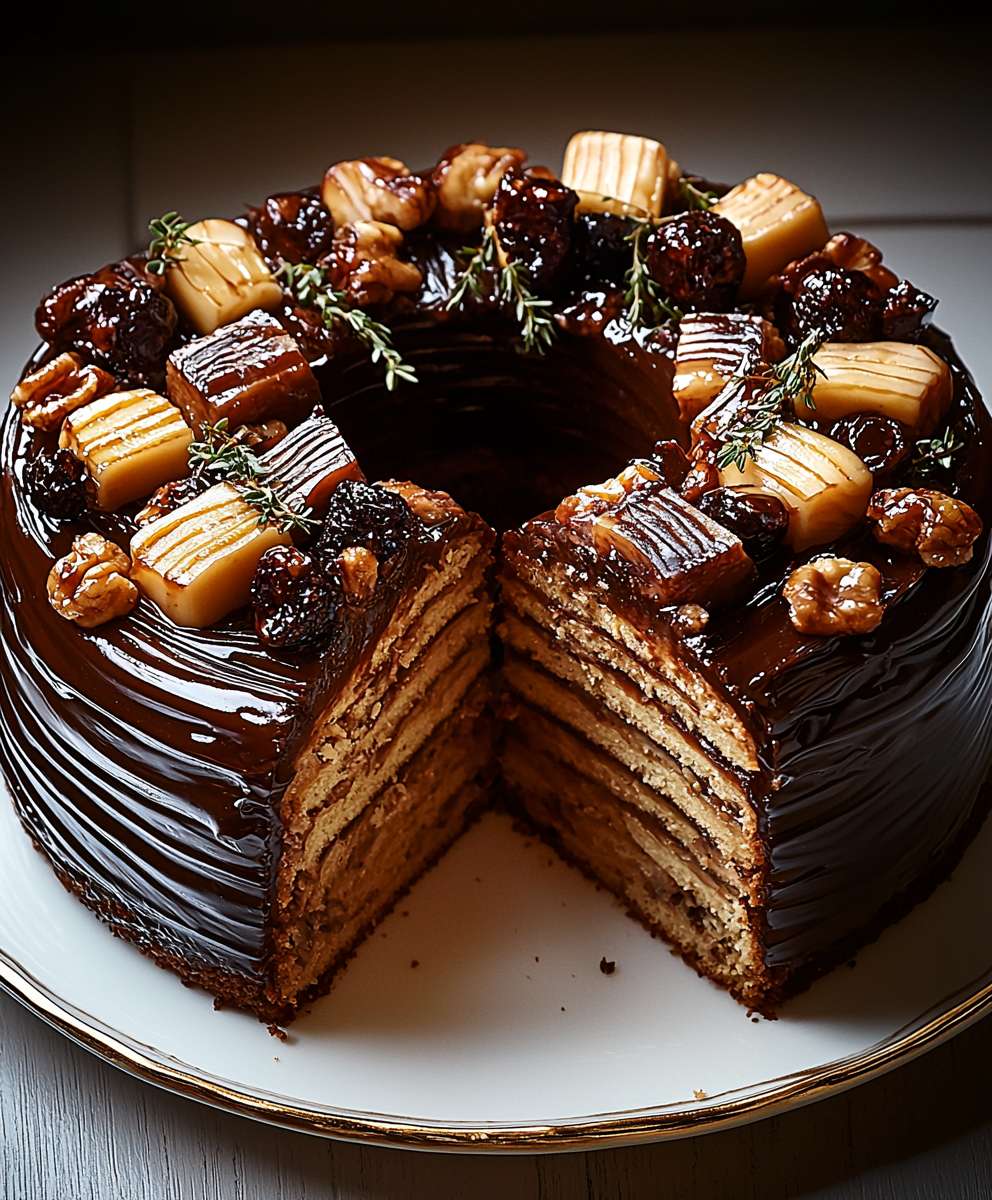
Couronne de ricanements, or “Crown of Giggles,” isn’t just a dessert; it’s a showstopper! Imagine presenting a stunning, golden-brown brioche wreath, its surface glistening with a delicate sugar glaze, to your eagerly awaiting guests. The aroma alone is enough to elicit smiles, but the taste? Oh, the taste is pure magic.
This delightful pastry, while perhaps not steeped in centuries of documented history like some other French delicacies, embodies the spirit of celebration and shared joy. Its whimsical name, “Crown of Giggles,” perfectly captures the lightheartedness and happiness it brings to any occasion. Think of it as a cousin to the classic brioche, elevated to regal status with its impressive shape and irresistible sweetness.
What makes the couronne de ricanements so beloved? It’s a combination of factors. The soft, buttery texture of the brioche is simply divine, melting in your mouth with each bite. The subtle sweetness is perfectly balanced, making it ideal for breakfast, brunch, or even a sophisticated dessert. Plus, its impressive presentation makes it a guaranteed conversation starter. It’s a dish that’s both beautiful and delicious, a winning combination in anyone’s book. So, are you ready to bake your own “Crown of Giggles” and spread some joy?
Ingredients:
- For the Brioche Dough:
- 500g strong bread flour, plus extra for dusting
- 10g instant dried yeast
- 50g granulated sugar
- 10g salt
- 100ml lukewarm milk
- 4 large eggs, lightly beaten
- 200g unsalted butter, softened and cut into cubes
- Zest of 1 orange
- Zest of 1 lemon
- 1 teaspoon vanilla extract
- For the Crème Pâtissière (Pastry Cream):
- 500ml whole milk
- 1 vanilla bean, split lengthwise and seeds scraped (or 1 teaspoon vanilla extract)
- 100g granulated sugar
- 4 large egg yolks
- 40g cornstarch
- 50g unsalted butter, cut into cubes
- For the Praline Filling:
- 150g hazelnuts
- 150g almonds
- 200g granulated sugar
- 50ml water
- Pinch of salt
- For the Assembly and Glaze:
- 100g apricot jam
- 2 tablespoons water
- Flaked almonds, for decoration (optional)
- Icing sugar, for dusting (optional)
Preparing the Brioche Dough:
Let’s start with the heart of our Couronne de Ricanements the brioche dough! This dough is rich, buttery, and incredibly flavorful, providing the perfect base for all the deliciousness to come. Don’t be intimidated; I’ll guide you through each step.
- Combine Dry Ingredients: In the bowl of a stand mixer fitted with the dough hook attachment, whisk together the flour, yeast, sugar, and salt. Make sure the yeast is evenly distributed.
- Add Wet Ingredients: Add the lukewarm milk, beaten eggs, orange zest, lemon zest, and vanilla extract to the dry ingredients. Mix on low speed until a shaggy dough forms.
- Incorporate the Butter: With the mixer still on low speed, gradually add the softened butter, a few cubes at a time, allowing each addition to be fully incorporated before adding the next. This process might take a little while, but patience is key! The dough will initially look quite messy, but it will eventually come together.
- Knead the Dough: Once all the butter is incorporated, increase the mixer speed to medium and knead the dough for 8-10 minutes, or until it becomes smooth, elastic, and pulls away from the sides of the bowl. The dough should be slightly sticky but not overly so. If it’s too sticky, add a tablespoon of flour at a time until it reaches the right consistency.
- First Rise: Lightly grease a large bowl with oil. Transfer the dough to the bowl, turning to coat it evenly. Cover the bowl with plastic wrap or a clean kitchen towel and let it rise in a warm place for 1.5-2 hours, or until doubled in size. This first rise is crucial for developing the flavor and texture of the brioche.
- Punch Down and Chill: Gently punch down the dough to release the air. Cover the bowl again and refrigerate the dough for at least 4 hours, or preferably overnight. This chilling period makes the dough easier to handle and enhances its flavor even further.
Making the Crème Pâtissière:
Next up, we’re creating the luscious crème pâtissière, or pastry cream. This creamy filling adds a delightful sweetness and richness to our Couronne. Don’t worry, it’s easier than it sounds!
- Infuse the Milk: In a medium saucepan, combine the milk and vanilla bean (or vanilla extract). Heat over medium heat until just simmering. Remove from heat and let steep for 15-20 minutes to infuse the milk with vanilla flavor. If using a vanilla bean, remove it after steeping.
- Whisk Egg Yolks and Sugar: In a separate bowl, whisk together the egg yolks and sugar until pale and thick. This usually takes about 2-3 minutes.
- Add Cornstarch: Whisk in the cornstarch until fully incorporated and no lumps remain. This is important to prevent a lumpy pastry cream.
- Temper the Egg Yolks: Gradually pour about one-third of the hot milk into the egg yolk mixture, whisking constantly to prevent the eggs from scrambling. This process is called tempering and helps to gradually raise the temperature of the egg yolks.
- Combine and Cook: Pour the tempered egg yolk mixture back into the saucepan with the remaining milk. Cook over medium heat, whisking constantly, until the mixture thickens and comes to a boil. Continue to cook for 1-2 minutes, whisking vigorously, until the pastry cream is very thick and smooth.
- Add Butter: Remove the saucepan from the heat and stir in the butter until melted and fully incorporated. This adds richness and shine to the pastry cream.
- Cool and Chill: Pour the pastry cream into a clean bowl. Cover the surface directly with plastic wrap to prevent a skin from forming. Refrigerate for at least 2 hours, or until completely chilled.
Crafting the Praline Filling:
Now, let’s move on to the star of the show the praline filling! This crunchy, nutty, and caramelized filling adds an irresistible texture and flavor to our Couronne. It’s a bit like making candy, but trust me, it’s worth the effort!
- Toast the Nuts: Preheat your oven to 175°C (350°F). Spread the hazelnuts and almonds on a baking sheet and toast for 10-12 minutes, or until lightly golden and fragrant. Keep a close eye on them to prevent burning.
- Remove Skins (Optional): Once the nuts are cool enough to handle, rub them in a clean kitchen towel to remove as much of the skins as possible. This step is optional, but it will result in a smoother praline.
- Make the Caramel: In a medium saucepan, combine the sugar, water, and salt. Cook over medium heat, without stirring, until the sugar dissolves and the mixture turns a deep amber color. This will take about 10-15 minutes. Be patient and don’t stir, as this can cause the sugar to crystallize. You can gently swirl the pan if needed.
- Add the Nuts: Carefully add the toasted nuts to the caramel and stir to coat them evenly.
- Cool and Harden: Pour the mixture onto a parchment-lined baking sheet and spread it into a thin, even layer. Let it cool completely until hardened.
- Grind into Praline Powder: Once the praline is completely cool and hardened, break it into smaller pieces. Place the pieces in a food processor and pulse until you have a coarse powder. Be careful not to over-process, as the nuts will release their oils and turn into a paste. You want a slightly chunky, sandy texture.
Assembling the Couronne:
Finally, the moment we’ve been waiting for assembling our magnificent Couronne de Ricanements! This is where all our hard work comes together to create a truly stunning and delicious treat.
- Roll Out the Dough: On a lightly floured surface, roll out the chilled brioche dough into a large rectangle, about 40cm x 50cm (16 inches x 20 inches).
- Spread the Crème Pâtissière: Spread the chilled crème pâtissière evenly over the dough, leaving a 2cm (1 inch) border along one of the long edges.
- Sprinkle the Praline: Sprinkle the praline powder evenly over the crème pâtissière.
- Roll Up the Dough: Starting from the long edge opposite the border, carefully roll up the dough into a tight log.
- Shape into a Ring: Gently transfer the log to a parchment-lined baking sheet. Bring the ends together to form a ring, overlapping them slightly. Pinch the ends together firmly to seal.
- Make Incisions: Using a sharp knife or kitchen scissors, make deep incisions along the outer edge of the ring, about 5cm (2 inches) apart. Make sure to cut almost all the way through the dough, but leave the inner ring intact.
- Twist the Slices: Gently twist each slice outwards, exposing the filling. This will create the characteristic “crown” shape of the Couronne.
- Second Rise: Cover the

Conclusion:
And there you have it! Our Couronne de Ricanements, a crown of giggles and deliciousness, ready to grace your table. I truly believe this recipe is a must-try for so many reasons. First and foremost, it’s incredibly versatile. Whether you’re hosting a sophisticated brunch, a casual afternoon tea, or simply craving a delightful treat, this crown fits the bill perfectly. The combination of textures the flaky, buttery pastry, the creamy, tangy filling, and the burst of fresh fruit is simply irresistible. It’s a symphony of flavors that will have everyone reaching for seconds (and maybe even thirds!).
But beyond the taste, this Couronne de Ricanements is also surprisingly easy to make. Don’t let the elegant presentation intimidate you! With a few simple steps and readily available ingredients, you can create a show-stopping dessert that will impress your friends and family. I’ve broken down the instructions into manageable steps, so even beginner bakers can achieve success. And the best part? You can customize it to your heart’s content!
Looking for serving suggestions? This crown is wonderful served warm, straight from the oven, or at room temperature. A dollop of whipped cream or a scoop of vanilla ice cream adds an extra touch of indulgence. For a brunch setting, pair it with a selection of fresh fruits, cheeses, and charcuterie for a truly memorable spread. And for a tea party, serve it alongside your favorite teas and finger sandwiches.
Now, let’s talk variations! Feel free to experiment with different fillings. If you’re a chocolate lover, try adding chocolate chips or cocoa powder to the cream cheese mixture. For a more savory twist, consider using a filling of spinach and feta cheese. You could even add a sprinkle of nuts, like almonds or pecans, for added crunch. The possibilities are endless! Don’t be afraid to get creative and make this recipe your own.
This Couronne de Ricanements is more than just a recipe; it’s an experience. It’s the joy of baking, the satisfaction of creating something beautiful and delicious, and the pleasure of sharing it with loved ones. It’s about creating memories that will last a lifetime.
I’m so excited for you to try this recipe and experience the magic of the Couronne de Ricanements for yourself. I truly believe it will become a new favorite in your household.
So, what are you waiting for? Gather your ingredients, preheat your oven, and get ready to bake! And most importantly, don’t forget to have fun! Baking should be a joyful and relaxing experience.
Once you’ve made your own Couronne de Ricanements, I would absolutely love to hear about your experience. Did you make any variations? What did your friends and family think? Share your photos and stories with me in the comments below! I can’t wait to see your creations and hear all about your baking adventures. Happy baking! I hope this recipe brings as much joy to your kitchen as it has to mine. Let the giggles begin!
Couronne de ricanements : Guide complet pour comprendre et gérer
A stunning Couronne de Ricanements with rich brioche, creamy crème pâtissière, and crunchy praline. A show-stopping dessert!
Ingredients
- 500g strong bread flour, plus extra for dusting
- 10g instant dried yeast
- 50g granulated sugar
- 10g salt
- 100ml lukewarm milk
- 4 large eggs, lightly beaten
- 200g unsalted butter, softened and cut into cubes
- Zest of 1 orange
- Zest of 1 lemon
- 1 teaspoon vanilla extract
- 500ml whole milk
- 1 vanilla bean, split lengthwise and seeds scraped (or 1 teaspoon vanilla extract)
- 100g granulated sugar
- 4 large egg yolks
- 40g cornstarch
- 50g unsalted butter, cut into cubes
- 150g hazelnuts
- 150g almonds
- 200g granulated sugar
- 50ml water
- Pinch of salt
- 100g apricot jam
- 2 tablespoons water
- Flaked almonds, for decoration (optional)
- Icing sugar, for dusting (optional)
Instructions
- In the bowl of a stand mixer fitted with the dough hook attachment, whisk together the flour, yeast, sugar, and salt. Make sure the yeast is evenly distributed.
- Add the lukewarm milk, beaten eggs, orange zest, lemon zest, and vanilla extract to the dry ingredients. Mix on low speed until a shaggy dough forms.
- With the mixer still on low speed, gradually add the softened butter, a few cubes at a time, allowing each addition to be fully incorporated before adding the next. This process might take a little while, but patience is key! The dough will initially look quite messy, but it will eventually come together.
- Once all the butter is incorporated, increase the mixer speed to medium and knead the dough for 8-10 minutes, or until it becomes smooth, elastic, and pulls away from the sides of the bowl. The dough should be slightly sticky but not overly so. If it’s too sticky, add a tablespoon of flour at a time until it reaches the right consistency.
- Lightly grease a large bowl with oil. Transfer the dough to the bowl, turning to coat it evenly. Cover the bowl with plastic wrap or a clean kitchen towel and let it rise in a warm place for 1.5-2 hours, or until doubled in size. This first rise is crucial for developing the flavor and texture of the brioche.
- Gently punch down the dough to release the air. Cover the bowl again and refrigerate the dough for at least 4 hours, or preferably overnight. This chilling period makes the dough easier to handle and enhances its flavor even further.
- In a medium saucepan, combine the milk and vanilla bean (or vanilla extract). Heat over medium heat until just simmering. Remove from heat and let steep for 15-20 minutes to infuse the milk with vanilla flavor. If using a vanilla bean, remove it after steeping.
- In a separate bowl, whisk together the egg yolks and sugar until pale and thick. This usually takes about 2-3 minutes.
- Whisk in the cornstarch until fully incorporated and no lumps remain. This is important to prevent a lumpy pastry cream.
- Gradually pour about one-third of the hot milk into the egg yolk mixture, whisking constantly to prevent the eggs from scrambling. This process is called tempering and helps to gradually raise the temperature of the egg yolks.
- Pour the tempered egg yolk mixture back into the saucepan with the remaining milk. Cook over medium heat, whisking constantly, until the mixture thickens and comes to a boil. Continue to cook for 1-2 minutes, whisking vigorously, until the pastry cream is very thick and smooth.
- Remove the saucepan from the heat and stir in the butter until melted and fully incorporated. This adds richness and shine to the pastry cream.
- Pour the pastry cream into a clean bowl. Cover the surface directly with plastic wrap to prevent a skin from forming. Refrigerate for at least 2 hours, or until completely chilled.
- Preheat your oven to 350°F (175°C). Spread the hazelnuts and almonds on a baking sheet and toast for 10-12 minutes, or until lightly golden and fragrant. Keep a close eye on them to prevent burning.
- Once the nuts are cool enough to handle, rub them in a clean kitchen towel to remove as much of the skins as possible. This step is optional, but it will result in a smoother praline.
- In a medium saucepan, combine the sugar, water, and salt. Cook over medium heat, without stirring, until the sugar dissolves and the mixture turns a deep amber color. This will take about 10-15 minutes. Be patient and don’t stir, as this can cause the sugar to crystallize. You can gently swirl the pan if needed.
- Carefully add the toasted nuts to the caramel and stir to coat them evenly.
- Pour the mixture onto a parchment-lined baking sheet and spread it into a thin, even layer. Let it cool completely until hardened.
- Once the praline is completely cool and hardened, break it into smaller pieces. Place the pieces in a food processor and pulse until you have a coarse powder. Be careful not to over-process, as the nuts will release their oils and turn into a paste. You want a slightly chunky, sandy texture.
- On a lightly floured surface, roll out the chilled brioche dough into a large rectangle, about 16 inches x 20 inches (40cm x 50cm).
- Spread the chilled crème pâtissière evenly over the dough, leaving a 1 inch (2cm) border along one of the long edges.
- Sprinkle the praline powder evenly over the crème pâtissière.
- Starting from the long edge opposite the border, carefully roll up the dough into a tight log.
- Gently transfer the log to a parchment-lined baking sheet. Bring the ends together to form a ring, overlapping them slightly. Pinch the ends together firmly to seal.
- Using a sharp knife or kitchen scissors, make deep incisions along the outer edge of the ring, about 2 inches (5cm) apart. Make sure to cut almost all the way through the dough, but leave the inner ring intact.
- Gently twist each slice outwards, exposing the filling. This will create the characteristic “crown” shape of the Couronne.
- Cover the Couronne loosely with plastic wrap or a clean kitchen towel and let it rise in a warm place for 30-45 minutes, or until slightly puffed.
- Preheat your oven to 350°F (175°C).
- Bake the Couronne for 30-35 minutes, or until golden brown and cooked through. If the top starts to brown too quickly, you can tent it with foil.
- While the Couronne is baking, prepare the apricot glaze. In a small saucepan, combine the apricot jam and water. Heat over low heat, stirring constantly, until the jam is melted and smooth.
- As soon as the Couronne comes out of the oven, brush it generously with the apricot glaze. If desired, sprinkle with flaked almonds and dust with icing sugar.
- Let the Couronne cool slightly on the baking sheet before transferring it to a serving platter. Serve warm
Notes
- This process might take a little while, but patience is key!
- This first rise is crucial for developing the flavor and texture of the brioche.
- This chilling period makes the dough easier to handle and enhances its flavor even further.
- This is important to prevent a lumpy pastry cream.
- This process is called tempering and helps to gradually raise the temperature of the egg yolks.
- This adds richness and shine to the pastry cream.
- Keep a close eye on them to prevent burning.
- This step is optional, but it will result in a smoother praline.
- Be patient and don’t stir, as this can cause the sugar to crystallize.
- Be careful not to over-process, as the nuts will release their oils and turn into a paste.
- If the top starts to brown too quickly, you can tent it with foil.


Leave a Comment