
Easy Kunafa, a dessert that whispers tales of Middle Eastern nights and celebrations, is about to become your new favorite indulgence. Imagine layers of buttery, shredded pastry embracing a creamy, cheesy heart, all drenched in a fragrant, sweet syrup. Sounds divine, right? This isn’t just a dessert; it’s an experience, a journey for your taste buds that’s surprisingly simple to recreate at home.
Kunafa, also spelled knafeh or kanafeh, boasts a rich history, deeply rooted in the culinary traditions of the Levant. While its exact origins are debated, it’s believed to have originated in Palestine, specifically Nablus, where it remains a beloved specialty. For centuries, this dessert has been a symbol of hospitality and joy, served during special occasions like weddings, holidays, and family gatherings.
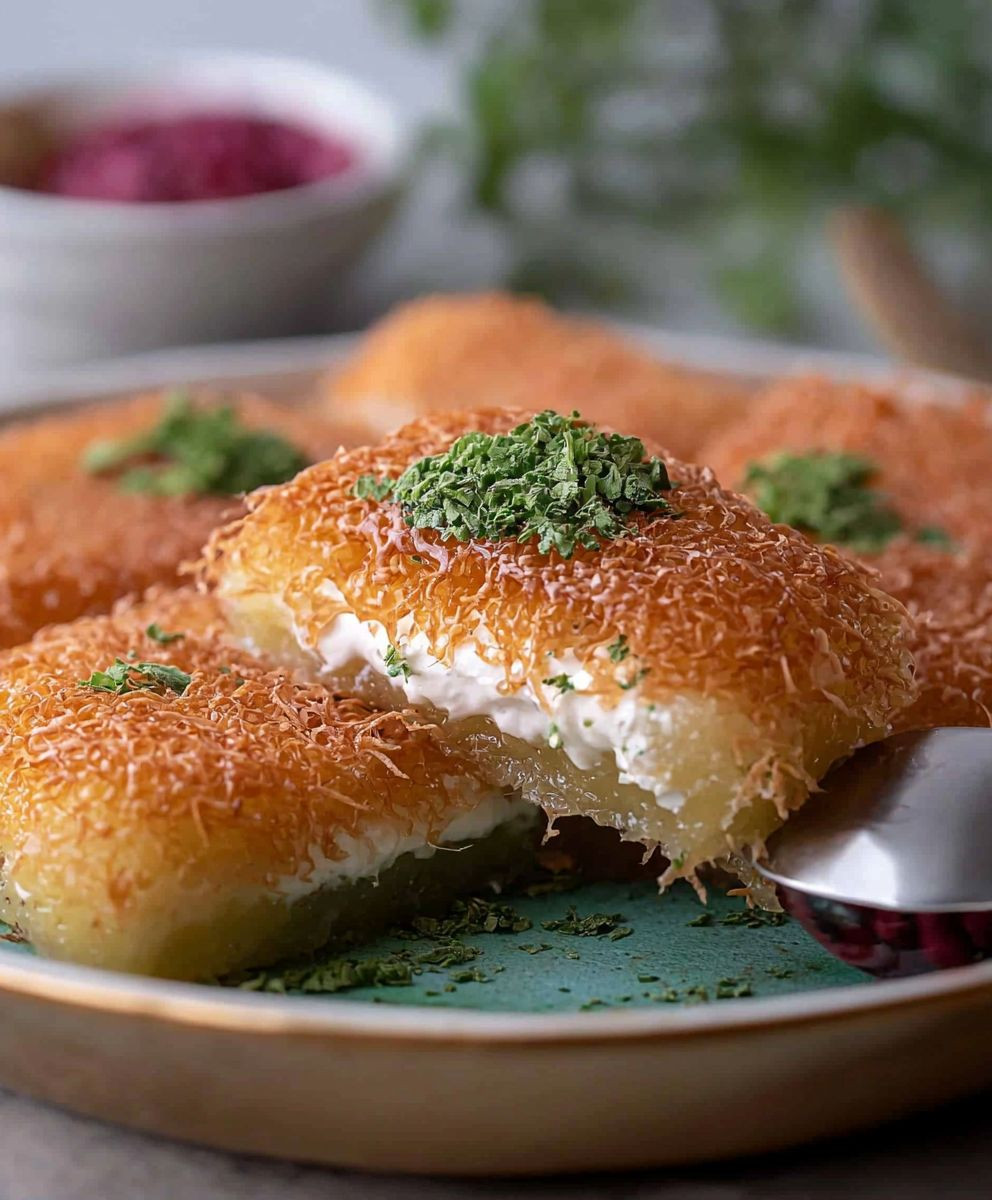
But what makes easy Kunafa so irresistible? It’s the perfect symphony of textures and flavors. The crispy, golden-brown pastry provides a delightful contrast to the soft, gooey cheese filling. The syrup, infused with rosewater or orange blossom water, adds a touch of floral sweetness that elevates the entire dish. And let’s be honest, who can resist the allure of warm, cheesy goodness enveloped in a sweet, crunchy embrace? Plus, with our simplified recipe, you can enjoy this decadent treat without spending hours in the kitchen. Get ready to impress your friends and family with your newfound baking skills!

Ingredients:
- For the Kataifi Dough:
- 500g Kataifi dough (shredded phyllo dough)
- 200g unsalted butter, melted
- 2 tablespoons vegetable oil
- For the Cream Filling (Qishta):
- 500ml heavy cream (35% fat or higher)
- 250ml whole milk
- 4 tablespoons cornstarch
- 2 tablespoons granulated sugar
- 1 teaspoon rose water (optional)
- 1/2 teaspoon orange blossom water (optional)
- For the Cheese Filling (Optional):
- 250g Akawi cheese, unsalted, soaked in water for at least 2 hours, changing the water frequently
- 125g Mozzarella cheese, shredded (low moisture)
- For the Syrup (Ater):
- 2 cups granulated sugar
- 1 cup water
- 1 tablespoon lemon juice
- 1 teaspoon rose water (optional)
- 1/2 teaspoon orange blossom water (optional)
- For Garnish:
- Chopped pistachios, for garnish
Preparing the Syrup (Ater):
The syrup needs to be prepared and cooled completely before you start assembling the Kunafa. This allows it to thicken and properly soak into the pastry.
- In a medium saucepan, combine the sugar and water.
- Bring the mixture to a boil over medium-high heat, stirring occasionally until the sugar is completely dissolved.
- Once boiling, reduce the heat to medium and let it simmer for about 8-10 minutes. Avoid stirring at this point to prevent crystallization.
- Add the lemon juice and simmer for another 2-3 minutes. The lemon juice helps prevent the syrup from crystallizing and adds a slight tang.
- Remove the saucepan from the heat and stir in the rose water and orange blossom water (if using). These add a lovely floral aroma to the syrup.
- Let the syrup cool completely before using. It will thicken as it cools. You can prepare this well in advance and store it in the refrigerator.
Preparing the Kataifi Dough:
This step is crucial for achieving that perfect crispy Kunafa texture. Make sure the dough is evenly coated with butter.
- Preheat your oven to 180°C (350°F).
- In a large bowl, gently separate the Kataifi dough strands. This is important to ensure even distribution of the butter. Don’t pull too hard, just gently loosen the strands.
- In a separate bowl, melt the butter completely. You can do this in the microwave or in a saucepan over low heat.
- Add the vegetable oil to the melted butter. The vegetable oil helps to prevent the butter from burning and adds to the crispiness.
- Pour the melted butter and oil mixture over the Kataifi dough.
- Using your hands, gently toss the dough to ensure that every strand is thoroughly coated with the butter mixture. This is a bit messy, but it’s essential for a crispy and golden Kunafa. Make sure there are no dry patches of dough.
Preparing the Cream Filling (Qishta):
The cream filling should be thick and smooth. Don’t overcook it, or it will become too stiff.
- In a medium saucepan, whisk together the heavy cream, milk, cornstarch, and sugar. Make sure the cornstarch is fully dissolved to avoid lumps.
- Place the saucepan over medium heat and cook, stirring constantly with a whisk, until the mixture thickens to a custard-like consistency. This usually takes about 5-7 minutes.
- Continue to stir constantly to prevent the mixture from sticking to the bottom of the pan and burning.
- Once the cream has thickened, remove the saucepan from the heat and stir in the rose water and orange blossom water (if using).
- Let the cream filling cool slightly before using. This will make it easier to spread.
Preparing the Cheese Filling (Optional):
If you’re using cheese, make sure to soak the Akawi cheese properly to remove excess salt. The mozzarella adds a nice stretchiness.
- Drain the Akawi cheese and pat it dry with paper towels.
- Shred the Akawi cheese.
- In a bowl, combine the shredded Akawi cheese and the shredded mozzarella cheese. Mix well.
Assembling the Kunafa:
This is where the magic happens! Press the dough firmly into the pan to create a solid base.
- Grease a round baking dish (approximately 25-30 cm in diameter) with a little bit of melted butter. You can also use a springform pan for easy removal.
- Divide the buttered Kataifi dough in half.
- Press half of the Kataifi dough evenly into the bottom of the prepared baking dish. Press it down firmly to create a compact and even layer. This forms the base of the Kunafa.
- If you’re using the cheese filling, spread it evenly over the Kataifi dough base, leaving a small border around the edges.
- Spread the cream filling (Qishta) evenly over the cheese filling (if using) or directly onto the Kataifi dough base. Again, leave a small border around the edges.
- Cover the cream filling (or cheese filling) with the remaining Kataifi dough. Spread it evenly and gently press it down to create a compact layer.
- Drizzle any remaining melted butter over the top of the Kunafa. This will help it to brown evenly.
Baking the Kunafa:
Keep a close eye on the Kunafa while it’s baking to prevent it from burning. The color should be a beautiful golden brown.
- Bake in the preheated oven for 30-40 minutes, or until the Kunafa is golden brown and crispy. The baking time may vary depending on your oven.
- Keep an eye on it, and if the top starts to brown too quickly, you can cover it loosely with aluminum foil.
- Once the Kunafa is golden brown, remove it from the oven.
Inverting and Soaking:
This is the final step that makes the Kunafa truly special. The hot Kunafa soaks up the cool syrup, creating a delicious contrast of textures and flavors.
- Let the Kunafa cool slightly in the baking dish for about 5-10 minutes. This will help it to set slightly and make it easier to invert.
- Place a serving plate over the top of the baking dish.
- Carefully invert the Kunafa onto the serving plate. Be careful, as it will be hot!
- Immediately pour the cooled syrup evenly over the hot Kunafa. Make sure to saturate the entire surface. The Kunafa should sizzle as the syrup is absorbed.
- Let the Kunafa soak in the syrup for at least 15-20 minutes before serving. This allows the syrup to fully penetrate the pastry.
Garnishing and Serving:
A sprinkle of pistachios adds a beautiful color and nutty flavor to the Kunafa.
- Garnish the Kunafa with chopped pistachios.
- Serve warm and enjoy! Kunafa is best enjoyed fresh, but it can also be stored in the refrigerator for a few days. Reheat it slightly before serving.
Conclusion:
This Easy Kunafa recipe isn’t just another dessert; it’s a passport to a world of sweet, cheesy, and utterly satisfying indulgence. From the crispy, golden kataifi dough to the creamy, melt-in-your-mouth cheese filling, every bite is an explosion of textures and flavors that will leave you craving more. I truly believe this is a must-try for anyone who appreciates a truly exceptional dessert. What makes this recipe so special is its simplicity. You don’t need to be a seasoned pastry chef to achieve kunafa perfection. I’ve carefully crafted this recipe to be accessible to everyone, regardless of their culinary experience. The instructions are clear, the ingredients are readily available, and the results are consistently amazing. Forget complicated techniques and hard-to-find ingredients; this recipe is all about delivering maximum flavor with minimum fuss. But the best part? The possibilities are endless! While I adore this recipe as is, feel free to experiment and make it your own. For a richer, more decadent experience, try using a blend of mozzarella and ricotta cheese for the filling. The ricotta adds a subtle sweetness and creaminess that complements the mozzarella perfectly. Or, if you’re feeling adventurous, incorporate a hint of orange blossom water or rose water into the syrup for a truly authentic Middle Eastern flavor. Serving suggestions? Oh, where do I even begin! This Easy Kunafa is divine served warm, straight from the oven, with a generous drizzle of the fragrant syrup. A scoop of vanilla ice cream on the side adds a delightful contrast of temperatures and textures. For a more traditional presentation, garnish with chopped pistachios or almonds. And if you’re feeling fancy, a sprinkle of edible rose petals adds a touch of elegance. It’s also fantastic with a strong cup of Arabic coffee or Turkish tea. The bitterness of the coffee cuts through the sweetness of the kunafa, creating a perfect balance. Don’t be intimidated by the name or the exotic ingredients. This recipe is surprisingly easy to master, and the rewards are well worth the effort. I promise, once you try this Easy Kunafa, you’ll be hooked! It’s the perfect dessert for special occasions, family gatherings, or simply a sweet treat to brighten up your day. So, what are you waiting for? Gather your ingredients, preheat your oven, and get ready to embark on a culinary adventure. I’m confident that you’ll love this recipe as much as I do. And more importantly, I’m excited to hear about your experience! I truly encourage you to try this recipe and share your creations with me. Did you make any variations? Did you add any special touches? What did your family and friends think? I’m eager to see your photos, read your comments, and learn from your experiences. Please feel free to leave a comment below or tag me on social media. Let’s spread the kunafa love together! Happy baking! PrintEasy Kunafa: The Simplest Recipe You’ll Ever Need

Crispy, golden Kunafa filled with creamy Qishta or cheese, soaked in fragrant rosewater syrup, and garnished with pistachios. A Middle Eastern dessert delight!
- Prep Time: 45 minutes
- Cook Time: 40 minutes
- Total Time: 85 minutes
- Yield: 8–10 servings 1x
Ingredients
- 500g Kataifi dough (shredded phyllo dough)
- 200g unsalted butter, melted
- 2 tablespoons vegetable oil
- 500ml heavy cream (35% fat or higher)
- 250ml whole milk
- 4 tablespoons cornstarch
- 2 tablespoons granulated sugar
- 1 teaspoon rose water (optional)
- 1/2 teaspoon orange blossom water (optional)
- 250g Akawi cheese, unsalted, soaked in water for at least 2 hours, changing the water frequently
- 125g Mozzarella cheese, shredded (low moisture)
- 2 cups granulated sugar
- 1 cup water
- 1 tablespoon lemon juice
- 1 teaspoon rose water (optional)
- 1/2 teaspoon orange blossom water (optional)
- Chopped pistachios, for garnish
Instructions
- Prepare the Syrup (Ater): In a medium saucepan, combine the sugar and water. Bring to a boil over medium-high heat, stirring until sugar dissolves. Reduce heat to medium and simmer for 8-10 minutes (avoid stirring). Add lemon juice and simmer for 2-3 minutes. Remove from heat, stir in rose water and orange blossom water (if using). Cool completely.
- Prepare the Kataifi Dough: Preheat oven to 350°F (180°C). Gently separate Kataifi dough strands in a large bowl. Melt butter in a separate bowl and add vegetable oil. Pour butter mixture over the dough and toss gently to coat all strands evenly.
- Prepare the Cream Filling (Qishta): In a medium saucepan, whisk together heavy cream, milk, cornstarch, and sugar. Cook over medium heat, stirring constantly, until thickened to a custard-like consistency (5-7 minutes). Remove from heat and stir in rose water and orange blossom water (if using). Let cool slightly.
- Prepare the Cheese Filling (Optional): Drain Akawi cheese and pat dry. Shred Akawi and mozzarella cheese and combine in a bowl.
- Assemble the Kunafa: Grease a round baking dish (25-30 cm) with melted butter. Divide the buttered Kataifi dough in half. Press half of the dough evenly into the bottom of the dish, creating a compact layer. If using cheese filling, spread it evenly over the base, leaving a small border. Spread the cream filling (Qishta) evenly over the cheese filling (if using) or directly onto the Kataifi dough base, leaving a small border. Cover with the remaining Kataifi dough, spreading evenly and gently pressing down. Drizzle any remaining melted butter over the top.
- Bake the Kunafa: Bake in the preheated oven for 30-40 minutes, or until golden brown and crispy. Cover loosely with aluminum foil if the top browns too quickly.
- Invert and Soak: Let the Kunafa cool slightly in the dish for 5-10 minutes. Place a serving plate over the top and carefully invert. Immediately pour the cooled syrup evenly over the hot Kunafa. Let soak for at least 15-20 minutes.
- Garnish and Serve: Garnish with chopped pistachios. Serve warm.
Notes
- The syrup needs to be prepared and cooled completely before assembling the Kunafa.
- Ensure the Kataifi dough is evenly coated with butter for a crispy texture.
- Don’t overcook the cream filling, or it will become too stiff.
- Soak the Akawi cheese properly to remove excess salt if using cheese filling.
- Press the dough firmly into the pan to create a solid base.
- Keep a close eye on the Kunafa while baking to prevent burning.
- Kunafa is best enjoyed fresh, but it can be stored in the refrigerator for a few days. Reheat slightly before serving.


Leave a Comment