
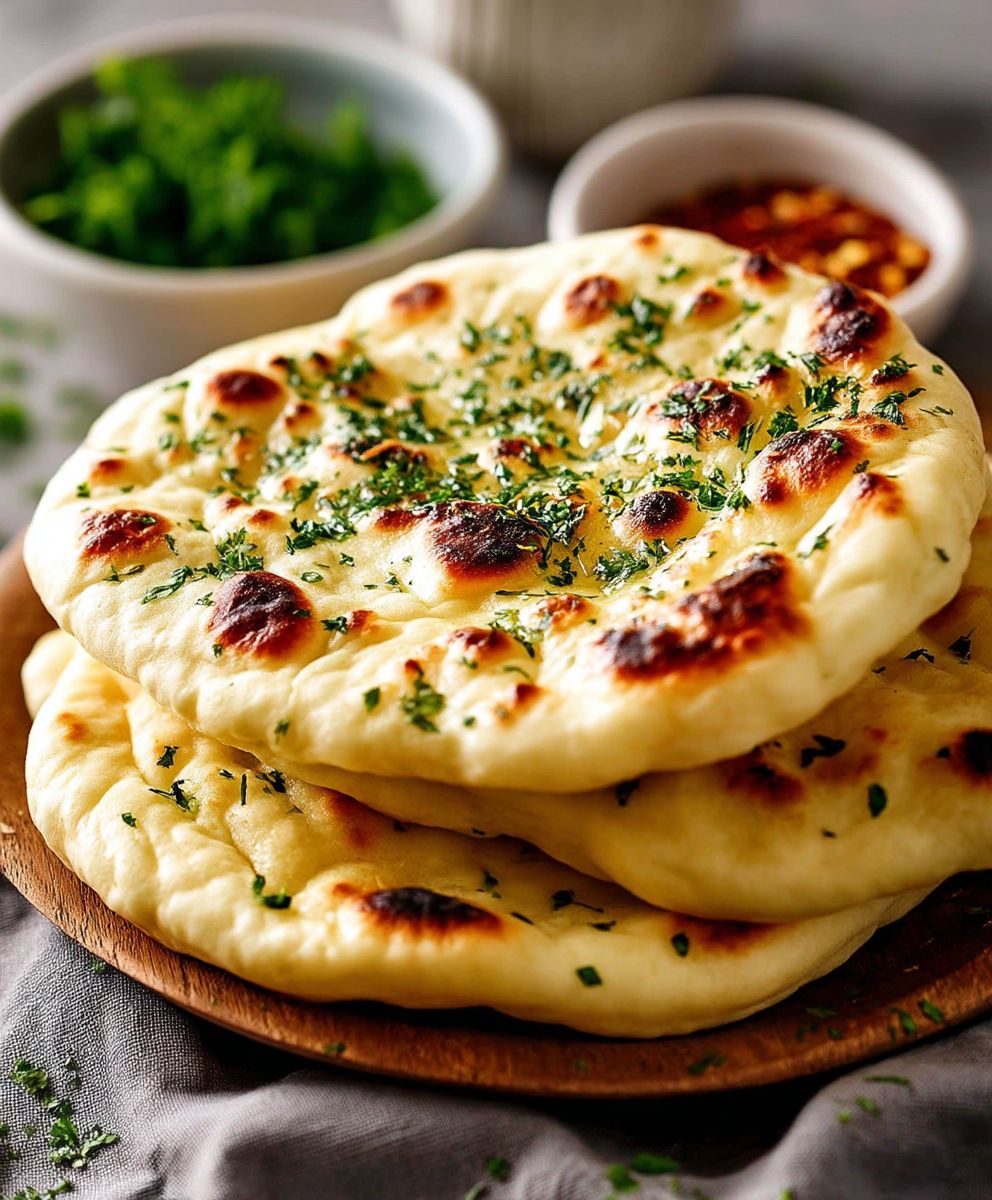
Easy Naan Bread, warm from the oven, is one of life’s simple pleasures, isn’t it? Imagine tearing off a piece of that pillowy, slightly charred flatbread, the aroma of toasted flour and a hint of ghee filling the air. Forget ordering takeout tonight; you can create this culinary magic right in your own kitchen!
Naan, a staple in South and Central Asian cuisine, boasts a history as rich and layered as its flavor. Believed to have originated in Persia, this bread has been gracing tables for centuries, evolving from simple unleavened dough to the soft, leavened delight we know and love today. It’s more than just bread; it’s a symbol of hospitality, often served during celebrations and family gatherings.
But what makes easy naan bread so universally appealing? It’s the perfect marriage of textures a slightly crisp exterior giving way to a soft, chewy interior. The subtle tang from yogurt, often used in the dough, adds a depth of flavor that complements a wide range of dishes, from creamy curries to grilled meats. And let’s be honest, the sheer convenience of whipping up a batch at home, far surpassing store-bought versions, is a major draw. So, are you ready to embark on a culinary adventure and discover how simple it is to make this incredible bread? Let’s get started!

Ingredients:
- 3 cups all-purpose flour, plus more for dusting
- 1 teaspoon baking powder
- 1/2 teaspoon baking soda
- 1 teaspoon salt
- 1 cup plain yogurt (full-fat or Greek yogurt works best)
- 1/2 cup warm water
- 2 tablespoons olive oil, plus more for brushing
- 1 clove garlic, minced (optional, for garlic naan)
- 1 tablespoon chopped cilantro (optional, for garnish)
Preparing the Dough:
Okay, let’s get started! Making naan at home is surprisingly easy, and the results are so much better than store-bought. The key is in the dough, so let’s focus on getting that right.
- Combine the dry ingredients: In a large bowl, whisk together the flour, baking powder, baking soda, and salt. Make sure everything is evenly distributed. This helps ensure the naan rises properly and has a good texture. I like to use a whisk to really get the baking powder and soda mixed in well.
- Add the wet ingredients: In a separate bowl, combine the yogurt, warm water, and olive oil. Whisk until smooth. The yogurt adds a lovely tang and helps create a soft, pliable dough. The warm water activates the baking powder and soda, so don’t skip that step!
- Combine wet and dry: Pour the wet ingredients into the bowl with the dry ingredients. Use a wooden spoon or your hands to mix until a shaggy dough forms. Don’t overmix at this stage; just make sure everything is combined.
- Knead the dough: Turn the dough out onto a lightly floured surface. Knead for 5-7 minutes, or until the dough is smooth and elastic. If the dough is too sticky, add a little more flour, one tablespoon at a time. If it’s too dry, add a teaspoon of water at a time. The dough should be slightly tacky but not stick to your hands. Kneading develops the gluten, which gives the naan its chewy texture.
- First Rise: Place the dough in a lightly oiled bowl, turning to coat. Cover with plastic wrap or a clean kitchen towel and let it rise in a warm place for at least 1 hour, or until doubled in size. This rise is crucial for developing flavor and creating a light, airy naan. You can even let it rise for longer, up to 2 hours, for an even better flavor.
Shaping and Cooking the Naan:
Now for the fun part shaping and cooking the naan! This is where you’ll see your hard work pay off. There are a few different ways to cook naan, but I’m going to show you my favorite method using a cast iron skillet.
- Preheat your cooking surface: Place a cast iron skillet (or a heavy-bottomed skillet) over medium-high heat. You want the skillet to be very hot before you start cooking the naan. This is essential for getting those characteristic bubbles and slightly charred spots. If you’re using a grill, preheat it to medium-high heat as well.
- Divide the dough: Punch down the risen dough to release the air. Turn it out onto a lightly floured surface and divide it into 6-8 equal pieces. The number of pieces will depend on how large you want your naan to be.
- Shape the naan: Take one piece of dough and roll it out into an oval or teardrop shape, about 1/4 inch thick. Don’t worry about making it perfectly symmetrical; rustic is good! You can use a rolling pin or just stretch it out with your hands.
- Cook the naan: Carefully place the rolled-out naan in the hot skillet. Cook for 2-3 minutes, or until bubbles start to form on the surface and the bottom is lightly browned.
- Flip and cook the other side: Flip the naan and cook for another 1-2 minutes, or until the other side is also lightly browned and cooked through. The naan should puff up slightly as it cooks.
- Optional: Broil for extra char: For extra char, you can carefully transfer the skillet to a preheated broiler for a few seconds, watching closely to prevent burning. This step is optional, but it adds a nice smoky flavor. Alternatively, you can hold the naan directly over a gas stovetop flame for a few seconds per side using tongs. Be very careful not to burn yourself!
- Repeat: Repeat steps 3-6 with the remaining dough.
Garlic Naan Variation (Optional):
Want to add a little extra flavor? Garlic naan is always a crowd-pleaser! Here’s how to make it:
- Prepare the garlic mixture: While the naan is cooking, mix the minced garlic with a tablespoon of olive oil in a small bowl.
- Brush with garlic oil: As soon as the naan comes out of the skillet, brush it with the garlic oil mixture.
- Garnish with cilantro: Sprinkle with chopped cilantro for a fresh, vibrant finish.
Serving and Storage:
Your homemade naan is best served warm, straight from the skillet. It’s delicious with curries, stews, or even just on its own with a little butter or ghee. Here are a few tips for serving and storing:
- Serve immediately: Naan is best when it’s fresh and warm.
- Keep warm: If you’re not serving it right away, you can keep the naan warm in a low oven (200°F) wrapped in a clean kitchen towel.
- Store leftovers: Leftover naan can be stored in an airtight container at room temperature for up to 2 days or in the refrigerator for up to 5 days.
- Reheat: To reheat, wrap the naan in foil and warm it in a low oven (300°F) for a few minutes, or microwave it for a few seconds. You can also reheat it in a dry skillet over medium heat.
- Freeze: For longer storage, you can freeze the naan. Wrap it tightly in plastic wrap and then place it in a freezer bag. It will keep in the freezer for up to 2 months. Thaw completely before reheating.
Tips for Perfect Naan:
- Use warm water: Warm water helps activate the yeast and baking powder, resulting in a lighter, fluffier naan.
- Don’t overmix the dough: Overmixing can lead to tough naan. Mix until just combined, then knead until smooth and elastic.
- Let the dough rise properly: A good rise is essential for developing flavor and creating a light, airy texture.
- Use a hot skillet: A hot skillet is key for getting those characteristic bubbles and slightly charred spots.
- Don’t overcrowd the skillet: Cook the naan one at a time to ensure even cooking.
- Brush with butter or ghee: Brushing the naan with melted butter or ghee after cooking adds richness and flavor.
Troubleshooting:
- Naan is not rising: Make sure your baking powder and baking soda are fresh. Also, ensure the water is warm enough to activate the yeast.
- Naan is too tough: You may have overmixed the dough. Be careful not to overmix next time.
- Naan is burning: Reduce the heat of the skillet or broiler.
- Naan is sticking to the skillet: Make sure the skillet is properly preheated and lightly oiled.
Enjoy your homemade naan! I hope you found this recipe helpful. Let me know in the comments if you have any questions or if you try it out!
Conclusion:
This Easy Naan Bread recipe isn’t just another bread recipe; it’s a gateway to transforming your weeknight dinners into something truly special. From the incredibly soft and pillowy texture to the subtly tangy flavor, every bite is a delight. I truly believe that once you try making naan at home, you’ll never want to go back to store-bought again! It’s surprisingly simple, requires minimal ingredients, and the satisfaction of pulling a warm, freshly baked naan from your own oven is simply unmatched.
But why is this recipe a must-try? Beyond the ease of preparation, it’s the sheer versatility that makes it a winner. Imagine using it to scoop up your favorite Indian curries, like a rich butter chicken or a spicy chana masala. Or perhaps you’re in the mood for something different? Try using it as a base for mini pizzas, topped with your favorite cheeses, vegetables, and meats. The possibilities are endless!
And speaking of possibilities, let’s talk about serving suggestions and variations. For a classic touch, brush the warm naan with melted butter and sprinkle with a pinch of sea salt. For a more aromatic experience, infuse the butter with garlic and herbs before brushing. If you’re feeling adventurous, try adding a sprinkle of nigella seeds (kalonji) or chopped cilantro to the dough before baking for an extra layer of flavor and visual appeal.
Looking for a sweeter treat? Brush the naan with honey butter and sprinkle with cinnamon sugar for a delightful dessert. You could even use it to make miniature naan bread tacos filled with grilled fruit and a dollop of whipped cream. The only limit is your imagination!
I also encourage you to experiment with different flours. While all-purpose flour works beautifully, you can try substituting a portion of it with whole wheat flour for a nuttier flavor and added fiber. Or, if you’re feeling particularly ambitious, try using a blend of all-purpose flour and bread flour for an even chewier texture.
Don’t be intimidated by the idea of making bread at home. This Easy Naan Bread recipe is designed to be foolproof, even for beginner bakers. The dough comes together quickly, and the cooking process is straightforward. With a little practice, you’ll be whipping up batches of perfect naan in no time.
I’m so confident that you’ll love this recipe that I urge you to give it a try. Gather your ingredients, preheat your oven, and prepare to be amazed by the deliciousness of homemade naan. And most importantly, don’t forget to share your experience! I’d love to hear about your variations, your serving suggestions, and any tips or tricks you discover along the way. Share your photos and stories on social media using #EasyNaanBreadRecipe I can’t wait to see what you create! Happy baking!
Easy Naan Bread: The Ultimate Guide to Making It at Home
Soft, chewy, and flavorful homemade naan bread, perfect for pairing with curries or enjoying on its own. Easy to make in a cast iron skillet!
Ingredients
- 3 cups all-purpose flour, plus more for dusting
- 1 teaspoon baking powder
- 1/2 teaspoon baking soda
- 1 teaspoon salt
- 1 cup plain yogurt (full-fat or Greek yogurt works best)
- 1/2 cup warm water
- 2 tablespoons olive oil, plus more for brushing
- 1 clove garlic, minced (optional, for garlic naan)
- 1 tablespoon chopped cilantro (optional, for garnish)
Instructions
- Combine Dry Ingredients: In a large bowl, whisk together the flour, baking powder, baking soda, and salt.
- Add Wet Ingredients: In a separate bowl, combine the yogurt, warm water, and olive oil. Whisk until smooth.
- Combine Wet and Dry: Pour the wet ingredients into the bowl with the dry ingredients. Use a wooden spoon or your hands to mix until a shaggy dough forms.
- Knead the Dough: Turn the dough out onto a lightly floured surface. Knead for 5-7 minutes, or until the dough is smooth and elastic. Add flour or water as needed to achieve the right consistency.
- First Rise: Place the dough in a lightly oiled bowl, turning to coat. Cover with plastic wrap or a clean kitchen towel and let it rise in a warm place for at least 1 hour, or until doubled in size.
- Preheat Cooking Surface: Place a cast iron skillet (or a heavy-bottomed skillet) over medium-high heat.
- Divide the Dough: Punch down the risen dough to release the air. Turn it out onto a lightly floured surface and divide it into 6-8 equal pieces.
- Shape the Naan: Take one piece of dough and roll it out into an oval or teardrop shape, about 1/4 inch thick.
- Cook the Naan: Carefully place the rolled-out naan in the hot skillet. Cook for 2-3 minutes, or until bubbles start to form on the surface and the bottom is lightly browned.
- Flip and Cook the Other Side: Flip the naan and cook for another 1-2 minutes, or until the other side is also lightly browned and cooked through.
- Optional: Broil for Extra Char: For extra char, you can carefully transfer the skillet to a preheated broiler for a few seconds, watching closely to prevent burning.
- Repeat: Repeat steps 8-11 with the remaining dough.
- For Garlic Naan (Optional): Mix minced garlic with a tablespoon of olive oil. Brush the cooked naan with the garlic oil mixture and sprinkle with chopped cilantro.
- Serve: Serve warm, preferably immediately.
Notes
- Use warm water to activate the baking powder and baking soda.
- Don’t overmix the dough, as this can result in tough naan.
- A hot skillet is essential for getting those characteristic bubbles and slightly charred spots.
- Naan is best served warm, straight from the skillet.
- Brush with butter or ghee for added richness and flavor.
- For longer storage, you can freeze the naan. Wrap it tightly in plastic wrap and then place it in a freezer bag. It will keep in the freezer for up to 2 months. Thaw completely before reheating.


Leave a Comment