
English Crumpets: those delightfully spongy, hole-riddled discs of deliciousness that are practically begging to be slathered with butter and jam. Have you ever wondered how to recreate that quintessential British breakfast treat in your own kitchen? Well, wonder no more! I’m here to guide you through the simple steps to making perfect crumpets, ensuring a batch that rivals even the best bakery offerings.
The history of the crumpet stretches back centuries, with early versions being more akin to pancakes cooked on a griddle. Over time, the addition of yeast and baking soda transformed them into the airy, porous delights we know and love today. They’ve become a staple of British teatime and breakfast tables, a comforting and satisfying treat enjoyed by generations.
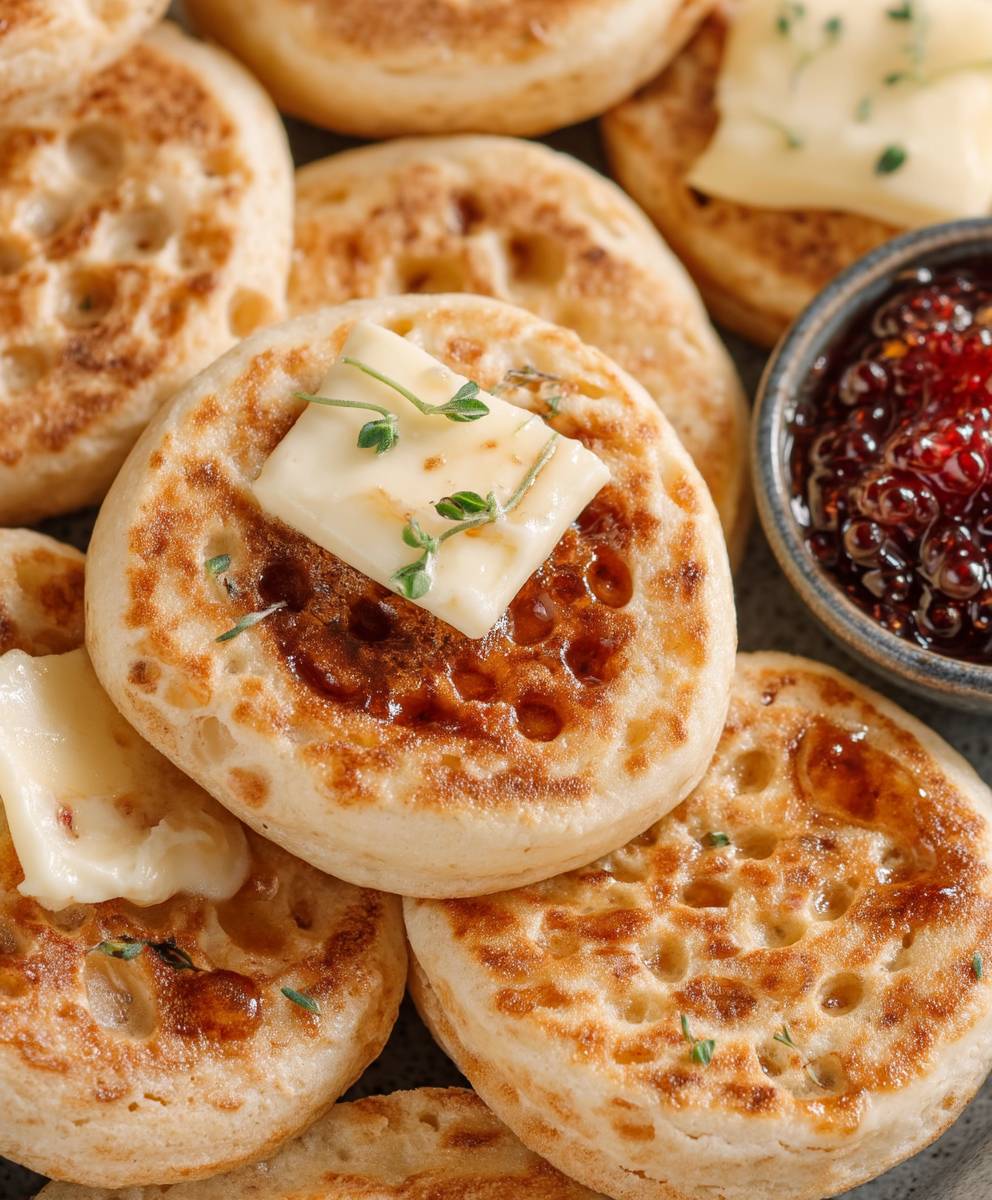
What is it about English Crumpets that makes them so irresistible? Perhaps it’s the unique texture a slightly chewy exterior giving way to a soft, almost honeycomb-like interior. Or maybe it’s the way those little holes act as perfect reservoirs for melted butter, honey, or your favorite spread. Whatever the reason, these are a guaranteed crowd-pleaser. Plus, they’re surprisingly easy to make at home, allowing you to enjoy fresh, warm crumpets whenever the craving strikes. So, let’s get started and unlock the secrets to perfect homemade crumpets!

Ingredients:
- 225g strong white bread flour, plus extra for dusting
- 1 tsp salt
- 7g fast-action dried yeast
- 300ml lukewarm milk
- 75ml lukewarm water
- 1 tsp bicarbonate of soda
- Vegetable oil, for greasing
Preparing the Crumpet Batter
- First, let’s get our dry ingredients ready. In a large mixing bowl, sift together the 225g of strong white bread flour and 1 teaspoon of salt. Sifting is important because it helps to aerate the flour, which will contribute to a lighter and fluffier crumpet. Trust me, you’ll notice the difference!
- Next, we’ll add the yeast. Sprinkle the 7g of fast-action dried yeast into the flour mixture. Make sure the yeast is evenly distributed. We don’t want any clumps of yeast in our batter.
- Now, for the wet ingredients. In a separate jug, combine the 300ml of lukewarm milk and 75ml of lukewarm water. The temperature is crucial here. Too hot, and you’ll kill the yeast. Too cold, and the yeast won’t activate properly. Lukewarm is the key!
- Gradually pour the milk and water mixture into the dry ingredients, mixing continuously with a wooden spoon or a whisk. Start slowly to avoid any lumps forming. Keep mixing until you have a smooth batter. It should be quite thin, almost like a pancake batter. Don’t worry if it seems a bit runny; that’s exactly what we want.
- Once the batter is smooth, cover the bowl with cling film or a clean tea towel and leave it in a warm place for about an hour, or until it has doubled in size. This is where the magic happens! The yeast will work its wonders, creating those lovely air bubbles that are characteristic of a good crumpet. I usually put mine in a slightly warm oven (turned off, of course!) or near a radiator.
- After an hour, or when the batter has doubled, dissolve 1 teaspoon of bicarbonate of soda in 2 tablespoons of cold water. This is another crucial step. The bicarbonate of soda will react with the acidity in the batter, creating even more air bubbles and giving the crumpets their signature texture.
- Gently fold the bicarbonate of soda mixture into the batter. Be careful not to overmix, as this will knock out the air. Just fold it in until it’s evenly distributed. The batter will probably bubble up a bit when you add the bicarbonate of soda, which is perfectly normal.
- Let the batter rest for another 15 minutes. This will allow the bicarbonate of soda to fully react and create even more bubbles.
Cooking the Crumpets
- Now, let’s get ready to cook our crumpets. You’ll need some crumpet rings. If you don’t have crumpet rings, you can use cookie cutters or even just free-form them, although they won’t be perfectly round.
- Lightly grease a large frying pan or griddle with vegetable oil. Make sure the pan is evenly coated. You don’t want the crumpets to stick!
- Place the crumpet rings in the pan. Make sure they are also lightly greased on the inside. This will help the crumpets release easily once they’re cooked.
- Heat the pan over a low heat. This is important! You want to cook the crumpets slowly so that they cook through evenly and develop those lovely holes. If the heat is too high, they’ll burn on the outside before they’re cooked on the inside.
- Once the pan is hot, carefully pour enough batter into each crumpet ring to fill it about halfway. Don’t overfill them, as they will rise as they cook.
- Cook the crumpets for about 8-10 minutes, or until the tops are covered in bubbles and the edges are set. You’ll notice the bubbles starting to pop and form holes. This is a good sign!
- Carefully remove the crumpet rings using a spatula or tongs. If the crumpets are sticking, gently run a knife around the inside of the ring to loosen them.
- Flip the crumpets over and cook for another 2-3 minutes, or until they are golden brown on the bottom.
- Remove the crumpets from the pan and place them on a wire rack to cool slightly. This will prevent them from becoming soggy.
Serving and Enjoying Your Crumpets
- Now for the best part: serving and enjoying your homemade crumpets! There are so many ways to enjoy them.
- The classic way is to toast them until they are golden brown and crispy, then spread them with butter. The butter will melt into all those lovely holes, creating a truly delicious treat.
- You can also top them with jam, honey, marmalade, or any other spread you like.
- For a savory option, try topping them with cheese, ham, or eggs.
- Crumpets are also delicious with a dollop of clotted cream and some fresh berries.
- I personally love mine with a poached egg and some hollandaise sauce. It’s like a mini Eggs Benedict!
- However you choose to enjoy them, homemade crumpets are a truly special treat. They’re perfect for breakfast, brunch, or even a late-night snack.
- Tips for Perfect Crumpets:
- Use strong white bread flour: This will give the crumpets their characteristic chewy texture.
- Don’t overmix the batter: Overmixing will develop the gluten and make the crumpets tough.
- Use a low heat: This will ensure that the crumpets cook through evenly and develop those lovely holes.
- Grease the pan and crumpet rings well: This will prevent the crumpets from sticking.
- Be patient: Crumpets take a little time to cook, but the results are worth it!
Storing Your Crumpets
If you have any leftover crumpets (which is unlikely!), you can store them in an airtight container at room temperature for up to 2 days. You can also freeze them for up to 2 months. To freeze, wrap them individually in cling film and then place them in a freezer bag. When you’re ready to eat them, simply thaw them at room temperature and then toast them as usual.
Troubleshooting
My crumpets are not rising: Make sure your yeast is fresh and that the milk and water are lukewarm, not hot. Also, make sure you’re leaving the batter in a warm place to rise.
My crumpets are burning on the outside but still raw on the inside: The heat is too high. Reduce the heat and cook them for longer.
My crumpets are sticking to the pan: Make sure you’re greasing the pan and crumpet rings well.
My crumpets don’t have any holes: You may not have added enough bicarbonate of soda, or you may have overmixed the batter. Also, make sure the batter is thin enough.
Enjoy!
I hope you enjoy making and eating these delicious homemade crumpets. They’re a bit of a labor of love, but they’re so worth it! Let me know in the comments if you have any questions or if you try the recipe. Happy crumpet-making!
Conclusion:
And there you have it! These English Crumpets are truly a must-try for anyone who appreciates a delightful breakfast or afternoon treat. From the satisfying sizzle as they cook on the griddle to the warm, comforting aroma that fills your kitchen, this recipe offers a truly special baking experience. But beyond the sensory pleasures, it’s the taste and texture that will truly win you over. The slightly chewy, porous interior, perfect for soaking up melted butter and your favorite toppings, combined with the gently crisp exterior, creates a symphony of textures in every bite.
Why is this recipe a must-try? Because it’s more than just a crumpet; it’s a taste of tradition, a comforting hug on a plate, and a surprisingly simple recipe to master. Forget store-bought versions that often lack that authentic, homemade charm. With just a few readily available ingredients and a little patience, you can create crumpets that are far superior in flavor and texture. Plus, the satisfaction of making something so delicious from scratch is incredibly rewarding!
But the fun doesn’t stop there! These crumpets are incredibly versatile and can be enjoyed in countless ways. For a classic experience, simply top them with butter and a drizzle of honey or maple syrup. For a savory twist, try spreading them with cream cheese and smoked salmon, or topping them with a poached egg and hollandaise sauce for a decadent brunch. Feeling adventurous? Experiment with different toppings like avocado and everything bagel seasoning, or even a dollop of Greek yogurt and fresh berries.
Here are a few serving suggestions and variations to get you started:
Serving Suggestions:
- Classic: Butter and honey or maple syrup.
- Savory: Cream cheese and smoked salmon, poached egg and hollandaise, avocado and everything bagel seasoning.
- Sweet: Greek yogurt and fresh berries, Nutella and sliced bananas, peanut butter and jelly.
Variations:
- Whole Wheat Crumpets: Substitute half of the all-purpose flour with whole wheat flour for a nuttier flavor.
- Cinnamon Raisin Crumpets: Add a teaspoon of cinnamon and a handful of raisins to the batter.
- Cheese Crumpets: Stir in a quarter cup of shredded cheddar cheese to the batter for a savory cheesy treat.
I truly believe that once you try this recipe, you’ll never go back to store-bought crumpets again. The process is simple, the ingredients are readily available, and the results are simply divine. So, gather your ingredients, preheat your griddle, and get ready to experience the joy of homemade English Crumpets.
I’m so excited for you to try this recipe! And I would absolutely love to hear about your experience. Did you try any of the variations? What were your favorite toppings? Share your photos and stories in the comments below! Let’s create a community of crumpet lovers and inspire each other with delicious ideas. Happy baking!
English Crumpets: The Ultimate Guide to Making and Enjoying Them
Fluffy, delicious homemade crumpets, perfect for breakfast, brunch, or a snack. Enjoy toasted with butter, jam, or your favorite toppings!
Ingredients
- 225g strong white bread flour, plus extra for dusting
- 1 tsp salt
- 7g fast-action dried yeast
- 300ml lukewarm milk
- 75ml lukewarm water
- 1 tsp bicarbonate of soda
- Vegetable oil, for greasing
Instructions
- In a large mixing bowl, sift together the flour and salt.
- Sprinkle the yeast into the flour mixture and distribute evenly.
- In a separate jug, combine the lukewarm milk and water.
- Gradually pour the milk and water mixture into the dry ingredients, mixing continuously until you have a smooth, thin batter.
- Cover the bowl with cling film or a clean tea towel and leave it in a warm place for about an hour, or until it has doubled in size.
- After an hour, dissolve the bicarbonate of soda in 2 tablespoons of cold water.
- Gently fold the bicarbonate of soda mixture into the batter. Be careful not to overmix.
- Let the batter rest for another 15 minutes.
- Lightly grease a large frying pan or griddle with vegetable oil.
- Place the crumpet rings in the pan and grease them lightly on the inside.
- Heat the pan over a low heat.
- Carefully pour enough batter into each crumpet ring to fill it about halfway.
- Cook the crumpets for about 8-10 minutes, or until the tops are covered in bubbles and the edges are set.
- Carefully remove the crumpet rings using a spatula or tongs.
- Flip the crumpets over and cook for another 2-3 minutes, or until they are golden brown on the bottom.
- Remove the crumpets from the pan and place them on a wire rack to cool slightly.
- Toast the crumpets until golden brown and crispy.
- Spread with butter, jam, honey, marmalade, cheese, ham, or eggs.
Notes
- Use strong white bread flour for a chewy texture.
- Don’t overmix the batter.
- Use a low heat to cook the crumpets evenly.
- Grease the pan and crumpet rings well to prevent sticking.
- Be patient, crumpets take time to cook.
- Store leftover crumpets in an airtight container at room temperature for up to 2 days or freeze for up to 2 months.


Leave a Comment