
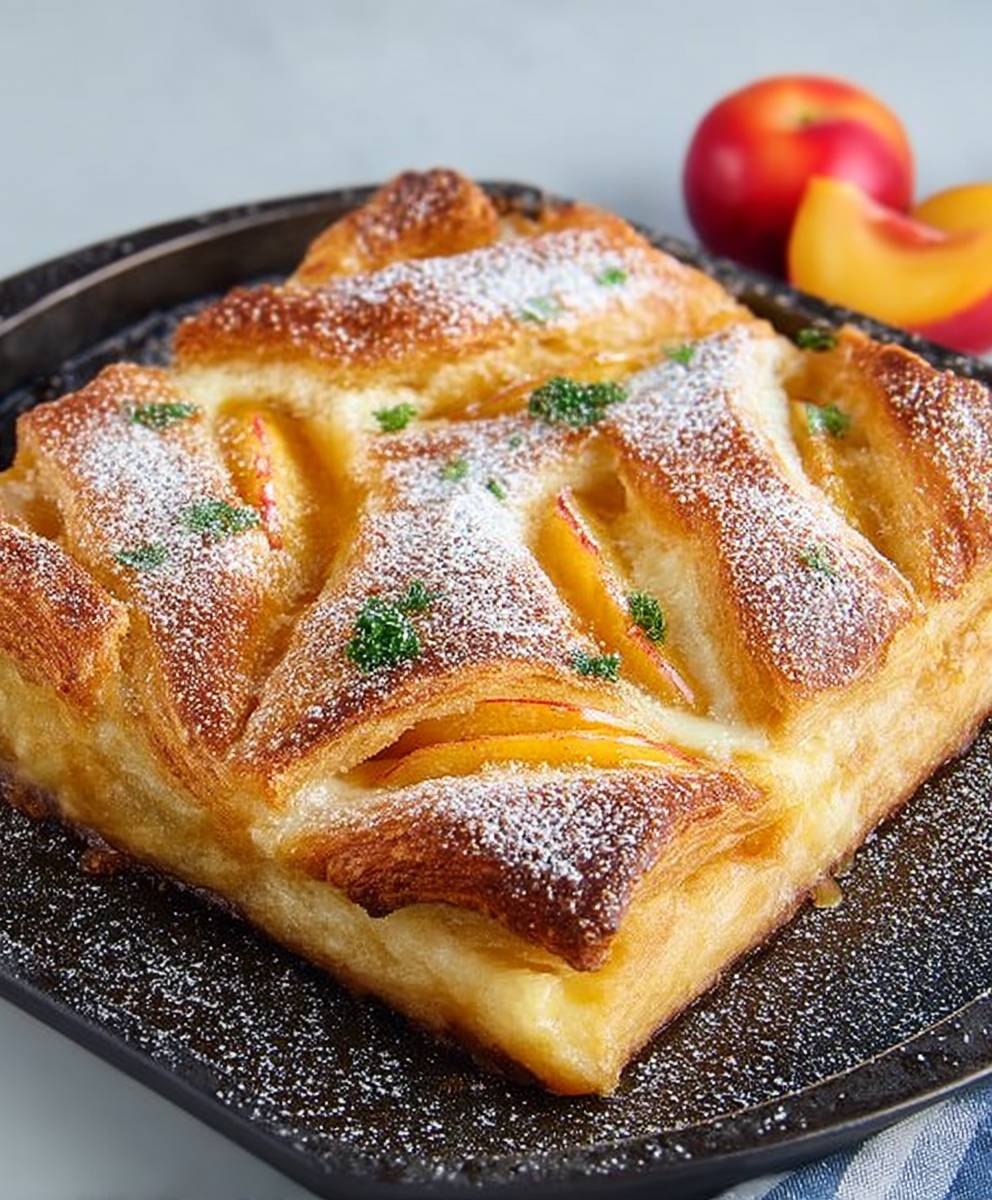
Giant Danish: Prepare to be amazed by this show-stopping pastry that’s as delicious as it is impressive! Imagine a flaky, buttery masterpiece, generously filled with sweet cream cheese and your favorite fruit preserves, all baked to golden perfection. This isn’t your average breakfast treat; it’s a conversation starter, a celebration centerpiece, and a guaranteed crowd-pleaser.
The Danish pastry, or “wienerbrød” as it’s known in Denmark, has a fascinating history. Despite its name, it actually originated in Austria! In the mid-19th century, Danish bakers went on strike, leading bakery owners to hire Austrian bakers instead. These Austrian bakers brought with them their own pastry techniques, which the Danes then adapted and perfected, eventually creating the iconic layered dough we know and love today. While the traditional Danish is a smaller, individual pastry, the Giant Danish takes the concept to a whole new level, making it perfect for sharing (or not, we won’t judge!).
People adore the Danish for its delightful combination of textures and flavors. The crisp, flaky layers of the pastry provide a satisfying crunch, while the creamy filling and sweet fruit offer a burst of flavor that’s simply irresistible. Plus, the Giant Danish is surprisingly easy to customize with your favorite fillings, making it a versatile treat for any occasion. Whether you’re serving it for brunch, dessert, or a special celebration, this impressive pastry is sure to be a hit!

Ingredients:
- For the Dough:
- 5 cups all-purpose flour, plus more for dusting
- 1/2 cup granulated sugar
- 1 teaspoon salt
- 2 packages (1/4 ounce each) active dry yeast
- 1 cup warm milk (105-115°F)
- 1/2 cup (1 stick) unsalted butter, melted
- 2 large eggs, lightly beaten
- 1 teaspoon vanilla extract
- For the Butter Block:
- 1 1/2 cups (3 sticks) unsalted butter, cold and cut into 1/2-inch cubes
- For the Cream Cheese Filling:
- 8 ounces cream cheese, softened
- 1/2 cup granulated sugar
- 1 large egg
- 1 teaspoon vanilla extract
- 1 tablespoon all-purpose flour
- For the Fruit Filling (Optional, use one or a combination):
- 1 cup cherry pie filling
- 1 cup apple pie filling
- 1 cup blueberry pie filling
- 1 cup raspberry jam
- For the Egg Wash:
- 1 large egg, beaten
- 1 tablespoon milk
- For the Glaze:
- 2 cups powdered sugar
- 1/4 cup milk, or more as needed
- 1/2 teaspoon vanilla extract
Preparing the Dough:
- In a large bowl, whisk together the flour, sugar, and salt.
- In a separate bowl, dissolve the yeast in the warm milk. Let it stand for 5-10 minutes until foamy. This indicates the yeast is active.
- Add the melted butter, beaten eggs, and vanilla extract to the yeast mixture. Stir to combine.
- Pour the wet ingredients into the dry ingredients and mix until a shaggy dough forms.
- Turn the dough out onto a lightly floured surface and knead for 5-7 minutes, or until smooth and elastic. The dough will be slightly sticky, but avoid adding too much flour.
- Place the dough in a lightly oiled bowl, turning to coat. Cover with plastic wrap and let rise in a warm place for 1-1.5 hours, or until doubled in size.
Creating the Butter Block:
- While the dough is rising, prepare the butter block. Place the cold, cubed butter between two large sheets of parchment paper.
- Using a rolling pin, pound and roll the butter into a 8×10-inch rectangle. The butter should be cold and firm, but pliable enough to roll. If the butter becomes too soft, refrigerate it for 10-15 minutes before continuing.
- Once the butter block is formed, refrigerate it until ready to use. It’s crucial that the butter remains cold throughout the lamination process.
Laminating the Dough:
- Once the dough has doubled in size, gently punch it down to release the air.
- Turn the dough out onto a lightly floured surface and roll it into a 12×16-inch rectangle.
- Place the cold butter block in the center of the dough rectangle.
- Fold one side of the dough over the butter, covering half of it. Then, fold the other side of the dough over the butter, completely enclosing it. You should now have a layered dough package.
- Gently pinch the edges of the dough to seal in the butter.
- Turn the dough 90 degrees so that the short end is facing you.
- Roll the dough into a 12×24-inch rectangle. Be gentle and avoid pressing too hard, as you don’t want to squeeze the butter out.
- Fold the dough into thirds, like a letter. This is called a single fold or a book fold.
- Wrap the dough tightly in plastic wrap and refrigerate for 30 minutes. This allows the gluten to relax and the butter to firm up.
- Repeat the rolling and folding process two more times, refrigerating the dough for 30 minutes between each fold. This creates the hundreds of layers that give Danish pastries their flaky texture. Each fold is crucial for developing the layers.
Preparing the Cream Cheese Filling:
- While the dough is chilling for the last time, prepare the cream cheese filling.
- In a medium bowl, beat the softened cream cheese and sugar together until smooth and creamy.
- Beat in the egg, vanilla extract, and flour until well combined. The flour helps to stabilize the filling during baking.
- Set aside until ready to use.
Assembling the Giant Danish:
- Preheat oven to 375°F (190°C). Line a large baking sheet with parchment paper.
- Remove the laminated dough from the refrigerator and roll it out into a large rectangle, approximately 16×24 inches.
- Carefully transfer the dough to the prepared baking sheet.
- Using a sharp knife or pizza cutter, score a line around the perimeter of the dough, about 1 inch from the edge. Be careful not to cut all the way through the dough; you just want to create a border.
- Spread the cream cheese filling evenly over the center of the dough, inside the scored border.
- If using fruit filling, spoon it over the cream cheese filling. You can use one type of filling or a combination of several. Get creative!
- Brush the exposed border of the dough with the egg wash. This will help it to brown nicely in the oven.
Baking the Giant Danish:
- Bake in the preheated oven for 25-35 minutes, or until the pastry is golden brown and the filling is set. The baking time may vary depending on your oven, so keep a close eye on it.
- If the edges of the pastry are browning too quickly, you can tent it with foil during the last 10-15 minutes of baking.
- Once baked, remove the Danish from the oven and let it cool on the baking sheet for at least 30 minutes before glazing.
Preparing the Glaze:
- While the Danish is cooling, prepare the glaze.
- In a medium bowl, whisk together the powdered sugar, milk, and vanilla extract until smooth. Add more milk, one tablespoon at a time, if needed to reach your desired consistency. The glaze should be thick enough to coat the pastry but thin enough to drizzle easily.
Glazing and Serving:
- Once the Danish has cooled slightly, drizzle the glaze evenly over the top.
- Let the glaze set for a few minutes before slicing and serving.
- This Giant Danish is best served warm or at room temperature. It’s perfect for breakfast, brunch, or dessert. Enjoy!
Conclusion:
This Giant Danish recipe isn’t just another pastry; it’s a showstopper, a conversation starter, and, most importantly, a delicious experience you absolutely must try. From the flaky, buttery layers to the creamy, sweet filling, every bite is a little piece of heaven. I know baking can sometimes feel intimidating, but trust me, this recipe is surprisingly straightforward, and the payoff is immense. Imagine the look on your family’s faces when you present this magnificent creation!
Why is this a must-try? Because it’s more than just a dessert; it’s a memory in the making. It’s the perfect centerpiece for a brunch, a delightful treat for a special occasion, or simply a way to elevate an ordinary weekend. The combination of textures and flavors is simply irresistible, and the sheer size of this Danish makes it a truly unforgettable experience. Plus, who can resist the aroma of freshly baked pastry filling the house?
But the fun doesn’t stop there! This recipe is also incredibly versatile. Feel free to experiment with different fillings. While I’m partial to the classic cream cheese filling, you could easily substitute it with a fruit compote, a chocolate ganache, or even a savory filling for a unique twist. Think apple cinnamon for a cozy autumn treat, or a tangy lemon curd for a bright and refreshing dessert.
Serving Suggestions and Variations:
* Warm it up: A slightly warmed slice of this Giant Danish is pure bliss. The filling becomes even creamier, and the pastry melts in your mouth.
* Add a glaze: A simple powdered sugar glaze adds a touch of sweetness and elegance. You can even flavor the glaze with a hint of vanilla, almond, or lemon extract.
* Top with fruit: Fresh berries, sliced peaches, or chopped nuts make a beautiful and delicious topping.
* Savory twist: For a savory variation, try filling the Danish with spinach and feta, or ham and cheese.
* Individual pastries: If you don’t want to make one giant Danish, you can easily divide the dough into smaller portions and create individual pastries.
Don’t be afraid to get creative and personalize this recipe to your liking. Baking is all about experimentation and having fun! I truly believe that anyone can make this Giant Danish, regardless of their baking experience. The key is to follow the instructions carefully and don’t be afraid to ask questions if you get stuck.
So, what are you waiting for? Gather your ingredients, preheat your oven, and get ready to embark on a baking adventure. I’m confident that you’ll be amazed by the results. And most importantly, don’t forget to share your creations with me! I’d love to see your photos and hear about your experiences. Tag me on social media and let me know what variations you tried. Happy baking, and enjoy every delicious bite of your homemade Giant Danish! I can’t wait to see what you create!
Giant Danish: A Delicious Guide to Baking and Enjoying
A show-stopping, flaky, and delicious giant Danish pastry filled with creamy cheese and your favorite fruit fillings. Perfect for a special breakfast, brunch, or dessert!
Ingredients
- 5 cups all-purpose flour, plus more for dusting
- 1/2 cup granulated sugar
- 1 teaspoon salt
- 2 packages (1/4 ounce each) active dry yeast
- 1 cup warm milk (105-115°F)
- 1/2 cup (1 stick) unsalted butter, melted
- 2 large eggs, lightly beaten
- 1 teaspoon vanilla extract
- 1 1/2 cups (3 sticks) unsalted butter, cold and cut into 1/2-inch cubes
- 8 ounces cream cheese, softened
- 1/2 cup granulated sugar
- 1 large egg
- 1 teaspoon vanilla extract
- 1 tablespoon all-purpose flour
- 1 cup cherry pie filling
- 1 cup apple pie filling
- 1 cup blueberry pie filling
- 1 cup raspberry jam
- 1 large egg, beaten
- 1 tablespoon milk
- 2 cups powdered sugar
- 1/4 cup milk, or more as needed
- 1/2 teaspoon vanilla extract
Instructions
- In a large bowl, whisk together the flour, sugar, and salt.
- In a separate bowl, dissolve the yeast in the warm milk. Let it stand for 5-10 minutes until foamy. This indicates the yeast is active.
- Add the melted butter, beaten eggs, and vanilla extract to the yeast mixture. Stir to combine.
- Pour the wet ingredients into the dry ingredients and mix until a shaggy dough forms.
- Turn the dough out onto a lightly floured surface and knead for 5-7 minutes, or until smooth and elastic. The dough will be slightly sticky, but avoid adding too much flour.
- Place the dough in a lightly oiled bowl, turning to coat. Cover with plastic wrap and let rise in a warm place for 1-1.5 hours, or until doubled in size.
- While the dough is rising, prepare the butter block. Place the cold, cubed butter between two large sheets of parchment paper.
- Using a rolling pin, pound and roll the butter into a 8×10-inch rectangle. The butter should be cold and firm, but pliable enough to roll. If the butter becomes too soft, refrigerate it for 10-15 minutes before continuing.
- Once the butter block is formed, refrigerate it until ready to use. It’s crucial that the butter remains cold throughout the lamination process.
- Once the dough has doubled in size, gently punch it down to release the air.
- Turn the dough out onto a lightly floured surface and roll it into a 12×16-inch rectangle.
- Place the cold butter block in the center of the dough rectangle.
- Fold one side of the dough over the butter, covering half of it. Then, fold the other side of the dough over the butter, completely enclosing it. You should now have a layered dough package.
- Gently pinch the edges of the dough to seal in the butter.
- Turn the dough 90 degrees so that the short end is facing you.
- Roll the dough into a 12×24-inch rectangle. Be gentle and avoid pressing too hard, as you don’t want to squeeze the butter out.
- Fold the dough into thirds, like a letter. This is called a single fold or a book fold.
- Wrap the dough tightly in plastic wrap and refrigerate for 30 minutes. This allows the gluten to relax and the butter to firm up.
- Repeat the rolling and folding process two more times, refrigerating the dough for 30 minutes between each fold. This creates the hundreds of layers that give Danish pastries their flaky texture. Each fold is crucial for developing the layers.
- While the dough is chilling for the last time, prepare the cream cheese filling.
- In a medium bowl, beat the softened cream cheese and sugar together until smooth and creamy.
- Beat in the egg, vanilla extract, and flour until well combined. The flour helps to stabilize the filling during baking.
- Set aside until ready to use.
- Preheat oven to 375°F (190°C). Line a large baking sheet with parchment paper.
- Remove the laminated dough from the refrigerator and roll it out into a large rectangle, approximately 16×24 inches.
- Carefully transfer the dough to the prepared baking sheet.
- Using a sharp knife or pizza cutter, score a line around the perimeter of the dough, about 1 inch from the edge. Be careful not to cut all the way through the dough; you just want to create a border.
- Spread the cream cheese filling evenly over the center of the dough, inside the scored border.
- If using fruit filling, spoon it over the cream cheese filling. You can use one type of filling or a combination of several. Get creative!
- Brush the exposed border of the dough with the egg wash. This will help it to brown nicely in the oven.
- Bake in the preheated oven for 25-35 minutes, or until the pastry is golden brown and the filling is set. The baking time may vary depending on your oven, so keep a close eye on it.
- If the edges of the pastry are browning too quickly, you can tent it with foil during the last 10-15 minutes of baking.
- Once baked, remove the Danish from the oven and let it cool on the baking sheet for at least 30 minutes before glazing.
- While the Danish is cooling, prepare the glaze.
- In a medium bowl, whisk together the powdered sugar, milk, and vanilla extract until smooth. Add more milk, one tablespoon at a time, if needed to reach your desired consistency. The glaze should be thick enough to coat the pastry but thin enough to drizzle easily.
- Once the Danish has cooled slightly, drizzle the glaze evenly over the top.
- Let the glaze set for a few minutes before slicing and serving.
- This Giant Danish is best served warm or at room temperature. It’s perfect for breakfast, brunch, or dessert. Enjoy!
Notes
- The key to a flaky Danish is keeping the butter cold throughout the lamination process. If the butter starts to melt, refrigerate the dough immediately.
- Don’t be intimidated by the lamination process! It takes time, but the results are worth it.
- Feel free to experiment with different fruit fillings.
- The dough can be made ahead of time and stored in the refrigerator for up to 24 hours.
- For best results, use a stand mixer with a dough hook attachment to knead the dough. However, kneading by hand works just fine.


Leave a Comment