
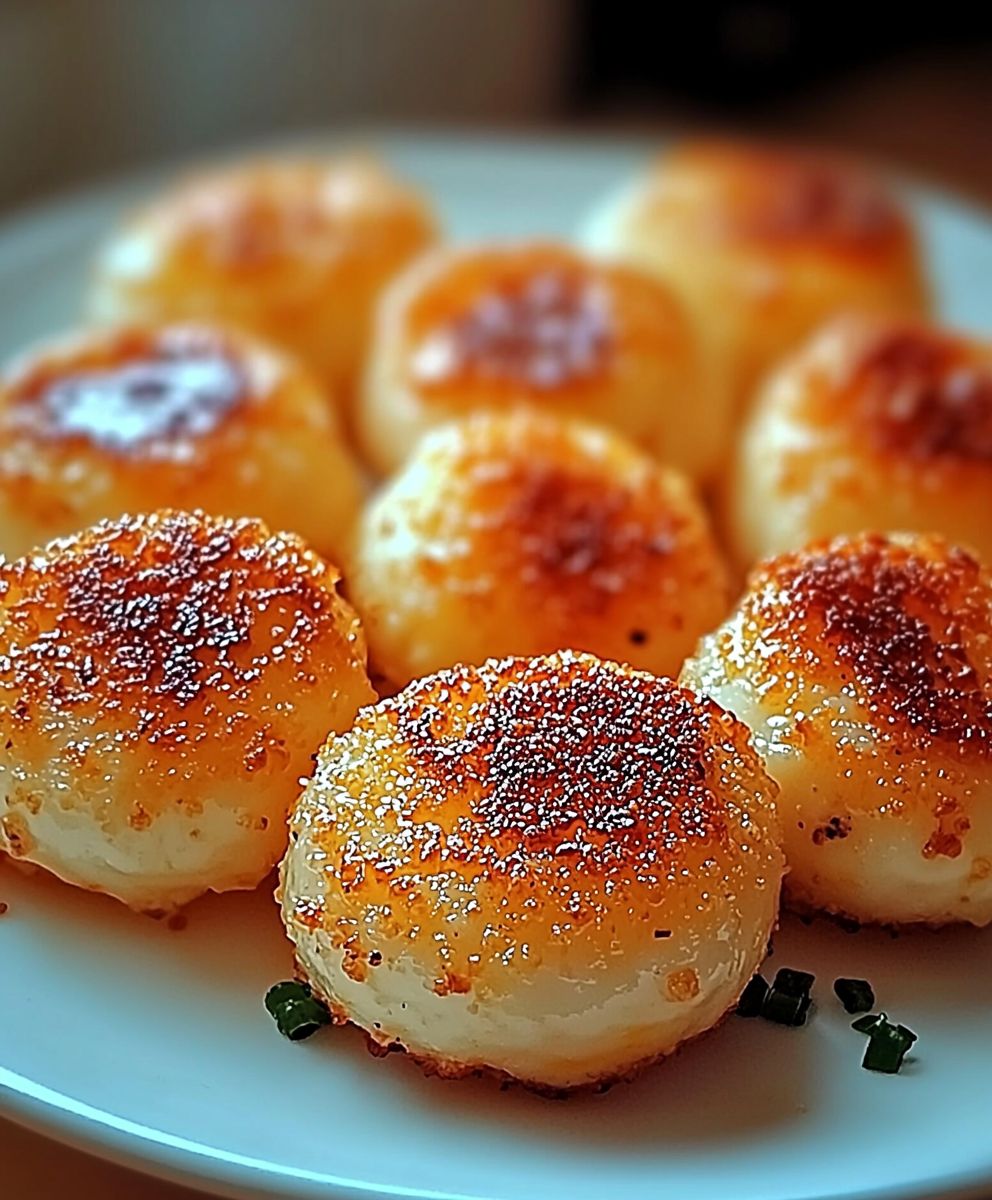
Golden Cheese Crunch: just the name alone conjures up images of irresistible, cheesy goodness, doesn’t it? I’m thrilled to share this recipe with you, because it’s not just a snack; it’s an experience. Imagine biting into a perfectly crisp, golden exterior that gives way to a warm, melty cheese center. It’s the kind of treat that disappears in minutes, leaving you craving more.
While the exact origins of this particular Golden Cheese Crunch recipe are a bit of a mystery, the concept of fried cheese snacks has been around for centuries, popping up in various cultures around the world. Think of the crispy cheese curds of Wisconsin or the fried halloumi of the Mediterranean. This recipe takes that timeless love of cheese and elevates it to a whole new level of crunchy, cheesy perfection.
So, what makes this dish so universally appealing? It’s the delightful combination of textures and flavors. The satisfying crunch, the gooey cheese, and the subtle savory notes all work together in perfect harmony. Plus, it’s incredibly easy and quick to make, making it ideal for a last-minute appetizer, a fun snack for kids, or even a late-night indulgence. Get ready to experience the ultimate cheesy delight!

Ingredients:
- For the Cheese Sauce:
- 4 tablespoons unsalted butter
- 4 tablespoons all-purpose flour
- 3 cups whole milk, warmed
- 1 teaspoon salt
- 1/2 teaspoon black pepper
- 1/4 teaspoon ground nutmeg
- 4 cups shredded sharp cheddar cheese
- 1 cup shredded Gruyere cheese
- 1/2 cup grated Parmesan cheese
- For the Pasta:
- 1 pound elbow macaroni
- Water for boiling
- 1 tablespoon salt (for pasta water)
- For the Crunchy Topping:
- 1 cup panko breadcrumbs
- 1/2 cup grated Parmesan cheese
- 1/4 cup melted unsalted butter
- 1/4 teaspoon garlic powder
- 1/4 teaspoon paprika
- Optional Add-ins:
- Cooked bacon crumbles
- Chopped cooked ham
- Jalapeño slices (for a spicy kick)
- Caramelized onions
Preparing the Cheese Sauce:
- Melt the Butter: In a large, heavy-bottomed saucepan, melt the butter over medium heat. Make sure the butter is fully melted but not browned. This is crucial for a smooth sauce.
- Make the Roux: Whisk in the flour and cook for 2-3 minutes, stirring constantly. This creates a roux, which is the base for our cheese sauce. It should be smooth and slightly golden. Don’t rush this step; cooking the flour properly eliminates any raw flour taste.
- Add the Milk Gradually: Slowly pour in the warm milk, about 1/2 cup at a time, whisking continuously to prevent lumps from forming. Make sure each addition of milk is fully incorporated before adding more. This gradual addition is key to a smooth, creamy sauce.
- Simmer and Thicken: Continue to cook, stirring constantly, until the sauce thickens enough to coat the back of a spoon. This usually takes about 5-7 minutes. You’ll know it’s ready when you can run your finger across the back of the spoon and the line remains clear.
- Season the Sauce: Remove the saucepan from the heat and stir in the salt, pepper, and nutmeg. Taste and adjust seasonings as needed. Remember, the cheese will also add saltiness, so don’t over-season at this stage.
- Melt the Cheese: Add the shredded cheddar cheese, Gruyere cheese, and Parmesan cheese, a handful at a time, stirring until completely melted and smooth. Ensure each addition of cheese is fully melted before adding more. This prevents the cheese from clumping and ensures a velvety smooth sauce. The Gruyere adds a wonderful nutty flavor, and the Parmesan provides a salty, savory note.
- Keep Warm: If you’re not using the cheese sauce immediately, keep it warm over very low heat, stirring occasionally, or cover it with plastic wrap, pressing the wrap directly onto the surface of the sauce to prevent a skin from forming.
Cooking the Pasta:
- Boil the Water: Bring a large pot of salted water to a rolling boil. The salt is important; it seasons the pasta from the inside out. Use plenty of water to ensure the pasta cooks evenly.
- Cook the Pasta: Add the elbow macaroni to the boiling water and cook according to package directions, but subtract 1-2 minutes from the recommended cooking time. We want the pasta to be slightly undercooked because it will continue to cook in the oven. This prevents it from becoming mushy.
- Drain the Pasta: Drain the pasta well in a colander. Do not rinse the pasta unless you want to cool it down quickly. For this recipe, we want the pasta to retain some of its starchiness, which will help the cheese sauce adhere to it.
Preparing the Crunchy Topping:
- Combine Ingredients: In a medium bowl, combine the panko breadcrumbs, grated Parmesan cheese, melted butter, garlic powder, and paprika.
- Mix Well: Toss the ingredients together until the breadcrumbs are evenly coated with the butter and seasonings. The panko breadcrumbs provide a wonderful crispy texture, and the Parmesan cheese adds a salty, savory flavor. The garlic powder and paprika add a touch of warmth and complexity.
Assembling and Baking:
- Preheat the Oven: Preheat your oven to 350°F (175°C).
- Combine Pasta and Cheese Sauce: In a large bowl, combine the cooked pasta and the cheese sauce. Gently toss to coat the pasta evenly with the sauce. Make sure every nook and cranny of the macaroni is covered in cheesy goodness.
- Add Optional Add-ins (Optional): If you’re using any optional add-ins, such as cooked bacon crumbles, chopped cooked ham, jalapeño slices, or caramelized onions, stir them into the pasta and cheese sauce mixture. These additions can really elevate the dish and add extra layers of flavor.
- Transfer to Baking Dish: Pour the pasta and cheese sauce mixture into a greased 9×13 inch baking dish. Make sure the mixture is evenly distributed in the dish.
- Sprinkle with Topping: Sprinkle the crunchy topping evenly over the pasta and cheese sauce. Ensure the entire surface is covered with the breadcrumb mixture for maximum crunch.
- Bake: Bake in the preheated oven for 20-25 minutes, or until the topping is golden brown and the cheese sauce is bubbly. Keep an eye on it to prevent the topping from burning. If the topping starts to brown too quickly, you can loosely cover the baking dish with aluminum foil.
- Let Rest: Remove from the oven and let rest for 5-10 minutes before serving. This allows the cheese sauce to set slightly and prevents it from being too runny.
Tips and Variations:
- Cheese Variations: Feel free to experiment with different types of cheese in the sauce. Monterey Jack, Havarti, or Gouda would all be delicious additions.
- Spice it Up: Add a pinch of cayenne pepper or a dash of hot sauce to the cheese sauce for a spicy kick.
- Vegetarian Option: Add roasted vegetables like broccoli, cauliflower, or bell peppers to the pasta and cheese sauce for a vegetarian-friendly meal.
- Make Ahead: You can assemble the mac and cheese ahead of time and store it in the refrigerator for up to 24 hours. Add a few extra minutes to the baking time if baking from cold.
- Freezing: Baked mac and cheese can be frozen for up to 2 months. Thaw completely in the refrigerator before reheating in the oven.
- Broiler Boost: For an extra crispy topping, broil the mac and cheese for the last 1-2 minutes of baking, keeping a close eye on it to prevent burning.
- Breadcrumb Alternatives: If you don’t have panko breadcrumbs, you can use crushed Ritz crackers or regular breadcrumbs for the topping.
- Milk Alternatives: While whole milk provides the richest flavor, you can use 2% milk or even a non-dairy milk alternative like almond milk or oat milk. Keep in mind that the sauce may not be as creamy.
- Gluten-Free Option: Use gluten-free pasta and gluten-free flour to make this recipe gluten-free.
Enjoy your Golden Cheese Crunch!
Conclusion:
This Golden Cheese Crunch isn’t just another snack; it’s a flavor explosion waiting to happen! From the satisfying crunch to the rich, cheesy goodness, every bite is a testament to simple ingredients transformed into something truly special. I genuinely believe this recipe deserves a spot in your regular rotation. It’s quick, easy, and guaranteed to be a crowd-pleaser, whether you’re hosting a game night, packing a lunchbox, or simply craving a delicious and comforting treat. But why is this recipe a must-try? Beyond the incredible taste and texture, it’s the versatility that truly sets it apart. You can easily customize it to suit your preferences and dietary needs. Feeling adventurous? Add a pinch of cayenne pepper for a spicy kick or a sprinkle of garlic powder for an extra layer of savory flavor. For a sweeter variation, consider incorporating a touch of brown sugar or even a drizzle of honey after baking. The possibilities are endless! And speaking of serving suggestions, the Golden Cheese Crunch is fantastic on its own, but it also pairs beautifully with a variety of accompaniments. Try serving it with a bowl of warm tomato soup for a comforting and satisfying meal. It also makes a fantastic topping for salads, adding a delightful crunch and cheesy flavor. For a more sophisticated presentation, arrange the cheese crisps on a cheese board alongside grapes, crackers, and your favorite cheeses. They’re also surprisingly delicious crumbled over pasta dishes or used as a crispy topping for baked potatoes. I’ve personally experimented with countless variations, and each one has been a resounding success. One of my favorites is adding a sprinkle of everything bagel seasoning before baking it elevates the flavor profile to a whole new level! Another fun idea is to use different types of cheese. A blend of cheddar and parmesan creates a wonderfully complex flavor, while using pepper jack adds a touch of heat. Don’t be afraid to get creative and experiment with your favorite cheeses and seasonings to create your own signature Golden Cheese Crunch. I’m so confident that you’ll love this recipe that I urge you to give it a try. It’s a simple yet satisfying way to elevate your snacking game and impress your friends and family. Once you’ve made your own batch of this irresistible Golden Cheese Crunch, I’d absolutely love to hear about your experience! Did you try any variations? What did you serve it with? What did your family think? Please feel free to share your thoughts, photos, and tips in the comments below. Your feedback is invaluable and helps me continue to create and share recipes that you’ll love. I’m excited to see what culinary masterpieces you create with this simple yet delicious recipe. Happy crunching! And remember, the best recipes are the ones that are shared and enjoyed with loved ones. So, gather your ingredients, preheat your oven, and get ready to experience the magic of homemade Golden Cheese Crunch! You won’t regret it. PrintGolden Cheese Crunch: The Ultimate Guide to This Delicious Snack

A classic mac and cheese elevated with a blend of sharp cheddar, Gruyere, and Parmesan, topped with a golden, crunchy panko breadcrumb topping.
- Prep Time: 20 minutes
- Cook Time: 45 minutes
- Total Time: 65 minutes
- Yield: 8–10 servings 1x
Ingredients
- 4 tablespoons unsalted butter
- 4 tablespoons all-purpose flour
- 3 cups whole milk, warmed
- 1 teaspoon salt
- 1/2 teaspoon black pepper
- 1/4 teaspoon ground nutmeg
- 4 cups shredded sharp cheddar cheese
- 1 cup shredded Gruyere cheese
- 1/2 cup grated Parmesan cheese
- 1 pound elbow macaroni
- Water for boiling
- 1 tablespoon salt (for pasta water)
- 1 cup panko breadcrumbs
- 1/2 cup grated Parmesan cheese
- 1/4 cup melted unsalted butter
- 1/4 teaspoon garlic powder
- 1/4 teaspoon paprika
- Cooked bacon crumbles
- Chopped cooked ham
- Jalapeño slices (for a spicy kick)
- Caramelized onions
Instructions
- Melt the butter in a large, heavy-bottomed saucepan over medium heat.
- Whisk in the flour and cook for 2-3 minutes, stirring constantly, to create a roux.
- Slowly pour in the warm milk, about 1/2 cup at a time, whisking continuously to prevent lumps.
- Continue to cook, stirring constantly, until the sauce thickens enough to coat the back of a spoon (5-7 minutes).
- Remove from heat and stir in the salt, pepper, and nutmeg. Taste and adjust seasonings.
- Add the shredded cheddar cheese, Gruyere cheese, and Parmesan cheese, a handful at a time, stirring until completely melted and smooth.
- Keep warm over very low heat, stirring occasionally, or cover with plastic wrap pressed onto the surface.
- Bring a large pot of salted water to a rolling boil.
- Add the elbow macaroni and cook according to package directions, subtracting 1-2 minutes from the recommended cooking time.
- Drain the pasta well in a colander. Do not rinse.
- In a medium bowl, combine the panko breadcrumbs, grated Parmesan cheese, melted butter, garlic powder, and paprika.
- Toss the ingredients together until the breadcrumbs are evenly coated.
- Preheat oven to 350°F (175°C).
- In a large bowl, combine the cooked pasta and the cheese sauce. Gently toss to coat.
- If using, stir in any optional add-ins.
- Pour the mixture into a greased 9×13 inch baking dish.
- Sprinkle the crunchy topping evenly over the pasta and cheese sauce.
- Bake for 20-25 minutes, or until the topping is golden brown and the cheese sauce is bubbly.
- Let rest for 5-10 minutes before serving.
Notes
- Cheese Variations: Experiment with different cheeses like Monterey Jack, Havarti, or Gouda.
- Spice it Up: Add cayenne pepper or hot sauce to the cheese sauce.
- Vegetarian Option: Add roasted vegetables like broccoli, cauliflower, or bell peppers.
- Make Ahead: Assemble ahead of time and store in the refrigerator for up to 24 hours. Add extra baking time if baking from cold.
- Freezing: Baked mac and cheese can be frozen for up to 2 months. Thaw completely before reheating.
- Broiler Boost: Broil for the last 1-2 minutes for an extra crispy topping.
- Breadcrumb Alternatives: Use crushed Ritz crackers or regular breadcrumbs.
- Milk Alternatives: Use 2% milk or non-dairy milk, but the sauce may not be as creamy.
- Gluten-Free Option: Use gluten-free pasta and flour.


Leave a Comment