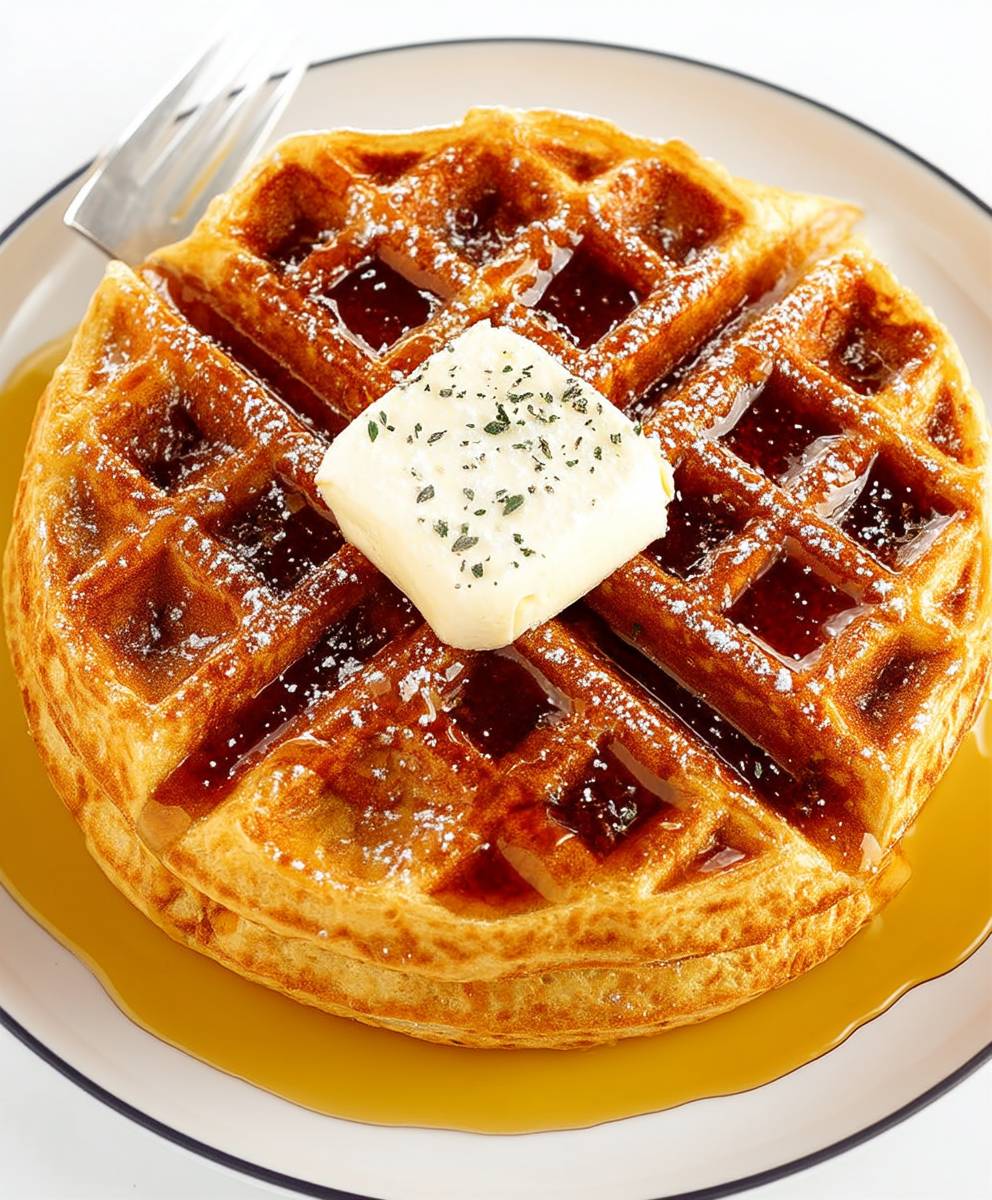
Greek Yogurt Waffles: Prepare to revolutionize your breakfast routine! Imagine sinking your teeth into a waffle that’s not only incredibly delicious but also packed with protein and boasting a delightfully tangy flavor. These aren’t your average waffles; they’re a game-changer.
Waffles, in their various forms, have been a breakfast staple for centuries, with roots tracing back to medieval Europe. While the traditional waffle focused on rich ingredients like butter and cream, our modern twist incorporates the wholesome goodness of Greek yogurt. This addition not only lightens the batter but also adds a nutritional boost, making it a guilt-free indulgence.
What makes these Greek Yogurt Waffles so irresistible? It’s the perfect balance of textures a crispy golden exterior giving way to a soft, fluffy interior. The subtle tang from the Greek yogurt complements the sweetness of the waffle, creating a flavor profile that’s both satisfying and refreshing. Plus, they are incredibly easy to make! Whether you’re a seasoned chef or a kitchen novice, you can whip up a batch of these delightful waffles in minutes. The convenience and deliciousness make them a surefire hit with the whole family. Get ready to experience waffles like never before!
Ingredients:
- 1 ½ cups all-purpose flour
- 2 teaspoons baking powder
- ½ teaspoon baking soda
- ¼ teaspoon salt
- 2 tablespoons granulated sugar
- 1 ½ cups plain Greek yogurt (full-fat or non-fat works)
- 2 large eggs, lightly beaten
- ½ cup milk (any kind)
- 4 tablespoons unsalted butter, melted and slightly cooled
- 1 teaspoon vanilla extract
- Cooking spray or oil, for waffle iron
Preparing the Waffle Batter
Alright, let’s get started on these delicious Greek Yogurt Waffles! The key to fluffy waffles is to not overmix the batter, so we’ll be gentle with it.
- Combine the dry ingredients: In a large bowl, whisk together the flour, baking powder, baking soda, salt, and sugar. Make sure everything is evenly distributed. This ensures that the baking powder and soda work their magic evenly throughout the waffles.
- Whisk the wet ingredients: In a separate medium bowl, whisk together the Greek yogurt, eggs, milk, melted butter, and vanilla extract. Ensure the butter isn’t too hot when you add it, or it might cook the eggs!
- Combine wet and dry: Pour the wet ingredients into the dry ingredients. Gently fold the mixture together until just combined. It’s okay if there are a few lumps resist the urge to overmix! Overmixing develops the gluten in the flour, which can result in tough waffles. We want light and airy waffles, not hockey pucks!
- Let the batter rest (optional but recommended): Cover the bowl with plastic wrap and let the batter rest for 5-10 minutes. This allows the gluten to relax and the baking powder to activate, resulting in even fluffier waffles. While this step is optional, I highly recommend it for the best texture.
Cooking the Waffles
Now for the fun part cooking those waffles! Every waffle iron is a little different, so you might need to adjust the cooking time slightly to get your waffles perfectly golden brown.
- Preheat your waffle iron: Preheat your waffle iron according to the manufacturer’s instructions. Most waffle irons have an indicator light that will tell you when it’s ready.
- Grease the waffle iron: Lightly grease the waffle iron with cooking spray or oil. This will prevent the waffles from sticking and make them easier to remove. I prefer using cooking spray, but a light brushing of melted butter or vegetable oil works well too.
- Pour the batter: Pour the recommended amount of batter onto the hot waffle iron. The amount of batter you need will depend on the size and shape of your waffle iron. Consult your waffle iron’s manual for specific instructions. Generally, you want to fill the iron so that the batter spreads almost to the edges, but doesn’t overflow.
- Cook the waffles: Close the waffle iron and cook according to the manufacturer’s instructions. This usually takes 3-5 minutes, or until the waffles are golden brown and crispy. Keep an eye on them you don’t want them to burn! The indicator light on your waffle iron should tell you when the waffles are done, but you can also gently lift the lid to check.
- Remove the waffles: Carefully remove the waffles from the waffle iron using a fork or tongs. Be careful not to scratch the surface of the waffle iron.
- Repeat: Repeat steps 3-5 with the remaining batter.
Serving and Enjoying Your Greek Yogurt Waffles
The best part? Eating them, of course! These waffles are delicious on their own, but they’re even better with your favorite toppings.
- Serve immediately: Serve the waffles immediately while they’re still warm and crispy.
- Add your favorite toppings: Top with your favorite toppings, such as fresh fruit, maple syrup, whipped cream, chocolate chips, nuts, or even a dollop of extra Greek yogurt! I personally love them with fresh berries and a drizzle of honey.
Tips for Perfect Waffles
- Don’t overmix the batter: I can’t stress this enough! Overmixing leads to tough waffles.
- Use room temperature ingredients: While not essential, using room temperature eggs and milk can help the batter come together more smoothly.
- Adjust the cooking time: Every waffle iron is different, so adjust the cooking time as needed to get your waffles perfectly golden brown.
- Keep waffles warm: If you’re making a large batch, keep the cooked waffles warm in a preheated oven (200°F) until ready to serve. Place them on a wire rack in a single layer to prevent them from getting soggy.
- Experiment with flavors: Feel free to add other ingredients to the batter, such as blueberries, chocolate chips, or cinnamon, to customize your waffles.
Variations
- Blueberry Greek Yogurt Waffles: Gently fold 1 cup of fresh or frozen blueberries into the batter before cooking.
- Chocolate Chip Greek Yogurt Waffles: Gently fold ½ cup of chocolate chips into the batter before cooking.
- Cinnamon Greek Yogurt Waffles: Add 1 teaspoon of ground cinnamon to the dry ingredients.
- Whole Wheat Greek Yogurt Waffles: Substitute ½ cup of the all-purpose flour with whole wheat flour.
- Lemon Greek Yogurt Waffles: Add the zest of one lemon to the wet ingredients.
Storing Leftover Waffles
If you happen to have any leftover waffles (which is rare in my house!), you can store them in the refrigerator or freezer.
- Refrigerator: Store the waffles in an airtight container in the refrigerator for up to 3 days. Reheat in a toaster or oven until warm and crispy.
- Freezer: Store the waffles in a freezer-safe bag or container in the freezer for up to 2 months. To reheat, toast them directly from frozen or bake them in a preheated oven (350°F) until warm and crispy.
Why Greek Yogurt?
You might be wondering why we’re using Greek yogurt in these waffles. Well, Greek yogurt adds a wonderful tanginess and richness to the waffles, while also making them incredibly moist and tender. It also adds a boost of protein, making these waffles a slightly healthier option than traditional waffles. Plus, it helps create a beautifully golden-brown crust.
Troubleshooting
- Waffles are sticking to the iron: Make sure you’re greasing the waffle iron properly. You may also need to adjust the cooking time.
- Waffles are not cooking evenly: Ensure your waffle iron is preheated properly and that you’re using the correct amount of batter.
- Waffles are too dense: You may have overmixed the batter. Remember to gently fold the wet and dry ingredients together until just combined.
- Waffles are not crispy: Make sure your waffle iron is hot enough and that you’re cooking the waffles for the correct amount of time. You can also try adding a little bit of cornstarch to the batter for extra crispiness.
Nutritional Information (Approximate, per waffle):
Note: Nutritional information is an estimate and may vary depending on the specific ingredients used.
- Calories: 200-250
- Protein: 8-10g
- Fat: 8-10g
- Carbohydrates: 25-30g
Enjoy your homemade Greek Yogurt Waffles! They are a perfect breakfast or brunch treat.

Conclusion:
And there you have it! These Greek Yogurt Waffles are truly a game-changer for breakfast, brunch, or even a fun dessert. I know, I know, I might be a little biased, but trust me on this one. The combination of the tangy Greek yogurt, the light and airy texture, and the golden-brown crispiness is simply irresistible. They’re not just delicious; they’re also packed with protein, making them a satisfying and guilt-free way to start your day.
Why is this recipe a must-try? Well, beyond the incredible taste and texture, it’s incredibly versatile and easy to adapt to your own preferences. Plus, it’s a fantastic way to sneak in some extra protein, especially if you have picky eaters in the house. They’ll never even know they’re eating something healthy!
But the real magic lies in the endless possibilities for serving and variations. Feeling fruity? Top your waffles with fresh berries, sliced bananas, or a dollop of homemade berry compote. Craving something a little more decadent? A drizzle of maple syrup, a sprinkle of chocolate chips, or a scoop of vanilla ice cream will do the trick. For a savory twist, try topping them with a fried egg, some crispy bacon, and a sprinkle of chives. Seriously, the options are limitless!
Here are a few of my favorite variations to get you started:
Serving Suggestions and Variations:
* Berry Bliss: Top with fresh raspberries, blueberries, and a light dusting of powdered sugar. A dollop of whipped cream wouldn’t hurt either!
* Chocolate Chip Dream: Fold mini chocolate chips into the batter before cooking for a chocolatey surprise in every bite.
* Savory Sensation: Top with a fried egg, crumbled bacon, and a sprinkle of cheddar cheese for a hearty and satisfying breakfast.
* Cinnamon Swirl: Swirl a mixture of cinnamon, sugar, and melted butter into the batter before cooking for a warm and comforting treat.
* Lemon Zest Delight: Add a tablespoon of lemon zest to the batter for a bright and citrusy flavor.
Don’t be afraid to experiment and get creative with your toppings and variations. That’s the beauty of this recipe it’s a blank canvas for your culinary imagination! You can even try adding different spices to the batter, like nutmeg or cardamom, for a unique flavor profile. Or, for a gluten-free option, simply substitute the all-purpose flour with a gluten-free blend.
I’m so confident that you’ll love these Greek Yogurt Waffles as much as I do. They’re quick, easy, and incredibly delicious the perfect combination for a busy morning or a lazy weekend brunch. So, what are you waiting for? Grab your waffle iron, gather your ingredients, and get ready to whip up a batch of these amazing waffles.
I truly hope you give this recipe a try. And when you do, please, please, please share your experience with me! I’d love to hear what you think, what variations you tried, and how you made them your own. You can leave a comment below, tag me on social media, or even send me an email. I’m always eager to hear from fellow food lovers and see your culinary creations. Happy waffle-making! I can’t wait to hear all about your Greek Yogurt Waffles adventures!
Greek Yogurt Waffles: The Ultimate Guide to Fluffy Perfection
Fluffy and tangy Greek Yogurt Waffles! Easy to make, packed with protein, and perfect for a delicious breakfast or brunch.
Ingredients
- 1 ½ cups all-purpose flour
- 2 teaspoons baking powder
- ½ teaspoon baking soda
- ¼ teaspoon salt
- 2 tablespoons granulated sugar
- 1 ½ cups plain Greek yogurt (full-fat or non-fat works)
- 2 large eggs, lightly beaten
- ½ cup milk (any kind)
- 4 tablespoons unsalted butter, melted and slightly cooled
- 1 teaspoon vanilla extract
- Cooking spray or oil, for waffle iron
Instructions
- Combine Dry Ingredients: In a large bowl, whisk together the flour, baking powder, baking soda, salt, and sugar.
- Whisk Wet Ingredients: In a separate medium bowl, whisk together the Greek yogurt, eggs, milk, melted butter, and vanilla extract.
- Combine Wet and Dry: Pour the wet ingredients into the dry ingredients. Gently fold the mixture together until just combined. It’s okay if there are a few lumps resist the urge to overmix!
- Rest (Optional): Cover the bowl with plastic wrap and let the batter rest for 5-10 minutes.
- Preheat Waffle Iron: Preheat your waffle iron according to the manufacturer’s instructions.
- Grease Waffle Iron: Lightly grease the waffle iron with cooking spray or oil.
- Pour Batter: Pour the recommended amount of batter onto the hot waffle iron.
- Cook Waffles: Close the waffle iron and cook according to the manufacturer’s instructions (usually 3-5 minutes), or until golden brown and crispy.
- Remove Waffles: Carefully remove the waffles from the waffle iron using a fork or tongs.
- Repeat: Repeat steps 7-9 with the remaining batter.
- Serve Immediately: Serve the waffles immediately while they’re still warm and crispy.
- Add Toppings: Top with your favorite toppings, such as fresh fruit, maple syrup, whipped cream, chocolate chips, or nuts.
Notes
- Don’t overmix the batter for the best texture.
- Resting the batter (5-10 minutes) is recommended for fluffier waffles.
- Adjust cooking time based on your waffle iron.
- Keep cooked waffles warm in a 200°F oven on a wire rack if making a large batch.
- Experiment with flavors by adding blueberries, chocolate chips, or cinnamon to the batter.
- Store leftover waffles in the refrigerator for up to 3 days or in the freezer for up to 2 months.


Leave a Comment