
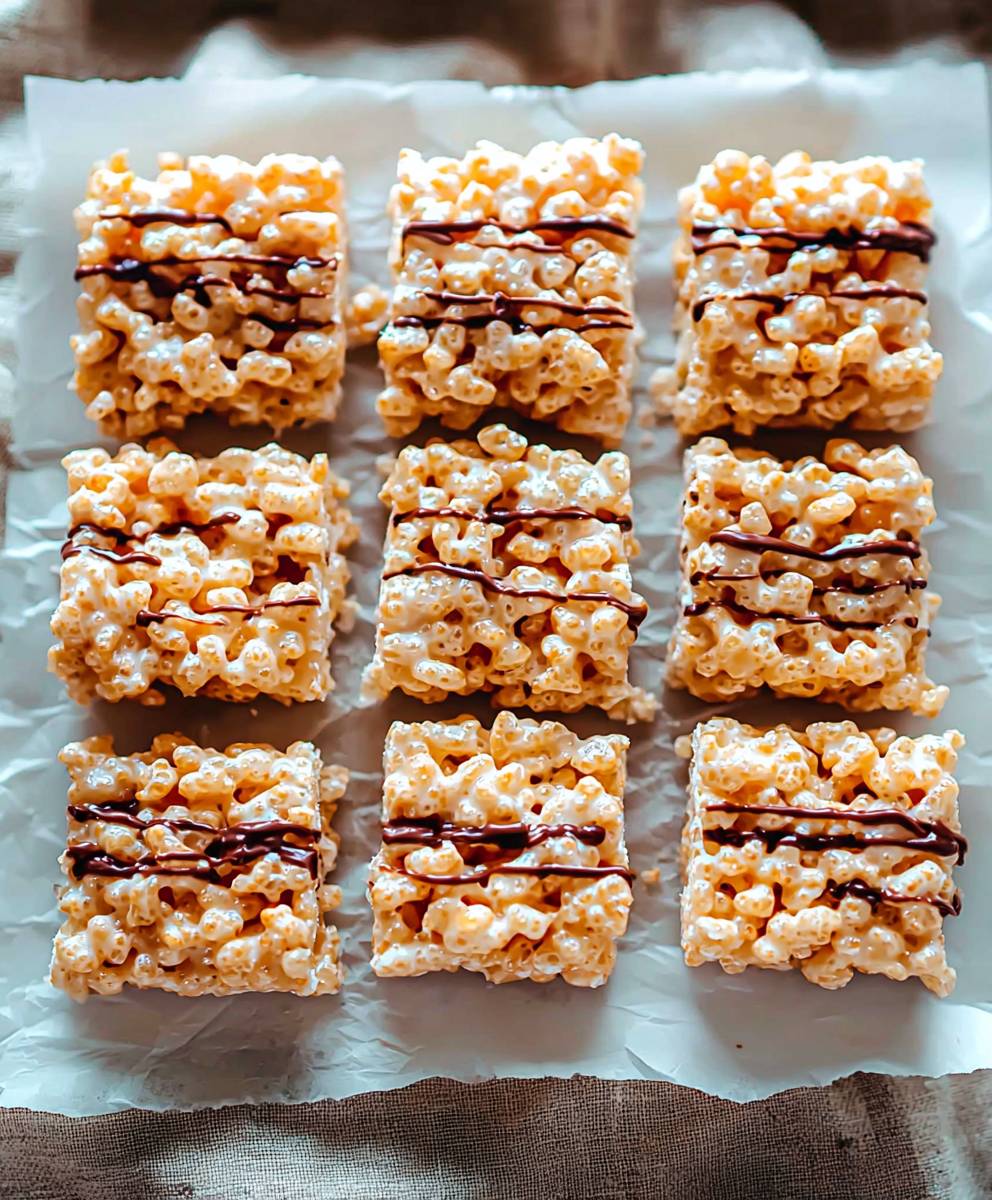
Healthy Rice Krispie Treat yes, you read that right! Imagine biting into that classic, gooey, marshmallowy square of your childhood, but without the guilt. We’ve taken the beloved Rice Krispie Treat and given it a nutritious makeover, creating a snack that’s both delicious and good for you.
The original Rice Krispie Treat, a simple concoction of puffed rice cereal, marshmallows, and butter, has been a staple in American households since the 1930s. Created by Mildred Day and her Kellogg’s co-worker, it was initially a fundraising recipe for the Camp Fire Girls. Its enduring popularity stems from its ease of preparation, its satisfyingly sweet taste, and its delightfully crunchy-chewy texture. Who can resist that perfect combination?
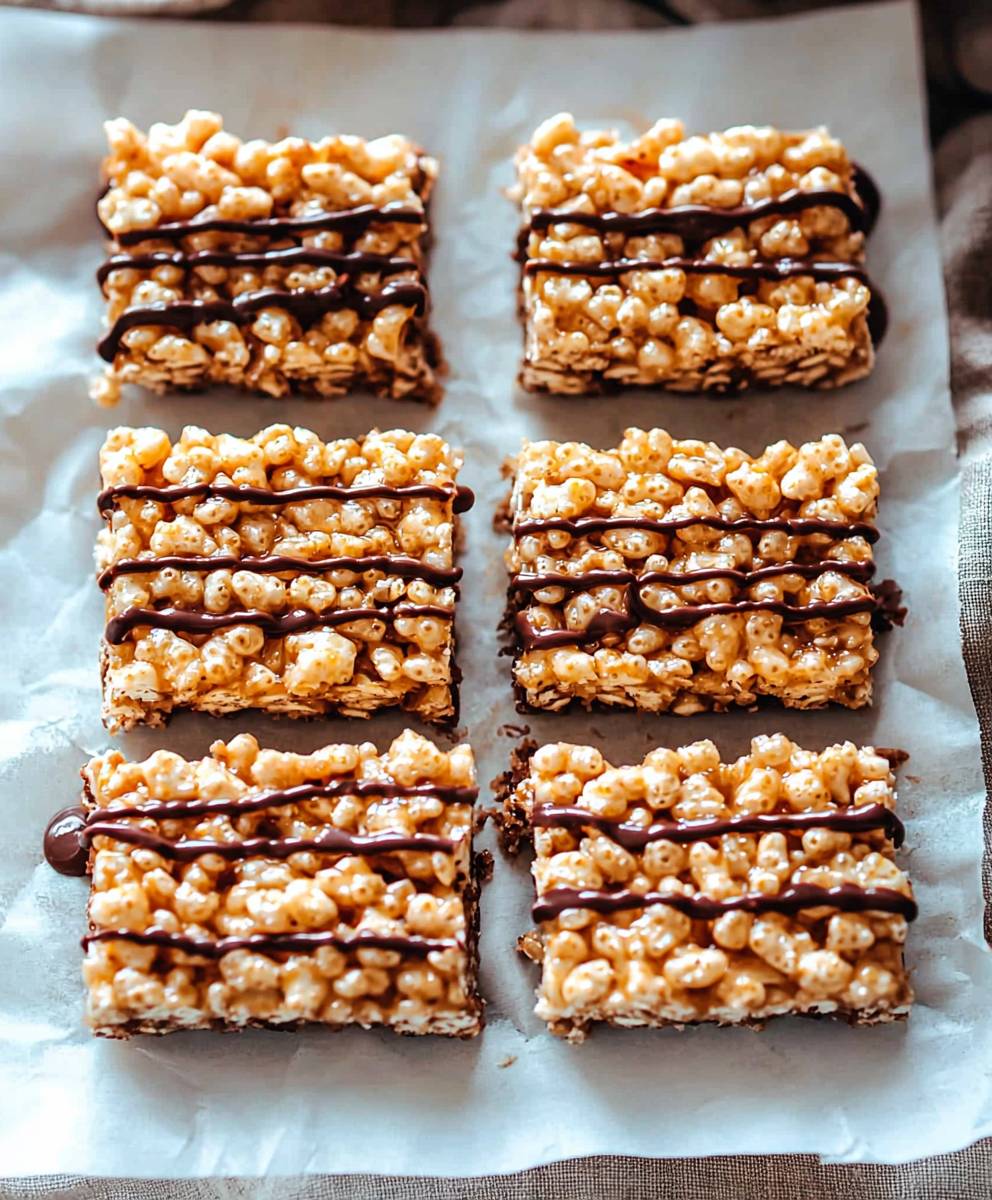
But let’s face it, the traditional recipe isn’t exactly a health food. That’s where our Healthy Rice Krispie Treat comes in! We’ve swapped out some of the less desirable ingredients for healthier alternatives, like brown rice cereal, natural sweeteners, and nut butter, without sacrificing any of the flavor or fun. Get ready to enjoy a guilt-free indulgence that will satisfy your sweet tooth and nourish your body. This recipe is perfect for a quick snack, a lunchbox treat, or even a light dessert. Let’s get started!
Ingredients:
- 6 cups brown rice crisps cereal (ensure it’s gluten-free if needed)
- 1/2 cup natural peanut butter (or almond butter for a different flavor)
- 1/4 cup honey (or maple syrup for a vegan option)
- 1/4 cup coconut oil, melted
- 1 teaspoon vanilla extract
- 1/4 teaspoon sea salt
- Optional additions:
- 1/4 cup chopped nuts (almonds, walnuts, pecans)
- 1/4 cup dried cranberries or raisins
- 1/4 cup chocolate chips (dark chocolate is a healthier choice)
- 1 tablespoon chia seeds or flax seeds
Preparing the Mixture:
- First, grab a large mixing bowl. This is important because you’ll need plenty of space to combine all the ingredients without making a mess. I always find that using a bowl that’s bigger than I think I need helps prevent spills!
- Next, measure out 6 cups of brown rice crisps cereal and pour them into the bowl. Make sure you’re using brown rice crisps, as they offer more fiber and nutrients compared to the traditional version. If you’re following a gluten-free diet, double-check the label to ensure the cereal is certified gluten-free.
- Now, in a separate, microwave-safe bowl, combine the peanut butter (or almond butter), honey (or maple syrup), and melted coconut oil. I like to use natural peanut butter because it doesn’t contain added sugars or hydrogenated oils. If you’re using coconut oil that’s solid at room temperature, microwave it for about 30-45 seconds, or until it’s completely melted. Be careful not to overheat it!
- Microwave the peanut butter mixture for about 30-60 seconds. This will help everything melt together smoothly. Keep a close eye on it and stir every 15 seconds to prevent burning. The goal is to have a warm, easily pourable mixture.
- Once the peanut butter mixture is melted and smooth, add the vanilla extract and sea salt. The vanilla extract enhances the flavor, while the sea salt balances the sweetness. Stir well to combine.
- Now comes the fun part! Pour the melted peanut butter mixture over the brown rice crisps in the large bowl. Use a spatula to gently fold the mixture into the cereal. Be careful not to crush the cereal too much. You want to coat each piece evenly without breaking them. This step requires a little patience, but it’s crucial for ensuring that the treats hold together well.
- If you’re adding any optional ingredients like chopped nuts, dried cranberries, or chocolate chips, now is the time to do it. Sprinkle them over the cereal mixture and gently fold them in until they’re evenly distributed. I love adding chopped almonds and dried cranberries for a little extra crunch and sweetness.
Pressing and Setting:
- Line an 8×8 inch baking pan with parchment paper. This will prevent the treats from sticking to the pan and make it easier to remove them later. Make sure the parchment paper overhangs the sides of the pan, creating “handles” that you can use to lift the treats out.
- Transfer the cereal mixture to the prepared baking pan. Use the spatula to spread the mixture evenly across the bottom of the pan.
- Now, using your hands or the back of a spoon, firmly press the mixture into the pan. This is important for creating a compact and cohesive treat. The firmer you press, the better the treats will hold together. I like to use a piece of parchment paper or plastic wrap over the mixture to prevent it from sticking to my hands or the spoon.
- Once the mixture is firmly pressed, cover the pan with plastic wrap and refrigerate for at least 30 minutes, or until the treats are set. This allows the coconut oil to solidify and the flavors to meld together. If you’re in a hurry, you can put them in the freezer for about 15-20 minutes.
Cutting and Serving:
- After the treats have set, remove the pan from the refrigerator. Use the parchment paper “handles” to lift the treats out of the pan.
- Place the treats on a cutting board. Use a sharp knife to cut them into squares. I usually cut them into 16 squares, but you can adjust the size to your preference.
- Serve immediately or store in an airtight container at room temperature for up to 3 days. If you live in a warm climate, you may want to store them in the refrigerator to prevent them from becoming too soft.
Tips and Variations:
- Nut Butter Options: Feel free to experiment with different nut butters. Almond butter, cashew butter, or even sunflower seed butter are all great alternatives to peanut butter. Each will impart a slightly different flavor to the treats.
- Sweetener Adjustments: If you prefer a less sweet treat, you can reduce the amount of honey or maple syrup. You can also use other natural sweeteners like agave nectar or date syrup.
- Chocolate Lovers: For a richer, more decadent treat, drizzle melted dark chocolate over the top of the treats after they’ve been cut. You can also add a sprinkle of sea salt for a sweet and salty combination.
- Spice it Up: Add a pinch of cinnamon or nutmeg to the peanut butter mixture for a warm, comforting flavor.
- Seed Power: Incorporate chia seeds, flax seeds, or hemp seeds for an extra boost of nutrients. These seeds are packed with fiber, omega-3 fatty acids, and protein.
- Fruitful Additions: Dried fruits like apricots, cherries, or blueberries are delicious additions to these treats. Just make sure to chop them into small pieces before adding them to the mixture.
- Vegan Option: To make these treats vegan, simply substitute the honey with maple syrup or agave nectar.
- Storage: Store the treats in an airtight container at room temperature for up to 3 days. If you live in a warm climate, store them in the refrigerator to prevent them from becoming too soft.
- Make Ahead: These treats can be made ahead of time and stored in the refrigerator for up to a week. They’re perfect for meal prepping or packing in lunchboxes.
- No-Bake Dessert: One of the best things about this recipe is that it requires no baking! It’s a quick and easy dessert that’s perfect for busy weeknights or when you don’t want to turn on the oven.
Health Benefits:
- Brown Rice Crisps: Brown rice crisps are a good source of fiber, which can help regulate digestion and keep you feeling full. They also contain essential minerals like magnesium and selenium.
- Natural Peanut Butter: Natural peanut butter is a good source of protein and healthy fats. It also contains vitamins and minerals like vitamin E, magnesium, and potassium.
- Honey (or Maple Syrup): Honey and maple syrup are natural sweeteners that contain antioxidants and other beneficial compounds. However, they should still be consumed in moderation.
- Coconut Oil: Coconut oil is a source of healthy fats, including medium-chain triglycerides (MCTs), which may have some health benefits.
- Nuts and Seeds: Nuts and seeds are packed with protein, fiber, healthy fats, and essential vitamins and minerals. They’re a great way to add extra nutrition to these treats.
- Dried Fruit: Dried fruit is a good source of fiber and antioxidants. However, it’s also high in sugar, so it should be consumed in moderation.
Why I Love This Recipe:
I absolutely adore this recipe because it’s a healthier twist on a classic treat. As someone who loves a good Rice Krispie treat but also tries to make mindful food choices, this recipe is a perfect compromise. It satisfies my sweet tooth without all the processed ingredients and excessive sugar found in traditional versions. Plus, it’s so easy to customize with different nuts, seeds, and dried fruits, making it a versatile and fun recipe to experiment with. The fact that it’s no-bake is a huge bonus, especially during the warmer months when I don’t want to heat up my kitchen. And let’s be honest, who can resist a chewy, crunchy, and slightly sweet treat that’s also good for you? These Healthy Rice Krispie Treats are a winner in my book!
Troubleshooting:
- Treats are too hard: If your treats are too hard, it could be because you pressed them too firmly into the pan or because you refrigerated them for too long. Next time, try pressing them more gently and reducing the refrigeration time.
- Treats are too soft: If your treats are too soft, it could be because the coconut oil wasn’t firm enough or because you didn’t press them firmly enough into the pan. Make sure the coconut oil is melted but not too hot, and press the mixture firmly into the pan.
Conclusion:
So there you have it! This Healthy Rice Krispie Treat recipe is more than just a sweet snack; it’s a guilt-free indulgence that’s incredibly easy to whip up. I truly believe this recipe is a must-try for anyone looking for a healthier alternative to the classic treat, especially if you’re catering to dietary restrictions or simply trying to make better choices. The combination of wholesome ingredients like brown rice crisps, natural sweeteners, and nut butter creates a symphony of flavors and textures that will leave you completely satisfied. But why is this recipe a must-try? Well, beyond the health benefits, it’s the sheer simplicity and versatility that make it a winner in my book. You don’t need any fancy equipment or advanced baking skills to create these delicious squares. It’s a perfect recipe for getting the kids involved in the kitchen, and it’s a fantastic way to satisfy those sweet cravings without derailing your healthy eating habits. Plus, it’s a crowd-pleaser! I’ve made these for potlucks, birthday parties, and even just a simple afternoon snack, and they’re always a hit. Now, let’s talk about serving suggestions and variations. These Healthy Rice Krispie Treats are fantastic on their own, but you can also get creative with how you serve them. Try cutting them into fun shapes for a kid-friendly presentation, or drizzle them with melted dark chocolate for an extra touch of decadence. For a more sophisticated twist, sprinkle them with sea salt or chopped nuts. And the variations? Oh, the possibilities are endless! Feel free to experiment with different nut butters, like almond butter or cashew butter, to change the flavor profile. You can also add dried fruits like cranberries or raisins for a chewy texture and a burst of sweetness. For a chocolatey version, stir in some cocoa powder or mini chocolate chips. If you’re feeling adventurous, try adding a pinch of cinnamon or nutmeg for a warm and comforting flavor. You could even incorporate protein powder for an extra boost of nutrients. The key is to have fun and customize the recipe to your liking! I’ve personally found that adding a tablespoon of chia seeds not only boosts the nutritional value but also adds a delightful little crunch. Another favorite variation of mine involves using a combination of brown rice crisps and puffed quinoa for a more complex texture. Don’t be afraid to get creative and experiment with different ingredients to find your perfect combination. I am so confident that you’ll love this recipe as much as I do. It’s a game-changer for anyone who wants to enjoy a classic treat without the guilt. It’s quick, easy, and incredibly satisfying. So, what are you waiting for? Head to your kitchen, gather your ingredients, and give this Healthy Rice Krispie Treat recipe a try! I promise you won’t be disappointed. And most importantly, I’d love to hear about your experience. Share your photos, variations, and feedback in the comments below. Let me know what you think, what you added, and how you made it your own. I can’t wait to see your creations! Happy cooking (and snacking)! PrintHealthy Rice Krispie Treat: Guilt-Free Recipe & Easy Steps
Healthier Rice Krispie Treats with brown rice crisps, peanut butter, honey, and coconut oil. A no-bake, customizable, quick, and easy dessert!
- Prep Time: 10 minutes
- Cook Time: 1 minute
- Total Time: 41 minutes
- Yield: 16 squares 1x
Ingredients
Scale- 6 cups brown rice crisps cereal (ensure it’s gluten-free if needed)
- 1/2 cup natural peanut butter (or almond butter for a different flavor)
- 1/4 cup honey (or maple syrup for a vegan option)
- 1/4 cup coconut oil, melted
- 1 teaspoon vanilla extract
- 1/4 teaspoon sea salt
- 1/4 cup chopped nuts (almonds, walnuts, pecans)
- 1/4 cup dried cranberries or raisins
- 1/4 cup chocolate chips (dark chocolate is a healthier choice)
- 1 tablespoon chia seeds or flax seeds
Instructions
- Prepare the Mixture: In a large mixing bowl, pour in the brown rice crisps cereal.
- In a separate microwave-safe bowl, combine the peanut butter (or almond butter), honey (or maple syrup), and melted coconut oil. Microwave for 30-60 seconds, stirring every 15 seconds, until melted and smooth.
- Add the vanilla extract and sea salt to the melted peanut butter mixture. Stir well to combine.
- Pour the peanut butter mixture over the brown rice crisps. Gently fold the mixture into the cereal, being careful not to crush the cereal.
- If using, add any optional ingredients (nuts, dried cranberries, chocolate chips, seeds) and gently fold them in.
- Pressing and Setting: Line an 8×8 inch baking pan with parchment paper, leaving an overhang.
- Transfer the cereal mixture to the prepared pan and spread evenly.
- Firmly press the mixture into the pan using your hands or the back of a spoon.
- Cover the pan with plastic wrap and refrigerate for at least 30 minutes, or until set.
- Cutting and Serving: Remove the treats from the refrigerator using the parchment paper overhang.
- Place the treats on a cutting board and cut into squares.
- Serve immediately or store in an airtight container at room temperature for up to 3 days.
Notes
- Nut Butter Options: Experiment with almond butter, cashew butter, or sunflower seed butter.
- Sweetener Adjustments: Reduce honey or maple syrup for a less sweet treat. Use agave nectar or date syrup.
- Chocolate Lovers: Drizzle melted dark chocolate over the top and sprinkle with sea salt.
- Spice it Up: Add a pinch of cinnamon or nutmeg to the peanut butter mixture.
- Seed Power: Incorporate chia seeds, flax seeds, or hemp seeds.
- Fruitful Additions: Add dried fruits like apricots, cherries, or blueberries.
- Vegan Option: Use maple syrup or agave nectar instead of honey.
- Storage: Store in an airtight container at room temperature for up to 3 days, or refrigerate in warm climates.
- Make Ahead: Can be made ahead and stored in the refrigerator for up to a week.
- No-Bake Dessert: Requires no baking!


Leave a Comment