
Homemade Marshmallows: Prepare to embark on a culinary adventure that will transform your perception of this classic confection! Forget the store-bought, overly processed versions; we’re diving headfirst into the world of fluffy, melt-in-your-mouth goodness that you can create right in your own kitchen. Have you ever wondered what makes marshmallows so irresistibly delightful? Beyond their pillowy texture and sweet flavor, marshmallows hold a special place in our hearts, evoking memories of cozy campfires, steaming mugs of hot chocolate, and childhood joy.
While the modern marshmallow is a far cry from its ancient origins, its roots can be traced back to ancient Egypt, where the sap of the marshmallow plant (Althaea officinalis) was combined with honey to create a medicinal treat. Over time, the recipe evolved, and the marshmallow became a beloved candy enjoyed worldwide. Today, people adore marshmallows for their versatility. They’re perfect for roasting over an open flame, adding a touch of sweetness to desserts, or simply enjoying straight from the bag. But the real magic happens when you make homemade marshmallows. The taste is unparalleled, the texture is divine, and the satisfaction of creating something so delicious from scratch is simply unmatched. So, let’s get started and unlock the secrets to crafting the perfect batch of these delightful treats!

Ingredients:
- 1 cup (240ml) cold water, divided
- 3 tablespoons (25g) powdered gelatin
- 2 cups (400g) granulated sugar
- ¾ cup (180ml) light corn syrup
- ¼ teaspoon salt
- 1 teaspoon vanilla extract
- Powdered sugar, for dusting
- Vegetable oil, for greasing
Preparing the Marshmallow Base
- Bloom the Gelatin: In the bowl of a stand mixer (or a large mixing bowl if using a hand mixer), pour ½ cup (120ml) of the cold water. Sprinkle the powdered gelatin evenly over the water. Let it sit for at least 5 minutes, or until the gelatin has softened and become sponge-like. This process is called blooming and is crucial for achieving the right marshmallow texture. Don’t skip this step!
- Prepare the Pan: While the gelatin is blooming, prepare your baking pan. An 8×8 inch square pan works perfectly. Generously grease the pan with vegetable oil. Make sure to get into all the corners and up the sides. Then, dust the greased pan with a generous layer of powdered sugar. Tap out any excess powdered sugar. This will prevent the marshmallows from sticking and make them easier to remove later. Trust me, you’ll thank me for this tip!
- Combine Sugar, Corn Syrup, Water, and Salt: In a medium saucepan, combine the granulated sugar, light corn syrup, the remaining ½ cup (120ml) of cold water, and salt. Stir the mixture together until the sugar is moistened.
Cooking the Sugar Syrup
- Cook to Soft Ball Stage: Place the saucepan over medium heat. Clip a candy thermometer to the side of the pan, making sure it doesn’t touch the bottom. Cook the mixture, without stirring, until it reaches 240°F (115°C), also known as the soft ball stage. This can take anywhere from 10 to 15 minutes, so be patient. It’s important not to stir the mixture during this process, as it can cause sugar crystals to form, resulting in grainy marshmallows. If sugar crystals do form on the sides of the pan, you can brush them down with a wet pastry brush.
- Monitor the Temperature: Keep a close eye on the candy thermometer. The temperature will rise slowly at first, and then it will accelerate as it gets closer to 240°F (115°C). Once it reaches the target temperature, immediately remove the saucepan from the heat.
Combining the Syrup and Gelatin
- Pour the Syrup into the Gelatin: Carefully pour the hot sugar syrup over the bloomed gelatin in the mixing bowl. Be careful, as the syrup is very hot!
- Whip the Mixture: Using the whisk attachment of your stand mixer (or a hand mixer), begin whipping the mixture on low speed. Gradually increase the speed to high and whip for 10-15 minutes, or until the mixture is thick, glossy, and has tripled in volume. The mixture will start out clear and gradually turn white and fluffy as it whips. This is where the magic happens! The long whipping time incorporates air into the mixture, creating the light and airy texture of marshmallows.
- Add Vanilla Extract: Once the mixture is thick and fluffy, reduce the mixer speed to low and add the vanilla extract. Mix until just combined.
Setting the Marshmallows
- Pour into Prepared Pan: Immediately pour the marshmallow mixture into the prepared pan. Use a greased spatula to spread the mixture evenly in the pan. The mixture will be very sticky, so greasing the spatula is essential.
- Dust with Powdered Sugar: Generously dust the top of the marshmallow mixture with powdered sugar. This will prevent a skin from forming and will also help to prevent the marshmallows from sticking when you cut them.
- Let Set: Let the marshmallows set at room temperature for at least 4 hours, or preferably overnight. This allows the marshmallows to fully set and firm up. Don’t be tempted to rush this process!
Cutting and Coating the Marshmallows
- Loosen the Edges: Once the marshmallows are fully set, loosen the edges of the marshmallows from the pan using a knife or spatula.
- Invert onto Cutting Board: Invert the marshmallows onto a cutting board dusted with powdered sugar. If the marshmallows are sticking, you can gently run a knife around the edges of the pan to help release them.
- Cut into Squares: Using a large, sharp knife or pizza cutter, cut the marshmallows into squares. For best results, dust the knife or pizza cutter with powdered sugar before each cut. This will prevent the marshmallows from sticking to the blade. You can cut them into any size you like, but 1-inch squares are a good starting point.
- Coat with Powdered Sugar: Place the cut marshmallows in a large bowl filled with powdered sugar. Toss them gently to coat them completely. This will prevent them from sticking together and will also give them a nice, sweet coating.
- Shake off Excess Powdered Sugar: Remove the marshmallows from the bowl and shake off any excess powdered sugar. You can use a fine-mesh sieve to do this.
Tips and Tricks for Perfect Marshmallows
- Use a Candy Thermometer: A candy thermometer is essential for making marshmallows. It ensures that the sugar syrup reaches the correct temperature, which is crucial for achieving the right marshmallow texture.
- Don’t Stir the Sugar Syrup: Avoid stirring the sugar syrup while it’s cooking, as this can cause sugar crystals to form. If sugar crystals do form on the sides of the pan, you can brush them down with a wet pastry brush.
- Whip the Mixture Long Enough: The marshmallow mixture needs to be whipped for a full 10-15 minutes to incorporate enough air and create the light and airy texture of marshmallows. Don’t cut the whipping time short!
- Grease and Dust the Pan Well: Generously greasing and dusting the pan with powdered sugar is essential for preventing the marshmallows from sticking.
- Use a Sharp Knife or Pizza Cutter: A sharp knife or pizza cutter will make it easier to cut the marshmallows into clean squares. Dust the blade with powdered sugar before each cut to prevent sticking.
- Store Properly: Store the marshmallows in an airtight container at room temperature. They will keep for several days.
- Variations: Get creative with your marshmallows! You can add different extracts, such as peppermint or almond, or you can add food coloring to create colorful marshmallows. You can also add chopped nuts, chocolate chips, or sprinkles to the mixture before pouring it into the pan.
Troubleshooting
- Marshmallows are too sticky: This is usually caused by not cooking the sugar syrup to the correct temperature or not whipping the mixture long enough. Make sure to use a candy thermometer and whip the mixture for the full 10-15 minutes.
- Marshmallows are grainy: This is usually caused by sugar crystals forming in the sugar syrup. Avoid stirring the syrup while it’s cooking, and brush down any sugar crystals that form on the sides of the pan with a wet pastry brush.
- Marshmallows are too firm: This can be caused by overcooking the sugar syrup. Make sure to remove the saucepan from the heat as soon as the syrup reaches 240°F (115°C).
- Marshmallows are too soft: This can be caused by undercooking the sugar syrup or not whipping the mixture long enough. Make sure to use a candy thermometer and whip the mixture for the full 10-15 minutes.
Serving Suggestions
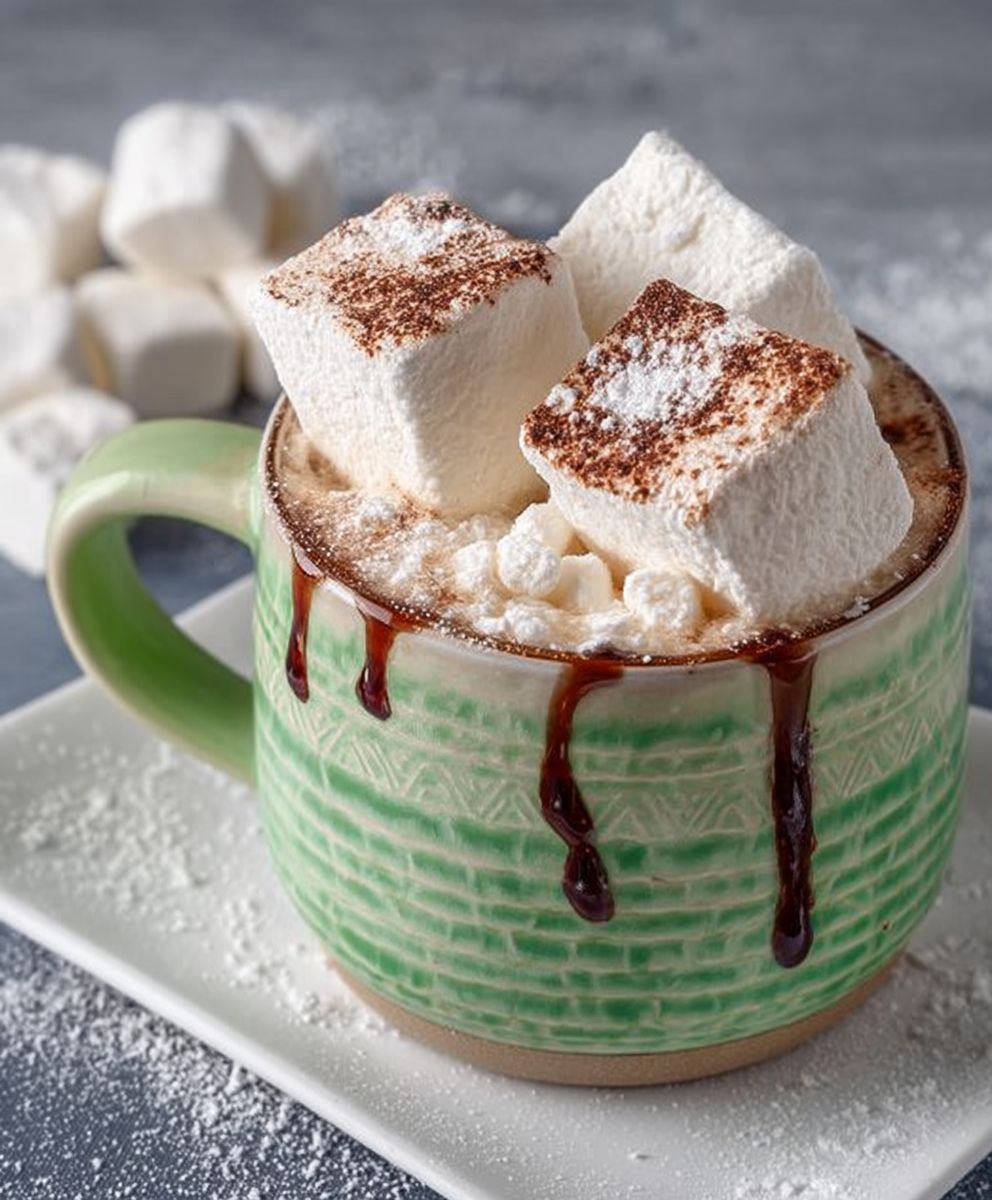
- Hot Chocolate: Homemade marshmallows are the perfect addition to a cup of hot chocolate. They melt beautifully and add a touch of sweetness and fluffiness.
- S’mores: Use your homemade marshmallows to make s’mores! They’re so much better than store-bought marshmallows.
- Rice Krispie Treats: Use your homemade marshmallows to make Rice Krispie treats. They’ll be extra gooey and delicious.
- Gifting: Package your homemade marshmallows in a pretty box or bag and give them as a gift. They’re sure to be appreciated!
- Simply Enjoy: Of course, you can always just enjoy your homemade marshmallows straight from the bowl! They’re so good, you won’t be able to resist.
Detailed Explanation of Ingredients
- Gelatin: Gelatin is the key ingredient that gives marshmallows their signature bouncy texture. It’s a protein derived from
Conclusion:
And there you have it! These Homemade Marshmallows are so much more than just a sweet treat; they’re an experience. From the satisfying whisking to the anticipation of the final product, making these marshmallows is a delightful journey that ends with a pillowy, melt-in-your-mouth reward. Forget the store-bought variety once you’ve tasted these, you’ll never go back. The difference is truly remarkable; the texture is lighter, the flavor is richer, and the satisfaction of knowing you made them yourself is simply unbeatable.
But why are these marshmallows a must-try? Well, beyond the superior taste and texture, they offer a level of customization you just can’t find in pre-packaged options. You control the ingredients, ensuring only the best goes into your sweet creation. Plus, they make fantastic gifts! Imagine presenting a beautifully wrapped box of homemade marshmallows to friends or family a thoughtful and delicious gesture that’s sure to be appreciated.
Now, let’s talk serving suggestions and variations! Of course, they’re perfect for roasting over a campfire, creating that classic s’more experience. But don’t stop there! Try adding them to your hot chocolate for an extra creamy and decadent treat. Chop them up and fold them into your favorite cookie dough for a surprise burst of sweetness. Or, get creative with flavors! A touch of vanilla extract is always a winner, but you could also experiment with peppermint, almond, or even citrus zest. For a visual appeal, consider adding a swirl of food coloring or rolling them in sprinkles, shredded coconut, or cocoa powder. Imagine a batch of vibrant pink strawberry marshmallows or elegant chocolate-covered delights! The possibilities are truly endless.
For a grown-up twist, infuse your marshmallows with a splash of your favorite liqueur. A hint of bourbon or rum can add a sophisticated depth of flavor that’s perfect for after-dinner indulgence. Just be sure to add the liqueur after the gelatin has bloomed and before you start whipping the mixture.
Another fun variation is to create flavored sugar coatings. Mix granulated sugar with freeze-dried fruit powder (like strawberry or raspberry) for a naturally flavored and colored coating. Or, combine sugar with spices like cinnamon or cardamom for a warm and inviting flavor.
I truly believe that everyone should experience the joy of making their own Homemade Marshmallows. It’s a fun and rewarding project that yields a truly exceptional treat. So, I encourage you to give this recipe a try. Don’t be intimidated by the process it’s simpler than you might think, and the results are well worth the effort.
Once you’ve made your batch of fluffy goodness, I’d love to hear about your experience! Share your photos, your flavor variations, and any tips or tricks you discovered along the way. Did you try a unique coating? Did you add a special ingredient? Let me know in the comments below! I can’t wait to see what you create. Happy marshmallow making!
Homemade Marshmallows: The Ultimate Guide to Fluffy Perfection
Fluffy, homemade marshmallows made easy with simple ingredients. Perfect for hot chocolate, s'mores, or enjoying on their own.
Ingredients
- 1 cup (240ml) cold water, divided
- 3 tablespoons (25g) powdered gelatin
- 2 cups (400g) granulated sugar
- ¾ cup (180ml) light corn syrup
- ¼ teaspoon salt
- 1 teaspoon vanilla extract
- Powdered sugar, for dusting
- Vegetable oil, for greasing
Instructions
- Bloom the Gelatin: In the bowl of a stand mixer (or a large mixing bowl if using a hand mixer), pour ½ cup (120ml) of the cold water. Sprinkle the powdered gelatin evenly over the water. Let it sit for at least 5 minutes, or until the gelatin has softened and become sponge-like.
- Prepare the Pan: While the gelatin is blooming, prepare your baking pan. An 8×8 inch square pan works perfectly. Generously grease the pan with vegetable oil. Make sure to get into all the corners and up the sides. Then, dust the greased pan with a generous layer of powdered sugar. Tap out any excess powdered sugar.
- Combine Sugar, Corn Syrup, Water, and Salt: In a medium saucepan, combine the granulated sugar, light corn syrup, the remaining ½ cup (120ml) of cold water, and salt. Stir the mixture together until the sugar is moistened.
- Cook to Soft Ball Stage: Place the saucepan over medium heat. Clip a candy thermometer to the side of the pan, making sure it doesn’t touch the bottom. Cook the mixture, without stirring, until it reaches 240°F (115°C), also known as the soft ball stage. This can take anywhere from 10 to 15 minutes. If sugar crystals do form on the sides of the pan, you can brush them down with a wet pastry brush.
- Monitor the Temperature: Keep a close eye on the candy thermometer. Once it reaches the target temperature, immediately remove the saucepan from the heat.
- Pour the Syrup into the Gelatin: Carefully pour the hot sugar syrup over the bloomed gelatin in the mixing bowl.
- Whip the Mixture: Using the whisk attachment of your stand mixer (or a hand mixer), begin whipping the mixture on low speed. Gradually increase the speed to high and whip for 10-15 minutes, or until the mixture is thick, glossy, and has tripled in volume. The mixture will start out clear and gradually turn white and fluffy as it whips.
- Add Vanilla Extract: Once the mixture is thick and fluffy, reduce the mixer speed to low and add the vanilla extract. Mix until just combined.
- Pour into Prepared Pan: Immediately pour the marshmallow mixture into the prepared pan. Use a greased spatula to spread the mixture evenly in the pan.
- Dust with Powdered Sugar: Generously dust the top of the marshmallow mixture with powdered sugar.
- Let Set: Let the marshmallows set at room temperature for at least 4 hours, or preferably overnight.
- Loosen the Edges: Once the marshmallows are fully set, loosen the edges of the marshmallows from the pan using a knife or spatula.
- Invert onto Cutting Board: Invert the marshmallows onto a cutting board dusted with powdered sugar.
- Cut into Squares: Using a large, sharp knife or pizza cutter, cut the marshmallows into squares. For best results, dust the knife or pizza cutter with powdered sugar before each cut.
- Coat with Powdered Sugar: Place the cut marshmallows in a large bowl filled with powdered sugar. Toss them gently to coat them completely.
- Shake off Excess Powdered Sugar: Remove the marshmallows from the bowl and shake off any excess powdered sugar. You can use a fine-mesh sieve to do this.
Notes
- Use a candy thermometer to ensure the sugar syrup reaches the correct temperature.
- Avoid stirring the sugar syrup while it’s cooking.
- Whip the marshmallow mixture for the full 10-15 minutes.
- Generously grease and dust the pan with powdered sugar.
- Store the marshmallows in an airtight container at room temperature.
Leave a Comment