
Ice Cream Pie: the dessert that screams summer fun and effortless elegance all at once! Imagine sinking your fork into a creamy, dreamy slice of frozen delight, a symphony of textures and flavors that dance on your tongue. This isn’t just a pie; it’s a nostalgic trip back to childhood summers, county fairs, and the pure joy of a simple, sweet treat.
While the exact origins of Ice Cream Pie are a bit hazy, its popularity surged in the mid-20th century, coinciding with the rise of home freezers and convenient pre-made ingredients. It became a staple at potlucks and family gatherings, a guaranteed crowd-pleaser that required minimal effort. Think of it as the ultimate “cool mom” dessert impressive, delicious, and surprisingly easy to whip up!
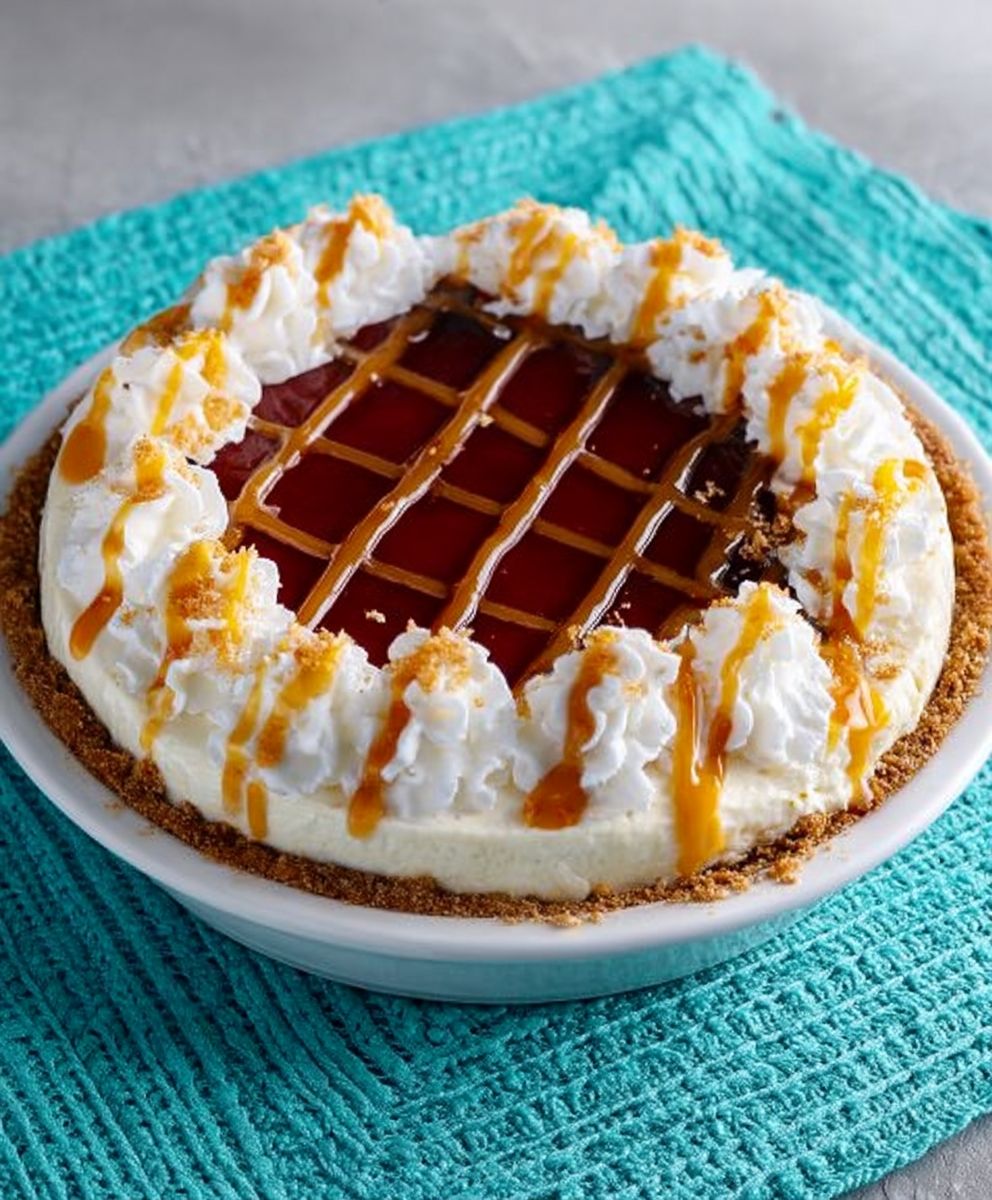
What makes this frozen confection so irresistible? It’s the perfect marriage of textures: the crisp, buttery crust, the smooth, melt-in-your-mouth ice cream filling, and the optional (but highly recommended) toppings that add a burst of flavor and visual appeal. Plus, it’s endlessly customizable! From classic chocolate and vanilla to adventurous combinations like salted caramel and coffee, the possibilities are truly endless. So, are you ready to create your own masterpiece? Let’s get started!

Ingredients:
- For the Crust:
- 1 ½ cups chocolate wafer crumbs (about 36 wafers)
- 5 tablespoons unsalted butter, melted
- ¼ cup granulated sugar
- For the Chocolate Ice Cream Layer:
- 1 ½ quarts chocolate ice cream, softened
- ½ cup hot fudge sauce, store-bought or homemade
- ¼ cup chopped pecans or walnuts (optional)
- For the Vanilla Ice Cream Layer:
- 1 ½ quarts vanilla ice cream, softened
- ½ cup caramel sauce, store-bought or homemade
- ¼ cup mini chocolate chips (optional)
- For the Whipped Cream Topping:
- 1 ½ cups heavy cream, cold
- 3 tablespoons powdered sugar
- 1 teaspoon vanilla extract
- Optional Garnishes:
- Chocolate shavings
- Maraschino cherries
- Extra chopped nuts
- Drizzled chocolate or caramel sauce
Preparing the Chocolate Wafer Crust
- Crush the Chocolate Wafers: The first step is to create the base of our pie the chocolate wafer crust! You can use a food processor for this, pulsing the chocolate wafers until they are finely ground into crumbs. If you don’t have a food processor, don’t worry! You can place the wafers in a large zip-top bag, seal it tightly, and then use a rolling pin to crush them into fine crumbs. This might take a little more elbow grease, but it works just as well. Make sure there are no large chunks remaining.
- Combine the Crumbs with Butter and Sugar: In a medium-sized bowl, combine the chocolate wafer crumbs, melted butter, and granulated sugar. Use a fork to mix everything together until the crumbs are evenly moistened. The mixture should resemble wet sand. This is what will hold the crust together.
- Press the Crust into the Pie Plate: Now, transfer the crumb mixture to a 9-inch pie plate. Use your fingers or the back of a spoon to firmly press the crumbs evenly across the bottom and up the sides of the pie plate. Make sure the crust is compact and uniform in thickness. This will prevent it from crumbling when you slice the pie later. Pay special attention to the edges, as they tend to be the weakest point.
- Pre-bake the Crust (Optional): For a sturdier crust, you can pre-bake it. Place the pie plate in a preheated oven at 350°F (175°C) for about 8-10 minutes. This will help the crust set and prevent it from becoming soggy. However, this step is optional, and you can skip it if you prefer a softer crust. If you do pre-bake, let the crust cool completely before adding the ice cream layers.
- Freeze the Crust: Place the prepared crust in the freezer while you prepare the ice cream layers. This will help it firm up and prevent the ice cream from melting too quickly when you add it. Freezing the crust for at least 30 minutes is ideal.
Layering the Ice Cream
- Soften the Chocolate Ice Cream: Take the chocolate ice cream out of the freezer and let it soften slightly. You want it to be soft enough to spread easily but not completely melted. This usually takes about 15-20 minutes at room temperature, but it depends on the temperature of your kitchen. You should be able to easily stir it with a spoon.
- Prepare the Hot Fudge Swirl (Optional): If you’re using hot fudge sauce, warm it up slightly in the microwave or in a saucepan on the stovetop. This will make it easier to swirl into the chocolate ice cream. Don’t overheat it, just warm it enough to make it pourable.
- Spread the Chocolate Ice Cream Layer: Remove the crust from the freezer. Spread the softened chocolate ice cream evenly over the bottom of the crust. If you’re using hot fudge sauce, drizzle it over the chocolate ice cream and use a knife or spoon to gently swirl it in. Sprinkle with chopped pecans or walnuts, if desired.
- Freeze the Chocolate Layer: Place the pie back in the freezer and let the chocolate ice cream layer firm up for at least 1 hour. This will prevent the vanilla ice cream layer from mixing with the chocolate layer. Make sure the surface is firm to the touch before proceeding.
- Soften the Vanilla Ice Cream: While the chocolate layer is freezing, take the vanilla ice cream out of the freezer and let it soften slightly, just like you did with the chocolate ice cream. Again, you want it to be spreadable but not melted.
- Prepare the Caramel Swirl (Optional): If you’re using caramel sauce, warm it up slightly in the microwave or in a saucepan on the stovetop, just like you did with the hot fudge sauce.
- Spread the Vanilla Ice Cream Layer: Remove the pie from the freezer. Spread the softened vanilla ice cream evenly over the chocolate ice cream layer. If you’re using caramel sauce, drizzle it over the vanilla ice cream and use a knife or spoon to gently swirl it in. Sprinkle with mini chocolate chips, if desired.
- Freeze the Entire Pie: Place the pie back in the freezer and let it freeze completely for at least 3-4 hours, or preferably overnight. This will ensure that the ice cream is firm enough to slice and serve. The longer it freezes, the better the texture will be.
Making the Whipped Cream Topping
- Chill the Bowl and Whisk: Before you start making the whipped cream, place the mixing bowl and whisk (or the beaters of your electric mixer) in the freezer for about 15-20 minutes. This will help the cream whip up faster and hold its shape better. Cold equipment is key to stable whipped cream.
- Combine the Ingredients: Pour the cold heavy cream into the chilled bowl. Add the powdered sugar and vanilla extract.
- Whip the Cream: Using the chilled whisk or electric mixer, start whipping the cream on medium speed. Gradually increase the speed to high as the cream begins to thicken. Continue whipping until stiff peaks form. This means that when you lift the whisk or beaters, the cream will hold its shape and stand up straight. Be careful not to overwhip, as this can turn the cream into butter.
Assembling and Garnishing the Ice Cream Pie
- Remove the Pie from the Freezer: Take the frozen ice cream pie out of the freezer about 15-20 minutes before you plan to serve it. This will allow it to soften slightly, making it easier to slice.
- Spread the Whipped Cream: Spread the whipped cream evenly over the top of the ice cream pie. You can use a spatula or a piping bag to create a decorative design.
- Garnish the Pie (Optional): Now comes the fun part garnishing! You can get creative with this step. Here are a few ideas:
- Chocolate Shavings: Sprinkle chocolate shavings over the whipped cream for a classic touch.
- Maraschino Cherries: Place maraschino cherries on top of the whipped cream for a pop of color.
- Extra Chopped Nuts: Sprinkle extra chopped nuts around the edge of the pie.
- Drizzled Chocolate or Caramel Sauce: Drizzle chocolate or caramel sauce over the whipped cream for an extra layer of flavor.
- Slice and Serve: Use a sharp knife to slice the ice cream pie into wedges. Serve immediately and enjoy! If you have any leftovers, store them in the freezer.
Tips for Success:
- Softening the Ice Cream: The key to a smooth and even ice cream pie is to soften the ice cream properly. Don’t let it melt completely, just soften it enough to spread easily.
- Freezing Between Layers: Freezing the pie between each layer is crucial to prevent the flavors from mixing and to create distinct layers.
- Using High-Quality Ingredients: Using high-quality ice cream, chocolate wafers, and other ingredients will make a big difference in the overall taste of the pie.
- Making it Ahead: This ice cream pie can be made ahead of time and stored in the freezer for several days. Just make sure to wrap it tightly in plastic wrap to prevent freezer burn.
- Variations: Feel free to experiment with different flavors of ice cream, sauces, and toppings. You can use peanut butter ice cream, strawberry ice cream, or any other flavor you like. You can also add
Conclusion:
This Ice Cream Pie isn’t just a dessert; it’s a celebration in every slice! From the satisfying crunch of the crust to the creamy, dreamy filling, it’s a guaranteed crowd-pleaser that’s surprisingly simple to make. I know you might be thinking, “Another ice cream recipe?” But trust me, this one is different. It’s the perfect balance of textures and flavors, and it’s so versatile that you can customize it to your heart’s content.
Why is this a must-try? Well, for starters, it requires minimal baking mostly just chilling! That’s a huge win in my book, especially during those hot summer months when you don’t want to turn on the oven. Plus, the combination of the crisp crust and the smooth ice cream is simply irresistible. It’s a dessert that appeals to everyone, from kids to adults, and it’s perfect for any occasion, whether it’s a casual family dinner or a special birthday celebration.
But the real magic lies in its adaptability. Feeling adventurous? Try swapping out the graham cracker crust for an Oreo crust for a chocolatey twist. Or, if you’re a peanut butter lover, use Nutter Butters! The possibilities are endless. As for the ice cream filling, the sky’s the limit! I’ve suggested vanilla, but don’t be afraid to experiment with your favorite flavors. Chocolate, strawberry, mint chocolate chip, coffee they all work beautifully. You could even create a layered pie with different ice cream flavors for a truly spectacular presentation.
And let’s not forget the toppings! While whipped cream and chocolate sauce are classic choices, you can get creative with sprinkles, chopped nuts, fresh fruit, or even a drizzle of caramel. For a truly decadent treat, try adding some crushed cookies or candy bars on top.
Serving suggestions? This Ice Cream Pie is best served cold, straight from the freezer. Let it sit for a few minutes to soften slightly before slicing. A dollop of whipped cream and a sprinkle of your favorite toppings will take it to the next level. It’s also fantastic with a side of fresh berries or a scoop of hot fudge.
I truly believe that this recipe will become a staple in your dessert repertoire. It’s easy, delicious, and endlessly customizable. It’s the kind of dessert that brings people together and creates lasting memories.
So, what are you waiting for? Gather your ingredients, put on your apron, and get ready to create some ice cream magic! I’m confident that you’ll love this recipe as much as I do.
And most importantly, I want to hear about your experience! Did you try a different crust? Did you experiment with the ice cream flavors? What toppings did you use? Share your creations and your feedback in the comments below. I can’t wait to see what you come up with! Let’s spread the ice cream pie love! Happy baking (or rather, chilling!). I am sure you will enjoy this Ice Cream Pie as much as my family does.
Ice Cream Pie: The Ultimate Guide to Making Delicious Frozen Pies
Decadent layered ice cream pie with chocolate wafer crust, chocolate and vanilla ice cream, and homemade whipped cream. Perfect for special occasions!
Ingredients
- 1 ½ cups chocolate wafer crumbs (about 36 wafers)
- 5 tablespoons unsalted butter, melted
- ¼ cup granulated sugar
- 1 ½ quarts chocolate ice cream, softened
- ½ cup hot fudge sauce, store-bought or homemade
- ¼ cup chopped pecans or walnuts (optional)
- 1 ½ quarts vanilla ice cream, softened
- ½ cup caramel sauce, store-bought or homemade
- ¼ cup mini chocolate chips (optional)
- 1 ½ cups heavy cream, cold
- 3 tablespoons powdered sugar
- 1 teaspoon vanilla extract
- Chocolate shavings
- Maraschino cherries
- Extra chopped nuts
- Drizzled chocolate or caramel sauce
Instructions
- Pulse chocolate wafers in a food processor until finely ground into crumbs. Alternatively, place wafers in a zip-top bag and crush with a rolling pin.
- In a medium bowl, combine chocolate wafer crumbs, melted butter, and granulated sugar. Mix until evenly moistened.
- Transfer crumb mixture to a 9-inch pie plate. Press firmly and evenly across the bottom and up the sides.
- For a sturdier crust, pre-bake in a preheated oven at 350°F (175°C) for 8-10 minutes. Let cool completely.
- Place the prepared crust in the freezer while you prepare the ice cream layers.
- Let chocolate ice cream soften slightly (15-20 minutes).
- Warm hot fudge sauce slightly.
- Remove crust from freezer. Spread softened chocolate ice cream evenly over the bottom of the crust. Drizzle with hot fudge sauce and swirl in. Sprinkle with chopped pecans or walnuts, if desired.
- Place pie back in the freezer for at least 1 hour.
- Let vanilla ice cream soften slightly.
- Warm caramel sauce slightly.
- Remove pie from freezer. Spread softened vanilla ice cream evenly over the chocolate ice cream layer. Drizzle with caramel sauce and swirl in. Sprinkle with mini chocolate chips, if desired.
- Place pie back in the freezer for at least 3-4 hours, or preferably overnight.
- Place mixing bowl and whisk in the freezer for 15-20 minutes.
- Pour cold heavy cream into the chilled bowl. Add powdered sugar and vanilla extract.
- Whip the cream on medium speed, gradually increasing to high, until stiff peaks form.
- Take the frozen ice cream pie out of the freezer about 15-20 minutes before you plan to serve it.
- Spread whipped cream evenly over the top of the ice cream pie.
- Garnish with chocolate shavings, maraschino cherries, extra chopped nuts, or drizzled chocolate or caramel sauce.
- Slice and serve immediately. Store leftovers in the freezer.
Notes
- Softening the ice cream properly is key.
- Freezing between layers prevents flavors from mixing.
- Use high-quality ingredients for the best taste.
- The pie can be made ahead of time and stored in the freezer.
- Feel free to experiment with different flavors of ice cream, sauces, and toppings.


Leave a Comment