
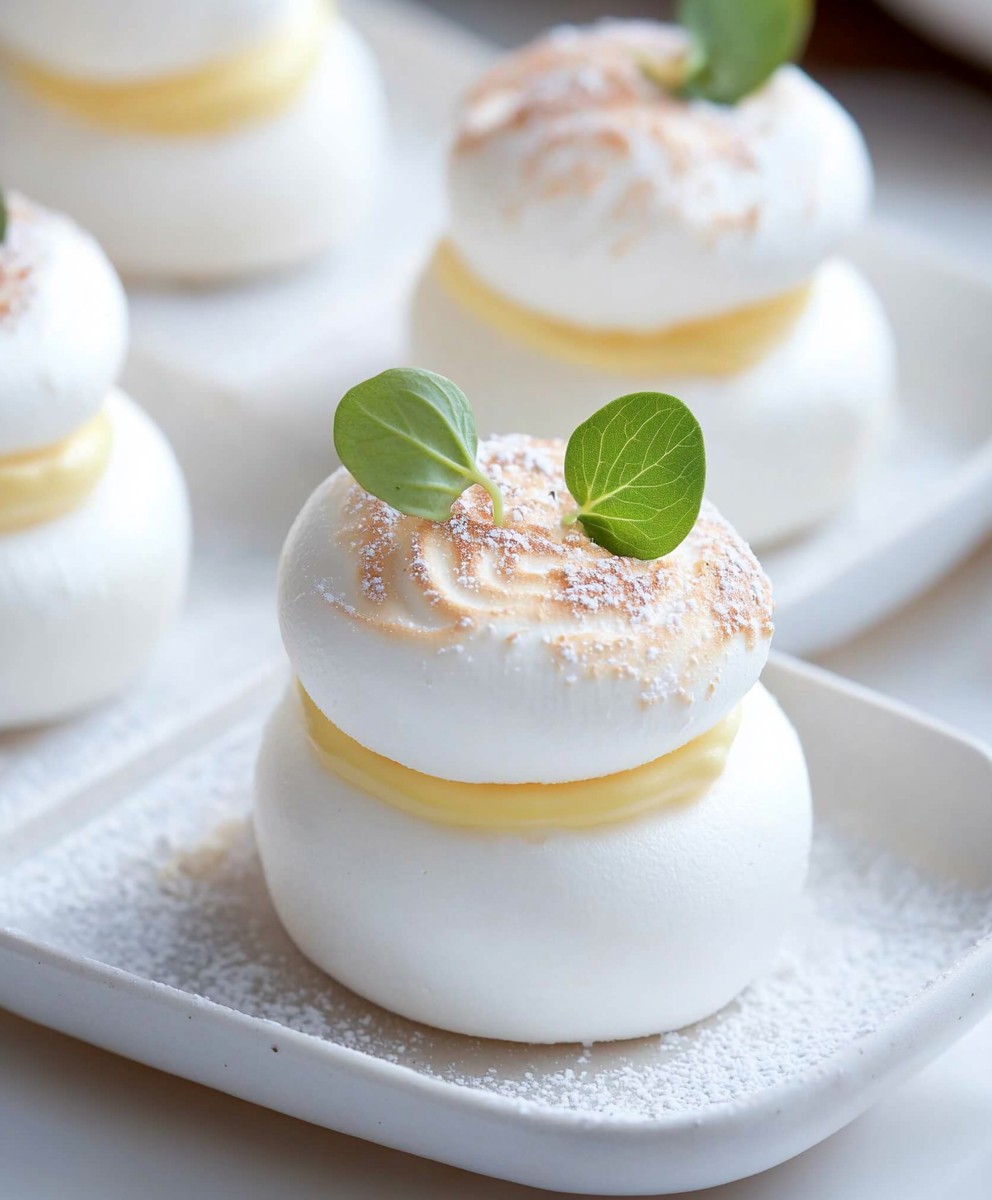
Meringue nests dessert is a delightful treat that never fails to impress. As I whip up these airy, delicate meringue shells, I cant help but think of the rich history behind this classic dessert. Originating in the 17th century, meringue has been a beloved staple in many cultures, often associated with celebrations and special occasions. The light, crisp texture of the meringue nests combined with a luscious filling makes this dessert a favorite among both young and old. People adore meringue nests dessert not only for their exquisite taste but also for their versatility; you can fill them with fresh fruits, whipped cream, or even chocolate ganache. Its a simple yet elegant dessert that brings joy to any gathering!

Ingredients:
- 4 large egg whites, at room temperature
- 1 cup granulated sugar
- 1 teaspoon vanilla extract
- 1/2 teaspoon cream of tartar
- 1 cup heavy whipping cream
- 2 tablespoons powdered sugar
- 1 teaspoon vanilla extract (for the whipped cream)
- 1 cup mixed berries (strawberries, blueberries, raspberries)
- Fresh mint leaves for garnish (optional)
Preparing the Meringue Nests
Making meringue nests is a delicate process, but I promise its worth it! Heres how I do it:
- Preheat your oven to 225°F (110°C). This low temperature is key to drying out the meringue without browning it.
- Line a baking sheet with parchment paper. I like to draw circles on the parchment to help me keep the nests uniform in size. You can use a glass or a cookie cutter to trace circles about 3 inches in diameter.
- In a clean, dry mixing bowl, add the egg whites. Make sure theres no yolk in the whites, as even a tiny bit of fat can prevent the meringue from whipping up properly.
- Using an electric mixer, beat the egg whites on medium speed until they become frothy. This usually takes about 1-2 minutes.
- Once frothy, add the cream of tartar. This helps stabilize the egg whites. Continue beating until soft peaks form, which should take another 2-3 minutes.
- Gradually add the granulated sugar, about a tablespoon at a time, while continuing to beat the egg whites. This process is crucial because adding the sugar slowly helps to dissolve it completely, resulting in a glossy meringue.
- Once all the sugar is added, increase the mixer speed to high and beat until stiff peaks form. The meringue should be shiny and hold its shape when you lift the beaters out of the bowl. This usually takes about 5-7 minutes.
- Finally, gently fold in the vanilla extract using a spatula. Be careful not to deflate the meringue.
- Using a piping bag or a spoon, dollop the meringue onto the prepared parchment paper, creating nests. I like to make a small well in the center of each nest to hold the whipped cream and berries later.
- Bake the meringues in the preheated oven for about 1.5 to 2 hours. They should be dry to the touch and easily lift off the parchment paper. Turn off the oven and let the meringues cool completely in the oven with the door slightly ajar. This helps prevent cracking.
Preparing the Whipped Cream
While the meringues are cooling, I like to prepare the whipped cream. Its super easy and adds a lovely richness to the dessert.
- In a mixing bowl, add the heavy whipping cream, powdered sugar, and vanilla extract.
- Using an electric mixer, beat the mixture on medium-high speed until soft peaks form. This usually takes about 3-5 minutes. Be careful not to overwhip, or youll end up with butter!
- Once the whipped cream is ready, I like to taste it and adjust the sweetness if necessary. You can add more powdered sugar if you prefer it sweeter.
Assembling the Meringue Nests
Now comes the fun partassembling the dessert! This is where you can get creative.
- Once the meringue nests are completely cool, carefully lift them off the parchment paper. They should come off easily if they are properly dried.
- Place the meringue nests on a serving platter or individual dessert plates.
- Using a spoon or piping bag, fill each meringue nest with a generous dollop of whipped cream. I like to pile it high for a beautiful presentation!
- Top the whipped cream with a mix of fresh berries. I usually use a combination of strawberries, blueberries, and raspberries for a colorful and flavorful topping.
- If you want to add a
Conclusion:
In summary, these delightful meringue nests are a must-try for anyone looking to impress their friends and family with a light, airy dessert thats as beautiful as it is delicious. The combination of crispy meringue and luscious fillings creates a perfect balance of textures and flavors that will leave everyone wanting more. Plus, the versatility of this recipe means you can easily customize the nests to suit your taste. Whether you choose to fill them with fresh berries, whipped cream, or even a rich chocolate mousse, the possibilities are endless! I encourage you to get creative with your serving suggestions. You could drizzle some chocolate sauce over the top, sprinkle with crushed nuts, or even add a dollop of tangy lemon curd for a zesty twist. If youre feeling adventurous, try experimenting with different flavorings in the meringue itself, such as vanilla, almond, or even a hint of citrus zest. I cant wait for you to try this meringue nests dessert! Its a fun and rewarding recipe thats perfect for any occasion, from casual gatherings to elegant dinner parties. Once youve made them, Id love to hear about your experience. Share your creations and any unique variations you come up with! Lets spread the joy of these delightful meringue nests together. Happy baking! PrintMeringue Nests Dessert: A Delightful Treat for Any Occasion

Enjoy these delicate meringue nests filled with creamy whipped cream and topped with a vibrant mix of fresh berries. Ideal for a light dessert or special occasions, they are both visually stunning and deliciously satisfying!
- Prep Time: 20 minutes
- Cook Time: 90 minutes
- Total Time: 110 minutes
- Yield: 4–6 servings 1x
Ingredients
Scale- 4 large egg whites, at room temperature
- 1 cup granulated sugar
- 1 teaspoon vanilla extract
- 1/2 teaspoon cream of tartar
- 1 cup heavy whipping cream
- 2 tablespoons powdered sugar
- 1 teaspoon vanilla extract (for the whipped cream)
- 1 cup mixed berries (strawberries, blueberries, raspberries)
- Fresh mint leaves for garnish (optional)
Instructions
- Preheat your oven to 225°F (110°C).
- Line a baking sheet with parchment paper and draw circles about 3 inches in diameter.
- In a clean mixing bowl, add the egg whites.
- Beat the egg whites on medium speed until frothy (1-2 minutes).
- Add the cream of tartar and continue beating until soft peaks form (2-3 minutes).
- Gradually add the granulated sugar, one tablespoon at a time, while beating.
- Increase the mixer speed to high and beat until stiff peaks form (5-7 minutes).
- Gently fold in the vanilla extract.
- Dollop the meringue onto the parchment paper, creating nests with a small well in the center.
- Bake for 1.5 to 2 hours until dry to the touch. Turn off the oven and let cool with the door slightly ajar.
- In a mixing bowl, combine the heavy whipping cream, powdered sugar, and vanilla extract.
- Beat on medium-high speed until soft peaks form (3-5 minutes).
- Taste and adjust sweetness if necessary.
- Carefully lift the cooled meringue nests off the parchment paper.
- Place them on a serving platter or individual plates.
- Fill each nest with whipped cream.
- Top with a mix of fresh berries.
- Garnish with fresh mint leaves if desired.
Notes
- Ensure that no yolk is present in the egg whites for optimal meringue texture.
- The meringue nests can be made ahead of time and stored in an airtight container.
- Feel free to customize the berry topping based on seasonal availability.
Leave a Comment