
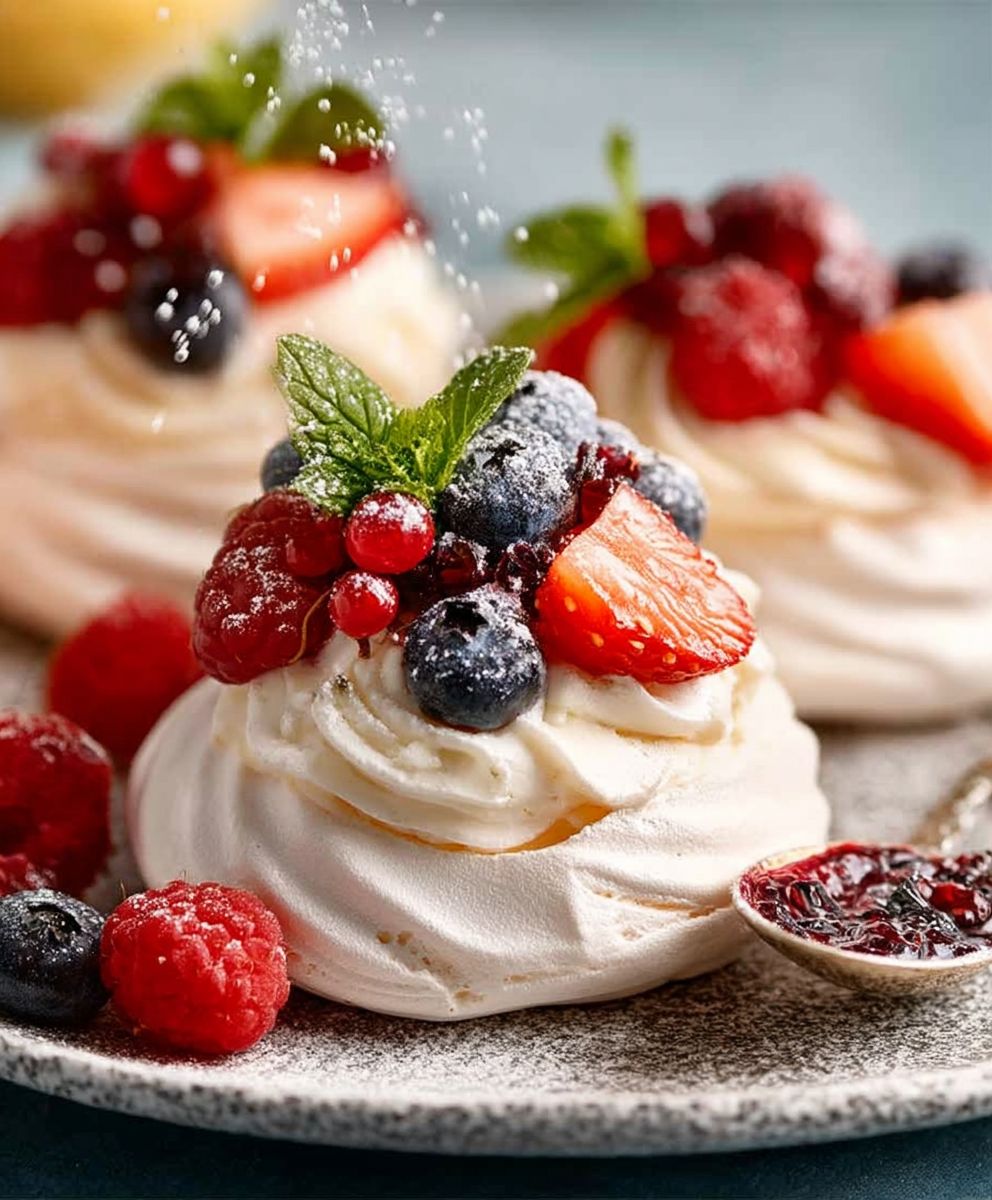
Mini Pavlovas: Prepare to be enchanted by these delicate, cloud-like meringues topped with luscious cream and vibrant berries! These aren’t just desserts; they’re miniature masterpieces that bring a touch of elegance to any occasion. Have you ever wondered how such a light and airy treat could pack such a flavorful punch?
The Pavlova, named after the renowned Russian ballerina Anna Pavlova, has a history shrouded in a friendly rivalry between Australia and New Zealand, both claiming its invention in the 1920s. Regardless of its true origin, this dessert has become a beloved classic in both countries and beyond. Its ethereal texture and versatility have made it a favorite for celebrations and everyday indulgences alike.
People adore Mini Pavlovas for their delightful contrast of textures: the crisp, slightly chewy meringue shell gives way to a soft, marshmallowy interior, all perfectly complemented by the smooth, rich cream and the burst of fresh fruit. They’re also incredibly customizable, allowing you to experiment with different toppings and flavors to suit your preferences. Plus, their individual size makes them ideal for portion control and elegant presentation. Whether you’re hosting a dinner party or simply craving a sweet treat, these Mini Pavlovas are guaranteed to impress!

Ingredients:
- For the Meringues:
- 4 large egg whites, at room temperature
- 1/4 teaspoon cream of tartar
- 1 cup (200g) granulated sugar
- 1 teaspoon vanilla extract
- 1/2 teaspoon white vinegar
- 1 tablespoon cornstarch
- For the Whipped Cream:
- 1 1/2 cups (360ml) heavy cream, cold
- 1/4 cup (30g) powdered sugar, sifted
- 1 teaspoon vanilla extract
- For the Topping:
- 1 pint fresh raspberries
- 1 pint fresh blueberries
- 1 kiwi, peeled and sliced
- Optional: Chocolate shavings, mint leaves for garnish
Preparing the Meringues:
- Preheat and Prepare: First things first, preheat your oven to 250°F (120°C). This low temperature is key for drying out the meringues rather than baking them. Line a large baking sheet with parchment paper. Parchment paper is essential to prevent the meringues from sticking.
- Whip the Egg Whites: In a clean, grease-free bowl (this is crucial!), add your egg whites and cream of tartar. Using an electric mixer (either a stand mixer or a hand mixer), begin whipping the egg whites on medium speed until soft peaks form. Soft peaks mean the peaks hold their shape but the tips curl over slightly.
- Gradually Add Sugar: Now, gradually add the granulated sugar, about a tablespoon at a time, while continuing to whip the egg whites. Make sure each addition of sugar is fully incorporated before adding the next. This slow addition helps create a stable meringue. Continue whipping until stiff, glossy peaks form. Stiff peaks mean the peaks stand straight up and hold their shape firmly. The mixture should look smooth and shiny.
- Add Vanilla, Vinegar, and Cornstarch: Once you have stiff peaks, add the vanilla extract, white vinegar, and cornstarch. Gently fold these ingredients into the meringue using a spatula. Be careful not to overmix, as this can deflate the meringue. The vinegar helps stabilize the meringue and adds a slight tang, while the cornstarch helps create a soft, marshmallowy center.
- Shape the Meringues: There are a couple of ways to shape your mini pavlovas. You can either use a spoon to dollop mounds of meringue onto the prepared baking sheet, or you can use a piping bag fitted with a large round tip. If using a spoon, aim for about 2-3 inches in diameter and create a slight well in the center of each meringue. If using a piping bag, pipe circles of meringue onto the baking sheet, then use the back of a spoon to create a well in the center. This well will hold the whipped cream and fruit later.
- Bake the Meringues: Place the baking sheet in the preheated oven and bake for 60-75 minutes, or until the meringues are dry and crisp on the outside. The baking time will depend on the size of your meringues and your oven. To test for doneness, gently tap one of the meringues. It should sound hollow.
- Cool Completely: Once the meringues are baked, turn off the oven and crack the oven door slightly. Let the meringues cool completely in the oven for at least 1 hour, or even longer. This slow cooling process helps prevent cracking. Do not be tempted to remove them from the oven while they are still warm, as they are very delicate at this stage.
Preparing the Whipped Cream:
- Chill Everything: Make sure your heavy cream, bowl, and whisk attachment are all well-chilled. This is essential for achieving a stable and fluffy whipped cream. You can even place the bowl and whisk in the freezer for about 15 minutes before you start.
- Whip the Cream: Pour the cold heavy cream into the chilled bowl. Using an electric mixer, begin whipping the cream on medium speed until soft peaks form.
- Add Sugar and Vanilla: Gradually add the sifted powdered sugar and vanilla extract to the whipped cream. Continue whipping until stiff peaks form. Be careful not to overwhip, as this can turn the cream into butter. The whipped cream should be thick and hold its shape.
- Keep Cold: If you’re not using the whipped cream immediately, store it in the refrigerator until ready to assemble the pavlovas.
Assembling the Mini Pavlovas:
- Prepare the Fruit: Wash and dry all of your fresh fruit. Slice the kiwi into thin slices. If using larger raspberries or blueberries, you can cut them in half for easier eating.
- Fill the Meringues: Gently spoon or pipe the whipped cream into the wells of the cooled meringues. Be generous with the whipped cream!
- Top with Fruit: Arrange the fresh raspberries, blueberries, and kiwi slices on top of the whipped cream. Get creative with your arrangement! You can create a colorful and visually appealing design.
- Garnish (Optional): If desired, garnish the mini pavlovas with chocolate shavings and fresh mint leaves. These additions add a touch of elegance and flavor.
- Serve Immediately: Mini pavlovas are best served immediately after assembling. The meringues can soften if they sit for too long with the whipped cream and fruit. If you need to prepare them in advance, you can make the meringues and whipped cream ahead of time and store them separately. Assemble the pavlovas just before serving.
Tips for Success:
- Use Room Temperature Egg Whites: Room temperature egg whites whip up to a greater volume than cold egg whites. Let your egg whites sit at room temperature for about 30 minutes before using them.
- Ensure a Clean Bowl: Any trace of grease or yolk in the bowl can prevent the egg whites from whipping properly. Make sure your bowl and whisk are spotlessly clean. You can even wipe them down with a bit of lemon juice or vinegar to remove any residue.
- Don’t Overbake: Overbaking the meringues can make them too hard and brittle. Keep a close eye on them while they’re baking and remove them from the oven as soon as they are dry and crisp.
- Cool Slowly: Cooling the meringues slowly in the oven helps prevent cracking. Don’t be tempted to remove them from the oven while they are still warm.
- Use Fresh Fruit: Fresh, ripe fruit is the best topping for mini pavlovas. Choose fruits that are in season for the best flavor.
- Make Ahead: The meringues can be made up to 2 days in advance and stored in an airtight container at room temperature. The whipped cream can be made a few hours in advance and stored in the refrigerator. Assemble the pavlovas just before serving.
Variations:
- Different Fruits: Feel free to use any of your favorite fruits to top the mini pavlovas. Strawberries, mangoes, peaches, and passion fruit are all great options.
- Lemon Curd: Instead of whipped cream, try filling the meringues with lemon curd. The tartness of the lemon curd pairs perfectly with the sweetness of the meringue.
- Chocolate Meringues: Add a tablespoon or two of cocoa powder to the meringue mixture for chocolate meringues.
- Coffee Meringues: Add a teaspoon of instant coffee powder to the meringue mixture for coffee meringues.
- Nuts: Sprinkle chopped nuts, such as almonds, pecans, or walnuts, on top of the whipped cream and fruit.
Troubleshooting:
- Meringues are cracking: This can be caused by baking the meringues at too high a temperature or cooling them too quickly. Make sure your oven temperature is accurate and let the meringues cool slowly in the oven.
- Meringues are sticky: This can be caused by humidity. If it’s a humid day, try adding a little extra cornstarch to the meringue mixture.
- Whipped cream is not stiff: This can be caused by using warm cream or not chilling the bowl and whisk. Make sure your cream, bowl, and whisk are all well-chilled.
Conclusion:
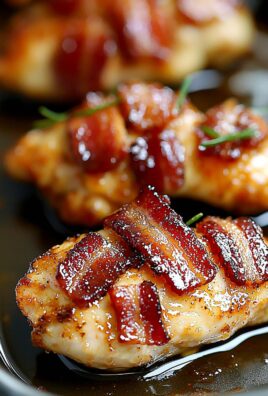
And there you have it! These Honey Soy Chicken Wings are truly a game-changer. From the sticky, sweet, and savory glaze to the perfectly crispy skin, every bite is an explosion of flavor that will leave you craving more. I know I always do! This isn’t just another chicken wing recipe; it’s an experience, a culinary adventure that’s surprisingly simple to embark on. The balance of honey’s sweetness with the umami depth of soy sauce creates a harmonious blend that’s simply irresistible. Trust me, once you try these, you’ll be making them again and again.
But the best part? This recipe is incredibly versatile! Feel free to experiment with different variations to suit your own taste. For a spicier kick, add a pinch of red pepper flakes or a dash of your favorite hot sauce to the marinade. If you prefer a tangier flavor, a squeeze of fresh lime juice or a splash of rice vinegar will do the trick. You could even try adding a touch of ginger or garlic for an extra layer of complexity. The possibilities are endless!
Serving these wings is just as fun as making them. They’re perfect as an appetizer for game day, a crowd-pleasing snack for parties, or even as a main course served with a side of rice and steamed vegetables. I personally love pairing them with a refreshing cucumber salad or some crispy coleslaw to balance out the richness of the glaze. And don’t forget the dipping sauce! A simple sriracha mayo or a creamy ranch dressing would be the perfect complement to these flavorful wings.
For a truly elevated experience, consider grilling these wings instead of baking them. The smoky char from the grill will add another dimension of flavor that’s simply divine. Just be sure to keep a close eye on them to prevent burning, as the honey glaze can caramelize quickly.
I’ve poured my heart and soul into perfecting this recipe, and I’m confident that you’ll love it as much as I do. It’s a guaranteed crowd-pleaser, a surefire way to impress your friends and family, and a delicious treat that you can enjoy any time of the year. So, what are you waiting for? Gather your ingredients, fire up your oven (or grill!), and get ready to experience the magic of these Honey Soy Chicken Wings.
I’m so excited for you to try this recipe! And more importantly, I’m eager to hear about your experience. Did you make any variations? What did you serve them with? What did your friends and family think? Please, please, please share your thoughts and photos in the comments below! Your feedback is invaluable, and it helps me to continue creating recipes that you’ll love. I can’t wait to see your culinary creations! Happy cooking! Don’t forget to tag me in your social media posts so I can see your amazing Honey Soy Chicken Wings!
Mini Pavlovas: Delightful & Easy Dessert Recipe
Delicate and airy mini pavlovas topped with fresh whipped cream and vibrant berries. A perfect light and elegant dessert!
Ingredients
- 4 large egg whites, at room temperature
- 1/4 teaspoon cream of tartar
- 1 cup (200g) granulated sugar
- 1 teaspoon vanilla extract
- 1/2 teaspoon white vinegar
- 1 tablespoon cornstarch
- 1 1/2 cups (360ml) heavy cream, cold
- 1/4 cup (30g) powdered sugar, sifted
- 1 teaspoon vanilla extract
- 1 pint fresh raspberries
- 1 pint fresh blueberries
- 1 kiwi, peeled and sliced
- Optional: Chocolate shavings, mint leaves for garnish
Instructions
- Preheat and Prepare: Preheat your oven to 250°F (120°C). Line a large baking sheet with parchment paper.
- Whip the Egg Whites: In a clean, grease-free bowl, add your egg whites and cream of tartar. Using an electric mixer, begin whipping the egg whites on medium speed until soft peaks form.
- Gradually Add Sugar: Gradually add the granulated sugar, about a tablespoon at a time, while continuing to whip the egg whites. Make sure each addition of sugar is fully incorporated before adding the next. Continue whipping until stiff, glossy peaks form.
- Add Vanilla, Vinegar, and Cornstarch: Once you have stiff peaks, add the vanilla extract, white vinegar, and cornstarch. Gently fold these ingredients into the meringue using a spatula. Be careful not to overmix.
- Shape the Meringues: Use a spoon to dollop mounds of meringue onto the prepared baking sheet, or use a piping bag fitted with a large round tip. Aim for about 2-3 inches in diameter and create a slight well in the center of each meringue.
- Bake the Meringues: Place the baking sheet in the preheated oven and bake for 60-75 minutes, or until the meringues are dry and crisp on the outside. To test for doneness, gently tap one of the meringues. It should sound hollow.
- Cool Completely: Once the meringues are baked, turn off the oven and crack the oven door slightly. Let the meringues cool completely in the oven for at least 1 hour, or even longer.
- Chill Everything: Make sure your heavy cream, bowl, and whisk attachment are all well-chilled.
- Whip the Cream: Pour the cold heavy cream into the chilled bowl. Using an electric mixer, begin whipping the cream on medium speed until soft peaks form.
- Add Sugar and Vanilla: Gradually add the sifted powdered sugar and vanilla extract to the whipped cream. Continue whipping until stiff peaks form. Be careful not to overwhip.
- Keep Cold: If you’re not using the whipped cream immediately, store it in the refrigerator until ready to assemble the pavlovas.
- Prepare the Fruit: Wash and dry all of your fresh fruit. Slice the kiwi into thin slices. If using larger raspberries or blueberries, you can cut them in half for easier eating.
- Fill the Meringues: Gently spoon or pipe the whipped cream into the wells of the cooled meringues.
- Top with Fruit: Arrange the fresh raspberries, blueberries, and kiwi slices on top of the whipped cream.
- Garnish (Optional): If desired, garnish the mini pavlovas with chocolate shavings and fresh mint leaves.
- Serve Immediately: Mini pavlovas are best served immediately after assembling.
Notes
- Use Room Temperature Egg Whites: Room temperature egg whites whip up to a greater volume than cold egg whites.
- Ensure a Clean Bowl: Any trace of grease or yolk in the bowl can prevent the egg whites from whipping properly.
- Don’t Overbake: Overbaking the meringues can make them too hard and brittle.
- Cool Slowly: Cooling the meringues slowly in the oven helps prevent cracking.
- Use Fresh Fruit: Fresh, ripe fruit is the best topping for mini pavlovas.
- Make Ahead: The meringues can be made up to 2 days in advance and stored in an airtight container at room temperature. The whipped cream can be made a few hours in advance and stored in the refrigerator. Assemble the pavlovas just before serving.

Leave a Comment