
No Bean Chili: the hearty, flavorful, and surprisingly easy dish that will redefine your chili expectations! Are you ready to experience the rich, smoky goodness of chili without the beans? I know, I know, it sounds almost sacrilegious to some, but trust me on this one. This recipe delivers all the comforting warmth and satisfying depth of flavor you crave, but with a smoother, meatier texture that’s simply irresistible.
While the exact origins of chili are debated, its roots are firmly planted in the American Southwest, particularly Texas. Over time, countless variations have emerged, each reflecting regional preferences and culinary creativity. This no bean chili version is a modern twist, catering to those who prefer a bean-free experience or are simply looking for a change of pace. It’s perfect for anyone following a low-carb or paleo diet, or for those who simply find beans difficult to digest.
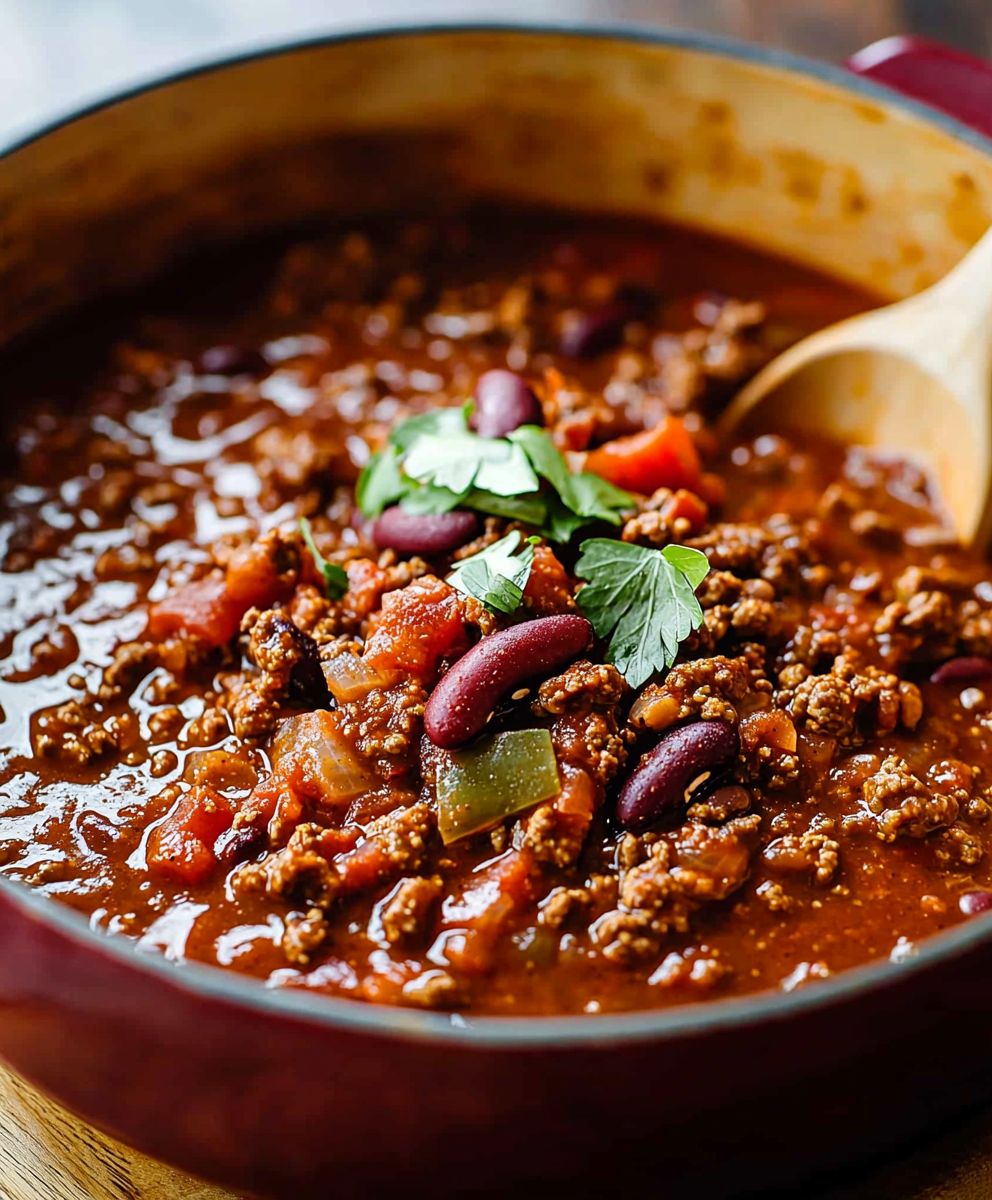
People adore chili for its robust flavor profile a symphony of savory meat, aromatic spices, and a hint of heat. It’s a dish that warms you from the inside out, perfect for chilly evenings or game-day gatherings. This particular recipe elevates the experience by focusing on the quality of the meat and the careful layering of spices, resulting in a chili that’s both deeply satisfying and incredibly easy to make. The absence of beans allows the other ingredients to truly shine, creating a chili that’s both comforting and refined. So, ditch the beans and get ready to discover your new favorite chili recipe!

Ingredients:
- 2 lbs ground beef (80/20 blend recommended for flavor)
- 1 large yellow onion, finely chopped
- 2 bell peppers (1 red, 1 green), seeded and diced
- 4 cloves garlic, minced
- 1 (28 ounce) can crushed tomatoes
- 1 (15 ounce) can tomato sauce
- 1 (15 ounce) can diced tomatoes, undrained
- 1 (4 ounce) can diced green chilies
- 2 tablespoons chili powder
- 1 tablespoon smoked paprika
- 1 teaspoon cumin
- 1 teaspoon dried oregano
- 1/2 teaspoon cayenne pepper (or more, to taste)
- 1/4 teaspoon ground cinnamon
- 1/4 teaspoon ground cloves
- 2 cups beef broth
- 1 tablespoon Worcestershire sauce
- 1 tablespoon apple cider vinegar
- 2 tablespoons olive oil
- Salt and freshly ground black pepper, to taste
- Optional toppings: shredded cheddar cheese, sour cream, chopped green onions, avocado slices, tortilla chips
Browning the Beef and Sautéing Vegetables
- Prepare the Beef: In a large, heavy-bottomed pot or Dutch oven, heat the olive oil over medium-high heat. Add the ground beef and break it up with a spoon. Cook, stirring occasionally, until the beef is browned and no longer pink. Be sure to crumble the beef well as it cooks; you don’t want large chunks.
- Drain Excess Fat: Once the beef is browned, carefully drain off any excess grease from the pot. This step is crucial for preventing a greasy chili. I usually tilt the pot and use a spoon to hold back the beef while pouring the grease into a heat-safe container.
- Sauté the Aromatics: Return the pot to the stove over medium heat. Add the chopped onion and bell peppers to the pot with the browned beef. Cook, stirring occasionally, until the vegetables are softened and the onion is translucent, about 5-7 minutes. This step helps to build a flavorful base for the chili.
- Add the Garlic: Add the minced garlic to the pot and cook for another minute, stirring constantly, until fragrant. Be careful not to burn the garlic, as it can become bitter.
Building the Chili Flavor
- Incorporate the Tomatoes: Add the crushed tomatoes, tomato sauce, and diced tomatoes (undrained) to the pot. Stir well to combine all the ingredients.
- Add the Green Chilies: Stir in the diced green chilies. This adds a subtle heat and a nice Southwestern flavor to the chili.
- Spice it Up: Now it’s time to add the chili powder, smoked paprika, cumin, dried oregano, cayenne pepper, cinnamon, and cloves. Stir well to ensure the spices are evenly distributed throughout the mixture. The cinnamon and cloves might seem unusual, but trust me, they add a wonderful depth of flavor.
- Season with Salt and Pepper: Season the chili generously with salt and freshly ground black pepper. Remember that you can always add more seasoning later, so it’s best to start with a moderate amount and adjust to your taste.
Simmering the Chili
- Add the Liquids: Pour in the beef broth, Worcestershire sauce, and apple cider vinegar. Stir well to combine all the ingredients. The beef broth provides moisture and richness, while the Worcestershire sauce adds umami and the apple cider vinegar provides a touch of acidity to balance the flavors.
- Bring to a Simmer: Bring the chili to a simmer over medium heat. Once it’s simmering, reduce the heat to low, cover the pot, and let it simmer for at least 1 hour, or up to 2-3 hours for even better flavor. The longer it simmers, the more the flavors will meld together.
- Stir Occasionally: Stir the chili occasionally during the simmering process to prevent it from sticking to the bottom of the pot.
- Adjust Seasoning: After the chili has simmered for at least an hour, taste it and adjust the seasoning as needed. You may want to add more salt, pepper, chili powder, or cayenne pepper to suit your taste.
- Thicken if Necessary: If the chili is too thin for your liking, you can thicken it by removing about 1 cup of the chili from the pot and pureeing it in a blender or food processor. Then, return the pureed chili to the pot and stir it in. This will add body and thickness to the chili without adding any extra ingredients. Alternatively, you can mix 1 tablespoon of cornstarch with 2 tablespoons of cold water to create a slurry, then stir the slurry into the chili and simmer for a few more minutes until thickened.
Serving the No Bean Chili
- Ladle into Bowls: Once the chili has reached your desired consistency and flavor, ladle it into bowls.
- Add Toppings: Top the chili with your favorite toppings, such as shredded cheddar cheese, sour cream, chopped green onions, avocado slices, and tortilla chips. I personally love a dollop of sour cream and a sprinkle of green onions.
- Serve and Enjoy: Serve the chili hot and enjoy! This No Bean Chili is perfect for a cold winter day, a game day gathering, or any time you’re craving a hearty and flavorful meal.
Tips and Variations:
- Spice Level: Adjust the amount of cayenne pepper to control the spice level of the chili. If you prefer a milder chili, omit the cayenne pepper altogether. If you like it extra spicy, add more cayenne pepper or a pinch of red pepper flakes.
- Meat Variations: You can substitute ground turkey or ground chicken for the ground beef. Just be sure to adjust the cooking time accordingly. You can also use a combination of different meats for a more complex flavor.
- Vegetable Additions: Feel free to add other vegetables to the chili, such as chopped carrots, celery, or zucchini. Add them along with the onions and bell peppers.
- Slow Cooker Option: This chili can also be made in a slow cooker. Brown the beef and sauté the vegetables as directed in the recipe. Then, transfer all the ingredients to a slow cooker and cook on low for 6-8 hours or on high for 3-4 hours.
- Freezing Instructions: This chili freezes well. Allow the chili to cool completely before transferring it to freezer-safe containers. Freeze for up to 3 months. Thaw overnight in the refrigerator before reheating.
- Serving Suggestions: Serve this chili with cornbread, crackers, or a side salad. It’s also great served over baked potatoes or nachos.
Make it Ahead:
This chili is even better the next day, as the flavors have more time to meld together. You can make it a day or two in advance and store it in the refrigerator until you’re ready to serve it. Simply reheat it on the stovetop or in the microwave.
Nutritional Information (approximate, per serving):
Calories: 450, Protein: 35g, Fat: 25g, Carbohydrates: 20g
Conclusion:
This No Bean Chili isn’t just another recipe; it’s a flavor explosion waiting to happen in your kitchen. I truly believe you’ll find it to be a game-changer, especially if you’re looking for a hearty, satisfying, and surprisingly quick meal. The depth of flavor we achieve without beans is remarkable, relying instead on a rich blend of spices, perfectly browned ground beef, and a vibrant tomato base that simmers into pure deliciousness. Its a comforting bowl of warmth thats perfect for chilly evenings, game days, or any time you crave a truly satisfying meal. But why is this No Bean Chili a must-try? Beyond the incredible taste, it’s incredibly versatile. It caters to a variety of dietary needs and preferences. If you’re watching your carb intake, this recipe is a fantastic option. If you simply don’t enjoy beans (and I know there are many of you out there!), you no longer have to compromise on flavor or texture. And, honestly, even bean lovers will be surprised at how much they enjoy this bean-free version. Now, let’s talk serving suggestions and variations! The possibilities are truly endless. For a classic presentation, ladle the chili into bowls and top with your favorite fixings. Think shredded cheddar cheese, a dollop of sour cream or Greek yogurt, chopped green onions, and a sprinkle of fresh cilantro. A side of warm cornbread or crusty bread is always a welcome addition for soaking up every last drop of that flavorful sauce. Feeling adventurous? Try these variations: * Spicy Kick: Add a pinch of cayenne pepper or a finely chopped jalapeño to the chili while it simmers for an extra layer of heat. * Smoky Flavor: Stir in a teaspoon of smoked paprika or a dash of liquid smoke for a deeper, more complex flavor profile. * Vegetable Boost: Add diced bell peppers, zucchini, or mushrooms to the chili for added nutrients and texture. Sauté them with the onions and garlic at the beginning of the recipe. * Slow Cooker Option: Brown the ground beef and sauté the onions and garlic as directed in the recipe. Then, transfer everything to a slow cooker and cook on low for 6-8 hours or on high for 3-4 hours. * Chili Cheese Fries: Spoon the chili over a bed of crispy french fries and top with melted cheese for an indulgent treat. * Chili Dogs: Use the chili as a topping for hot dogs for a quick and easy weeknight meal. I truly encourage you to give this recipe a try. It’s simple enough for a weeknight dinner, yet impressive enough to serve to guests. I’ve poured my heart into perfecting this recipe, and I’m confident that you’ll love it as much as I do. Once you’ve made it, I’d absolutely love to hear about your experience! Did you make any variations? What toppings did you use? What did your family and friends think? Share your photos and comments in the comments section below. Your feedback is invaluable, and it helps me continue to create and share recipes that you’ll love. Happy cooking, and I can’t wait to hear about your No Bean Chili adventures! PrintNo Bean Chili: The Ultimate Guide to a Delicious & Easy Recipe

Hearty and flavorful No Bean Chili, packed with ground beef, vibrant vegetables, and a rich blend of spices. Perfect for a comforting meal on a cold day!
- Prep Time: 20 minutes
- Cook Time: 60 minutes
- Total Time: 200 minutes
- Yield: 6–8 servings 1x
Ingredients
- 2 lbs ground beef (80/20 blend recommended for flavor)
- 2 tablespoons olive oil
- 1 large yellow onion, finely chopped
- 2 bell peppers (1 red, 1 green), seeded and diced
- 4 cloves garlic, minced
- 1 (28 ounce) can crushed tomatoes
- 1 (15 ounce) can tomato sauce
- 1 (15 ounce) can diced tomatoes, undrained
- 1 (4 ounce) can diced green chilies
- 2 tablespoons chili powder
- 1 tablespoon smoked paprika
- 1 teaspoon cumin
- 1 teaspoon dried oregano
- 1/2 teaspoon cayenne pepper (or more, to taste)
- 1/4 teaspoon ground cinnamon
- 1/4 teaspoon ground cloves
- 2 cups beef broth
- 1 tablespoon Worcestershire sauce
- 1 tablespoon apple cider vinegar
- Salt and freshly ground black pepper, to taste
- Optional toppings: shredded cheddar cheese, sour cream, chopped green onions, avocado slices, tortilla chips
Instructions
- Prepare the Beef: In a large, heavy-bottomed pot or Dutch oven, heat the olive oil over medium-high heat. Add the ground beef and break it up with a spoon. Cook, stirring occasionally, until the beef is browned and no longer pink. Drain off any excess grease.
- Sauté the Aromatics: Return the pot to the stove over medium heat. Add the chopped onion and bell peppers to the pot with the browned beef. Cook, stirring occasionally, until the vegetables are softened and the onion is translucent, about 5-7 minutes. Add the minced garlic to the pot and cook for another minute, stirring constantly, until fragrant.
- Incorporate the Tomatoes: Add the crushed tomatoes, tomato sauce, and diced tomatoes (undrained) to the pot. Stir well to combine all the ingredients.
- Add the Green Chilies: Stir in the diced green chilies.
- Spice it Up: Add the chili powder, smoked paprika, cumin, dried oregano, cayenne pepper, cinnamon, and cloves. Stir well to ensure the spices are evenly distributed throughout the mixture.
- Season with Salt and Pepper: Season the chili generously with salt and freshly ground black pepper.
- Add the Liquids: Pour in the beef broth, Worcestershire sauce, and apple cider vinegar. Stir well to combine all the ingredients.
- Bring to a Simmer: Bring the chili to a simmer over medium heat. Once it’s simmering, reduce the heat to low, cover the pot, and let it simmer for at least 1 hour, or up to 2-3 hours for even better flavor. Stir occasionally during the simmering process to prevent it from sticking to the bottom of the pot.
- Adjust Seasoning: After the chili has simmered for at least an hour, taste it and adjust the seasoning as needed.
- Thicken if Necessary: If the chili is too thin for your liking, you can thicken it by removing about 1 cup of the chili from the pot and pureeing it in a blender or food processor. Then, return the pureed chili to the pot and stir it in. Alternatively, you can mix 1 tablespoon of cornstarch with 2 tablespoons of cold water to create a slurry, then stir the slurry into the chili and simmer for a few more minutes until thickened.
- Ladle into Bowls: Once the chili has reached your desired consistency and flavor, ladle it into bowls.
- Add Toppings: Top the chili with your favorite toppings, such as shredded cheddar cheese, sour cream, chopped green onions, avocado slices, and tortilla chips.
- Serve and Enjoy: Serve the chili hot and enjoy!
Notes
- Spice Level: Adjust the amount of cayenne pepper to control the spice level of the chili.
- Meat Variations: You can substitute ground turkey or ground chicken for the ground beef.
- Vegetable Additions: Feel free to add other vegetables to the chili, such as chopped carrots, celery, or zucchini. Add them along with the onions and bell peppers.
- Slow Cooker Option: This chili can also be made in a slow cooker. Brown the beef and sauté the vegetables as directed in the recipe. Then, transfer all the ingredients to a slow cooker and cook on low for 6-8 hours or on high for 3-4 hours.
- Freezing Instructions: This chili freezes well. Allow the chili to cool completely before transferring it to freezer-safe containers. Freeze for up to 3 months. Thaw overnight in the refrigerator before reheating.
- Serving Suggestions: Serve this chili with cornbread, crackers, or a side salad. It’s also great served over baked potatoes or nachos.
- Make it Ahead: This chili is even better the next day, as the flavors have more time to meld together. You can make it a day or two in advance and store it in the refrigerator until you’re ready to serve it. Simply reheat it on the stovetop or in the microwave.


Leave a Comment