
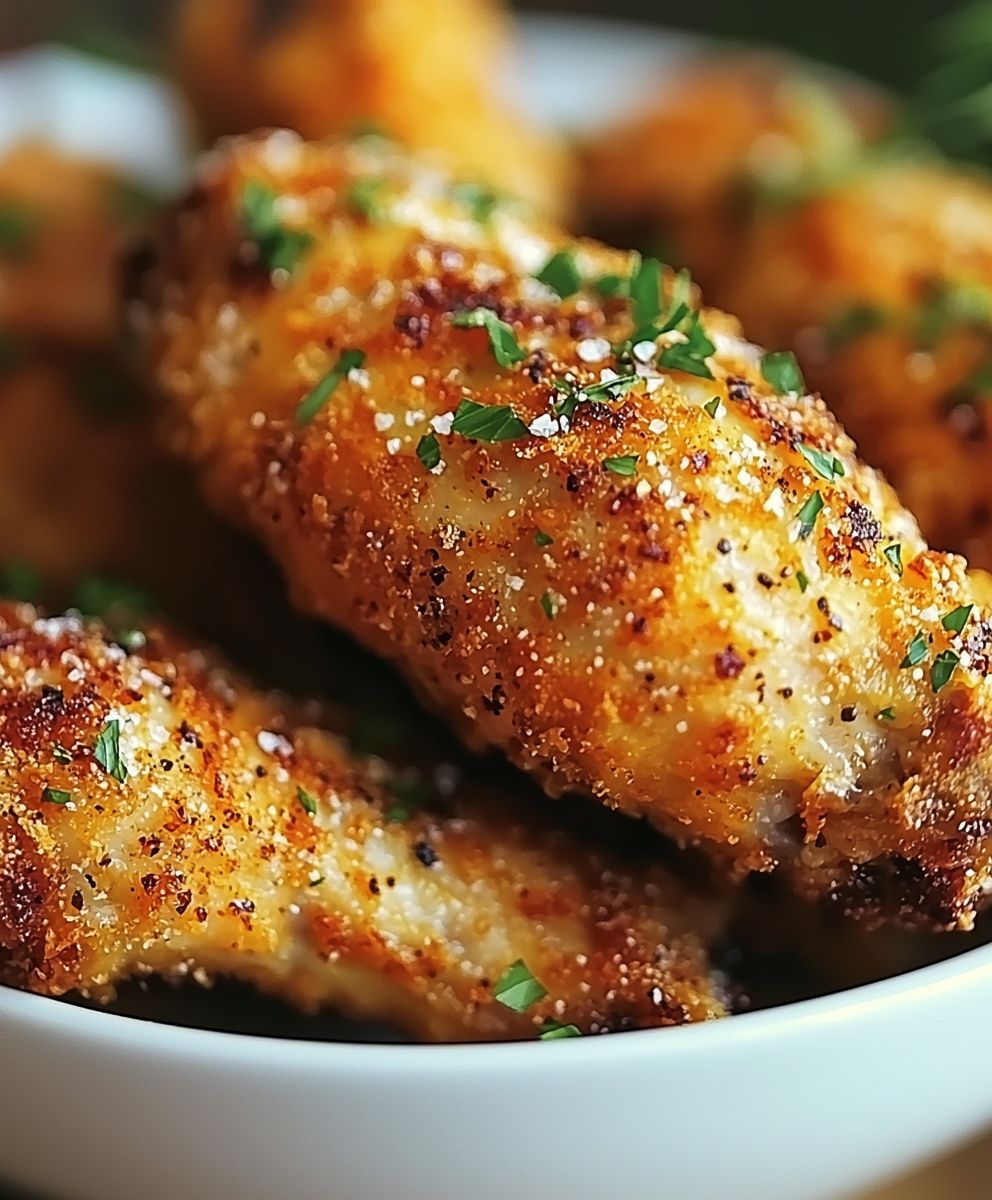
Oven Fried Chicken: Craving that crispy, golden-brown goodness of fried chicken but without the guilt and mess of deep-frying? You’re in the right place! I’m about to share my absolute favorite recipe for achieving that classic fried chicken flavor and texture, all while keeping things healthier and easier in the kitchen.
Fried chicken, a dish deeply rooted in Southern American culinary tradition, has evolved from a simple family meal to a globally beloved comfort food. Its origins can be traced back to Scottish and West African cooking techniques, blending to create the crispy, flavorful delight we know and love today. But let’s be honest, sometimes the thought of all that oil can be a bit daunting.
That’s where my Oven Fried Chicken recipe comes in! People adore fried chicken for its irresistible combination of crispy skin and juicy, tender meat. It’s the perfect balance of textures and flavors that satisfies cravings like no other. This oven-baked version delivers all that deliciousness without the need for excessive oil, making it a healthier and more convenient option for busy weeknights or relaxed weekend gatherings. Get ready to experience the magic of perfectly crispy, oven-baked chicken that will have everyone asking for seconds!

Ingredients:
- 3 lbs bone-in, skin-on chicken pieces (thighs, drumsticks, breasts)
- 1 cup all-purpose flour
- 1/2 cup cornstarch
- 2 teaspoons paprika
- 1 teaspoon garlic powder
- 1 teaspoon onion powder
- 1 teaspoon dried thyme
- 1/2 teaspoon dried oregano
- 1/2 teaspoon cayenne pepper (optional, for heat)
- 1 teaspoon salt
- 1/2 teaspoon black pepper
- 1 cup buttermilk
- 1 large egg
- 1/4 cup hot sauce (optional, for flavor)
- 1/2 cup vegetable oil, divided
Preparing the Chicken and Coating:
Okay, let’s get started! First things first, we need to prep our chicken and get that delicious coating ready. This is where the magic happens, so pay close attention!
- Pat the Chicken Dry: This is crucial! Use paper towels to thoroughly pat each piece of chicken dry. Removing excess moisture will help the coating adhere better and result in crispier “fried” chicken. Trust me, don’t skip this step.
- Prepare the Buttermilk Mixture: In a medium bowl, whisk together the buttermilk, egg, and hot sauce (if using). The hot sauce adds a subtle kick, but it’s totally optional if you prefer a milder flavor. Set this aside for now.
- Mix the Dry Ingredients: In a separate, shallow dish (like a pie plate or a baking dish), combine the flour, cornstarch, paprika, garlic powder, onion powder, thyme, oregano, cayenne pepper (if using), salt, and pepper. Whisk everything together really well to ensure all the spices are evenly distributed. The cornstarch is key for that extra crispy texture, so don’t leave it out!
- Coat the Chicken: Now comes the fun part! Take one piece of chicken at a time and dredge it in the flour mixture, making sure to coat it completely. Press the flour mixture onto the chicken to help it stick. Then, dip the chicken into the buttermilk mixture, ensuring it’s fully submerged. Finally, dredge it back into the flour mixture, again pressing to coat it thoroughly. We want a nice, thick coating here. Repeat this process for all the chicken pieces.
- Let the Chicken Rest: Place the coated chicken pieces on a wire rack set over a baking sheet. This allows air to circulate around the chicken and helps the coating to set, which will contribute to a crispier final product. Let the chicken rest for at least 20 minutes, or even up to an hour in the refrigerator. This is a game changer!
Preheating and Preparing the Oven:
While the chicken is resting, let’s get the oven ready. Proper oven temperature and preparation are essential for achieving that “fried” texture without actually deep-frying.
- Preheat the Oven: Preheat your oven to 400°F (200°C). Make sure your oven is fully preheated before you put the chicken in.
- Prepare the Baking Sheet: Line a large baking sheet with parchment paper. This will prevent the chicken from sticking and make cleanup a breeze. You can also use aluminum foil, but parchment paper works best.
- Add Oil to the Baking Sheet: Pour half of the vegetable oil (1/4 cup) onto the prepared baking sheet. Spread the oil evenly over the parchment paper. This will help the bottom of the chicken get nice and crispy.
Baking the Chicken:
Now for the main event! We’re going to bake the chicken until it’s golden brown, crispy, and cooked through. Don’t be tempted to rush this process; patience is key!
- Place Chicken on Baking Sheet: Carefully place the coated chicken pieces onto the prepared baking sheet, making sure they are not overcrowded. You want to leave a little space between each piece so the air can circulate properly.
- Drizzle with Remaining Oil: Drizzle the remaining vegetable oil (1/4 cup) over the top of the chicken pieces. This will help them brown evenly and get that beautiful, crispy crust.
- Bake the Chicken: Place the baking sheet in the preheated oven and bake for 30 minutes.
- Flip the Chicken: After 30 minutes, carefully flip the chicken pieces over. This will ensure that both sides get evenly browned and crispy.
- Continue Baking: Continue baking for another 20-30 minutes, or until the chicken is cooked through and the internal temperature reaches 165°F (74°C). Use a meat thermometer to check the temperature; insert it into the thickest part of the chicken, avoiding the bone.
- Optional: Broil for Extra Crispiness: If you want your chicken to be extra crispy, you can broil it for the last few minutes of cooking. Keep a close eye on it, as it can burn quickly under the broiler. Broil for 1-2 minutes per side, or until it reaches your desired level of crispiness.
Resting and Serving:
Almost there! Once the chicken is cooked through and beautifully browned, it’s time to let it rest and then serve it up. This resting period is important for allowing the juices to redistribute, resulting in more tender and flavorful chicken.
- Let the Chicken Rest: Remove the baking sheet from the oven and transfer the chicken pieces to a wire rack. Let the chicken rest for at least 10 minutes before serving. This allows the juices to redistribute, resulting in more tender and flavorful chicken.
- Serve and Enjoy: Serve the oven-fried chicken hot. It’s delicious on its own, or you can pair it with your favorite sides, such as mashed potatoes, coleslaw, corn on the cob, or biscuits. Enjoy!
Tips for the Best Oven-Fried Chicken:
- Don’t Overcrowd the Pan: Overcrowding the baking sheet will steam the chicken instead of allowing it to crisp up. If necessary, bake the chicken in batches.
- Use a Meat Thermometer: A meat thermometer is the best way to ensure that the chicken is cooked through. The internal temperature should reach 165°F (74°C).
- Adjust Baking Time as Needed: Baking times may vary depending on your oven and the size of the chicken pieces. Keep an eye on the chicken and adjust the baking time accordingly.
- Experiment with Spices: Feel free to adjust the spices to your liking. You can add more or less of any of the spices, or you can try adding other spices, such as smoked paprika, chili powder, or cumin.
- Make it Gluten-Free: To make this recipe gluten-free, simply substitute the all-purpose flour with a gluten-free all-purpose flour blend.
Variations:
- Spicy Oven-Fried Chicken: Add more cayenne pepper to the flour mixture, or use a spicier hot sauce in the buttermilk mixture.
- Honey Garlic Oven-Fried Chicken: Brush the chicken with a mixture of honey and garlic after it’s finished baking.
- Lemon Herb Oven-Fried Chicken: Add lemon zest and fresh herbs, such as rosemary or parsley, to the flour mixture.
Conclusion:
This Oven Fried Chicken recipe isn’t just another chicken dish; it’s a game-changer. It delivers all the crispy, juicy goodness of traditional fried chicken without the mess, the extra calories, or the lingering smell of oil that permeates your kitchen for days. Seriously, who wouldn’t want that? The perfectly seasoned breading, the tender, flavorful chicken, and the ease of baking make this a weeknight winner and a crowd-pleasing favorite. I’ve made this countless times, and it’s always a hit, even with the pickiest eaters! But the best part? It’s incredibly versatile. While I love serving it with classic sides like creamy mashed potatoes and gravy, or a vibrant coleslaw, the possibilities are truly endless. For a Southern-inspired feast, pair it with collard greens and cornbread. Craving something lighter? Try it with a fresh garden salad and roasted vegetables. You could even shred the chicken and use it in tacos, salads, or sandwiches for a quick and easy lunch.Serving Suggestions and Variations:
* Spice it up: Add a pinch of cayenne pepper or a dash of hot sauce to the breading for a fiery kick. * Herb it up: Experiment with different herbs in the breading. Rosemary, thyme, or oregano would all be delicious additions. * Cheese it up: Sprinkle some grated Parmesan cheese into the breading for a cheesy twist. * Gluten-free option: Use gluten-free breadcrumbs and flour for a gluten-free version. * Dipping sauces: Serve with a variety of dipping sauces, such as honey mustard, barbecue sauce, ranch dressing, or a spicy aioli. * Make it a meal: Serve alongside your favorite sides, such as mashed potatoes, coleslaw, corn on the cob, or green beans. * Chicken tenders: Cut the chicken breasts into strips before breading and baking for easy-to-eat chicken tenders. * Chicken sandwiches: Use the oven-fried chicken to make delicious chicken sandwiches on toasted buns with your favorite toppings. I truly believe that this Oven Fried Chicken recipe will become a staple in your kitchen. It’s simple enough for beginner cooks, yet impressive enough to serve to guests. It’s a healthier alternative to traditional fried chicken that doesn’t compromise on flavor or texture. Its a win-win! So, what are you waiting for? Preheat your oven, gather your ingredients, and get ready to experience the joy of crispy, juicy, and utterly delicious oven-fried chicken. I’m confident that you’ll love it as much as I do. And please, don’t be shy! Once you’ve tried this recipe, I’d love to hear about your experience. Share your photos, your variations, and your serving suggestions in the comments below. Let me know what you thought, what you changed, and what you paired it with. Your feedback is invaluable, and it helps me to continue creating recipes that you’ll love. Happy cooking! I can’t wait to see your oven-fried chicken creations! PrintOven Fried Chicken: Crispy, Healthy, and Delicious Recipe

Crispy, flavorful oven-fried chicken that’s healthier than traditional frying but just as delicious!
- Prep Time: 25 minutes
- Cook Time: 50 minutes
- Total Time: 75 minutes
- Yield: 6–8 servings 1x
Ingredients
- 3 lbs bone-in, skin-on chicken pieces (thighs, drumsticks, breasts)
- 1 cup all-purpose flour
- 1/2 cup cornstarch
- 2 teaspoons paprika
- 1 teaspoon garlic powder
- 1 teaspoon onion powder
- 1 teaspoon dried thyme
- 1/2 teaspoon dried oregano
- 1/2 teaspoon cayenne pepper (optional, for heat)
- 1 teaspoon salt
- 1/2 teaspoon black pepper
- 1 cup buttermilk
- 1 large egg
- 1/4 cup hot sauce (optional, for flavor)
- 1/2 cup vegetable oil, divided
Instructions
- Pat the Chicken Dry: Thoroughly pat each piece of chicken dry with paper towels.
- Prepare Buttermilk Mixture: In a medium bowl, whisk together the buttermilk, egg, and hot sauce (if using).
- Mix Dry Ingredients: In a shallow dish, combine the flour, cornstarch, paprika, garlic powder, onion powder, thyme, oregano, cayenne pepper (if using), salt, and pepper. Whisk well.
- Coat the Chicken: Dredge each piece of chicken in the flour mixture, then dip in the buttermilk mixture, and dredge again in the flour mixture. Press to coat well.
- Let Chicken Rest: Place coated chicken on a wire rack over a baking sheet. Let rest for at least 20 minutes (up to an hour in the refrigerator).
- Preheat Oven: Preheat oven to 400°F (200°C).
- Prepare Baking Sheet: Line a large baking sheet with parchment paper. Pour 1/4 cup of vegetable oil onto the parchment paper and spread evenly.
- Place Chicken on Baking Sheet: Carefully place the coated chicken pieces onto the prepared baking sheet, leaving space between each piece.
- Drizzle with Remaining Oil: Drizzle the remaining 1/4 cup of vegetable oil over the top of the chicken pieces.
- Bake: Bake for 30 minutes.
- Flip: Carefully flip the chicken pieces over.
- Continue Baking: Continue baking for another 20-30 minutes, or until the chicken is cooked through and the internal temperature reaches 165°F (74°C).
- Optional: Broil: For extra crispiness, broil for the last 1-2 minutes per side, watching carefully to prevent burning.
- Let Rest: Remove from oven and transfer chicken to a wire rack. Let rest for at least 10 minutes before serving.
- Serve: Serve hot with your favorite sides.
Notes
- Don’t overcrowd the pan; bake in batches if necessary.
- Use a meat thermometer to ensure the chicken is cooked through (165°F/74°C).
- Adjust baking time as needed based on your oven and chicken size.
- Experiment with spices to your liking.
- To make gluten-free, substitute all-purpose flour with a gluten-free blend.
- For spicy chicken, add more cayenne pepper or use a spicier hot sauce.
- For honey garlic chicken, brush with a mixture of honey and garlic after baking.
- For lemon herb chicken, add lemon zest and fresh herbs to the flour mixture.


Leave a Comment