
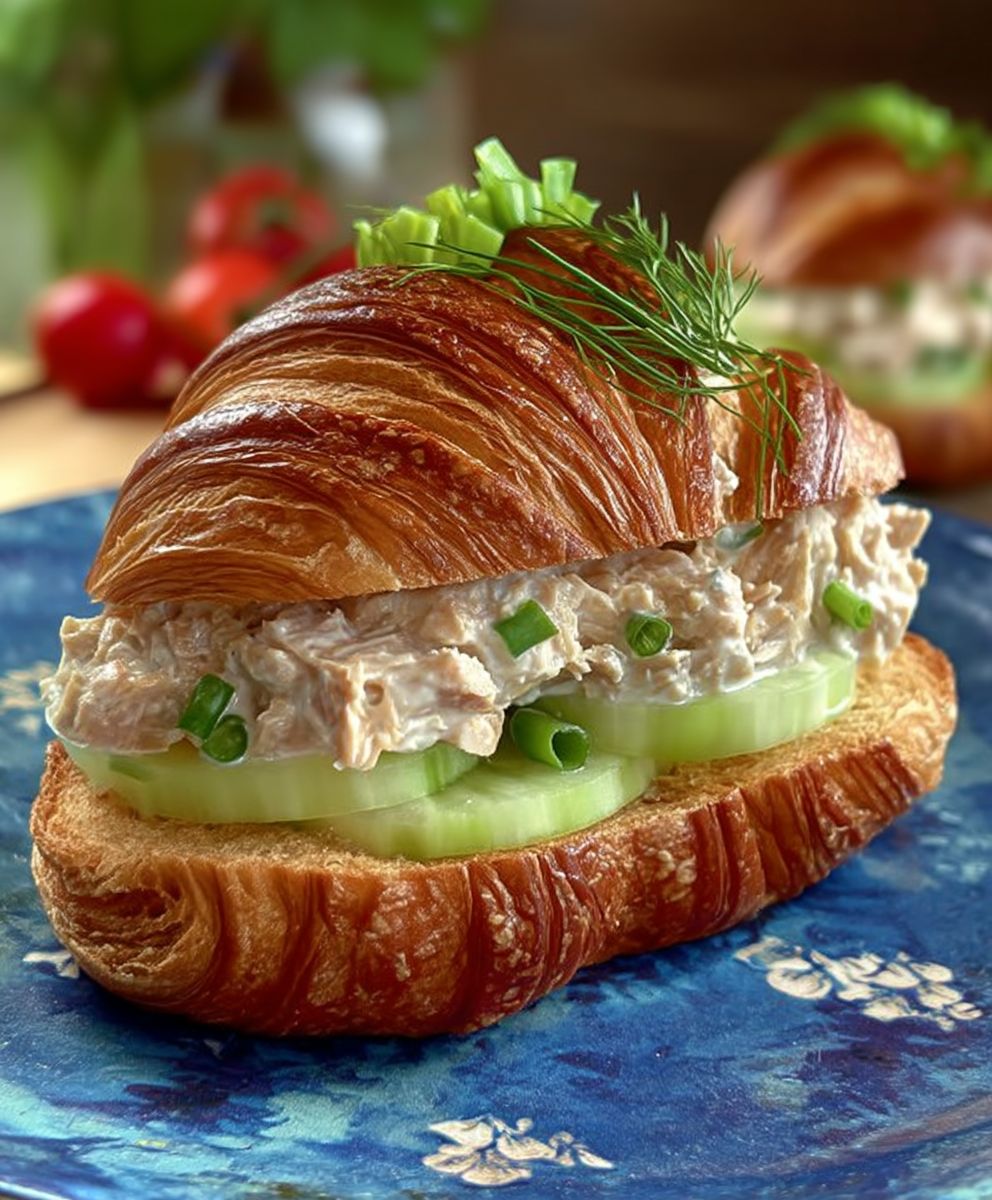
Tuna Sandwich: The humble lunchbox staple, elevated! Are you ready to rediscover the simple joy of a perfectly crafted tuna sandwich? Forget everything you thought you knew about this classic we’re about to embark on a culinary adventure that will transform your lunchtime routine.
The tuna sandwich, a seemingly simple concoction, boasts a surprisingly rich history. Emerging as a popular and affordable option in the early 20th century, it quickly became a symbol of American comfort food. During times of economic hardship, it offered a nutritious and accessible meal for families across the nation. Its enduring appeal speaks volumes about its versatility and satisfying nature.
But what is it about the tuna sandwich that keeps us coming back for more? Is it the creamy, savory filling? The satisfying crunch of celery? Or perhaps the nostalgic memories it evokes? For many, it’s a combination of all these factors. The beauty of a great tuna sandwich lies in its adaptability. Whether you prefer a classic mayonnaise-based version, a zesty lemon-dill twist, or a spicy sriracha kick, there’s a tuna sandwich out there to tantalize every taste bud. Join me as we explore the secrets to creating the ultimate tuna sandwich, a culinary masterpiece that’s both easy to make and incredibly delicious.

Ingredients:
- 5 ounces canned tuna in water, drained well
- 1/4 cup mayonnaise (I prefer light mayo, but use your favorite!)
- 2 tablespoons finely chopped celery
- 1 tablespoon finely chopped red onion
- 1 tablespoon lemon juice (freshly squeezed is best!)
- 1/4 teaspoon black pepper
- Pinch of salt (or to taste)
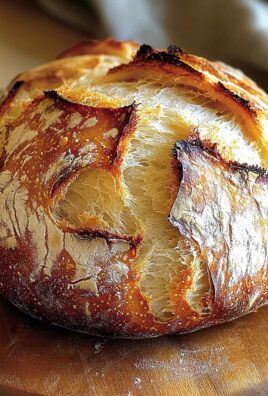
- 4 slices of your favorite bread (I love sourdough or whole wheat)
- 2 tablespoons butter, softened (optional, for toasting the bread)
- Lettuce leaves (optional, for adding some crunch)
- Sliced tomato (optional, for extra flavor)
- Sliced avocado (optional, for creaminess)
- Sprouts (optional, for added nutrients)
- Pickles (optional, for a tangy kick)
Preparing the Tuna Salad:
This is where the magic happens! We’re going to transform that can of tuna into a creamy, flavorful filling that will make your taste buds sing. Don’t be afraid to experiment with the ingredients to find your perfect tuna salad blend.
- Drain the Tuna: This is a crucial first step. You want to get rid of as much excess water as possible. I usually press the tuna against the side of the can with a fork to squeeze out the water. You can also use a fine-mesh sieve. Nobody wants a soggy sandwich!
- Combine the Tuna and Mayonnaise: In a medium-sized bowl, add the drained tuna and mayonnaise. Gently mix them together with a fork. Be careful not to overmix, as you want to keep some texture in the tuna.
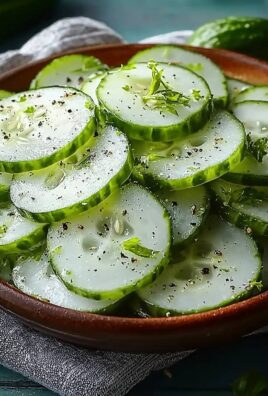
- Add the Celery and Red Onion: Now, add the finely chopped celery and red onion to the bowl. These ingredients add a wonderful crunch and a subtle bite that complements the tuna perfectly. Make sure the celery and onion are finely chopped so they don’t overpower the other flavors.
- Incorporate the Lemon Juice and Pepper: Squeeze in the fresh lemon juice. The acidity of the lemon juice brightens up the tuna salad and balances the richness of the mayonnaise. Add the black pepper. I like a generous amount of pepper, but adjust it to your liking.
- Season with Salt: Add a pinch of salt. Remember that canned tuna can already be a bit salty, so start with a small amount and taste as you go. You can always add more, but you can’t take it away!
- Mix Well: Gently mix all the ingredients together until they are well combined. Again, be careful not to overmix. You want the tuna salad to be creamy but still have some texture.
- Taste and Adjust: This is the most important step! Taste the tuna salad and adjust the seasonings as needed. Does it need more salt? More pepper? A little more lemon juice? This is your chance to make it perfect.
- Chill (Optional): For the best flavor, I recommend chilling the tuna salad in the refrigerator for at least 30 minutes before assembling the sandwich. This allows the flavors to meld together and the tuna salad to firm up a bit. However, if you’re in a hurry, you can skip this step.
Preparing the Bread:
The bread is the foundation of your tuna sandwich, so it’s important to choose wisely. I personally love sourdough or whole wheat bread, but any bread that you enjoy will work. You can also toast the bread for added texture and flavor.
- Choose Your Bread: Select your favorite bread. Consider the size and shape of the bread slices. You want them to be large enough to hold the tuna salad without being too bulky.
- Butter the Bread (Optional): If you’re toasting the bread, spread a thin layer of softened butter on one side of each slice. This will help the bread to brown evenly and add a delicious buttery flavor.
- Toast the Bread (Optional): Toast the bread in a toaster or under the broiler until it is golden brown and slightly crispy. Keep a close eye on it to prevent it from burning. I like my toast to be lightly golden, but you can toast it to your preferred level of crispness.
- Let the Bread Cool Slightly: If you’ve toasted the bread, let it cool slightly before assembling the sandwich. This will prevent the tuna salad from melting and becoming soggy.
Assembling the Tuna Sandwich:
Now for the fun part! It’s time to put everything together and create your masterpiece. Feel free to get creative with the toppings and add whatever you like.
- Lay Out the Bread: Place two slices of bread on a clean surface. If you’ve toasted the bread, make sure the toasted side is facing up.
- Add Lettuce (Optional): If you’re using lettuce, place a few leaves on one slice of bread. This will create a barrier between the bread and the tuna salad, preventing the bread from becoming soggy.
- Spread the Tuna Salad: Generously spread the tuna salad on top of the lettuce (or directly on the bread if you’re not using lettuce). Make sure to distribute the tuna salad evenly so that every bite is flavorful.
- Add Tomato and Avocado (Optional): If you’re using tomato and avocado, arrange the slices on top of the tuna salad. These ingredients add a wonderful freshness and creaminess to the sandwich.
- Add Sprouts and Pickles (Optional): If you’re using sprouts and pickles, sprinkle them on top of the tomato and avocado (or directly on the tuna salad if you’re not using tomato and avocado). These ingredients add a nice crunch and a tangy kick to the sandwich.
- Top with the Other Slice of Bread: Carefully place the other slice of bread on top of the toppings, toasted side down (if toasted).
- Cut and Serve: Use a sharp knife to cut the sandwich in half. You can cut it diagonally or straight down the middle, depending on your preference. Serve immediately and enjoy!
Tips and Variations:
- Add a Kick: For a spicier tuna salad, add a pinch of red pepper flakes or a dash of hot sauce.
- Use Different Herbs: Experiment with different herbs, such as dill, parsley, or chives, to add a unique flavor to your tuna salad.
- Add Some Crunch: Add some chopped walnuts or almonds for extra crunch.
- Make it a Melt: Spread butter on the outside of the bread and grill the sandwich in a pan until golden brown and the cheese is melted.
- Use Different Types of Bread: Try using croissants, bagels, or even lettuce wraps instead of bread.
- Add a Hard-Boiled Egg: Dice a hard-boiled egg and add it to the tuna salad for extra protein and flavor.
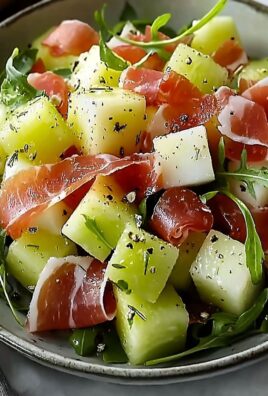
- Make it a Salad: Skip the bread altogether and serve the tuna salad on a bed of lettuce.
Enjoy your delicious and customizable tuna sandwich!
Conclusion:
This isn’t just another tuna sandwich recipe; it’s a gateway to lunchtime bliss! I truly believe this is a must-try recipe because it elevates the humble tuna sandwich from a simple snack to a satisfying and flavorful meal. The combination of creamy mayonnaise, crunchy celery, tangy lemon juice, and that secret ingredient (dill!), creates a symphony of flavors that will tantalize your taste buds. Forget dry, bland tuna sandwiches this recipe delivers moist, flavorful perfection every single time.
But the best part? It’s incredibly versatile! While I’ve shared my go-to version, feel free to experiment and make it your own. For a spicier kick, add a pinch of red pepper flakes or a dash of your favorite hot sauce. If you’re watching your calorie intake, you can substitute the mayonnaise with Greek yogurt for a lighter, tangier flavor. Craving something a little sweeter? A touch of chopped apple or grapes adds a delightful burst of freshness.
And don’t limit yourself to just bread! This tuna salad is equally delicious served on crackers, lettuce wraps, or even stuffed into an avocado half for a healthy and satisfying lunch. You could also use it as a filling for stuffed bell peppers or tomatoes for a more substantial meal. For a truly decadent experience, try grilling the sandwich after assembling it the warm, crispy bread and melty tuna salad are simply divine.
Consider adding different types of bread to your sandwich. Sourdough, rye, or even a croissant can elevate the experience. Toasting the bread lightly adds a pleasant crunch and prevents the sandwich from becoming soggy. You can also experiment with different cheeses, such as cheddar, provolone, or Swiss, for an extra layer of flavor.
I’ve been making this tuna sandwich recipe for years, and it’s always a crowd-pleaser. It’s perfect for a quick lunch, a picnic in the park, or even a light dinner on a warm evening. It’s also a great way to use up leftover tuna, making it a budget-friendly and sustainable option.
I’m confident that once you try this recipe, it will become a staple in your kitchen. It’s simple, delicious, and endlessly customizable. So, what are you waiting for? Gather your ingredients, follow the easy steps, and prepare to be amazed by the incredible flavor of this elevated tuna sandwich.
I’m so excited for you to try this recipe! Once you’ve had a chance to make it, I would absolutely love to hear about your experience. Did you make any variations? What did you think of the flavor? Share your thoughts and photos in the comments below! Your feedback is invaluable, and it helps me to create even better recipes in the future. Happy sandwich-making! Let me know what your favorite additions are to your perfect tuna sandwich! I am always looking for new ideas.
Tuna Sandwich: The Ultimate Guide to Making the Perfect One
Classic tuna salad sandwich, easily customizable with your favorite toppings. A quick and satisfying lunch!
Ingredients
- 5 ounces canned tuna in water, drained well
- 1/4 cup mayonnaise (light or regular)
- 2 tablespoons finely chopped celery
- 1 tablespoon finely chopped red onion
- 1 tablespoon lemon juice (freshly squeezed)
- 1/4 teaspoon black pepper
- Pinch of salt (or to taste)
- 4 slices bread (sourdough or whole wheat recommended)
- 2 tablespoons butter, softened (optional, for toasting)
- Lettuce leaves (optional)
- Sliced tomato (optional)
- Sliced avocado (optional)
- Sprouts (optional)
- Pickles (optional)
Instructions
- Drain the Tuna: Drain tuna well, pressing against the side of the can with a fork or using a fine-mesh sieve to remove excess water.
- Combine Tuna and Mayonnaise: In a medium bowl, gently mix drained tuna and mayonnaise with a fork. Avoid overmixing.
- Add Celery and Red Onion: Add finely chopped celery and red onion to the bowl.
- Incorporate Lemon Juice and Pepper: Squeeze in lemon juice and add black pepper.
- Season with Salt: Add a pinch of salt, tasting as you go.
- Mix Well: Gently mix all ingredients until well combined, being careful not to overmix.
- Taste and Adjust: Taste and adjust seasonings as needed.
- Chill (Optional): For best flavor, chill tuna salad in the refrigerator for at least 30 minutes.
- Choose Your Bread: Select your favorite bread.
- Butter the Bread (Optional): If toasting, spread a thin layer of softened butter on one side of each slice.
- Toast the Bread (Optional): Toast bread in a toaster or under the broiler until golden brown.
- Let the Bread Cool Slightly: If toasted, let the bread cool slightly before assembling.
- Lay Out the Bread: Place two slices of bread on a clean surface, toasted side up if toasted.
- Add Lettuce (Optional): Place lettuce leaves on one slice of bread.
- Spread the Tuna Salad: Generously spread tuna salad on top of the lettuce (or directly on the bread).
- Add Tomato and Avocado (Optional): Arrange tomato and avocado slices on top of the tuna salad.
- Add Sprouts and Pickles (Optional): Sprinkle sprouts and pickles on top of the tomato and avocado (or directly on the tuna salad).
- Top with the Other Slice of Bread: Carefully place the other slice of bread on top, toasted side down if toasted.
- Cut and Serve: Cut the sandwich in half and serve immediately.
Notes
- For a spicier tuna salad, add a pinch of red pepper flakes or a dash of hot sauce.
- Experiment with different herbs, such as dill, parsley, or chives.
- Add chopped walnuts or almonds for extra crunch.
- Make it a melt by buttering the outside of the bread and grilling the sandwich until golden brown.
- Try using croissants, bagels, or lettuce wraps instead of bread.
- Add a diced hard-boiled egg for extra protein and flavor.
- Make it a salad by serving the tuna salad on a bed of lettuce.
Leave a Comment