
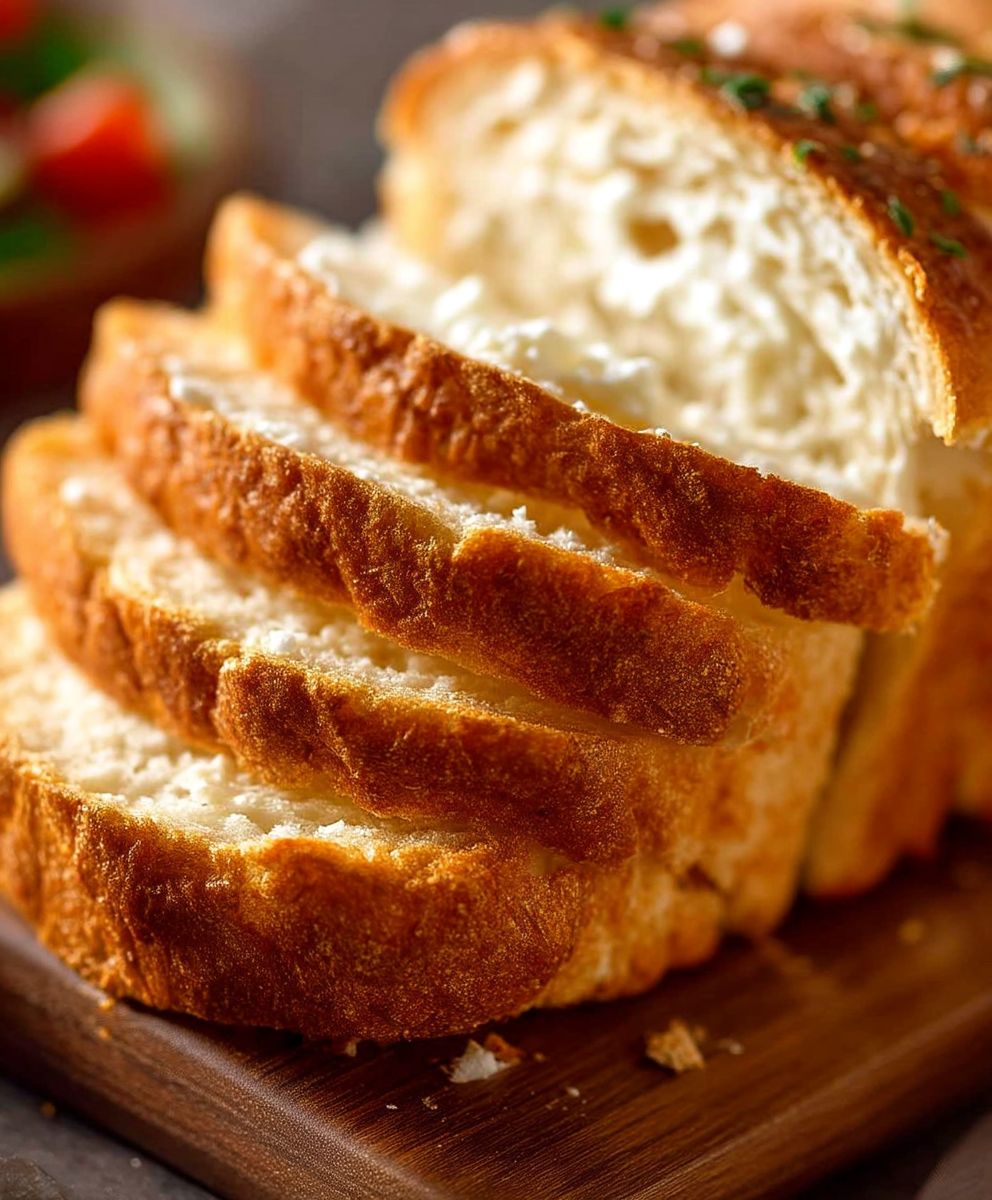
Yeast Free Sandwich Bread: Imagine sinking your teeth into a perfectly soft, homemade sandwich, crafted with bread that’s delightfully tender and boasts a subtly sweet flavor. But what if you could achieve this without the fuss and wait of traditional yeast-based recipes? For those of us who are yeast-sensitive, short on time, or simply looking for a simpler baking experience, the answer is a resounding yes!
While traditional breadmaking has deep roots in cultures worldwide, relying on the magic of yeast for its rise, the concept of yeast-free bread isn’t entirely new. Many cultures have historically utilized alternative leavening agents, such as baking soda and baking powder, to create quick breads and flatbreads. This method offers a faster and more accessible way to enjoy freshly baked goods.
What makes Yeast Free Sandwich Bread so appealing? It’s the perfect combination of convenience and deliciousness. People adore this bread because it eliminates the need for proofing, kneading, and the often unpredictable nature of yeast. The result is a loaf that’s ready in a fraction of the time, offering a satisfyingly soft texture and a mild, comforting flavor that pairs perfectly with your favorite sandwich fillings. Plus, it’s a fantastic option for anyone with yeast sensitivities or those simply looking to expand their baking repertoire. Let’s get started!

Ingredients:
- 6 cups all-purpose flour, plus more for dusting
- 2 teaspoons baking powder
- 1 teaspoon baking soda
- 1 teaspoon salt
- 1/4 cup granulated sugar
- 1/4 cup vegetable oil, plus more for greasing
- 2 1/2 cups buttermilk, or milk mixed with 2 1/2 tablespoons lemon juice or white vinegar
Preparing the Dough:
- First things first, let’s get our dry ingredients ready. In a large bowl, whisk together the 6 cups of all-purpose flour, 2 teaspoons of baking powder, 1 teaspoon of baking soda, 1 teaspoon of salt, and 1/4 cup of granulated sugar. Make sure everything is well combined so that the baking powder and baking soda are evenly distributed throughout the flour. This will ensure our bread rises properly and has a nice, even texture.
- Now, for the wet ingredients. In a separate bowl, whisk together the 1/4 cup of vegetable oil and 2 1/2 cups of buttermilk. If you don’t have buttermilk on hand, don’t worry! You can easily make a substitute by adding 2 1/2 tablespoons of lemon juice or white vinegar to regular milk. Let it sit for about 5 minutes to curdle slightly before using. This will give your bread that tangy flavor that buttermilk provides.
- Time to combine the wet and dry ingredients. Pour the wet ingredients into the bowl with the dry ingredients. Using a wooden spoon or a sturdy spatula, gently mix everything together until just combined. Be careful not to overmix the dough, as this can result in a tough bread. You want the dough to be slightly sticky, but not so sticky that it’s impossible to handle. If the dough seems too dry, add a tablespoon or two of milk at a time until it reaches the desired consistency. If it’s too wet, add a tablespoon or two of flour.
- Once the dough is combined, turn it out onto a lightly floured surface. Gently knead the dough for about 5-7 minutes, or until it becomes smooth and elastic. Kneading helps to develop the gluten in the flour, which gives the bread its structure. If the dough sticks to the surface, add a little more flour as needed.
- After kneading, form the dough into a ball. Lightly grease a large bowl with vegetable oil. Place the dough in the bowl, turning it to coat all sides with the oil. This will prevent the dough from drying out as it rises. Cover the bowl with plastic wrap or a clean kitchen towel.
- Now, let the dough rest. Unlike traditional bread recipes that require a long rise, this yeast-free bread only needs to rest for about 20-30 minutes. This allows the baking powder and baking soda to start working their magic, giving the bread a little bit of lift. While the dough is resting, preheat your oven to 375°F (190°C).
Shaping and Baking:
- After the dough has rested, gently punch it down to release any air bubbles. Turn the dough out onto a lightly floured surface.
- Divide the dough in half. Shape each half into a loaf. You can do this by gently rolling the dough into a rectangle and then folding it in thirds, like you’re folding a letter. Then, tuck the ends underneath to create a smooth loaf shape.
- Grease two 9×5 inch loaf pans with vegetable oil. Place each loaf of dough into a prepared pan.
- Bake for 30-35 minutes, or until the loaves are golden brown and sound hollow when tapped on the bottom. To check for doneness, you can also insert a toothpick into the center of a loaf. If the toothpick comes out clean, the bread is done. If it comes out with wet batter on it, bake for a few more minutes.
- Once the bread is baked, remove it from the oven and let it cool in the pans for about 10 minutes. This will prevent the bread from sticking to the pans.
- After 10 minutes, carefully remove the loaves from the pans and place them on a wire rack to cool completely. It’s important to let the bread cool completely before slicing, as this will prevent it from becoming gummy.
Tips and Variations:
Here are a few tips and variations to help you customize this recipe to your liking:
- Add herbs: For a savory twist, add 1-2 tablespoons of dried herbs, such as rosemary, thyme, or oregano, to the dough along with the dry ingredients.
- Add cheese: Stir in 1 cup of shredded cheese, such as cheddar, mozzarella, or parmesan, to the dough for a cheesy bread.
- Add seeds: Sprinkle the tops of the loaves with sesame seeds, poppy seeds, or sunflower seeds before baking for added flavor and texture.
- Make it whole wheat: Substitute up to half of the all-purpose flour with whole wheat flour for a healthier bread. Keep in mind that whole wheat flour will absorb more liquid, so you may need to add a little more buttermilk to the dough.
- Sweeten it up: Add 1/4 cup of honey or maple syrup to the dough for a slightly sweeter bread.
- Storage: Store the cooled bread in an airtight container at room temperature for up to 3 days, or in the refrigerator for up to a week. You can also freeze the bread for longer storage. To freeze, wrap the loaves tightly in plastic wrap and then place them in a freezer bag. The bread can be frozen for up to 3 months. Thaw the bread completely before slicing and serving.
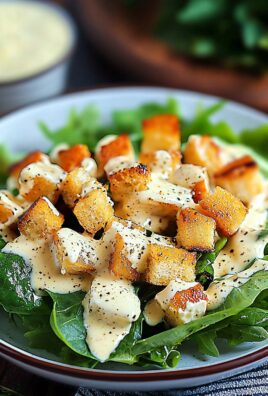
- Serving suggestions: This yeast-free sandwich bread is perfect for making sandwiches, toast, or grilled cheese. It’s also delicious served with soup or salad.
Troubleshooting:
If you’re having trouble with this recipe, here are a few common issues and how to fix them:
- Bread is too dense: This could be caused by overmixing the dough or not using enough baking powder and baking soda. Make sure to gently mix the dough until just combined and use fresh baking powder and baking soda.
- Bread is too dry: This could be caused by using too much flour or not enough buttermilk. Make sure to measure the flour accurately and add a little more buttermilk if the dough seems too dry.
- Bread is too sticky: This could be caused by using too much buttermilk or not enough flour. Add a little more flour if the dough seems too sticky.
- Bread is not rising: This could be caused by using old baking powder and baking soda. Make sure to use fresh baking powder and baking soda. Also, make sure your oven is preheated to the correct temperature.
- Bread is burning on top: This could be caused by the oven being too hot. Reduce the oven temperature by 25 degrees and bake for a few more minutes. You can also tent the loaves with foil during the last 10-15 minutes of baking to prevent them from burning.
Enjoy your homemade yeast-free sandwich bread!
Conclusion:
This Buttery Seasoned Rice is more than just a side dish; it’s a flavor explosion waiting to happen! I truly believe this recipe is a must-try because it elevates simple rice into something truly special. The combination of butter, herbs, and carefully selected seasonings creates a symphony of taste that complements a wide variety of main courses. It’s incredibly easy to make, requiring minimal effort for maximum flavor payoff, making it perfect for busy weeknights or elegant dinner parties. Forget bland, boring rice this recipe will transform your perception of what rice can be!
Think of all the possibilities! This Buttery Seasoned Rice is fantastic served alongside grilled chicken, pan-seared salmon, or a hearty vegetable stew. For a Mediterranean twist, try adding a squeeze of lemon juice and a sprinkle of feta cheese after cooking. If you’re feeling adventurous, stir in some toasted pine nuts and dried cranberries for a festive and flavorful side. It’s also delicious as a base for a quick and easy rice bowl just add your favorite protein and veggies!
Here are a few serving suggestions to get you started:
* Classic Pairing: Serve alongside roasted chicken and steamed broccoli for a comforting and complete meal.
* Seafood Delight: Pair with grilled shrimp or baked cod for a light and flavorful dinner.
* Vegetarian Option: Use vegetable broth instead of chicken broth and serve with a lentil curry or a chickpea tagine.
* Spice It Up: Add a pinch of red pepper flakes for a touch of heat.
* Herb Garden: Experiment with different herbs like thyme, rosemary, or oregano to customize the flavor to your liking.
I’ve personally made this recipe countless times, and it’s always a crowd-pleaser. The aroma alone is enough to make everyone’s mouth water! The best part is how adaptable it is. You can easily adjust the seasonings to suit your personal preferences. Don’t be afraid to experiment and make it your own!
I’m so confident that you’ll love this Buttery Seasoned Rice that I urge you to try it out as soon as possible. It’s a simple recipe with a big impact, and I know it will become a staple in your kitchen.
Once you’ve given it a try, I would absolutely love to hear about your experience! Did you make any variations? What did you serve it with? What did your family and friends think? Please share your thoughts and photos in the comments below. Your feedback is invaluable, and it helps me to continue creating delicious and easy-to-follow recipes that everyone can enjoy. Happy cooking, and I can’t wait to hear all about your culinary adventures with this amazing rice! Let me know if you have any questions, and I’ll do my best to answer them. Enjoy!
Yeast Free Sandwich Bread: The Ultimate Guide & Recipe
Easy and delicious yeast-free sandwich bread, perfect for sandwiches, toast, or enjoying with soup. This quick bread requires no kneading or long rising times!
Ingredients
- 6 cups all-purpose flour, plus more for dusting
- 2 teaspoons baking powder
- 1 teaspoon baking soda
- 1 teaspoon salt
- 1/4 cup granulated sugar
- 1/4 cup vegetable oil, plus more for greasing
- 2 1/2 cups buttermilk, or milk mixed with 2 1/2 tablespoons lemon juice or white vinegar
Instructions
- Prepare Dry Ingredients: In a large bowl, whisk together the flour, baking powder, baking soda, salt, and sugar.
- Prepare Wet Ingredients: In a separate bowl, whisk together the vegetable oil and buttermilk (or milk/lemon juice/vinegar mixture). Let the buttermilk substitute sit for 5 minutes to curdle slightly.
- Combine Wet and Dry: Pour the wet ingredients into the dry ingredients. Gently mix until just combined. Do not overmix. The dough should be slightly sticky. Adjust with milk or flour, 1 tablespoon at a time, if needed.
- Knead: Turn the dough out onto a lightly floured surface. Knead for 5-7 minutes, or until smooth and elastic. Add flour as needed to prevent sticking.
- Rest: Form the dough into a ball. Grease a large bowl with vegetable oil, place the dough in the bowl, turning to coat. Cover with plastic wrap or a clean kitchen towel. Let rest for 20-30 minutes. Preheat oven to 375°F (190°C).
- Shape: After resting, punch down the dough. Turn it out onto a lightly floured surface.
- Divide and Shape Loaves: Divide the dough in half. Shape each half into a loaf by rolling into a rectangle, folding in thirds, and tucking the ends underneath.
- Prepare Pans: Grease two 9×5 inch loaf pans with vegetable oil. Place each loaf in a prepared pan.
- Bake: Bake for 30-35 minutes, or until golden brown and the loaves sound hollow when tapped on the bottom. A toothpick inserted into the center should come out clean.
- Cool: Remove from oven and let cool in the pans for 10 minutes.
- Finish Cooling: Carefully remove the loaves from the pans and place them on a wire rack to cool completely before slicing.
Notes
- Variations:
- Herbs: Add 1-2 tablespoons of dried herbs (rosemary, thyme, oregano) to the dry ingredients.
- Cheese: Stir in 1 cup of shredded cheese (cheddar, mozzarella, parmesan).
- Seeds: Sprinkle sesame, poppy, or sunflower seeds on top before baking.
- Whole Wheat: Substitute up to half of the all-purpose flour with whole wheat flour. You may need to add more buttermilk.
- Sweeten: Add 1/4 cup of honey or maple syrup.
- Storage: Store cooled bread in an airtight container at room temperature for up to 3 days, or in the refrigerator for up to a week. Freeze for up to 3 months, wrapped tightly in plastic wrap and in a freezer bag. Thaw completely before slicing.
- Serving Suggestions: Perfect for sandwiches, toast, grilled cheese, soup, or salad.
- Troubleshooting:
- Dense Bread: Avoid overmixing. Use fresh baking powder and baking soda.
- Dry Bread: Measure flour accurately. Add more buttermilk if needed.
- Sticky Bread: Add more flour if needed.
- Not Rising: Use fresh baking powder and baking soda. Ensure oven is preheated.
- Burning on Top: Reduce oven temperature by 25 degrees or tent with foil during the last 10-15 minutes of baking.


Leave a Comment